Picked up this paper model from WAK at the IPMS Ireland Nationals 2025. I wanted to build a Galway Hooker for many years now, but there was no wooden kit available.
I didn’t consider paper models at all, having no experience with them.
Thankfully there was a completed Galway Hooker model on display in the show, so I got to see it. I was so impressed with it, that my wife instantly bought the kit for me.
Since I wanted to build such model for many years, even before I stumbled upon this kit I had two books that proved indispensable in this build:
- Galway Hookers: Working Sailboats of Galway Bay by Richard J. Scott
- Húicéirí (Galway Hookers) by Eilis Petroni & Liam Dossena
I actually had the pleasure of discovering the second book in Charlie Byrne’s Bookshop in Galway.
Galway Hooker
Galway Hooker is a traditional fishing boat used in Galway bay here in Ireland. There are four different classes of Galway Hookers, but this model represents Bád Mór (big boat), the biggest one, ranging from 10.5 to 13.5 metres long.
I admired these lovely boats each time I visited Galway, and the Galway City Museum has one such boat on display, where she can be observed close up.
Build notes
This is my first ever paper model, certainly a new experience.
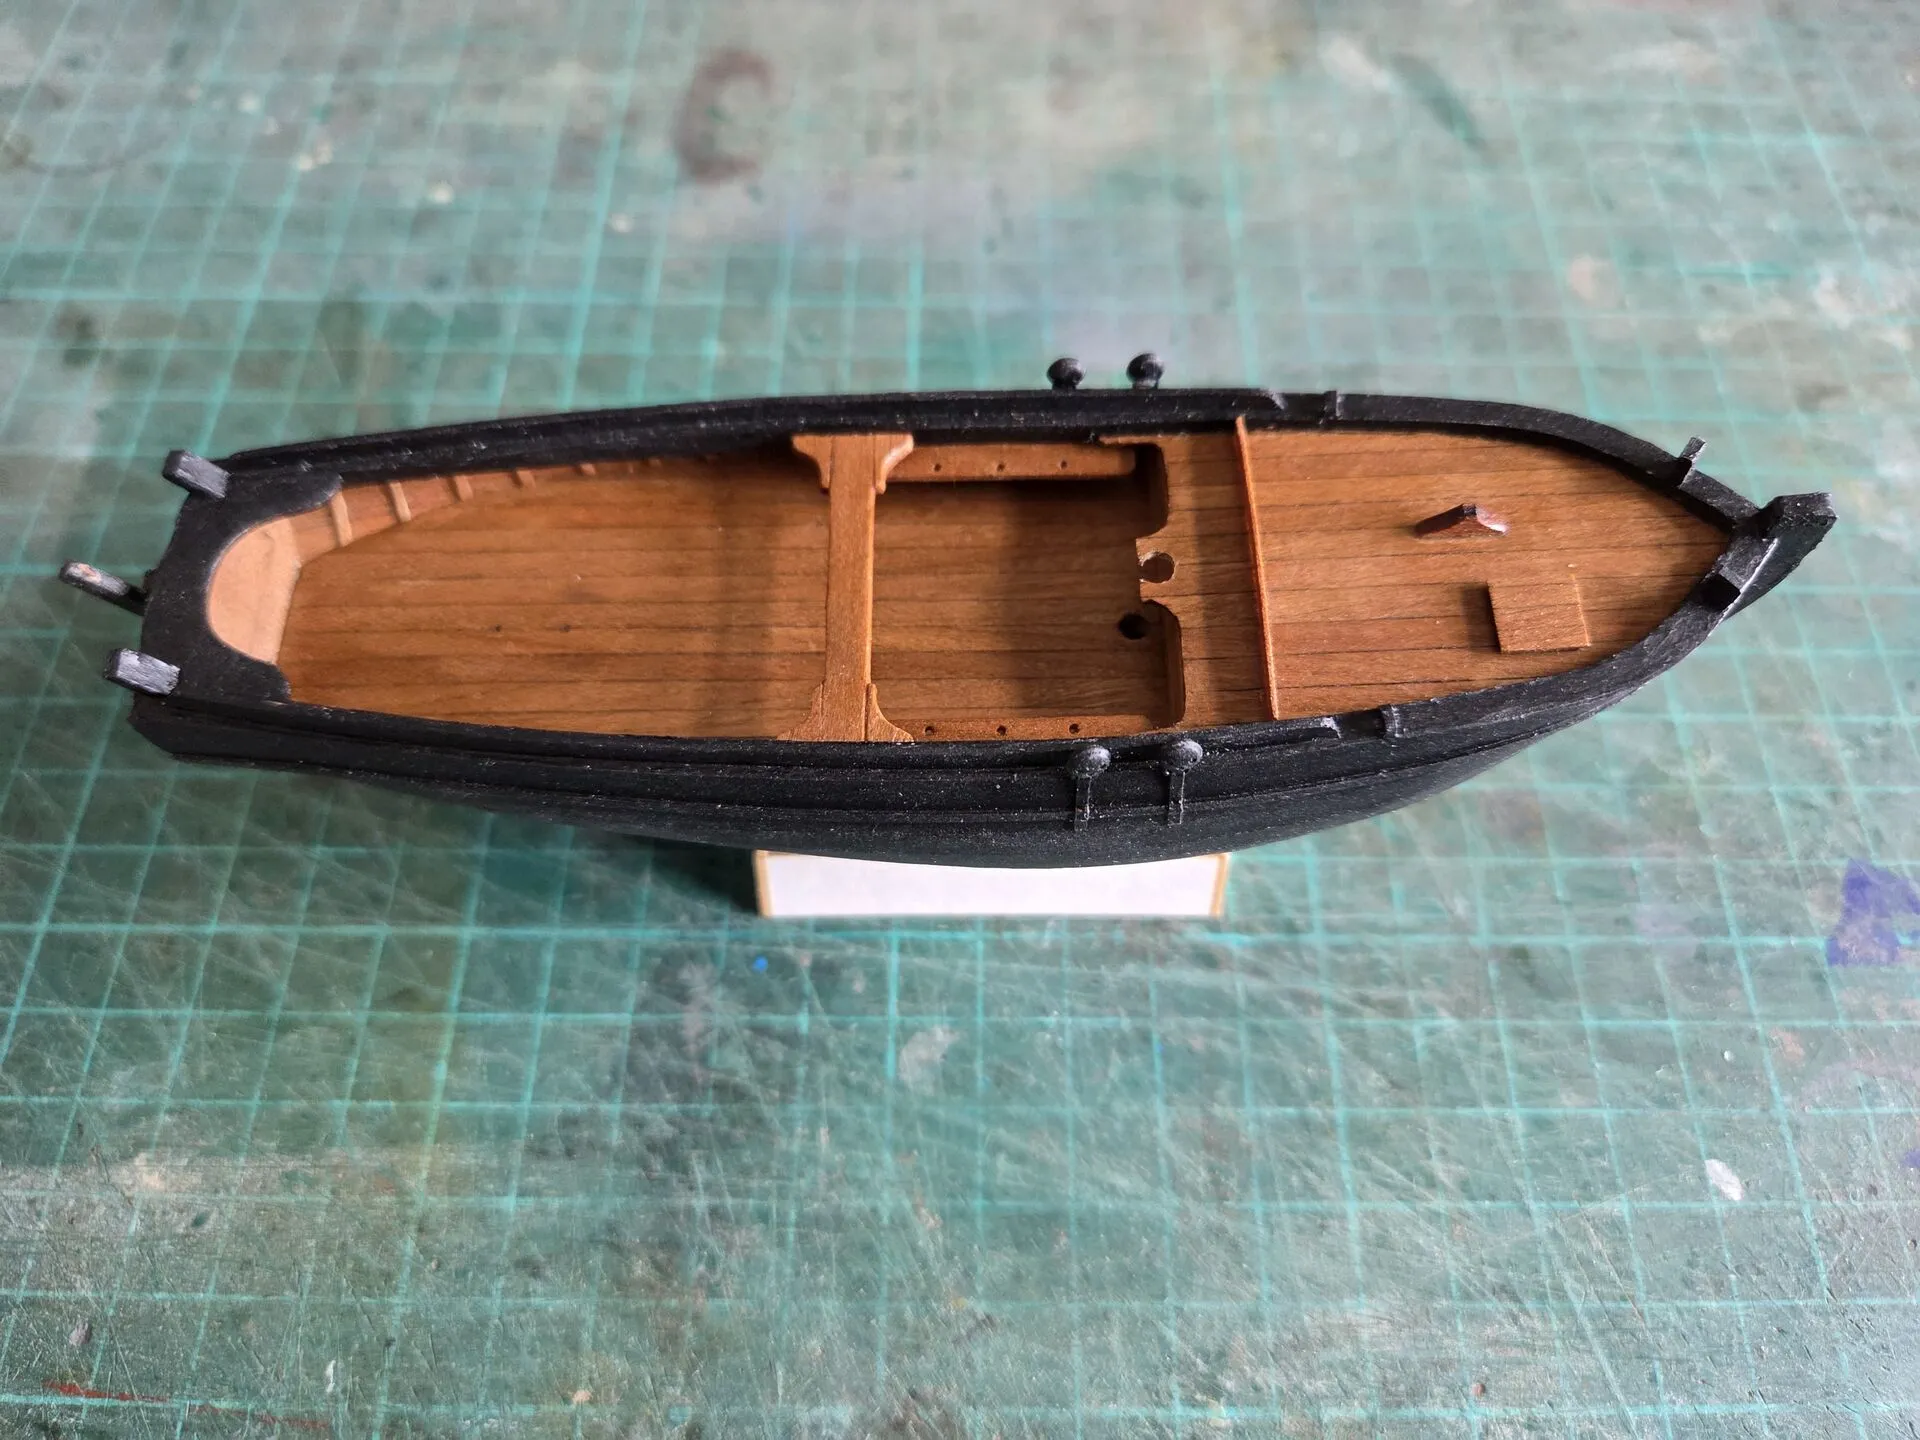
Hull
Building the structure of the hull was identical to the modern wooden kits - laser cut parts, except here they were cut from thick 1mm cardboard. It is rather soft, I much prefer plywood or MDF, but nothing challenging.
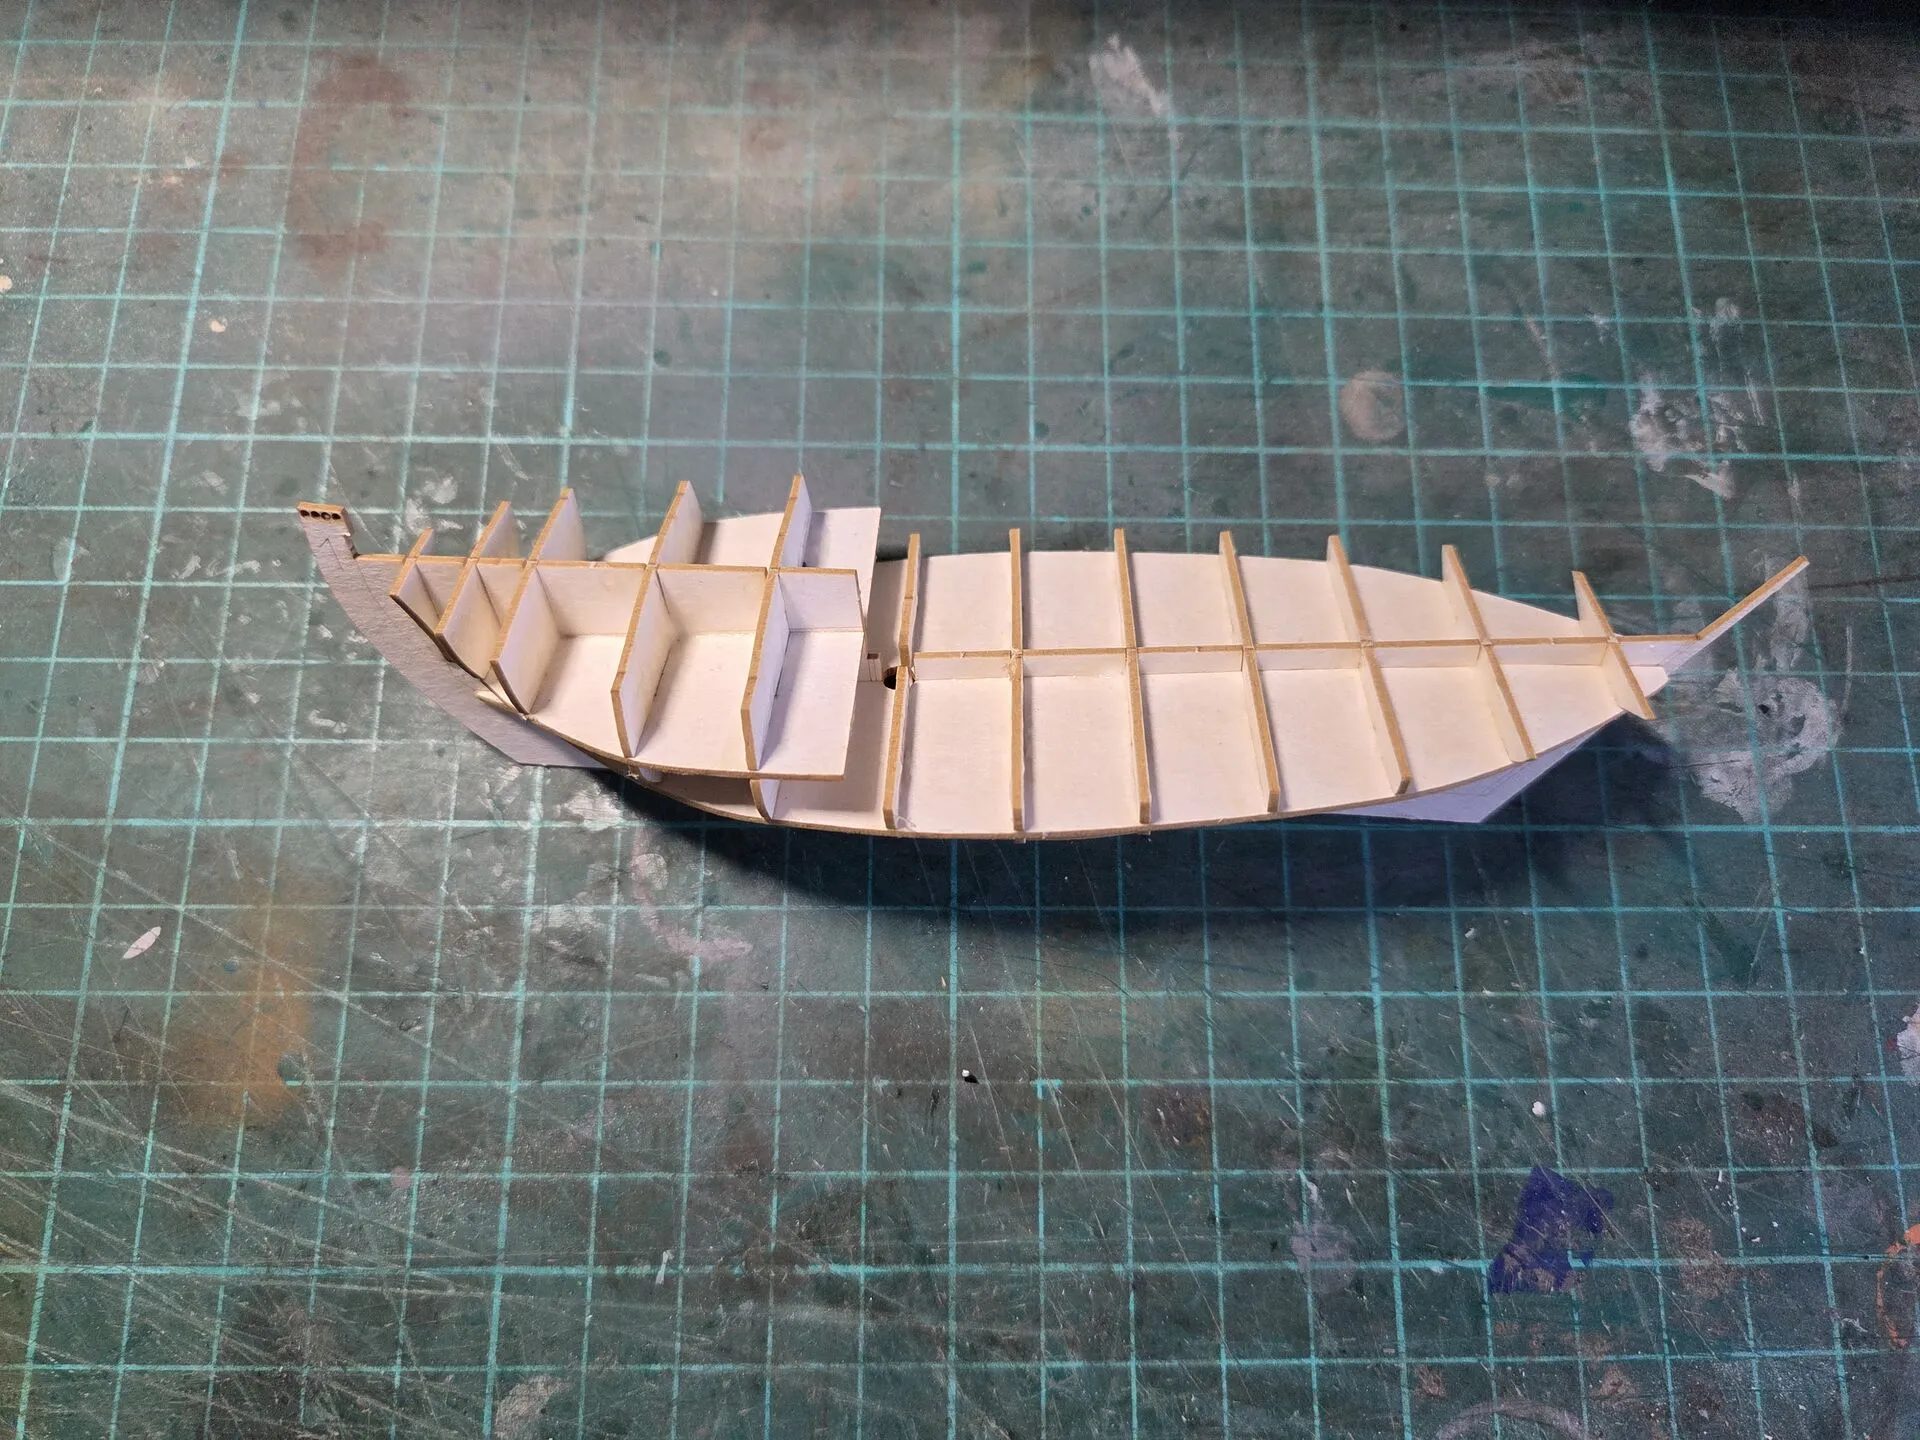
I knew from the get-go that I’ll replace all visible bare wood parts with real veneer, and bought nice 0.5 mm cherry sheets.
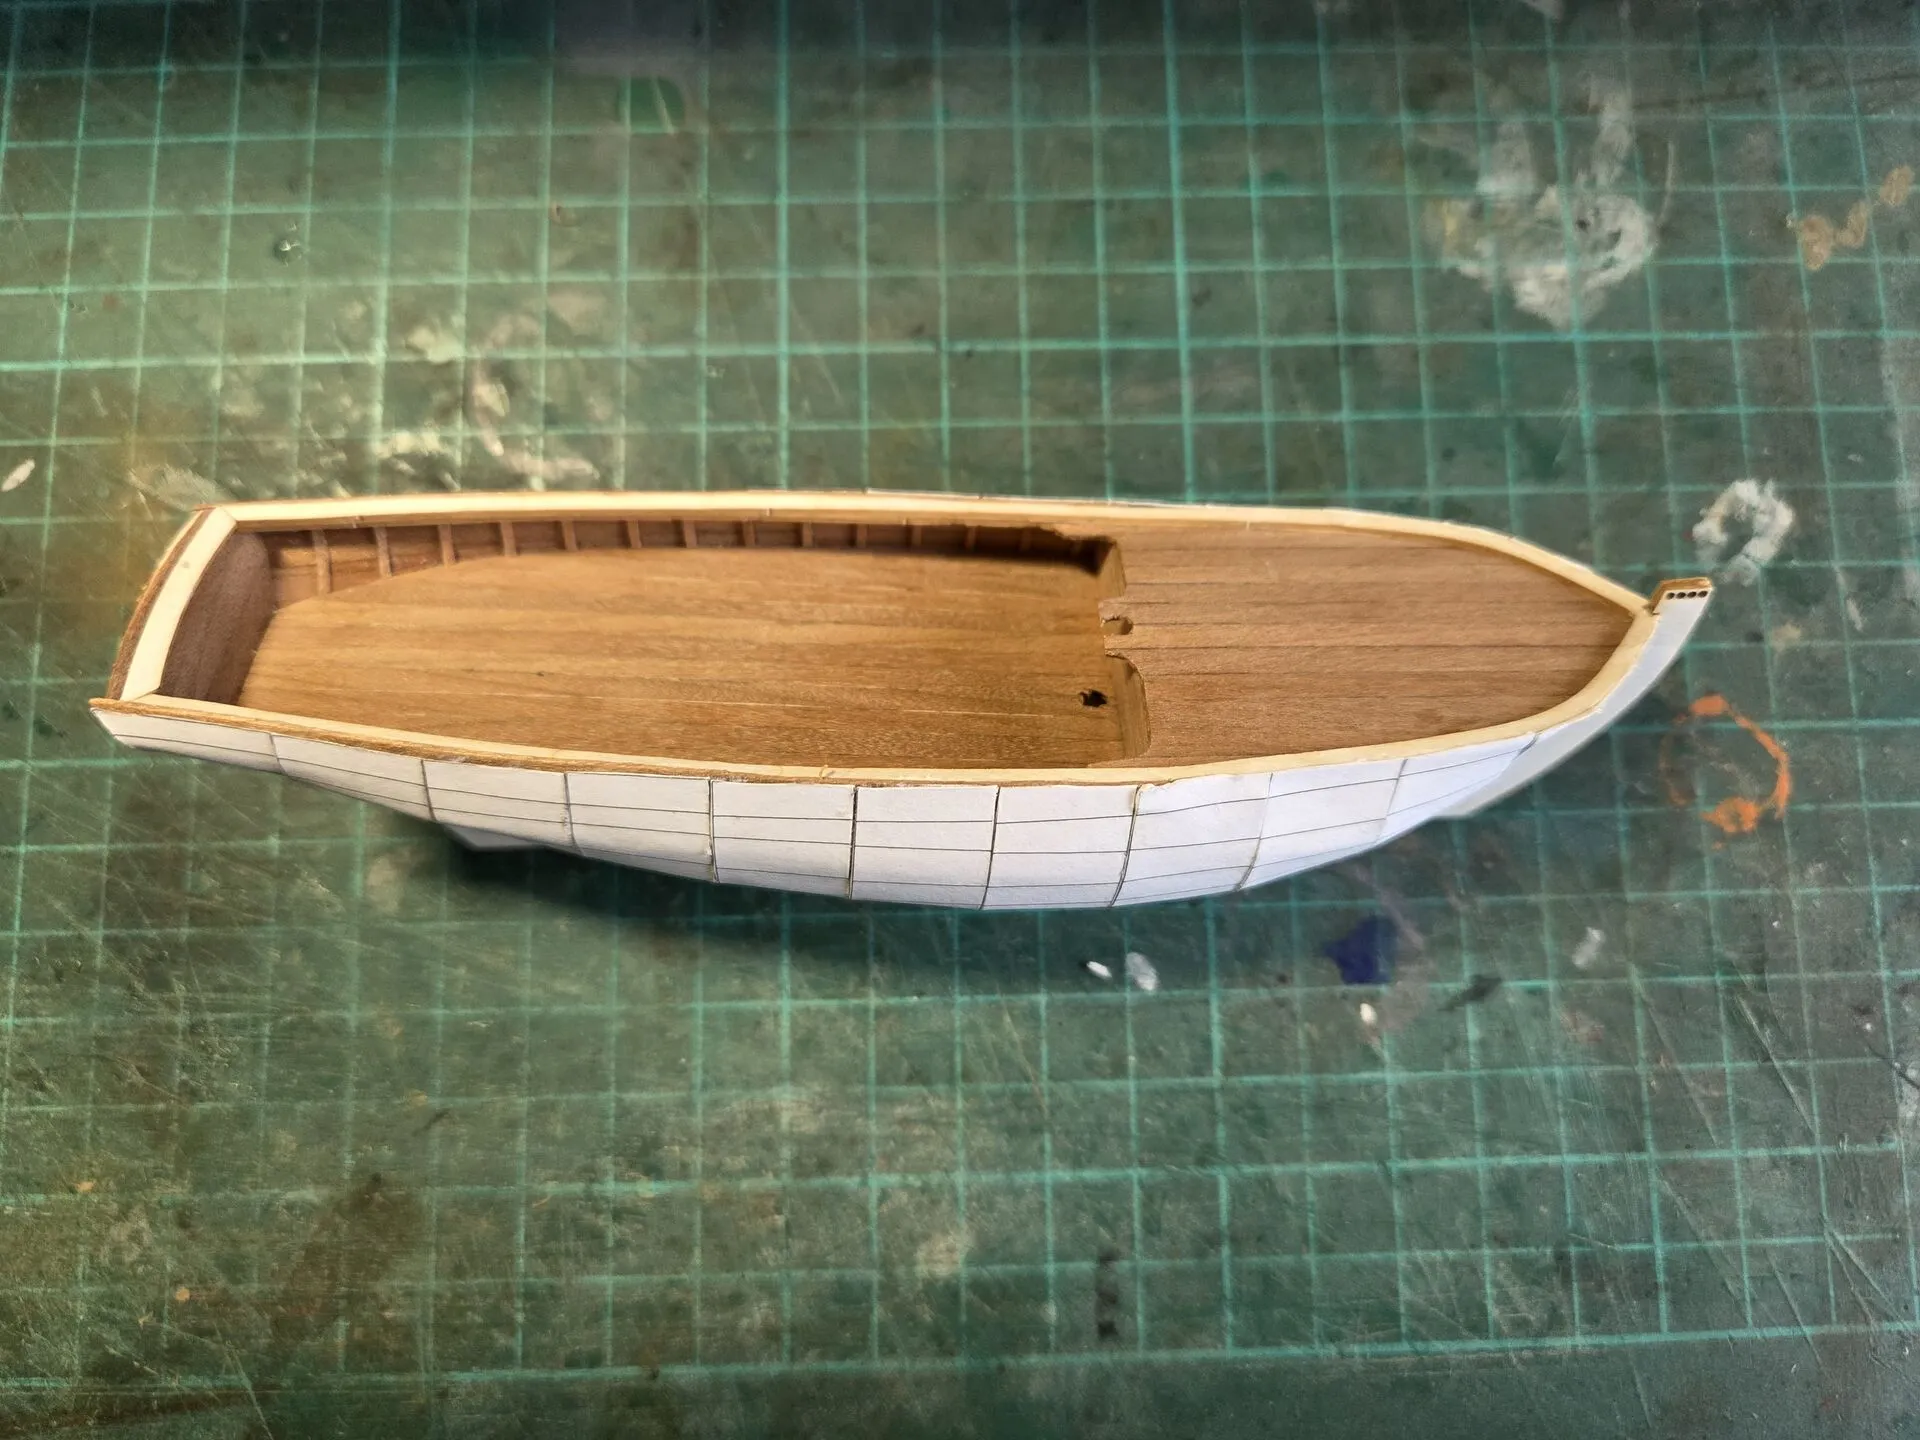
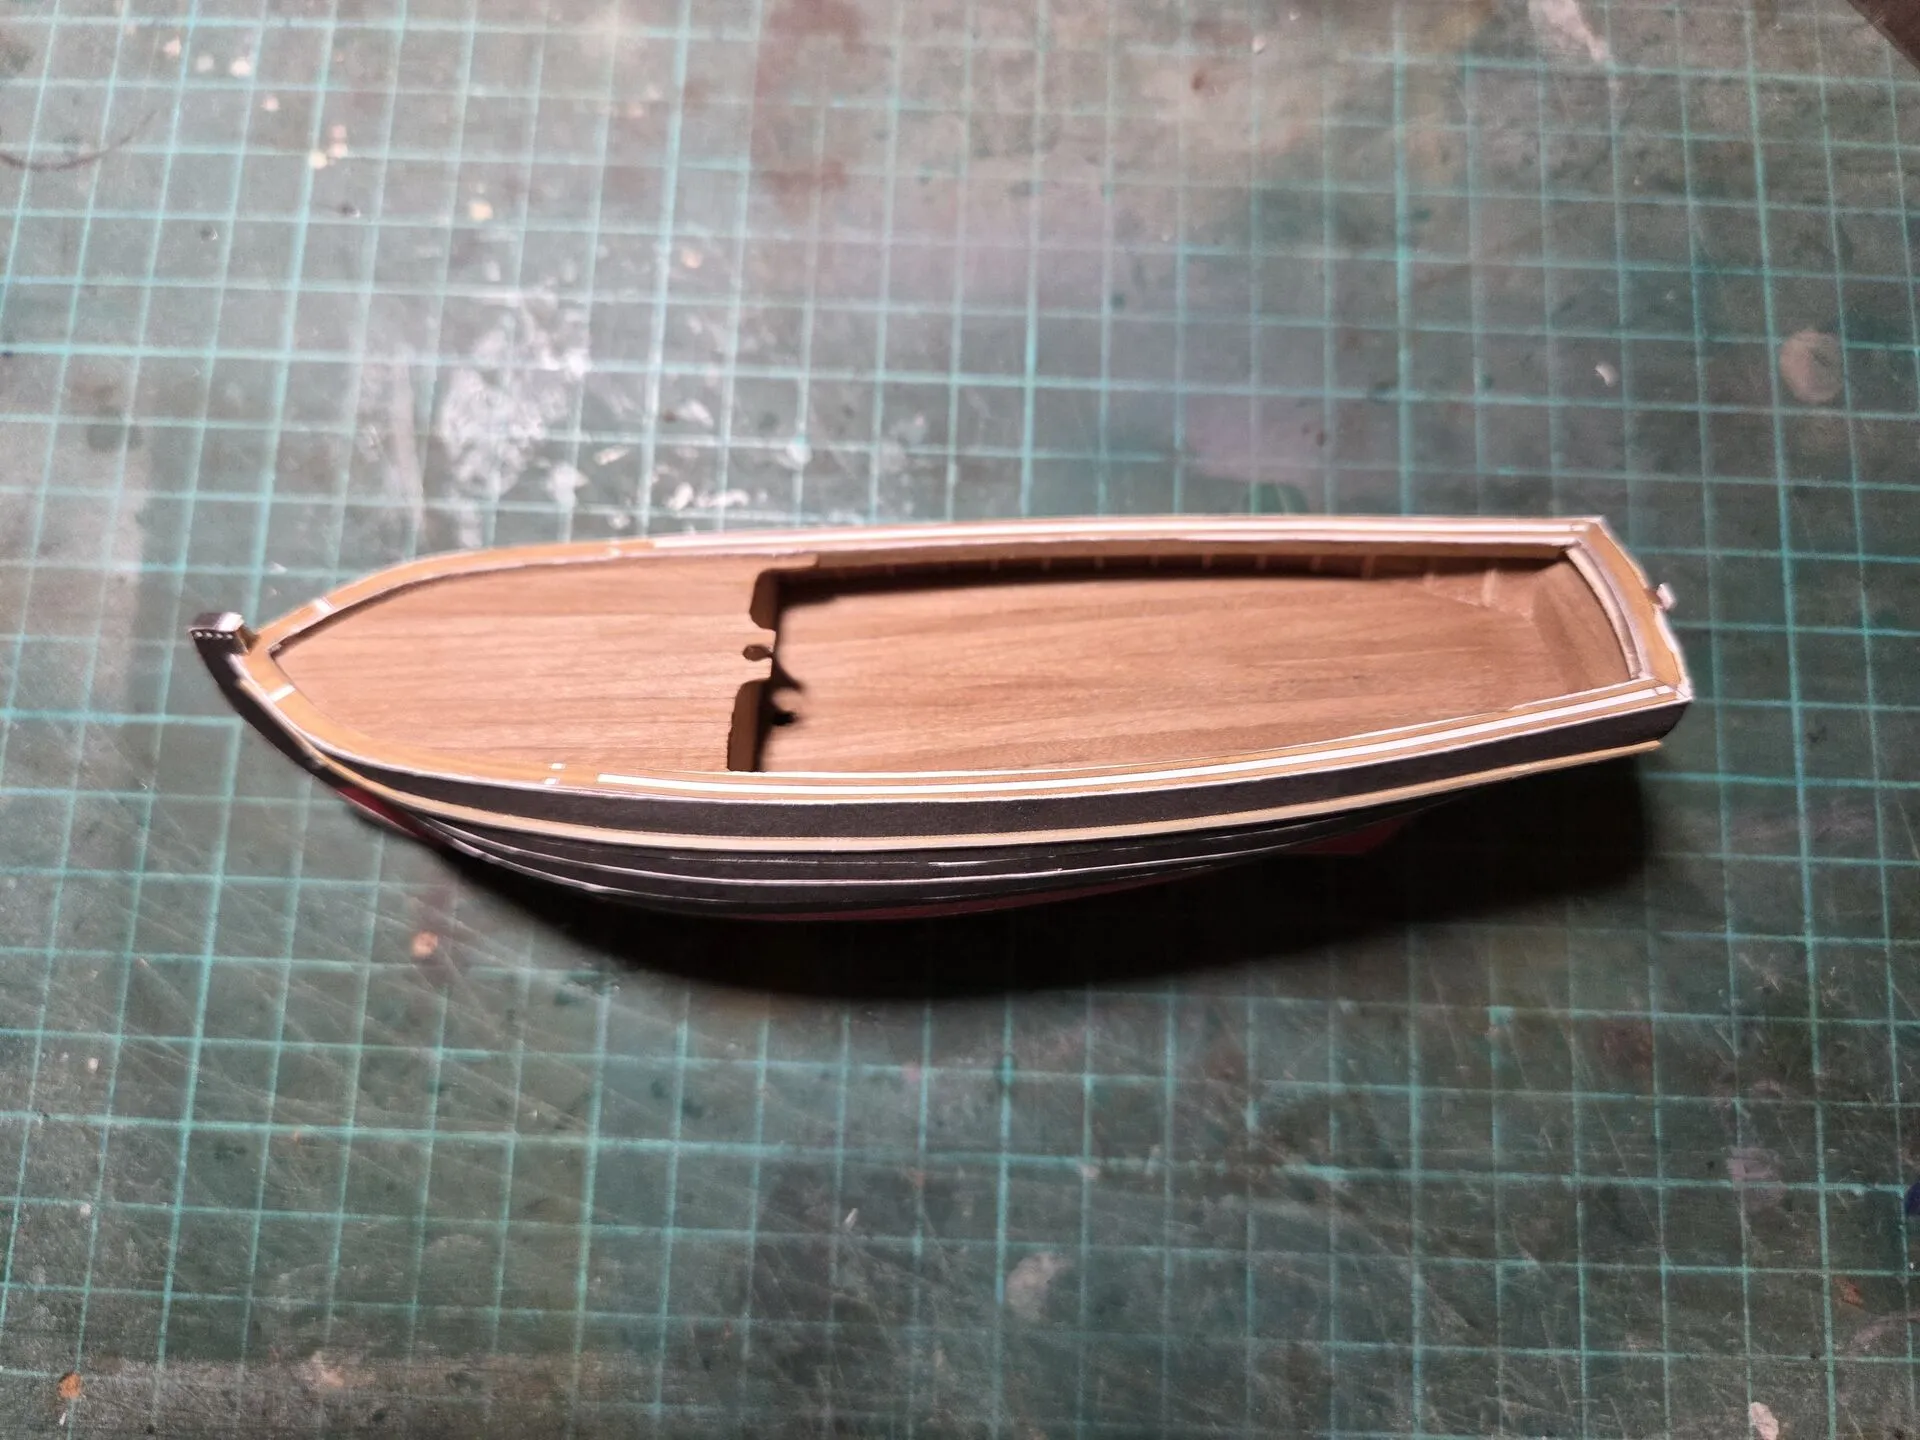
One of the first things I did was covering the deck of the boat with planks that I made from that veneer.
Nothing challenging at all, and the result looks pretty good.
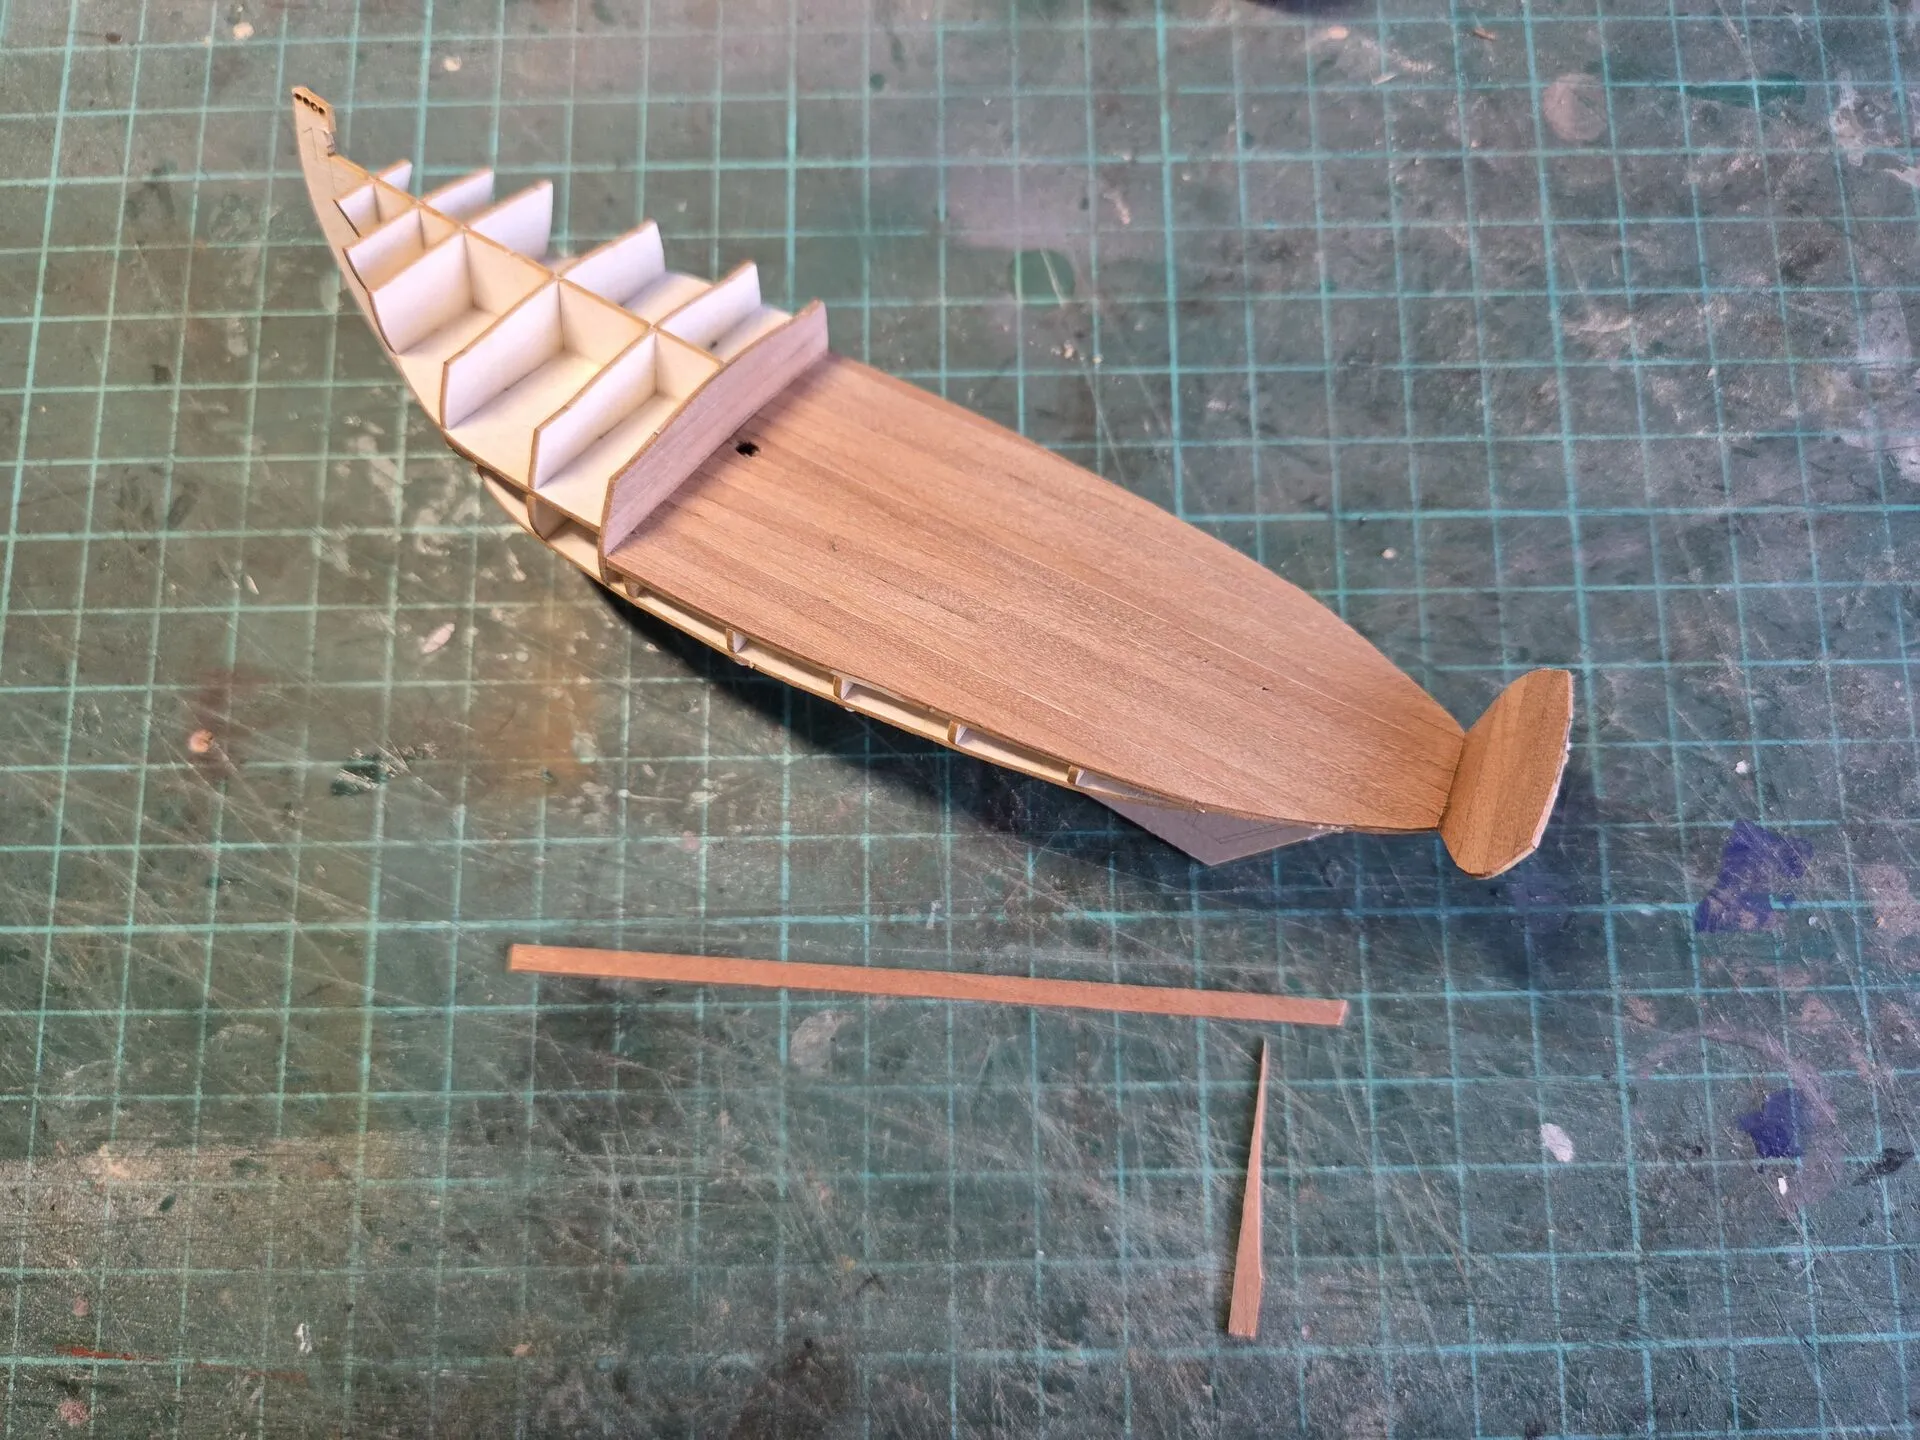
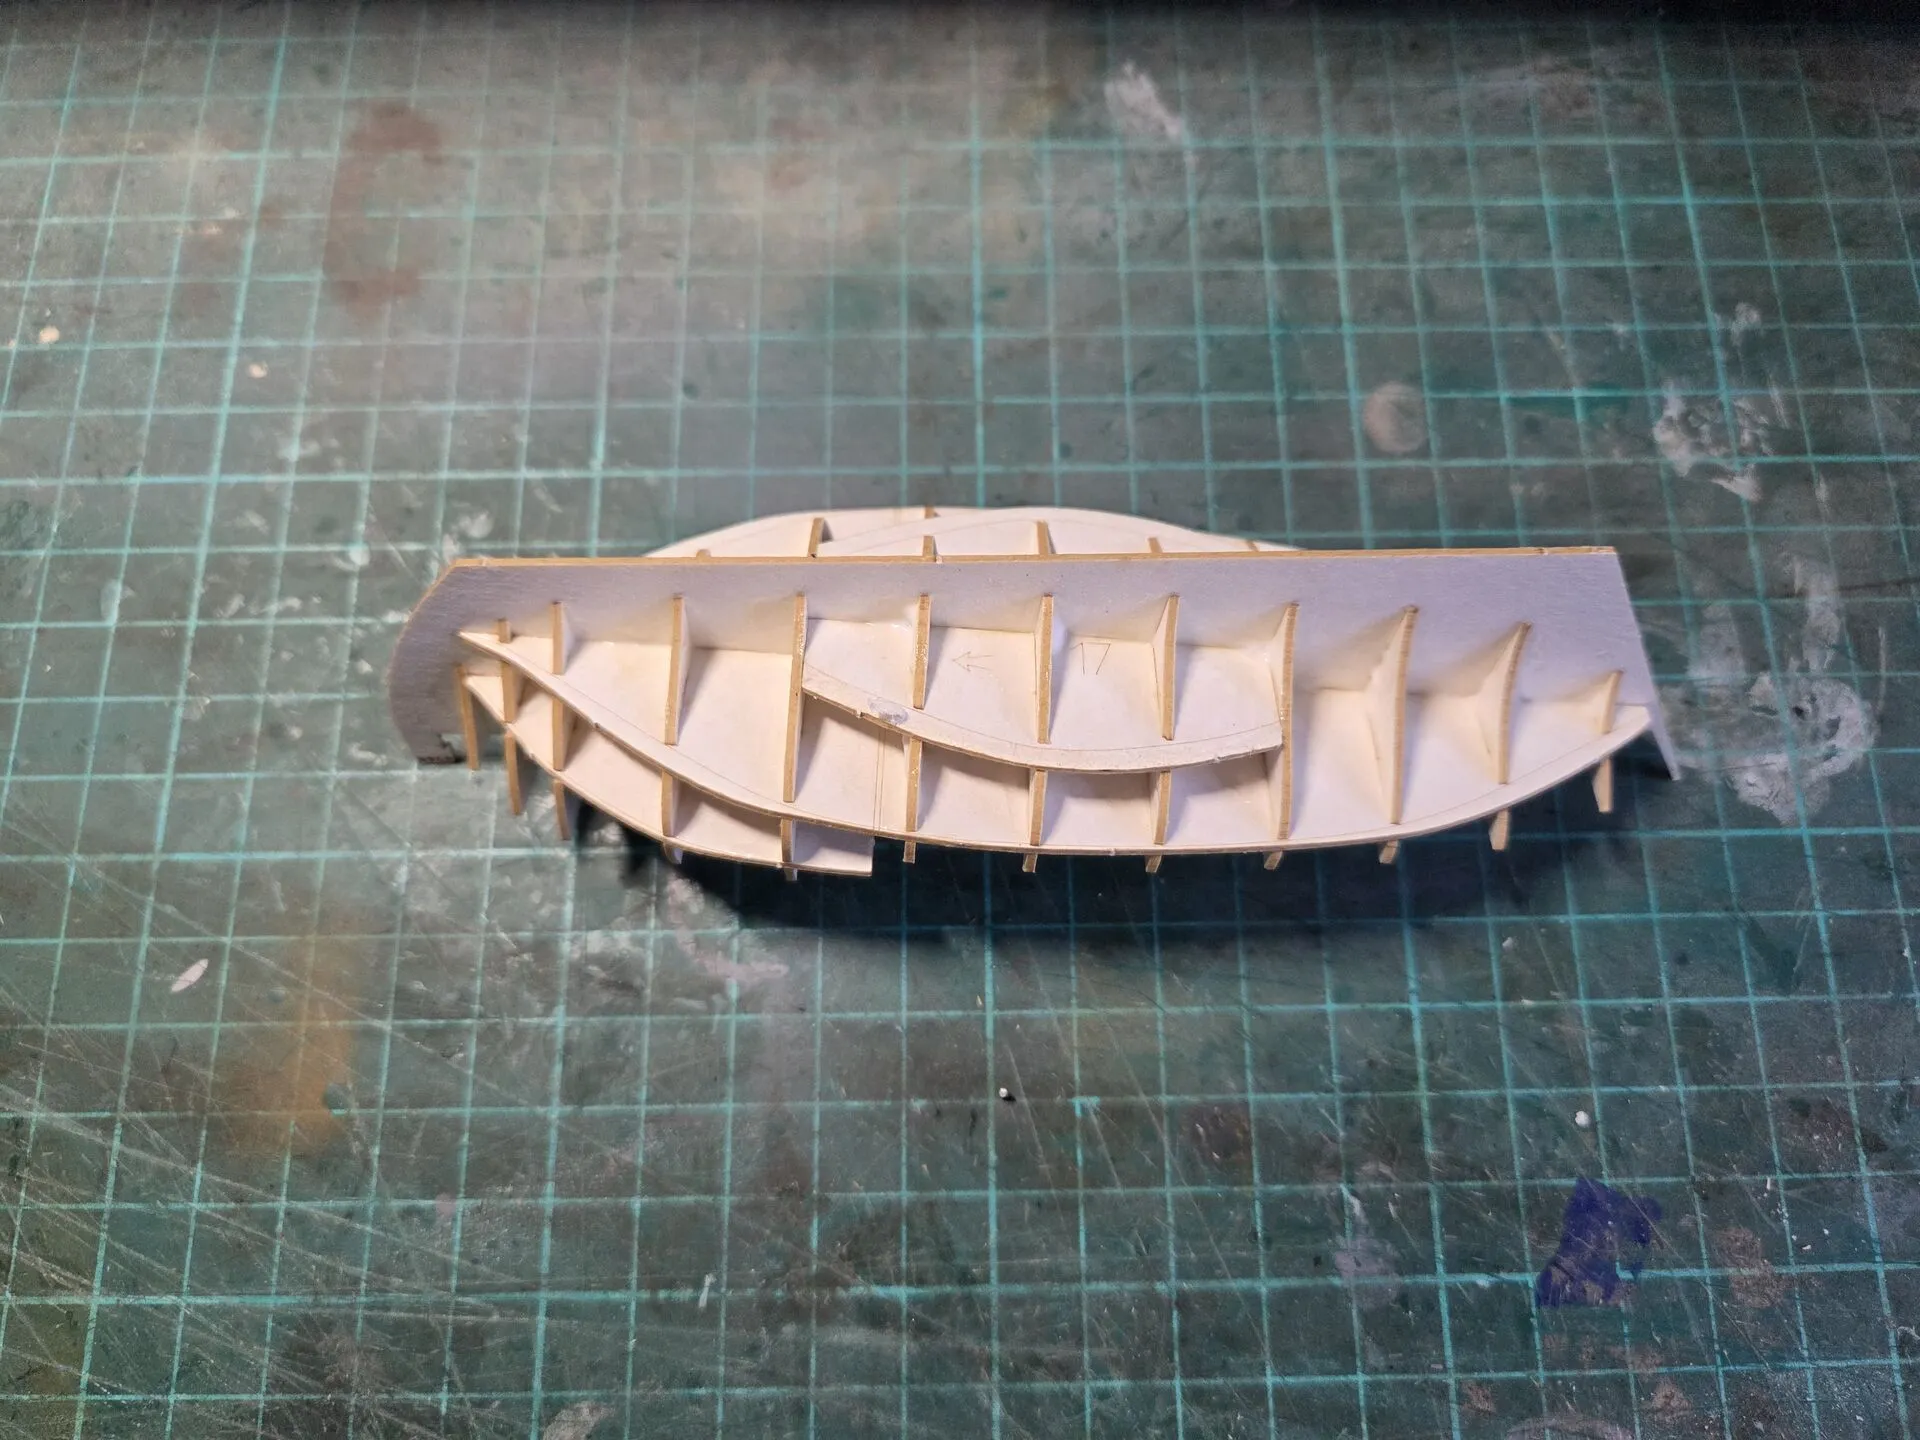
The next part proved to be challenging. I needed to set up the internal parts of the hull planking, again replacing the paper parts with veneers. Since they needed to be precisely shaped and bent, what I did was first copy the paper parts onto veneer (double-sided tape proved indispensable), cut them out with the scalpel, and then install on the model one by one, using a big sheet of thick paper as a backing to make sure they keep shape.
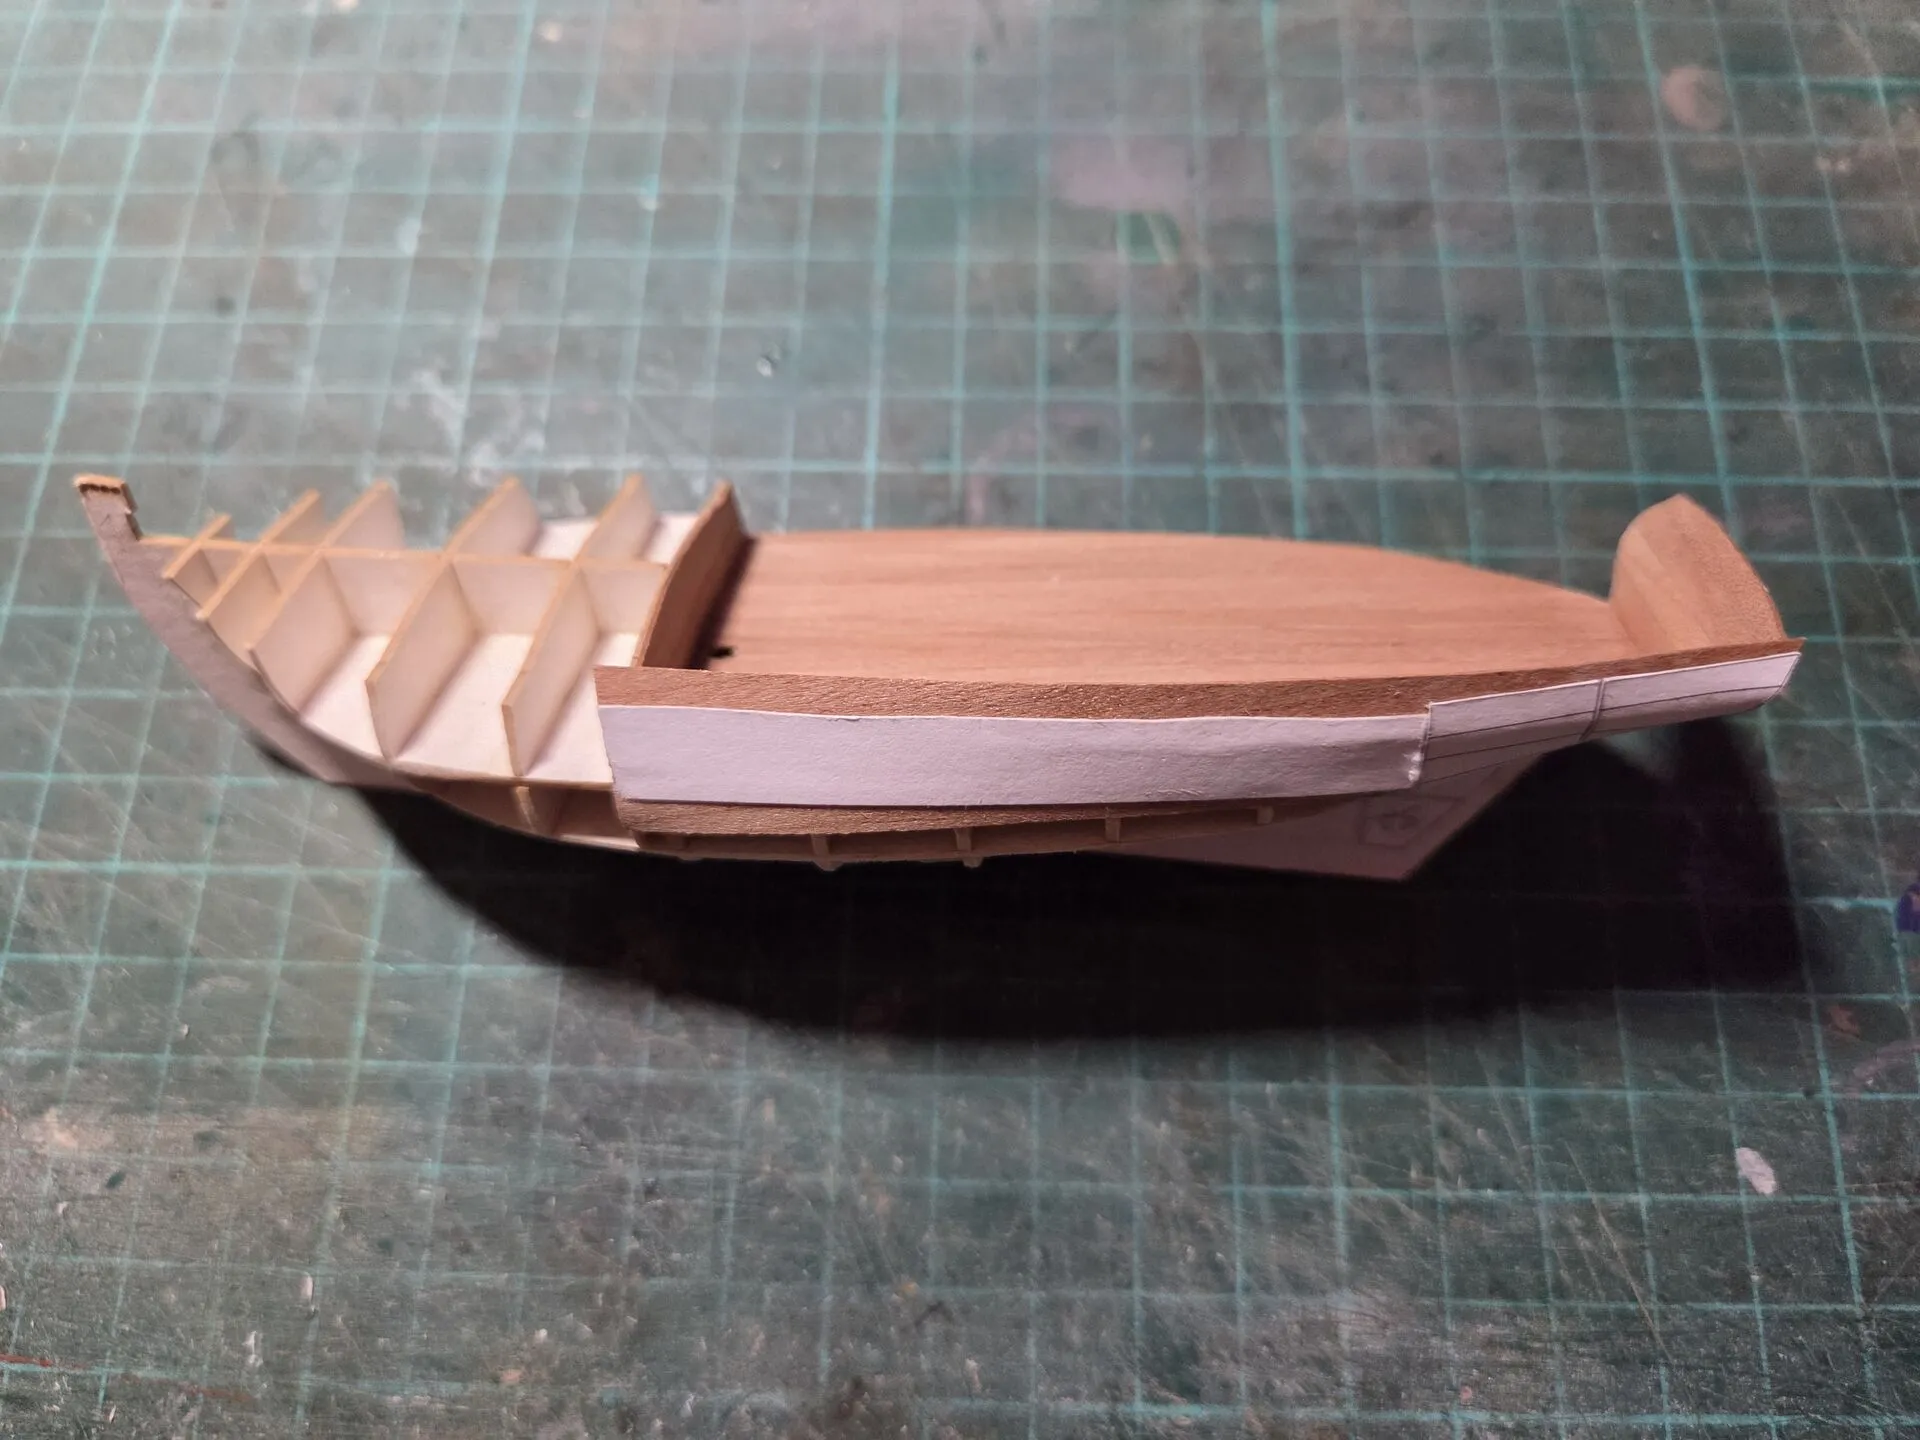
Planking
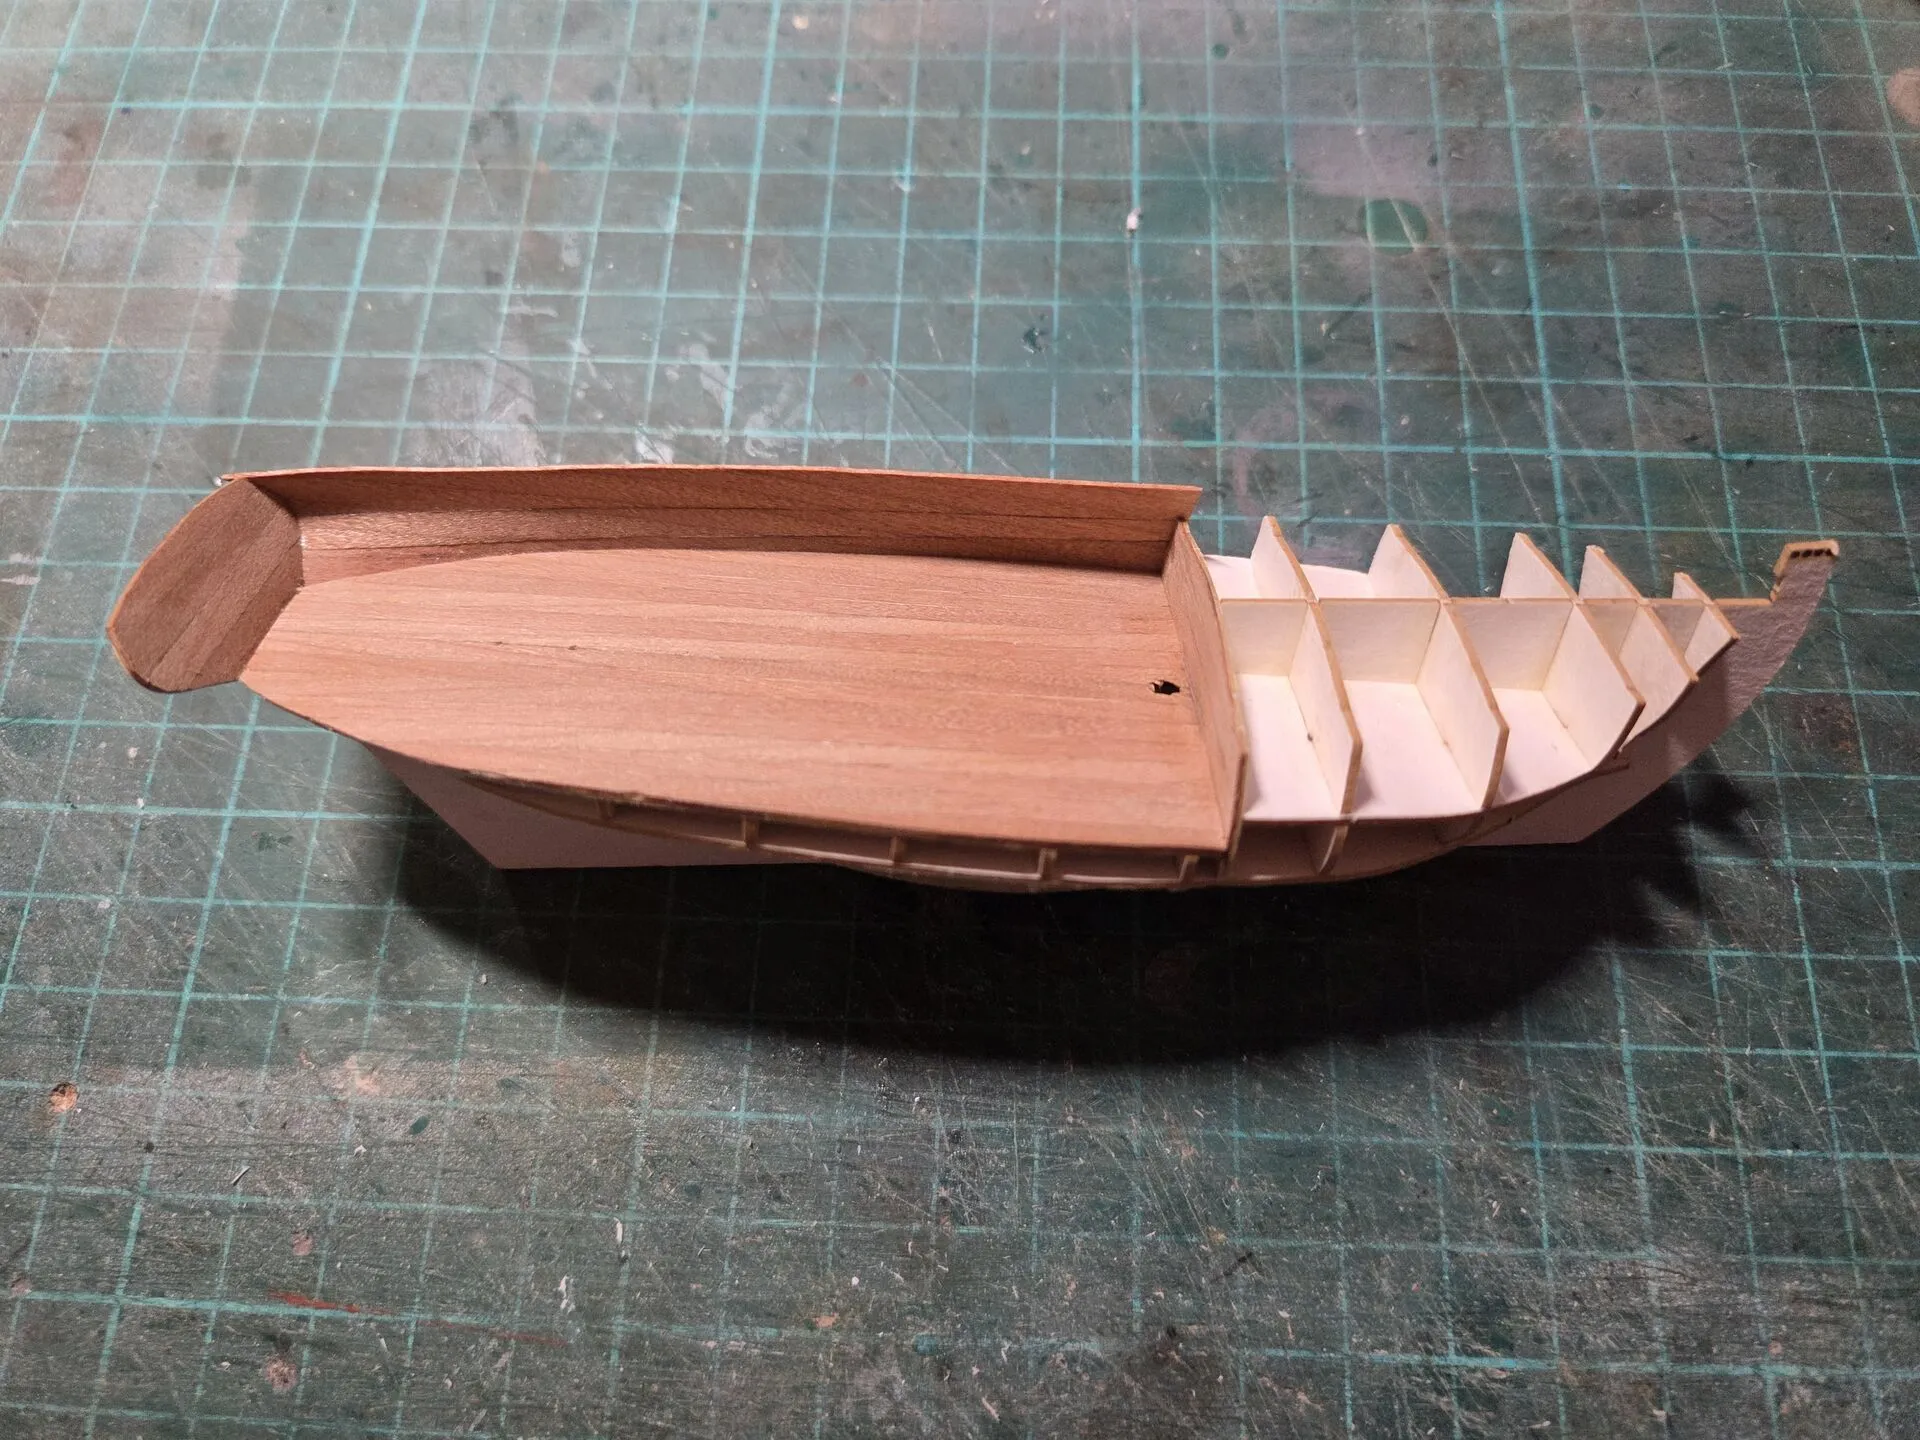
Once all three planks were glued in and held together by this paper backing, I proceeded with the first layer of outside planking. When adding those paper planking segments, I cut off the backing section after section, and gradually replaced it with the first layer of planking. Worked a charm, the inner planks stayed put.
Adding the fore deck and parts of the railing was also simple.
Then it was time for the second planking layer.
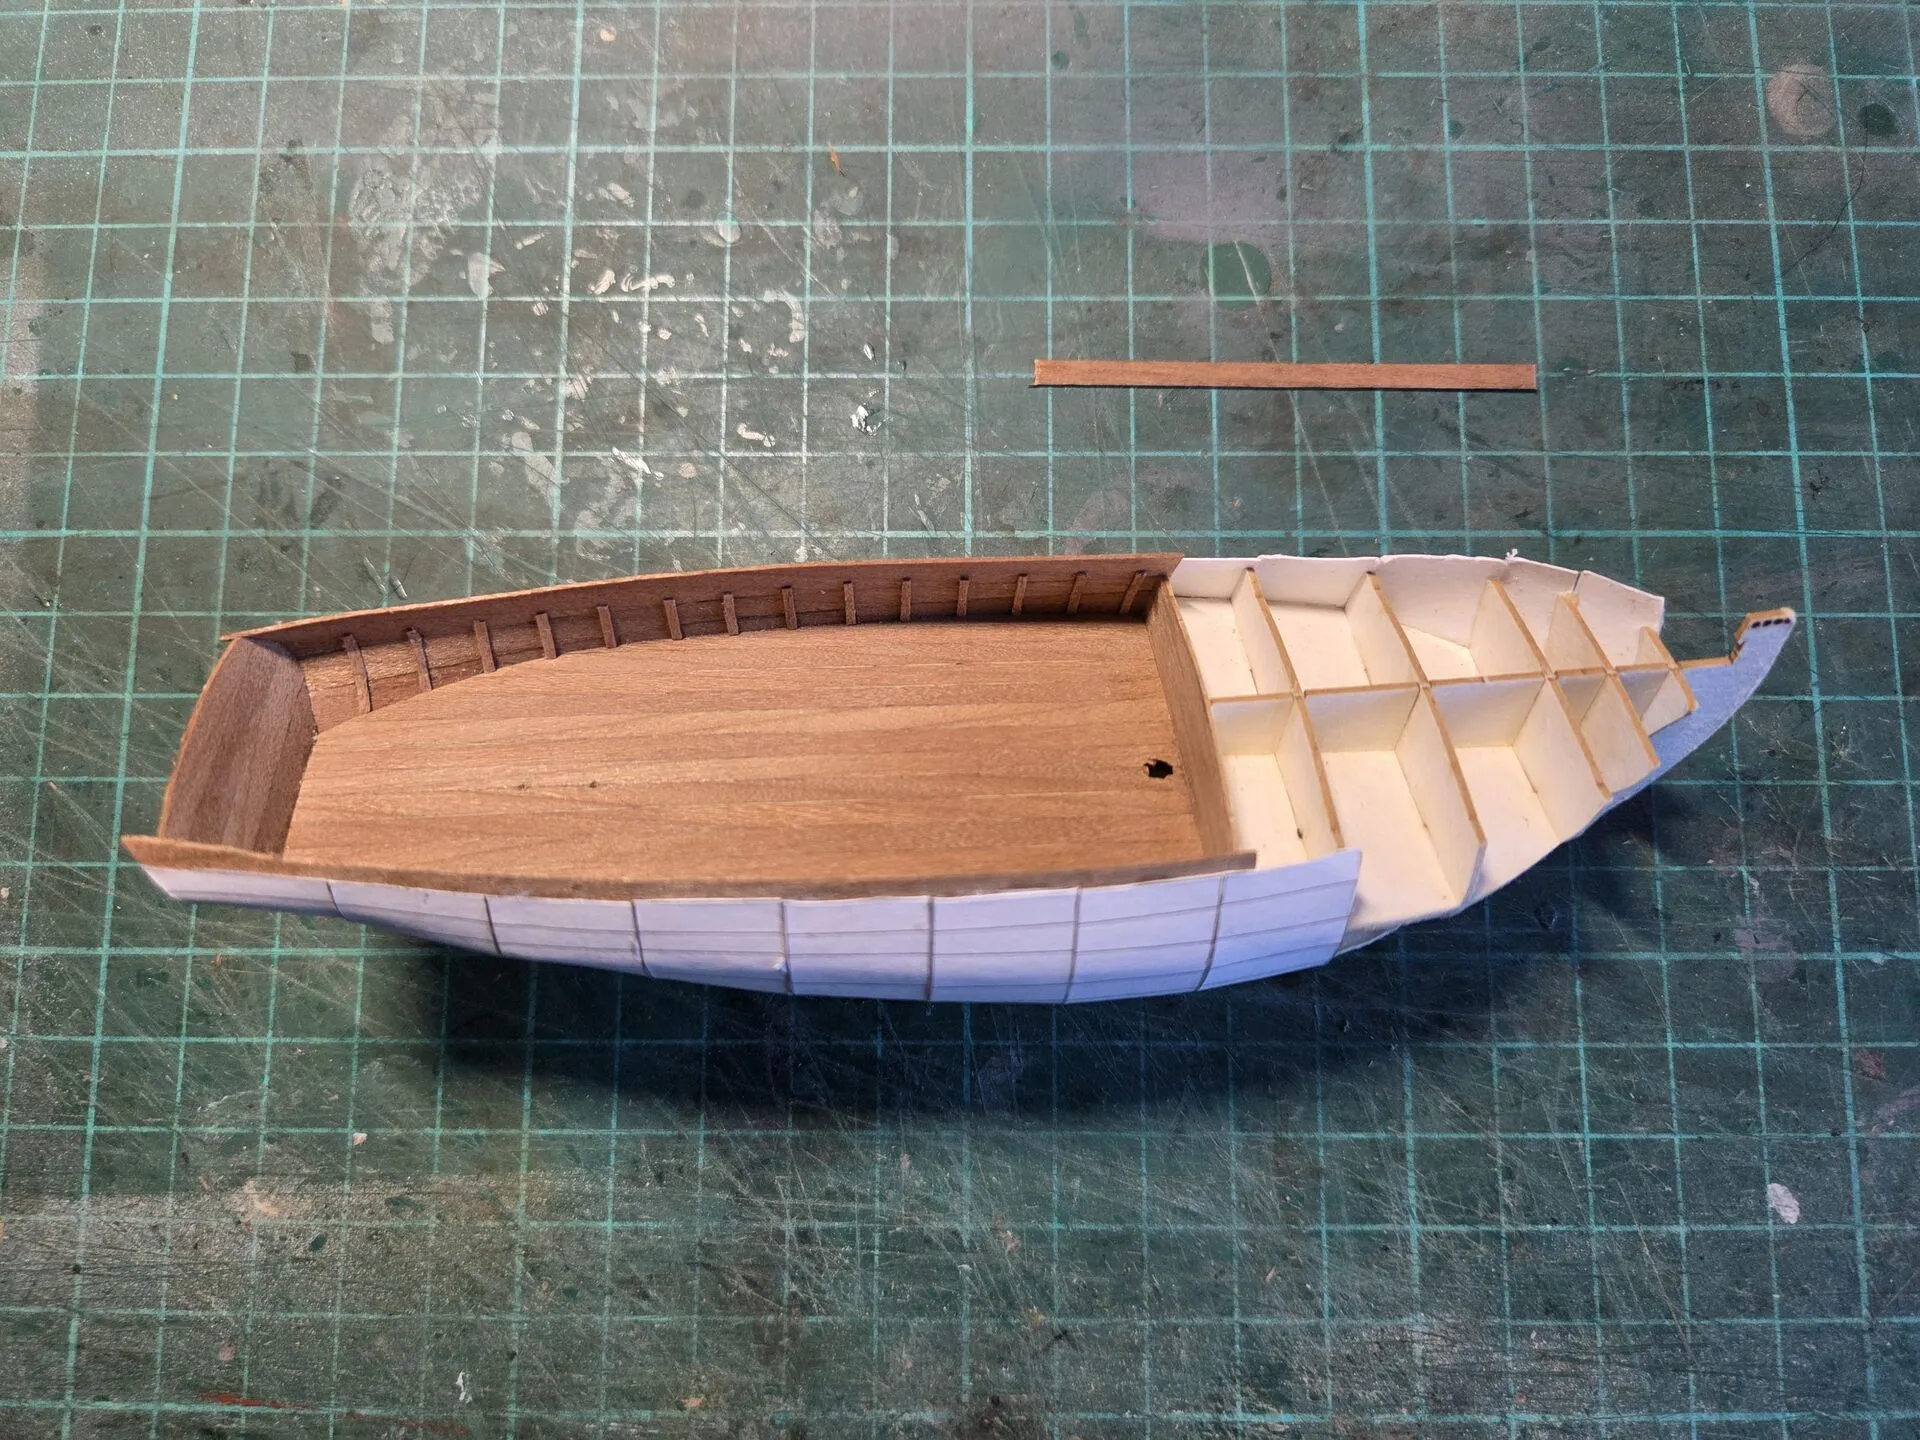
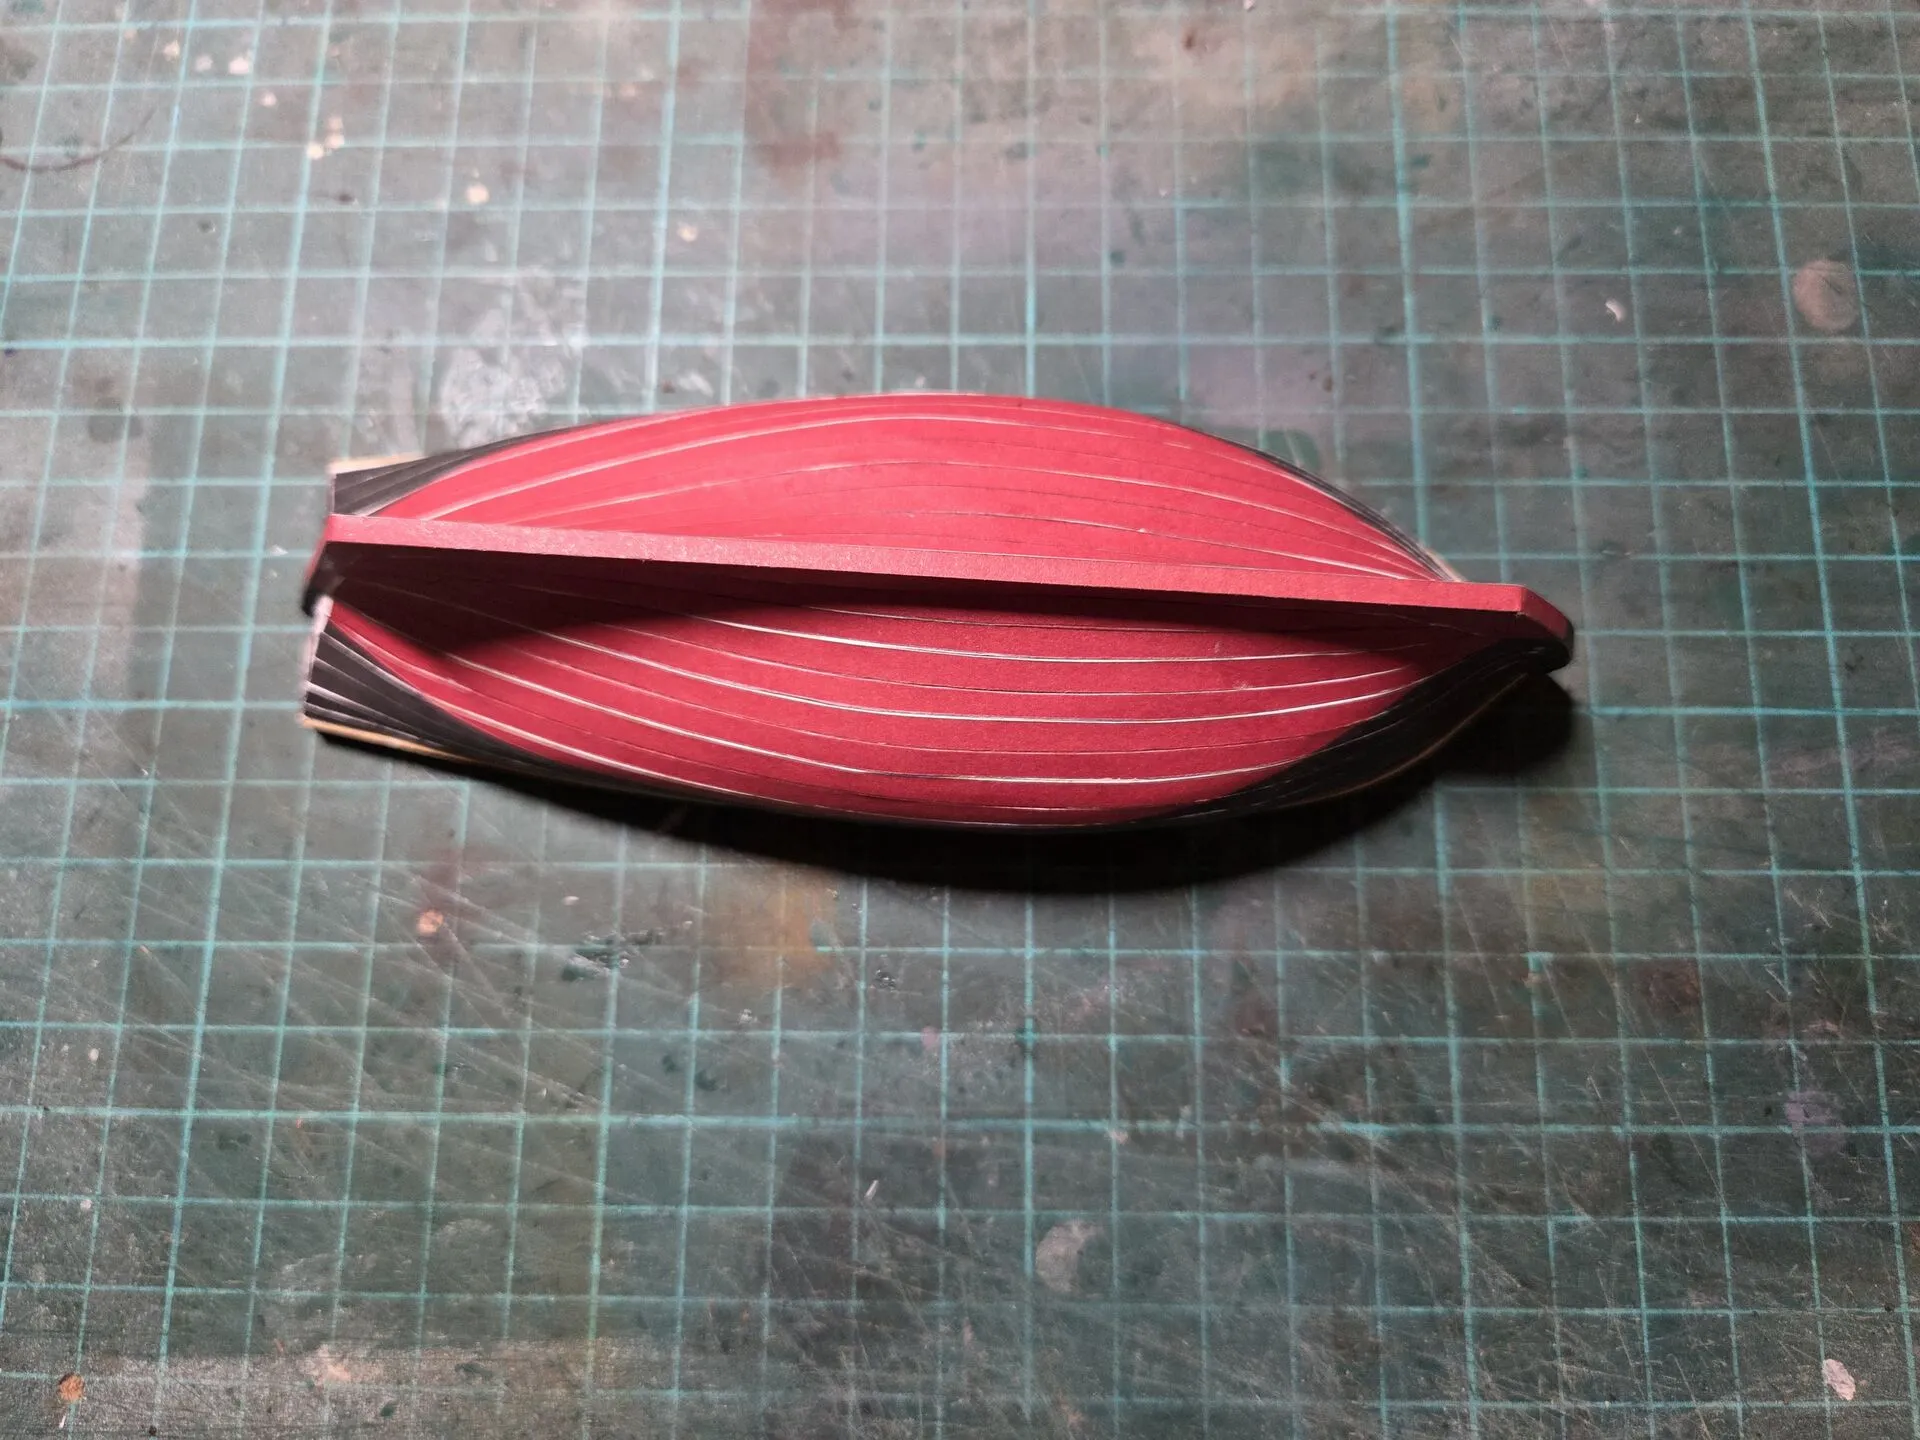
At first, I was delighted - the kit provided precisely shaped laser cut planks from 0.5 mm card stock. But after adding couple of planks I was very disappointed - the card stock proved to be too soft, and the hull had visible dents and bends. And given how soft it was, I saw no way to fix it with the putty.
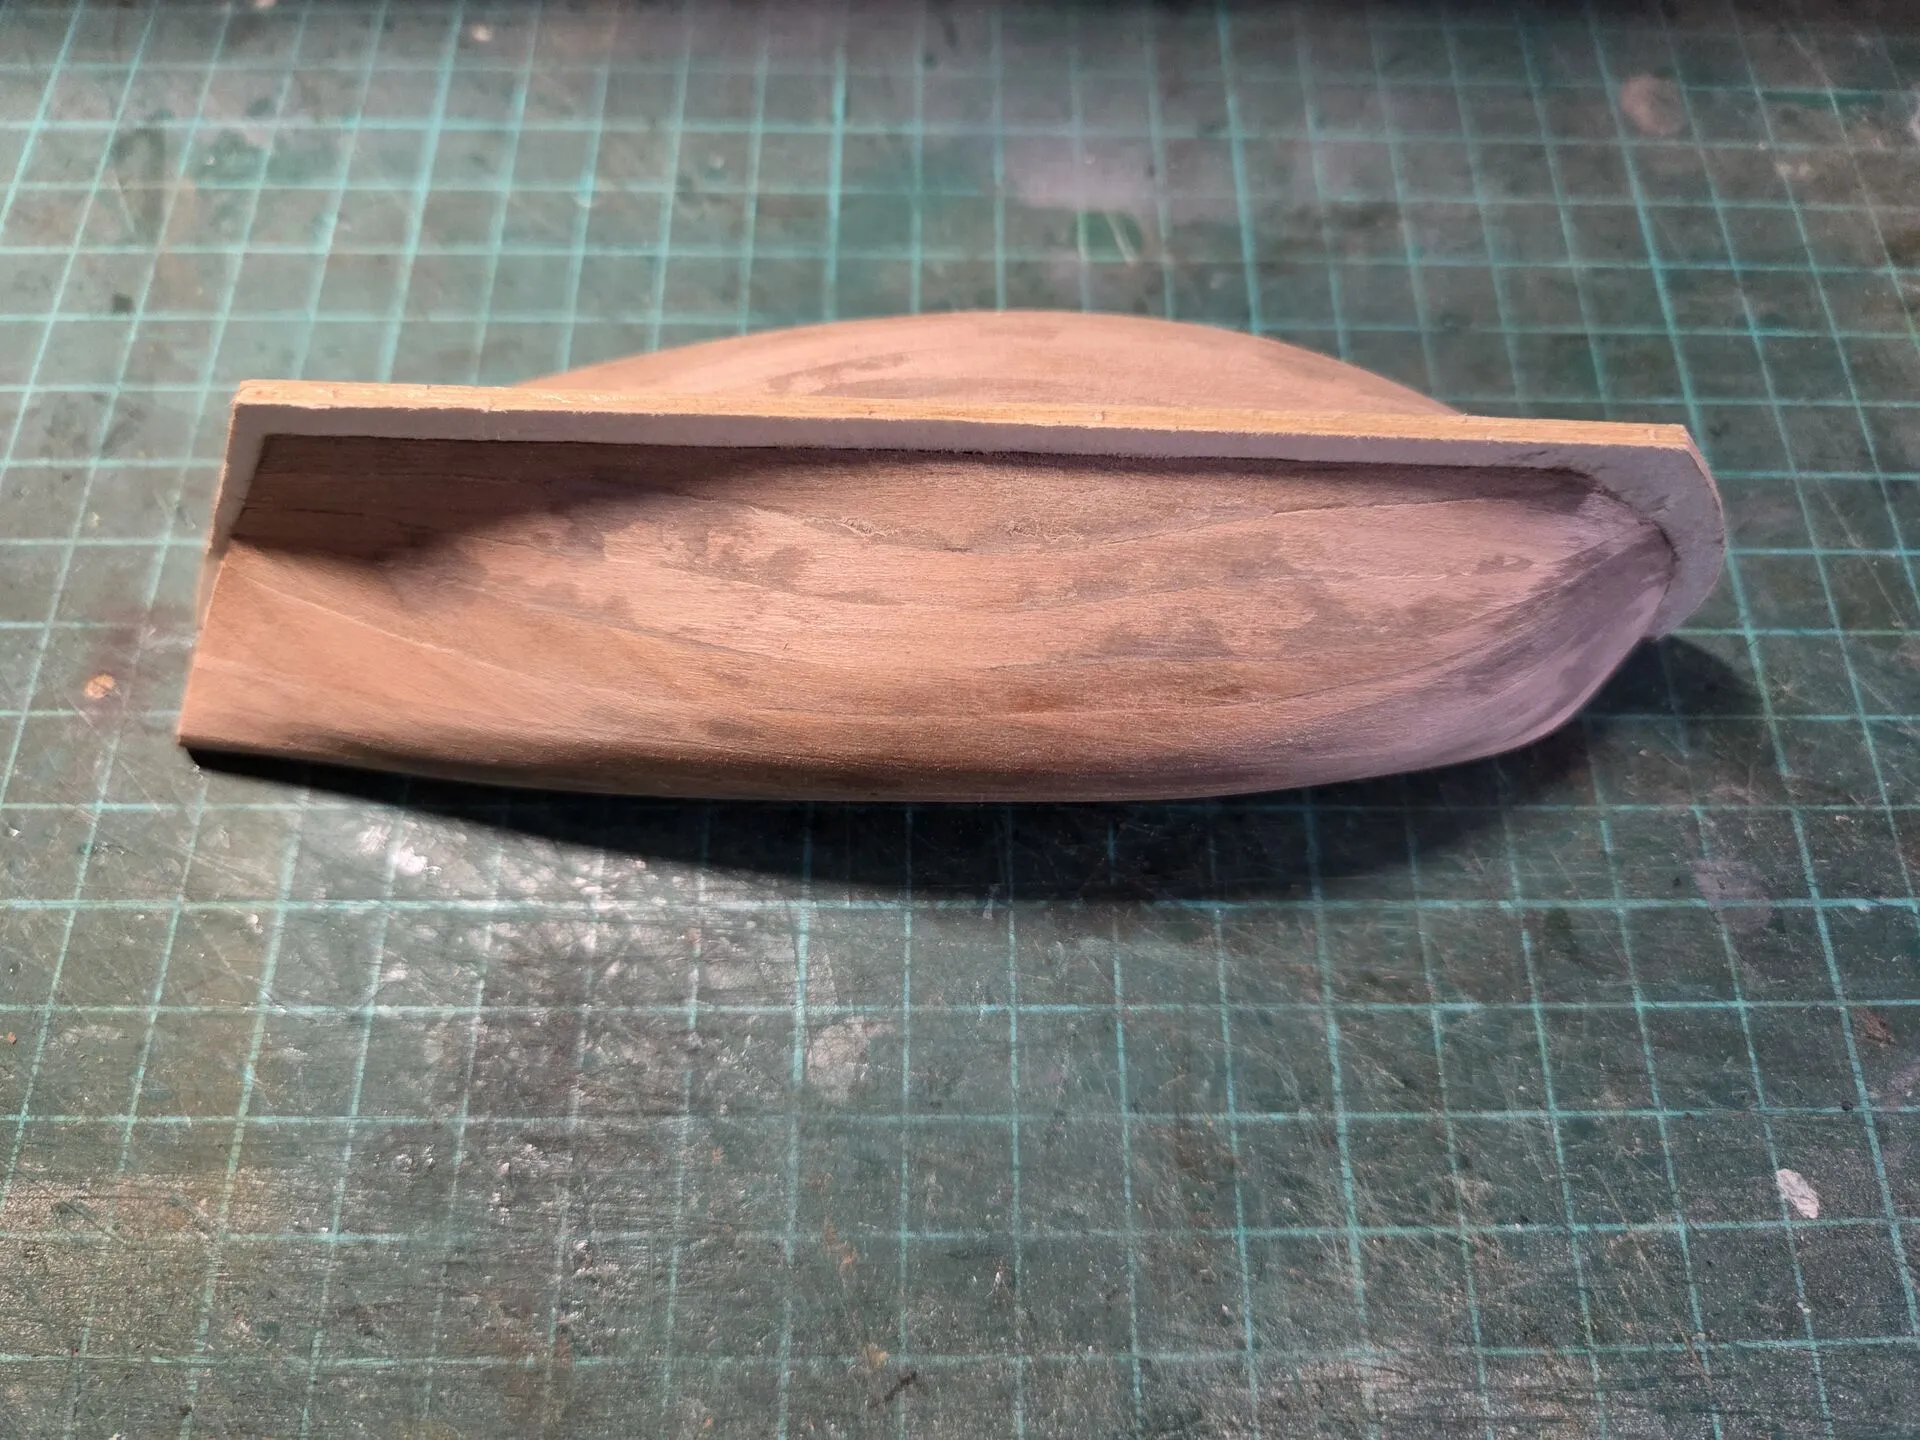
My solution was simple - replace the 0.5 mm card stock with 0.5 mm veneer. Again, I copied the shapes of the planks from the kit, and glued the new wooden planks in place. The difference is night and day, with wood curving nicely without any dents or bends.
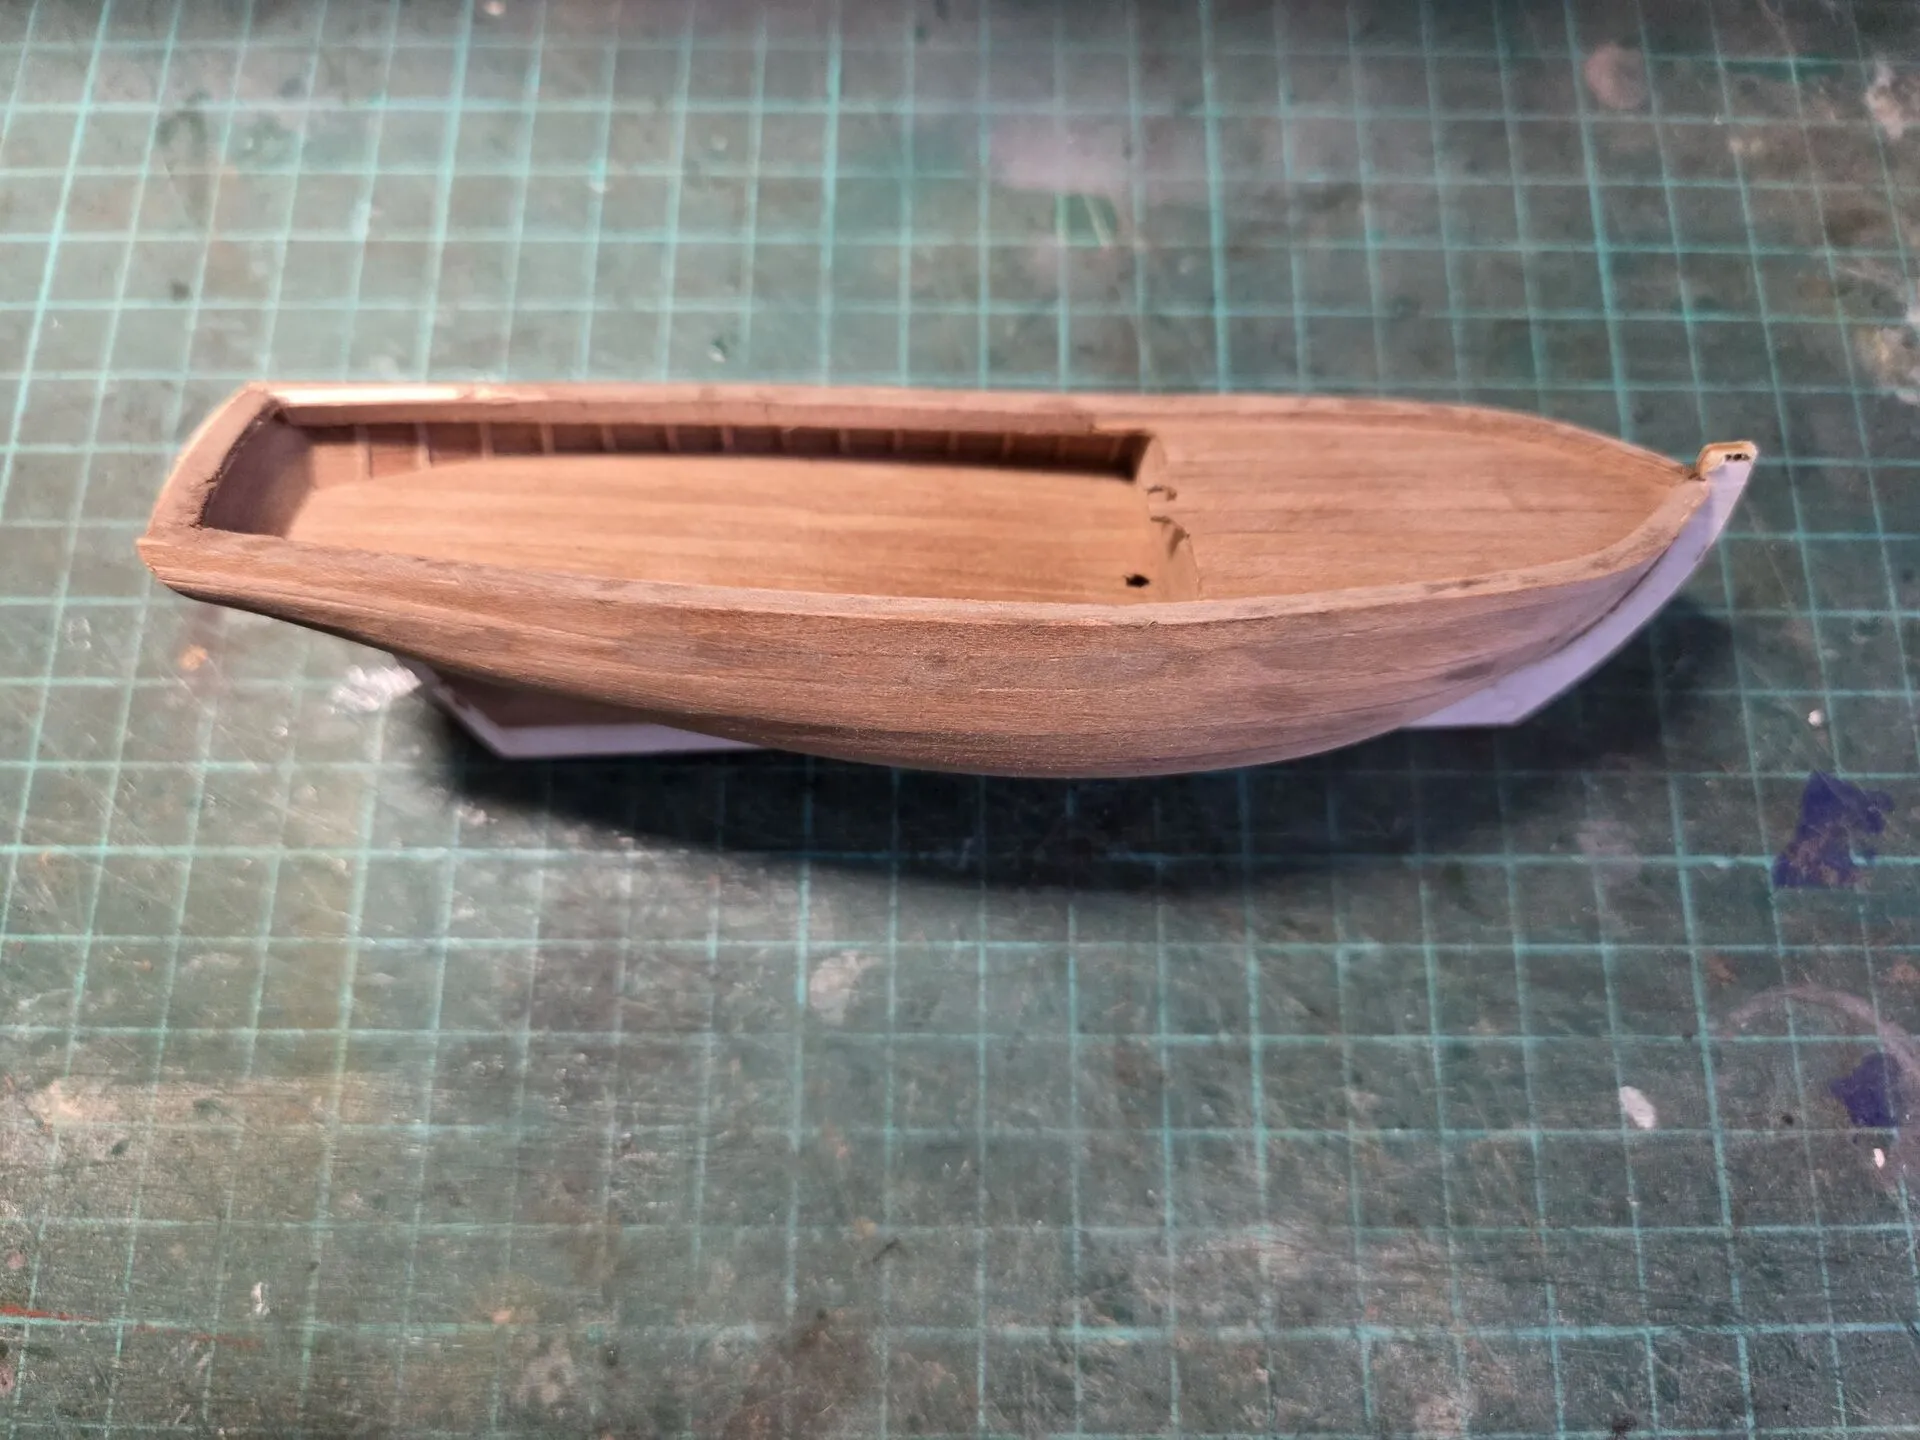
Of course, I didn’t bother too much with making this layer perfect, and simply filled the few gaps with the wood filler. A bit of careful sanding, and I’ve got a very smooth and solid hull.
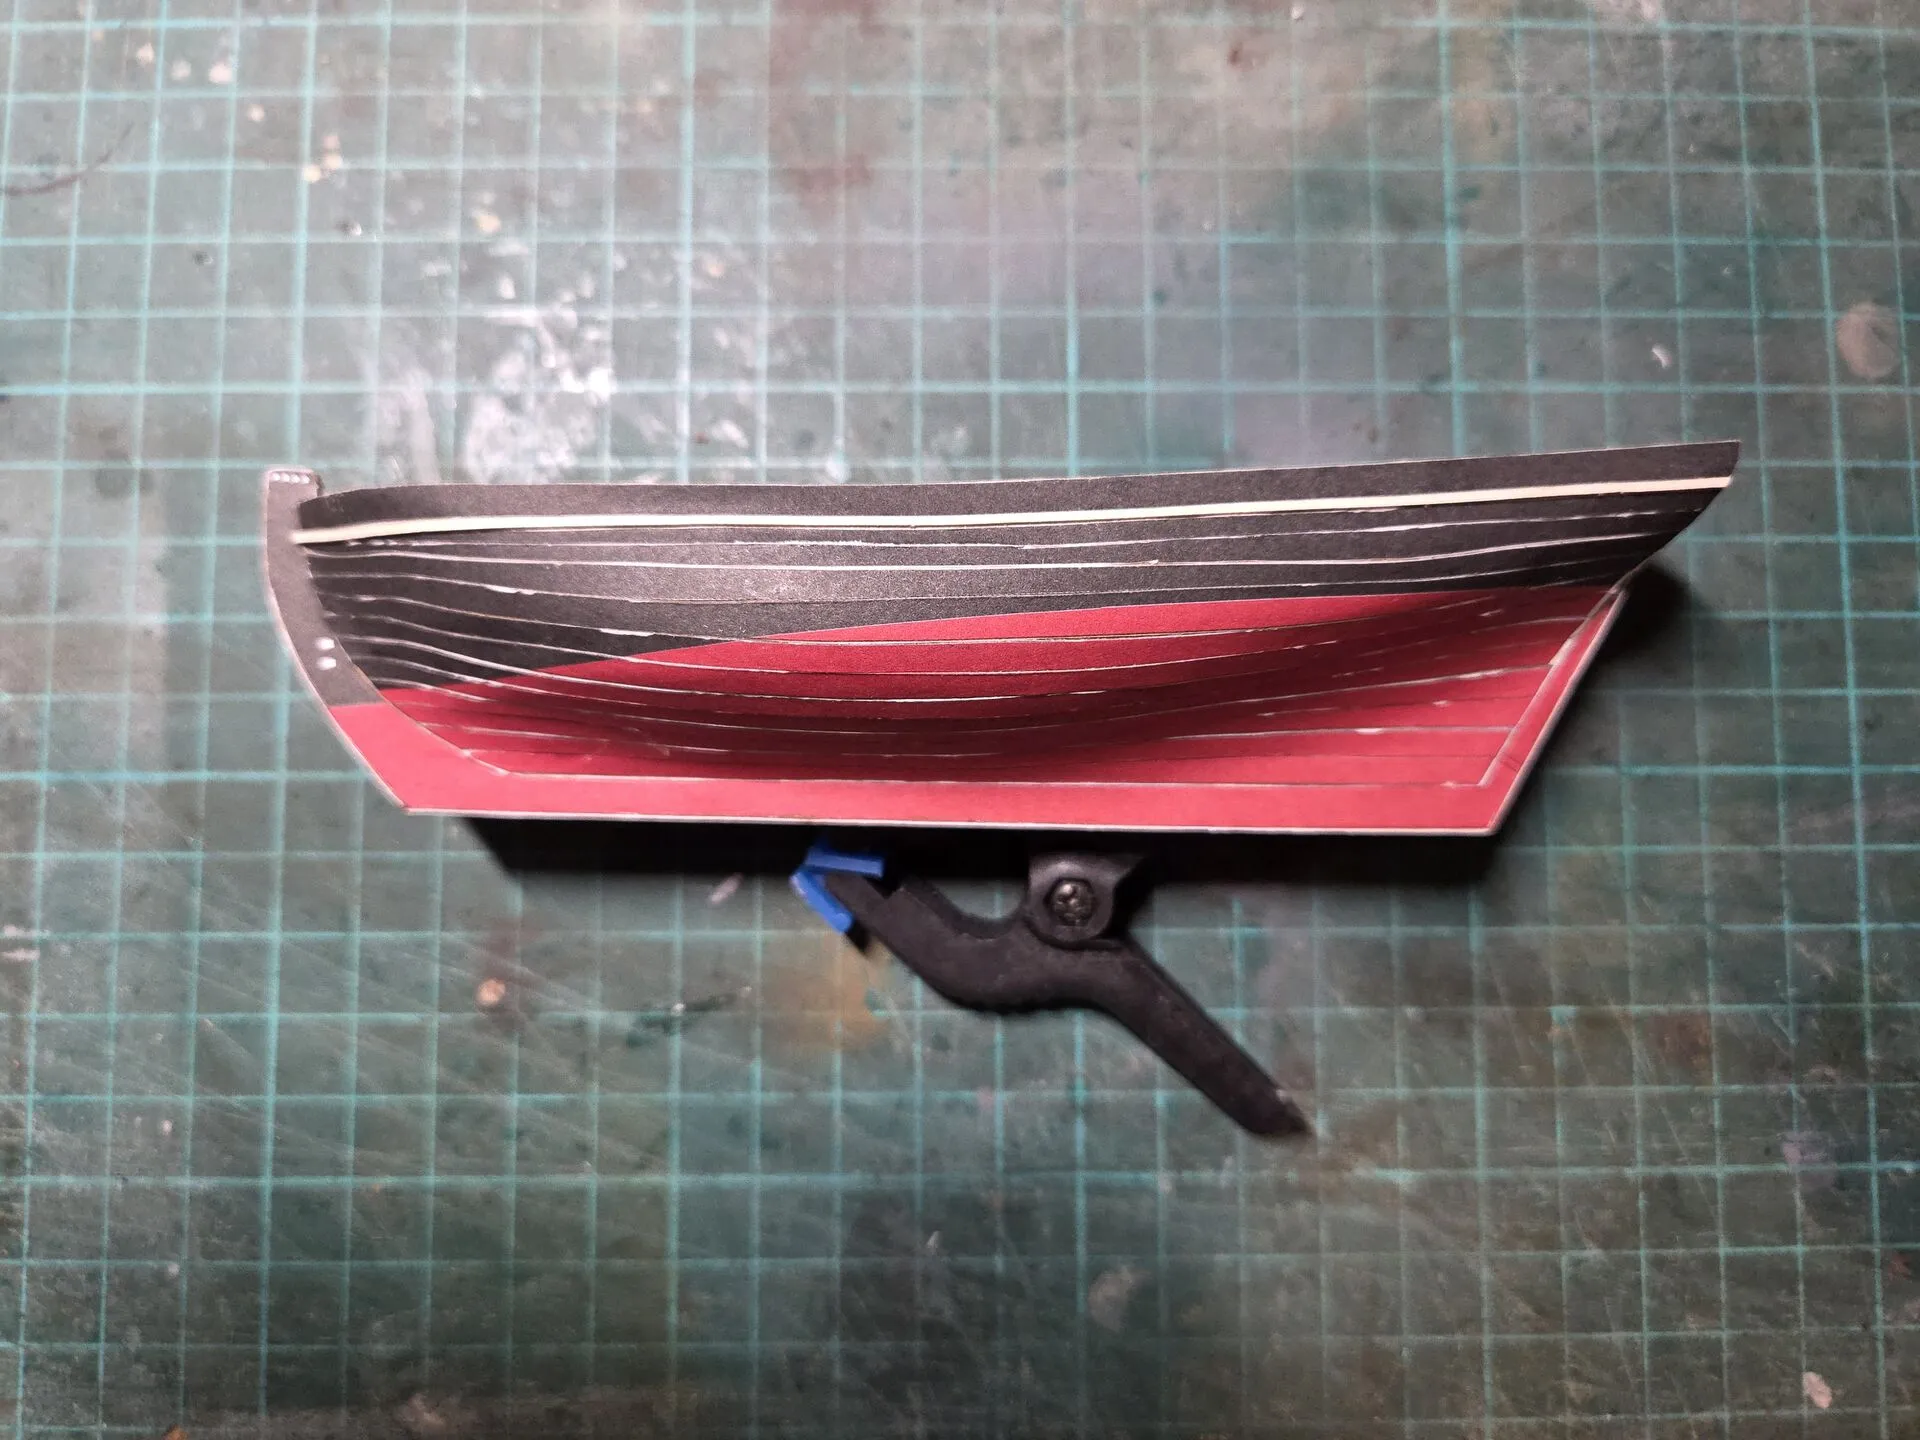
After I completed the wooden planking layer, I added the paper top part because it had the places marked for other parts, and I already knew that I’ll be painting it anyway.
Although the kit depicts the cap rail as bare wood, all my reference photos show it painted, so I’ll stick with the references.
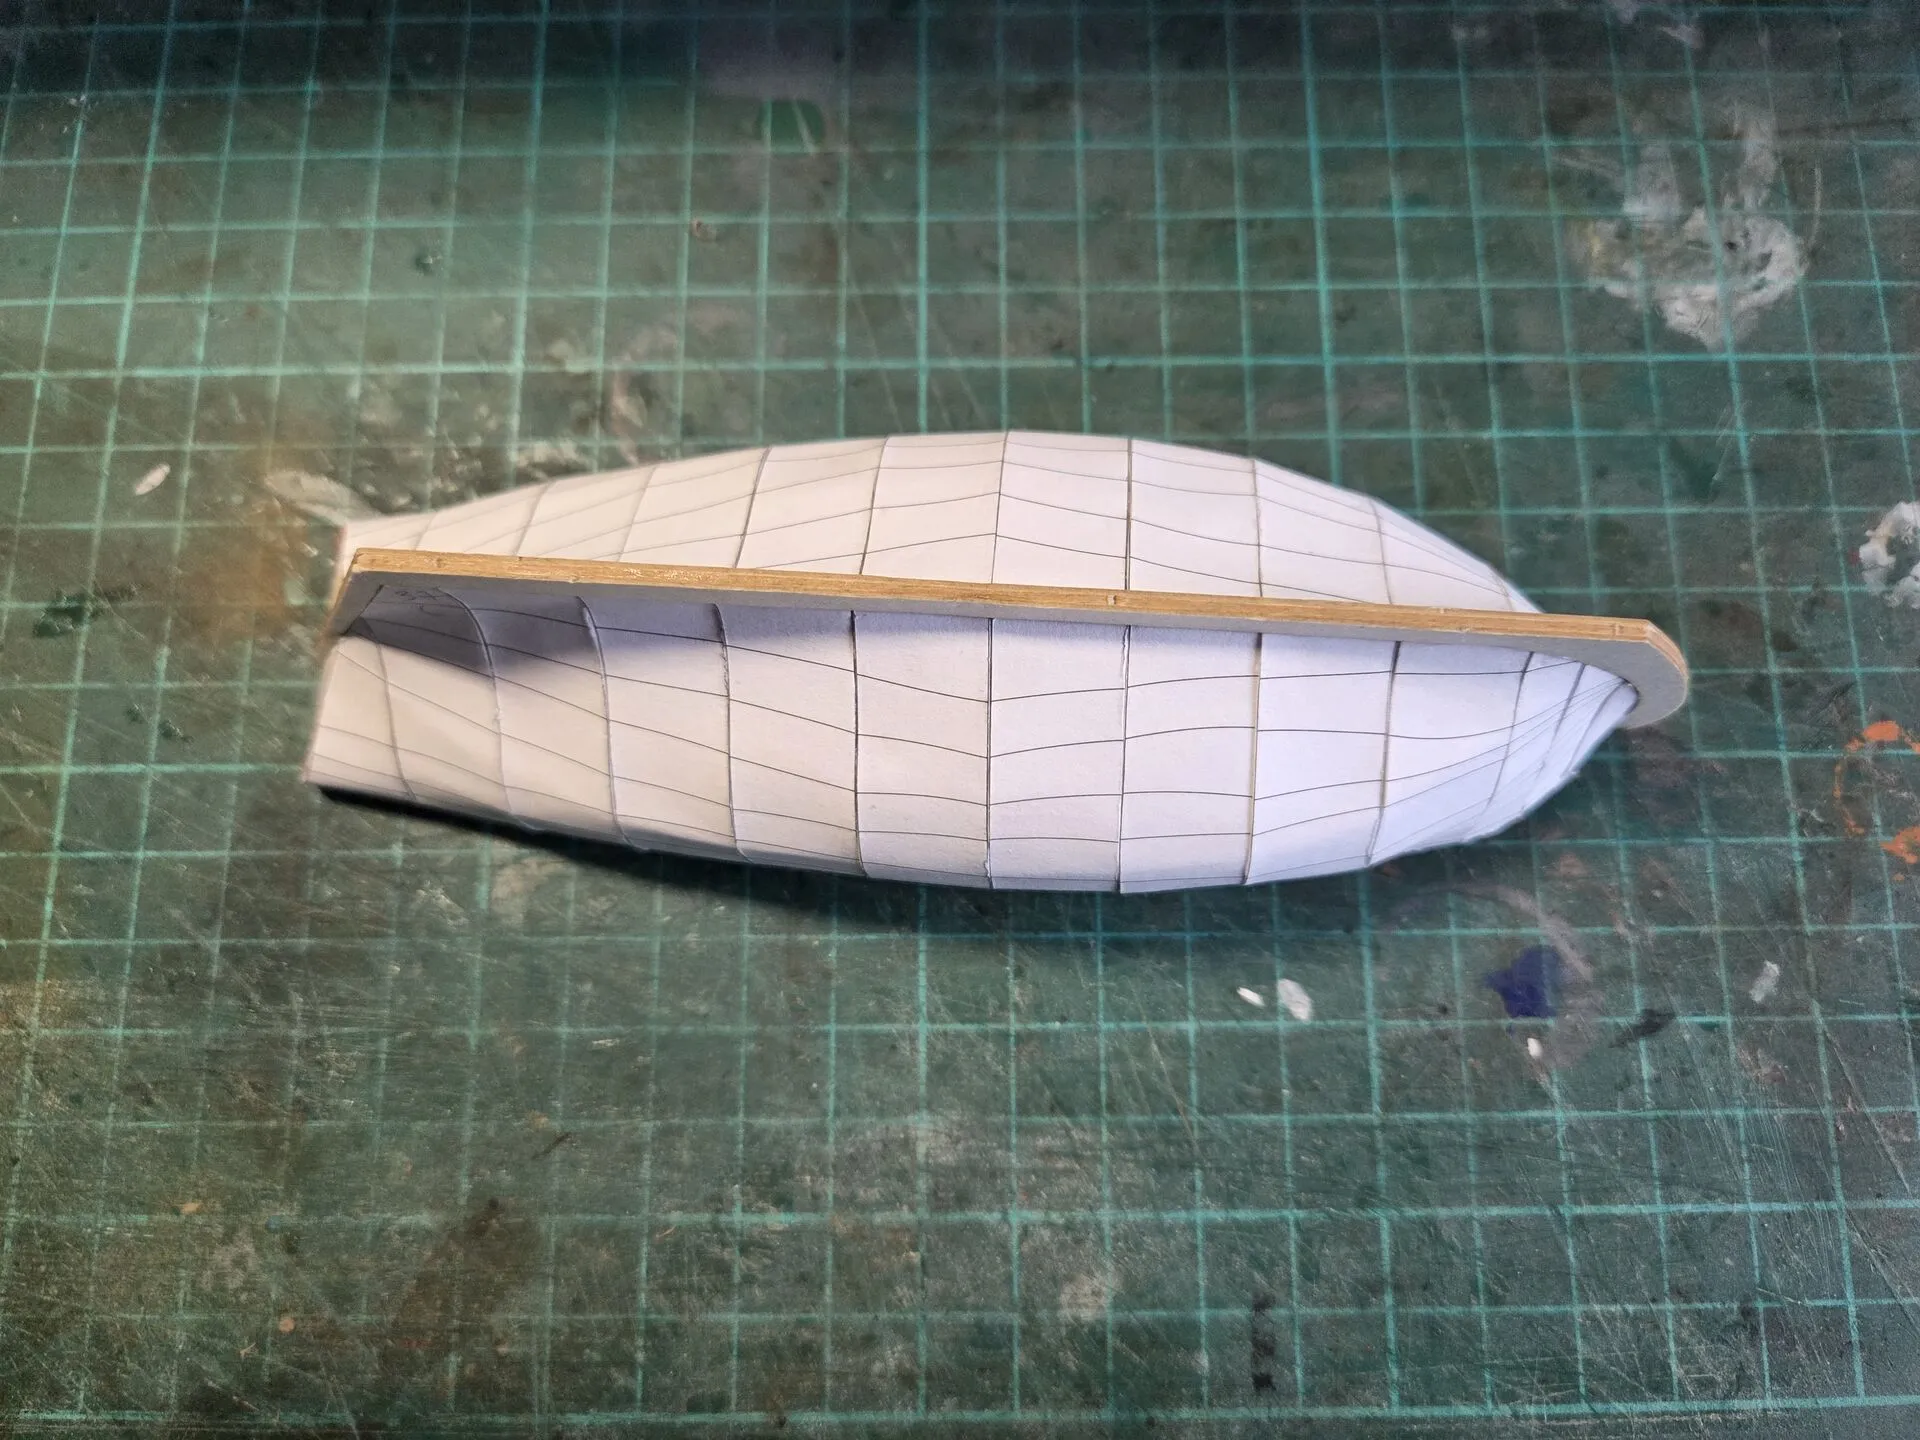
Finally, it was time for the top planking layer. I used the printed paper planks because they were pre-spiled, and saved me the headache of doing it myself.
Again, I knew I’ll be painting the hull anyway, which will hide the fact that it is paper.
Nothing challenging at all with this process, reminded me of my first wooden model kits from Master Korabel and Falkonet, where planks also come pre-spiled. I used a sharp scalpel blade to cut out the planks, and then glued them with PVA glue.
The reason I bothered with this layer at all (after all I’ll re-paint it anyway) is because I wanted the planks to be still slightly visible after the paint layer, and the previous planks were spiled not realistically, instead optimising for coverage.
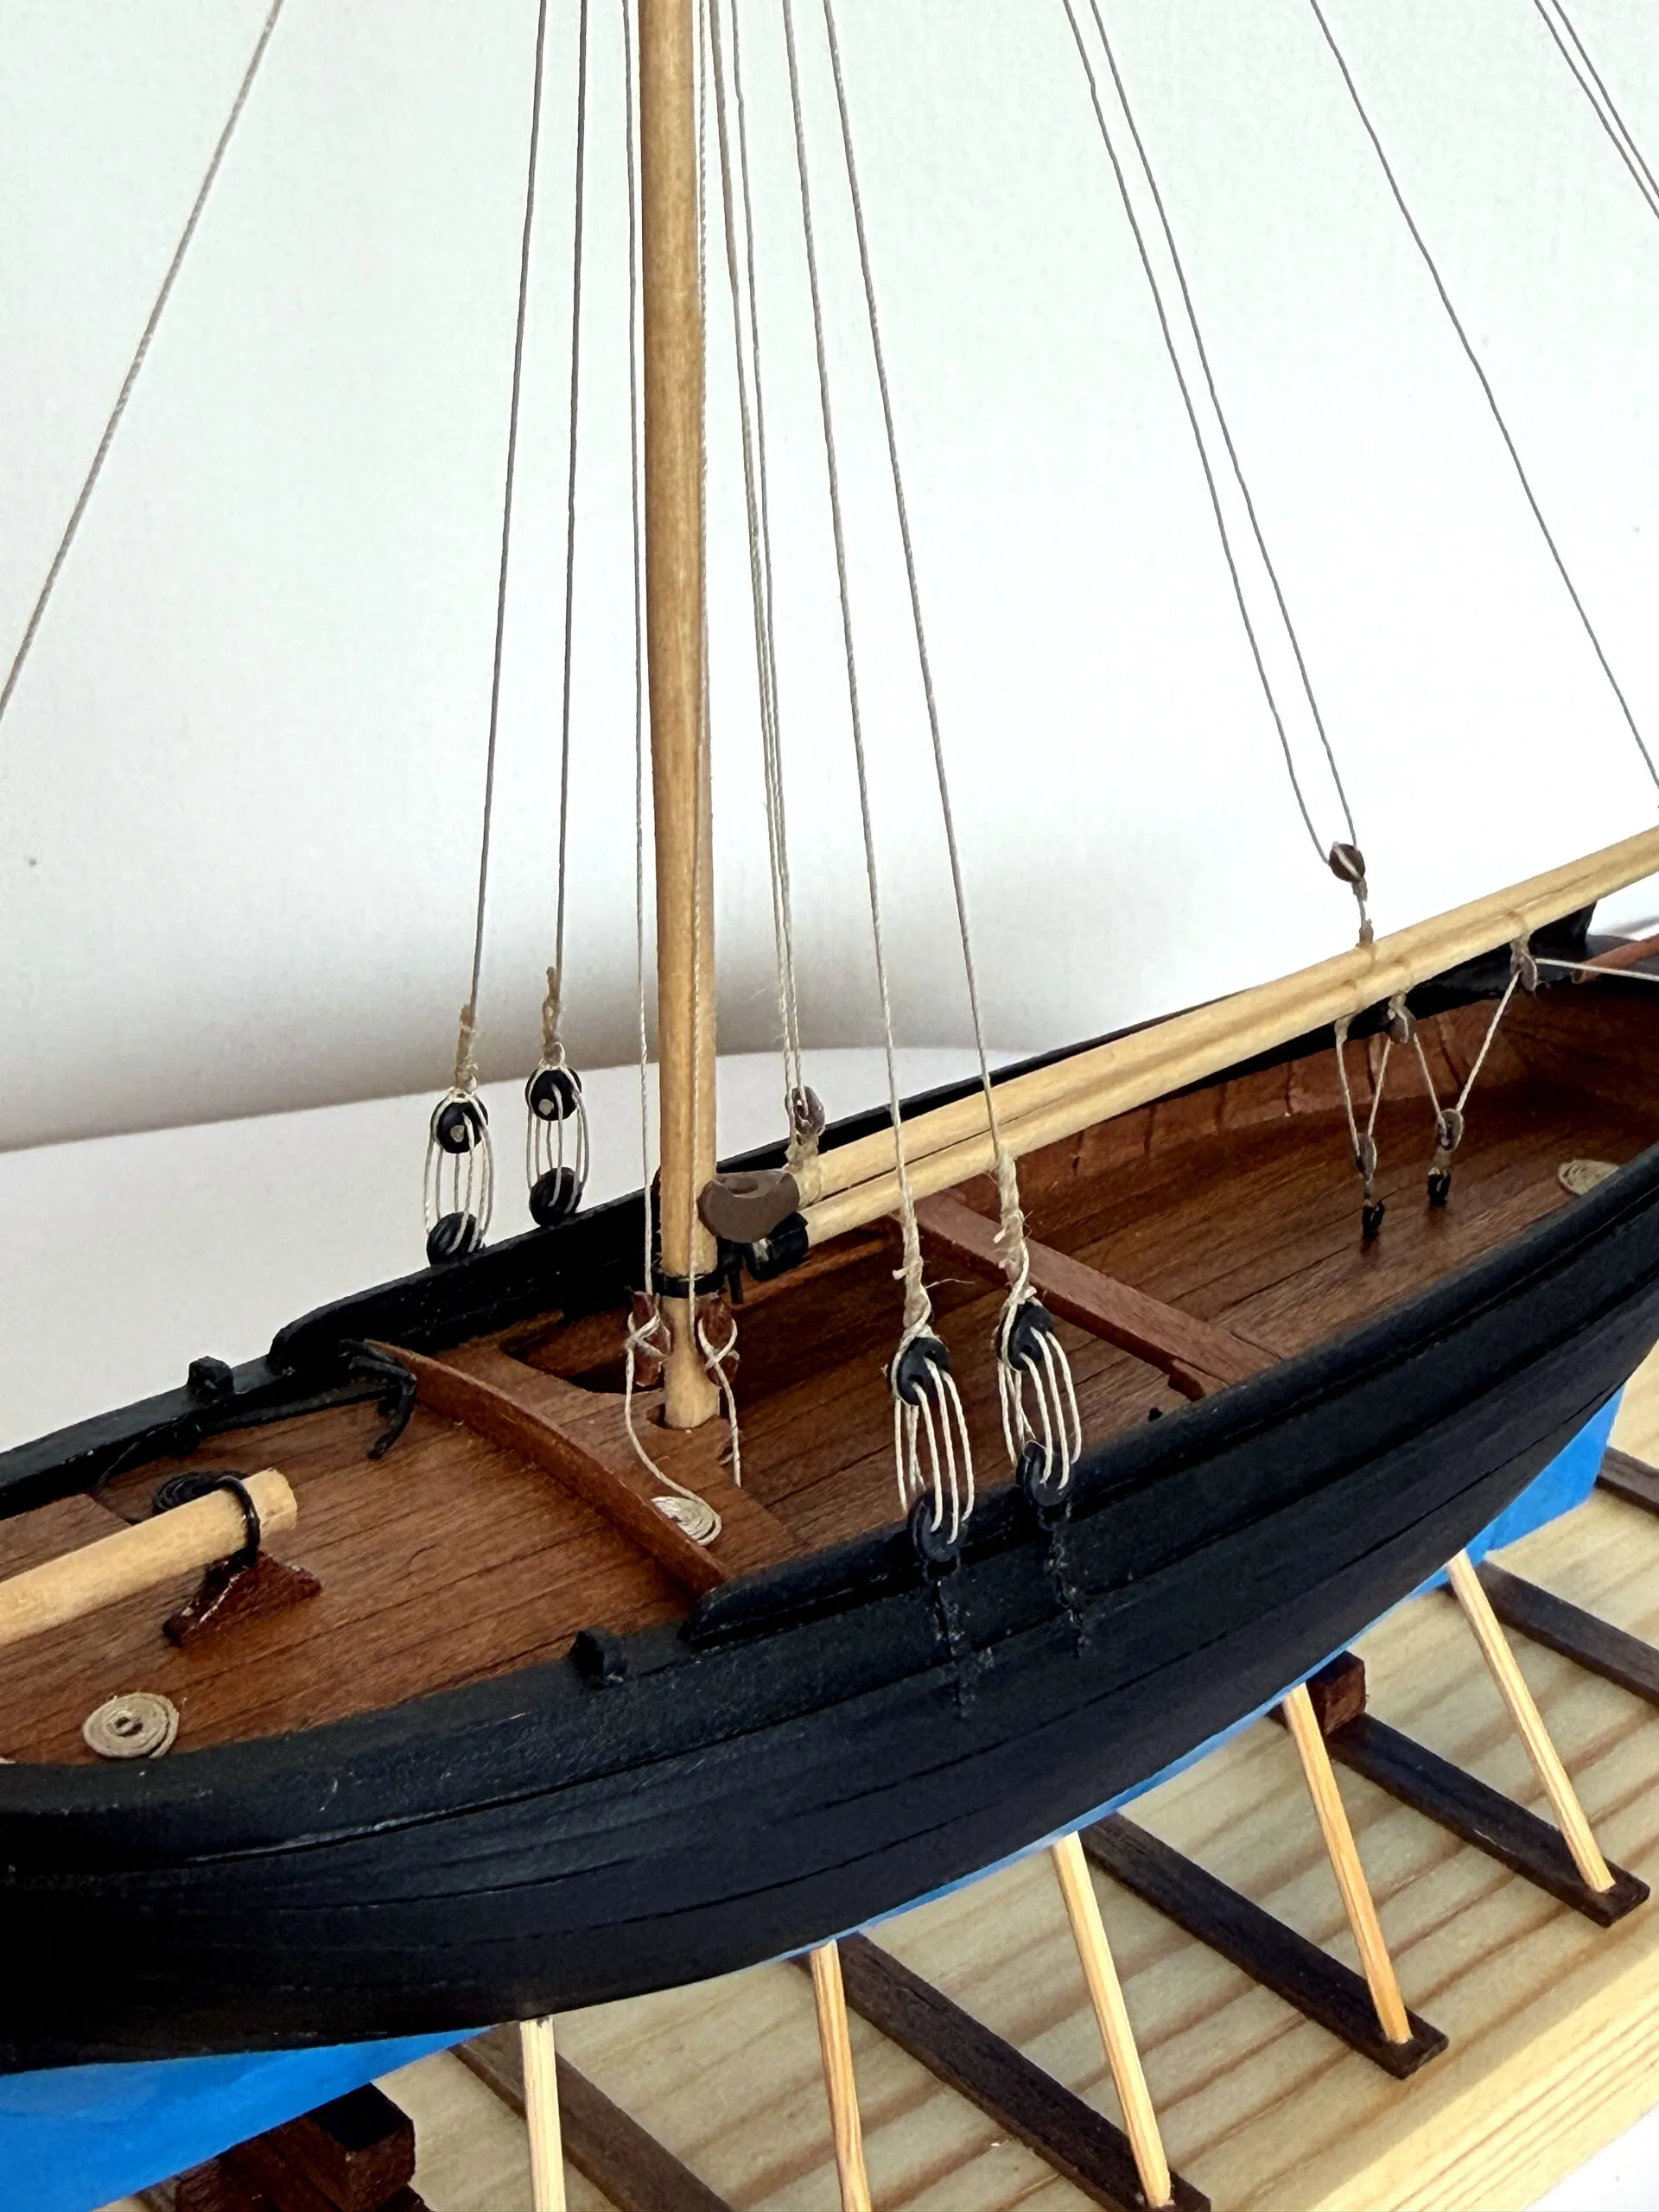
Details
I used wood to add the plank-sheer elements, again replacing the paper parts. I simply couldn’t make it work with paper, that’s the only reason for this modification.
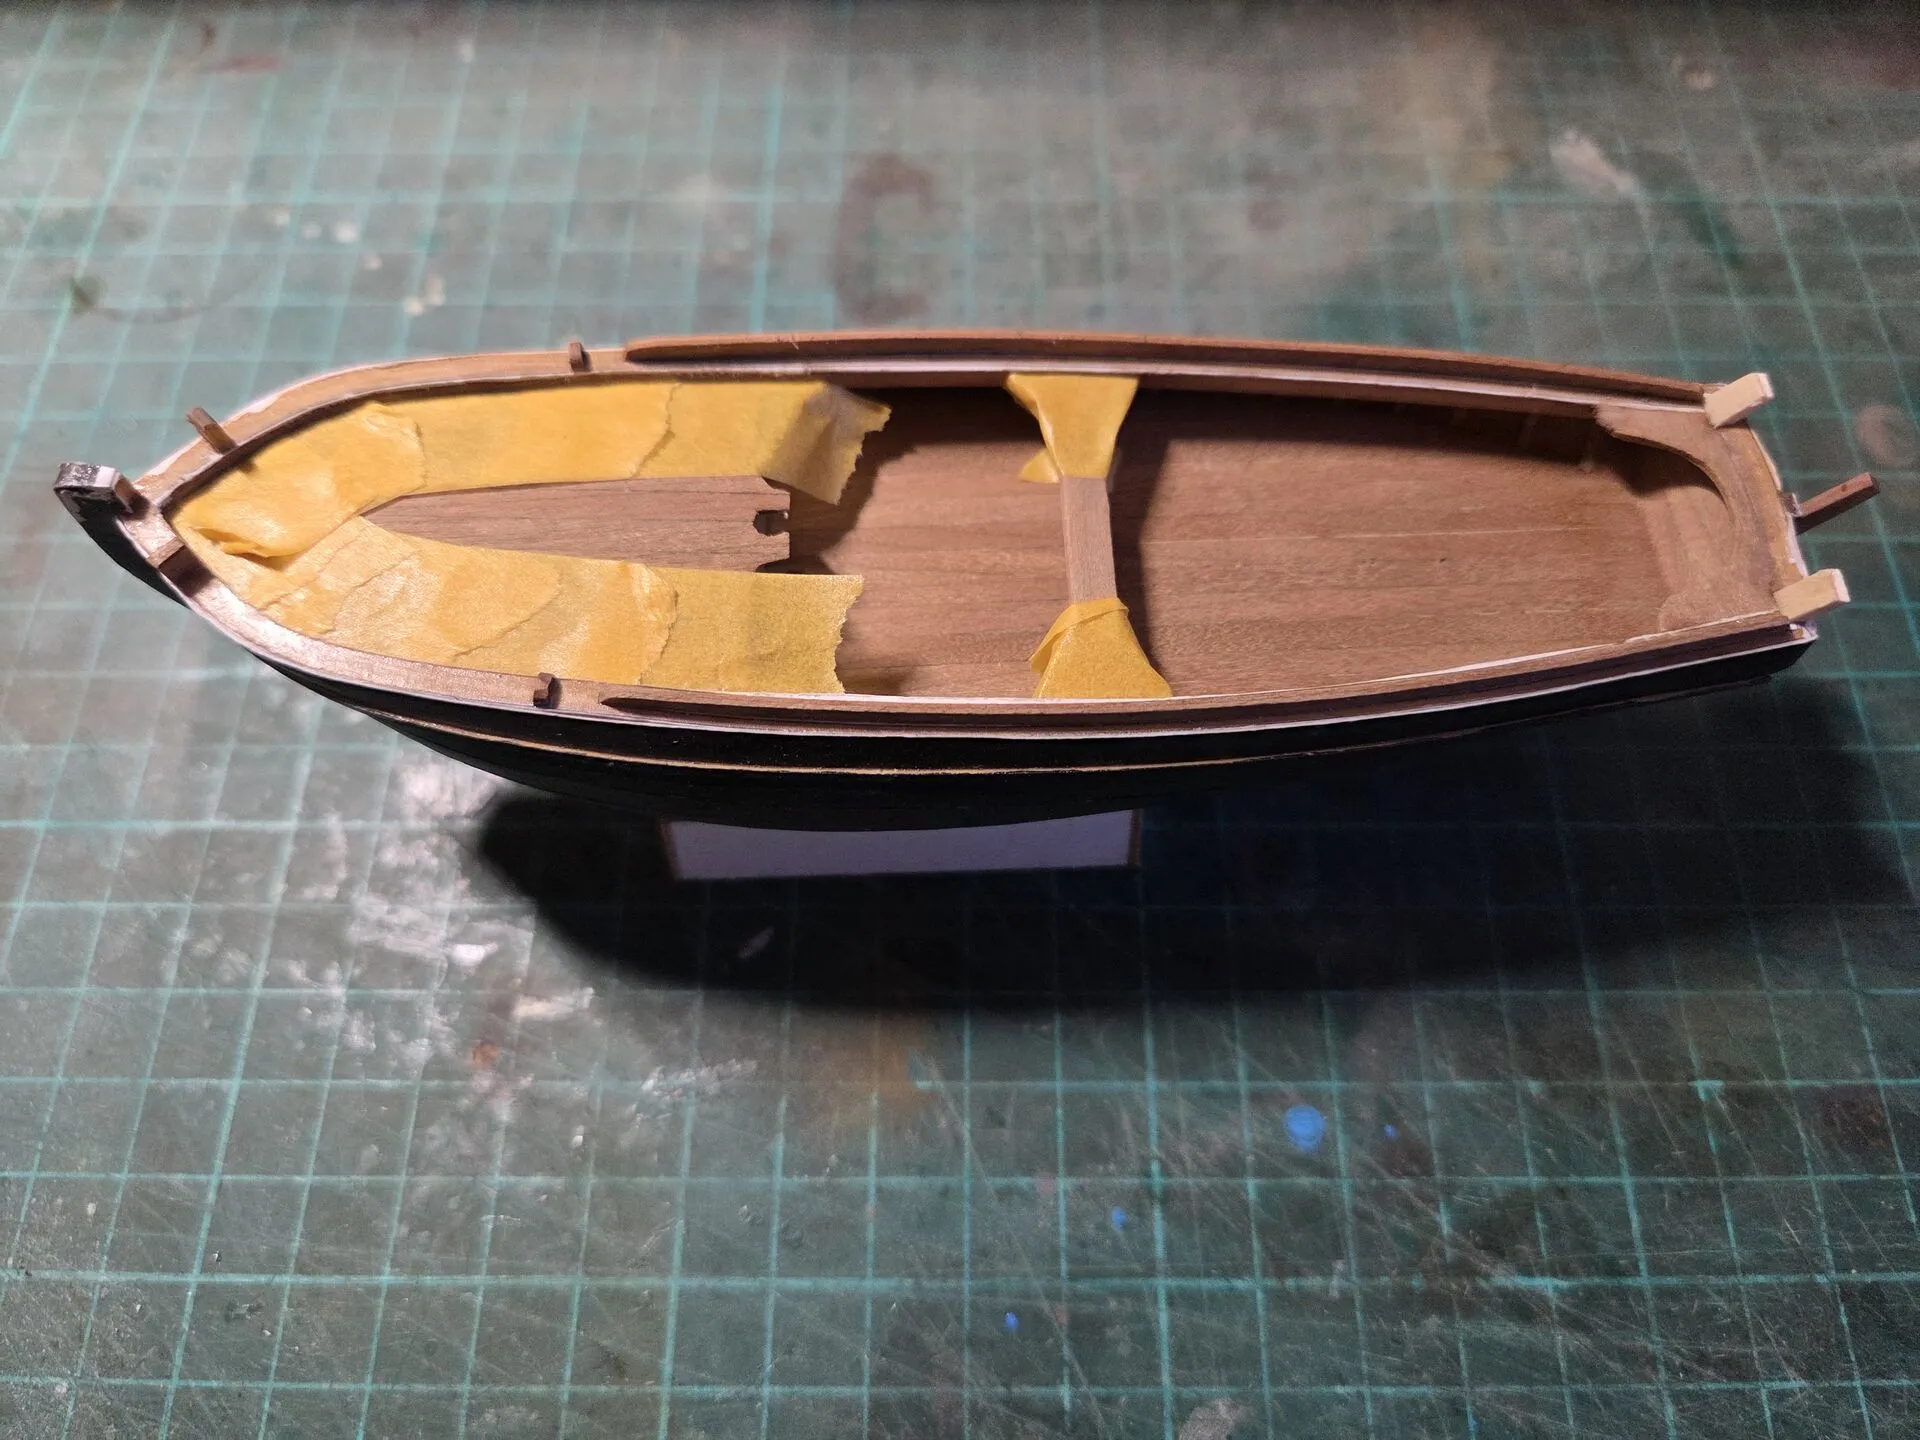
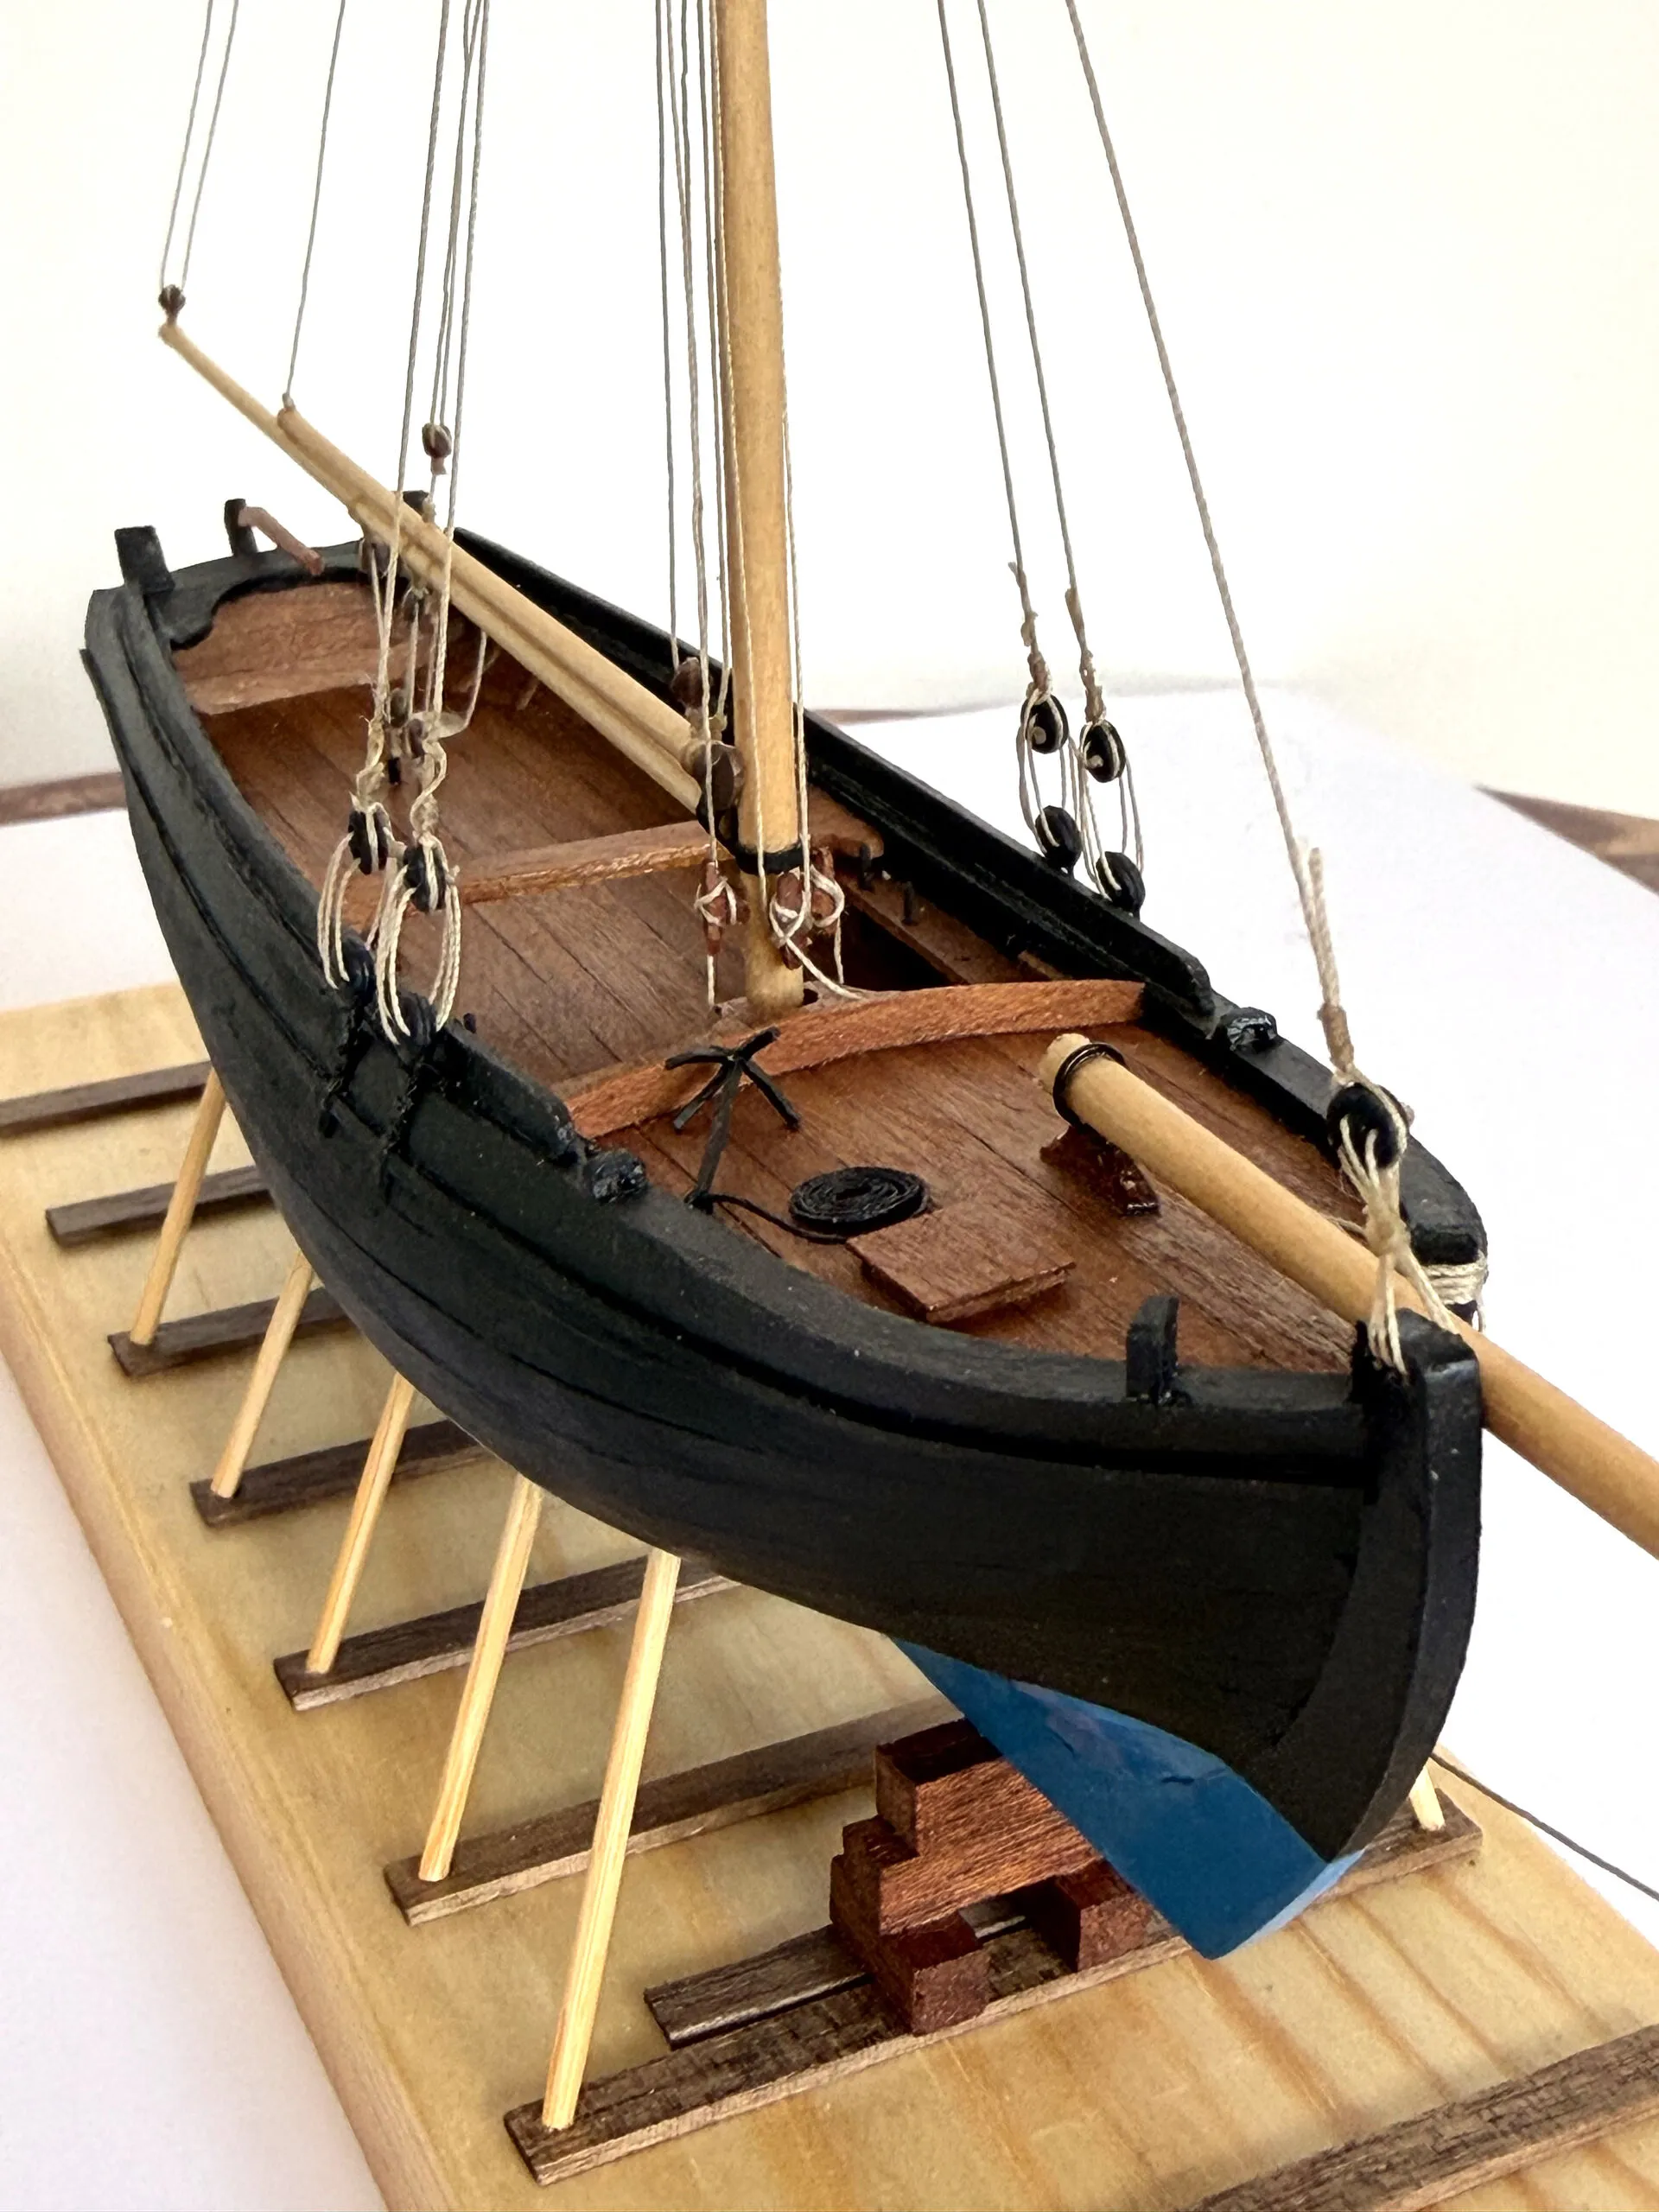
Did the same with the rudder - started to build it from paper parts, gave up half-way through, and simply made the whole part from solid cherry wood. It was much easier, and I will have no problems handling the part.
Which of course was crucial when adding the pintles and gudgeons to hang the rudder. I used some leftover brass strips from other kit’s photo etch, soldered brass pins to them, and glued everything with CA glue.
Similarly, I scratch-built the deadeye chains for mast shrouds. The kit provided resin deadeyes, which I added brass wire and strips to. Turned out really well, can’t imagine using paper straps for this - how can they handle the shroud tension?!
Adding the pin rails was also a bit challenging, had to sandwich two 0.5 mm veneers to make planks, and then glue them under the bulwarks. Not sure how sturdy they are, but it is a very awkward place, and very thin plank, I would have hard time using brass pins there. Although that’s my backup option if the glue fails.
In general, I noticed that trivial steps take tons of time because I’m scratch-building a vast majority of the parts. In case of a kit for example, the pin rails would be precisely laser cut, ready for the installation. Here I had to glue the sandwich, copy the paper parts, carefully cut them out, drill holes, and figure out how to mount the rails myself.
I did some more soldering using the leftover brass strips, soldered the attachment system for the boom - basically a gudgeon with pintle, just a bit more elaborate. Pretty happy with how it turned out.
Then I did more soldering for the bowsprit - a couple of rings. Again nothing super difficult, but with a nice outcome.
I also made the cleats out of wood, didn’t bother with a template for just three of them, simply free-handed them out of 2mm wood sheet.
Rigging
I kept the resin, 3D-printed blocks the kit came with - I didn’t have such small wooden blocks, they are about 2mm each.
Simply painted them brown and called it a day.
Rigging was the usual affair. I always dread and postpone this stage, but then go through it rather quickly and without many issues. The same happened here, only spent maybe three days in total, working less than an hour per day.
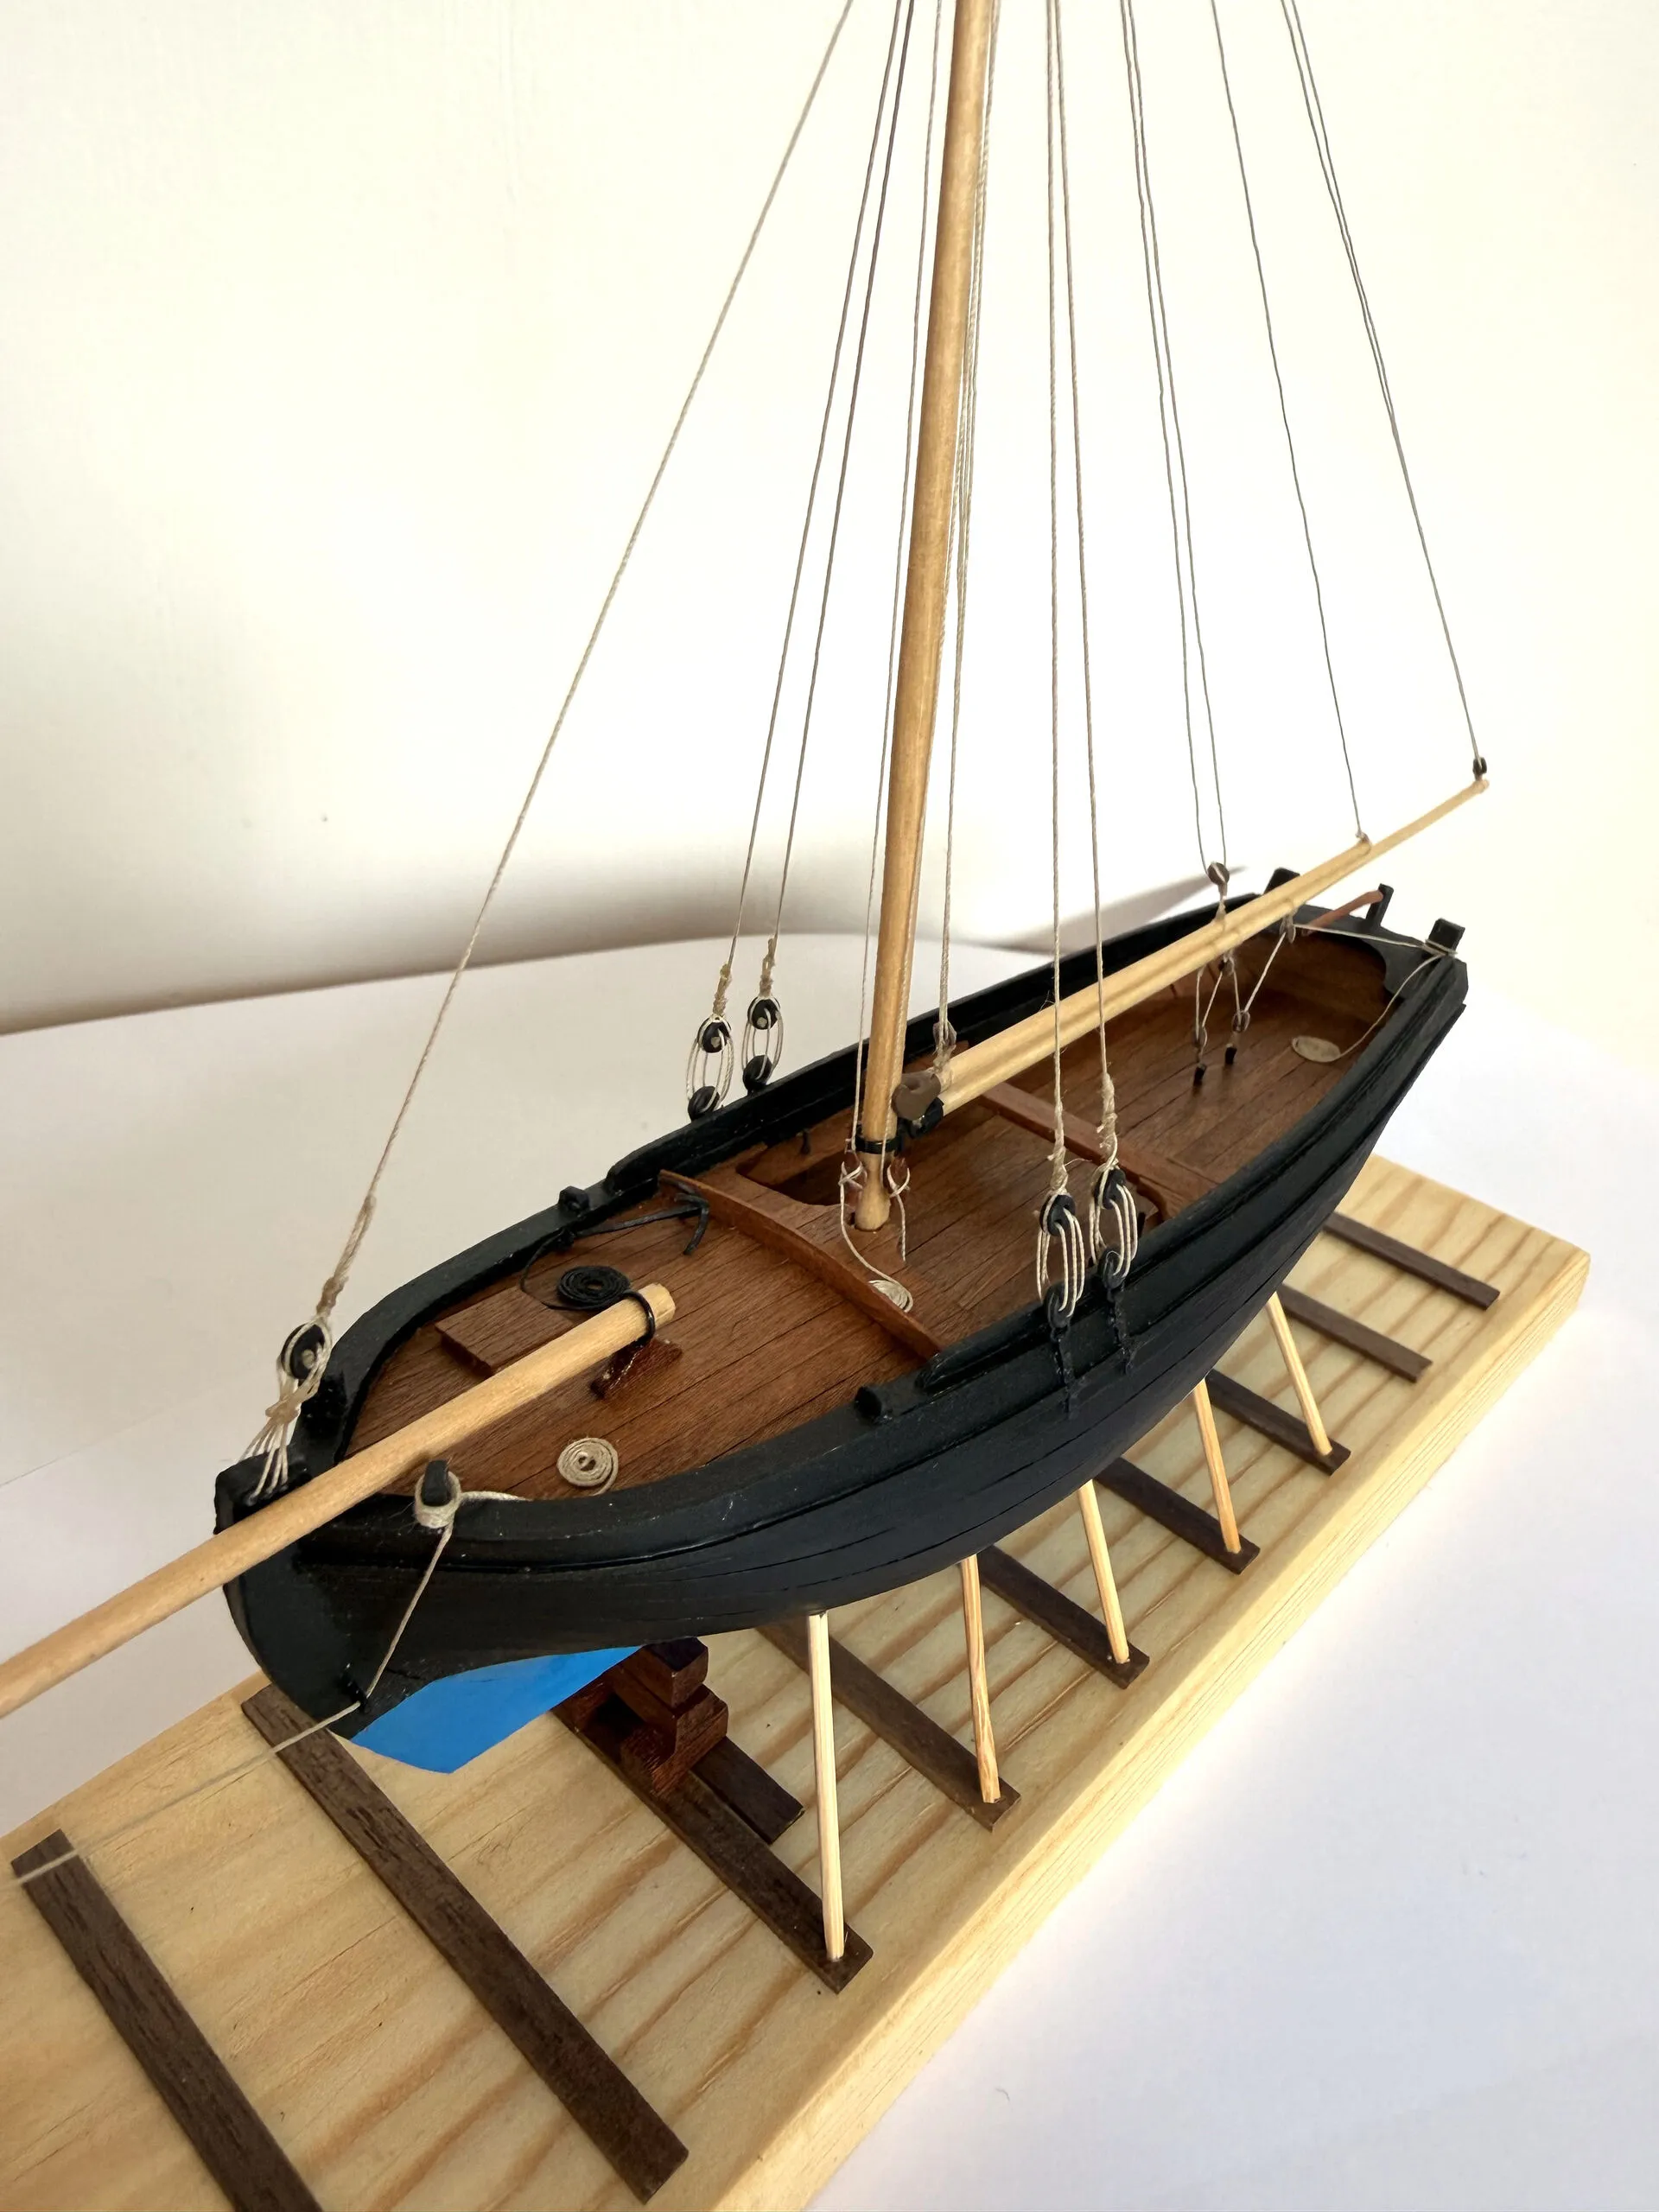
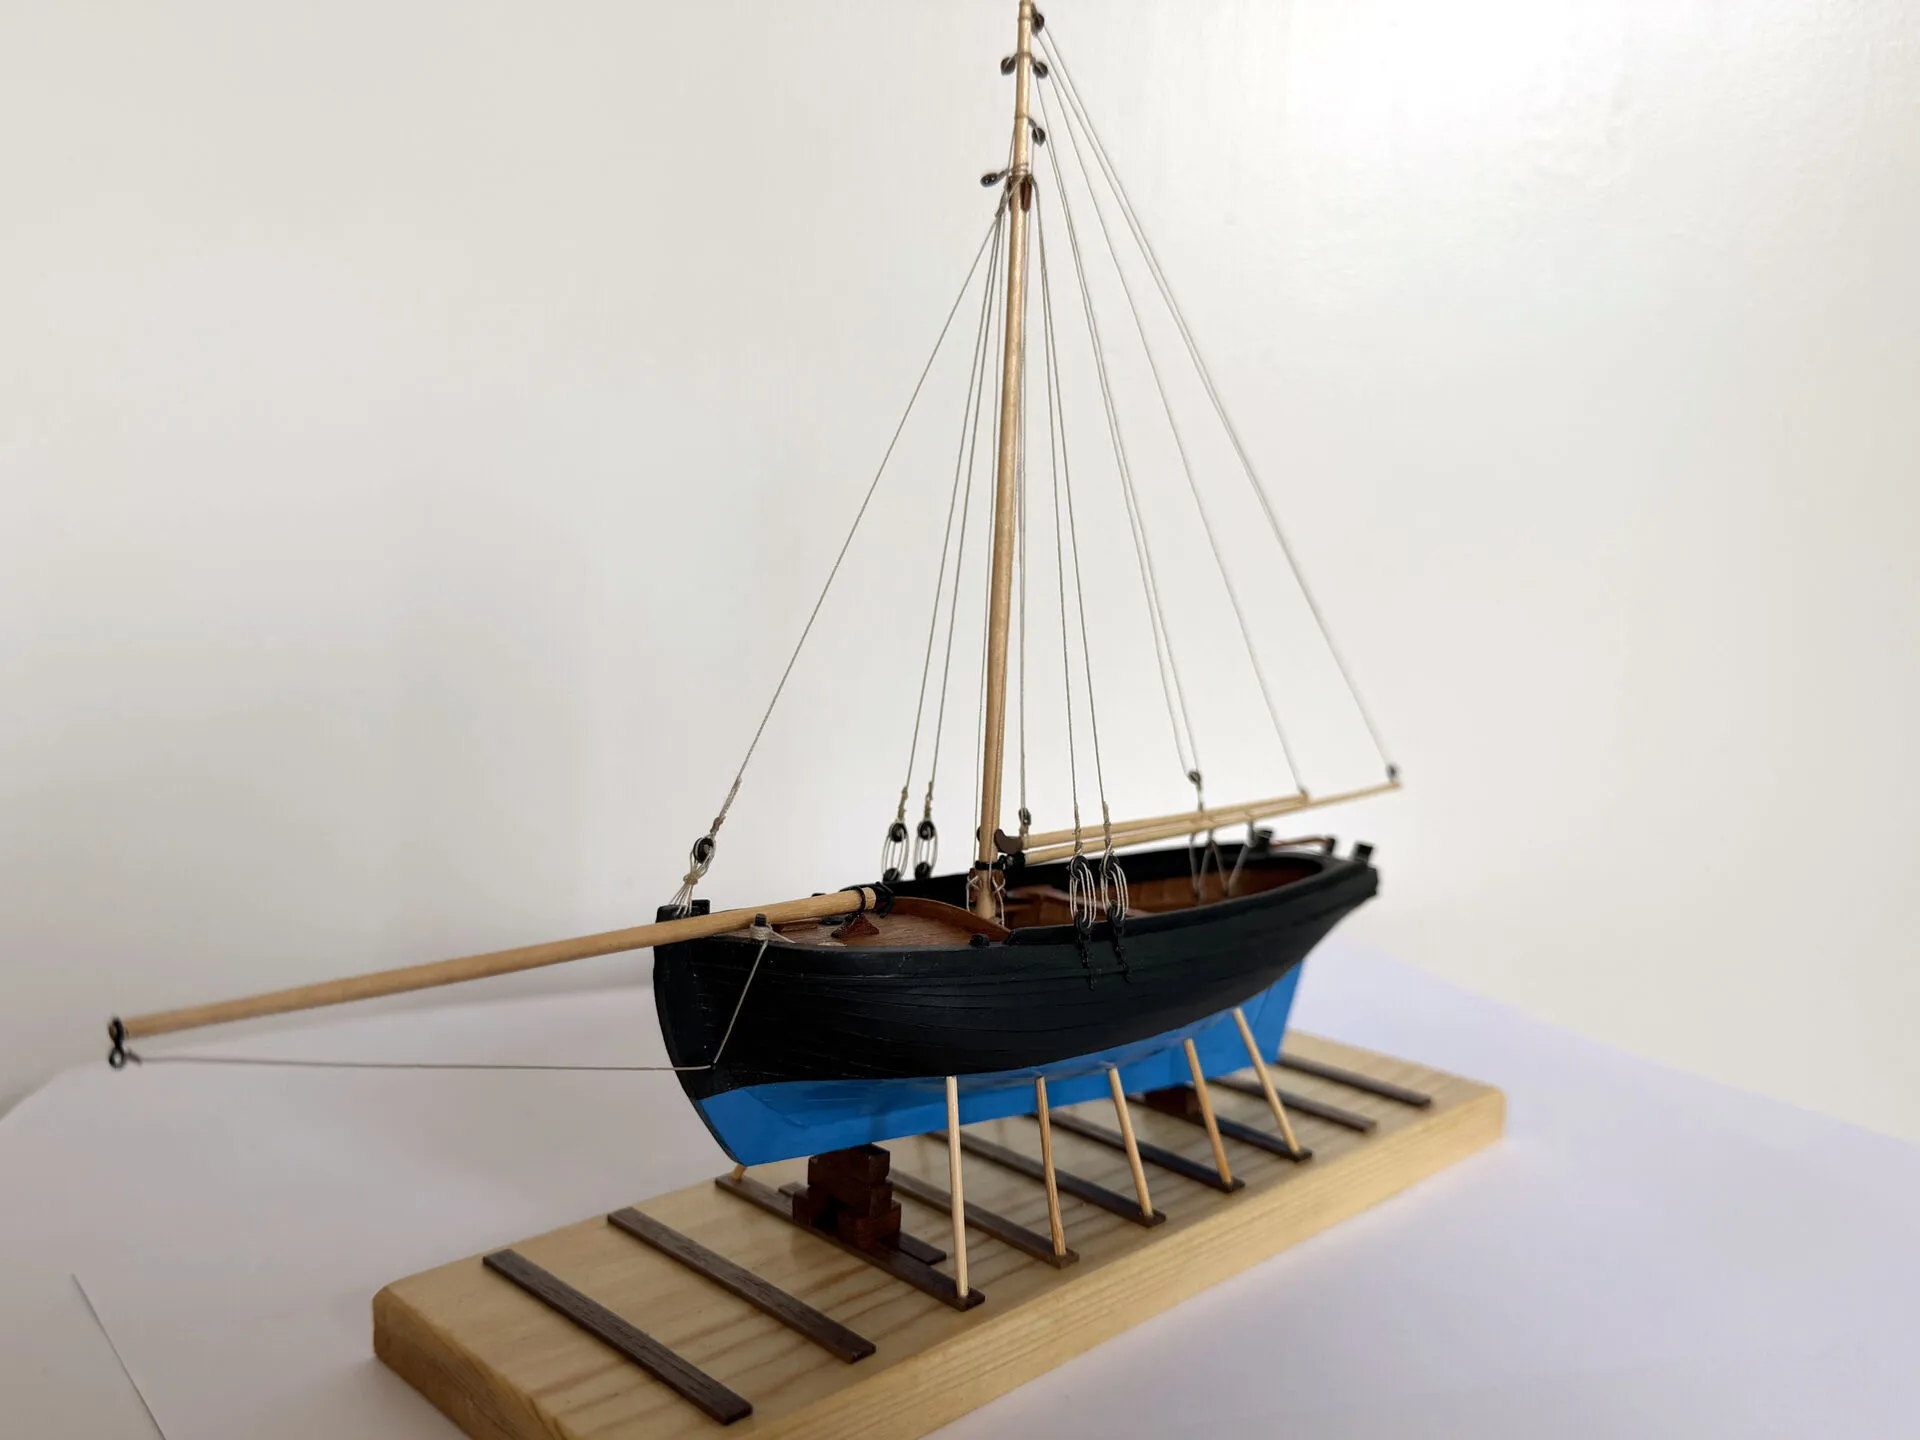
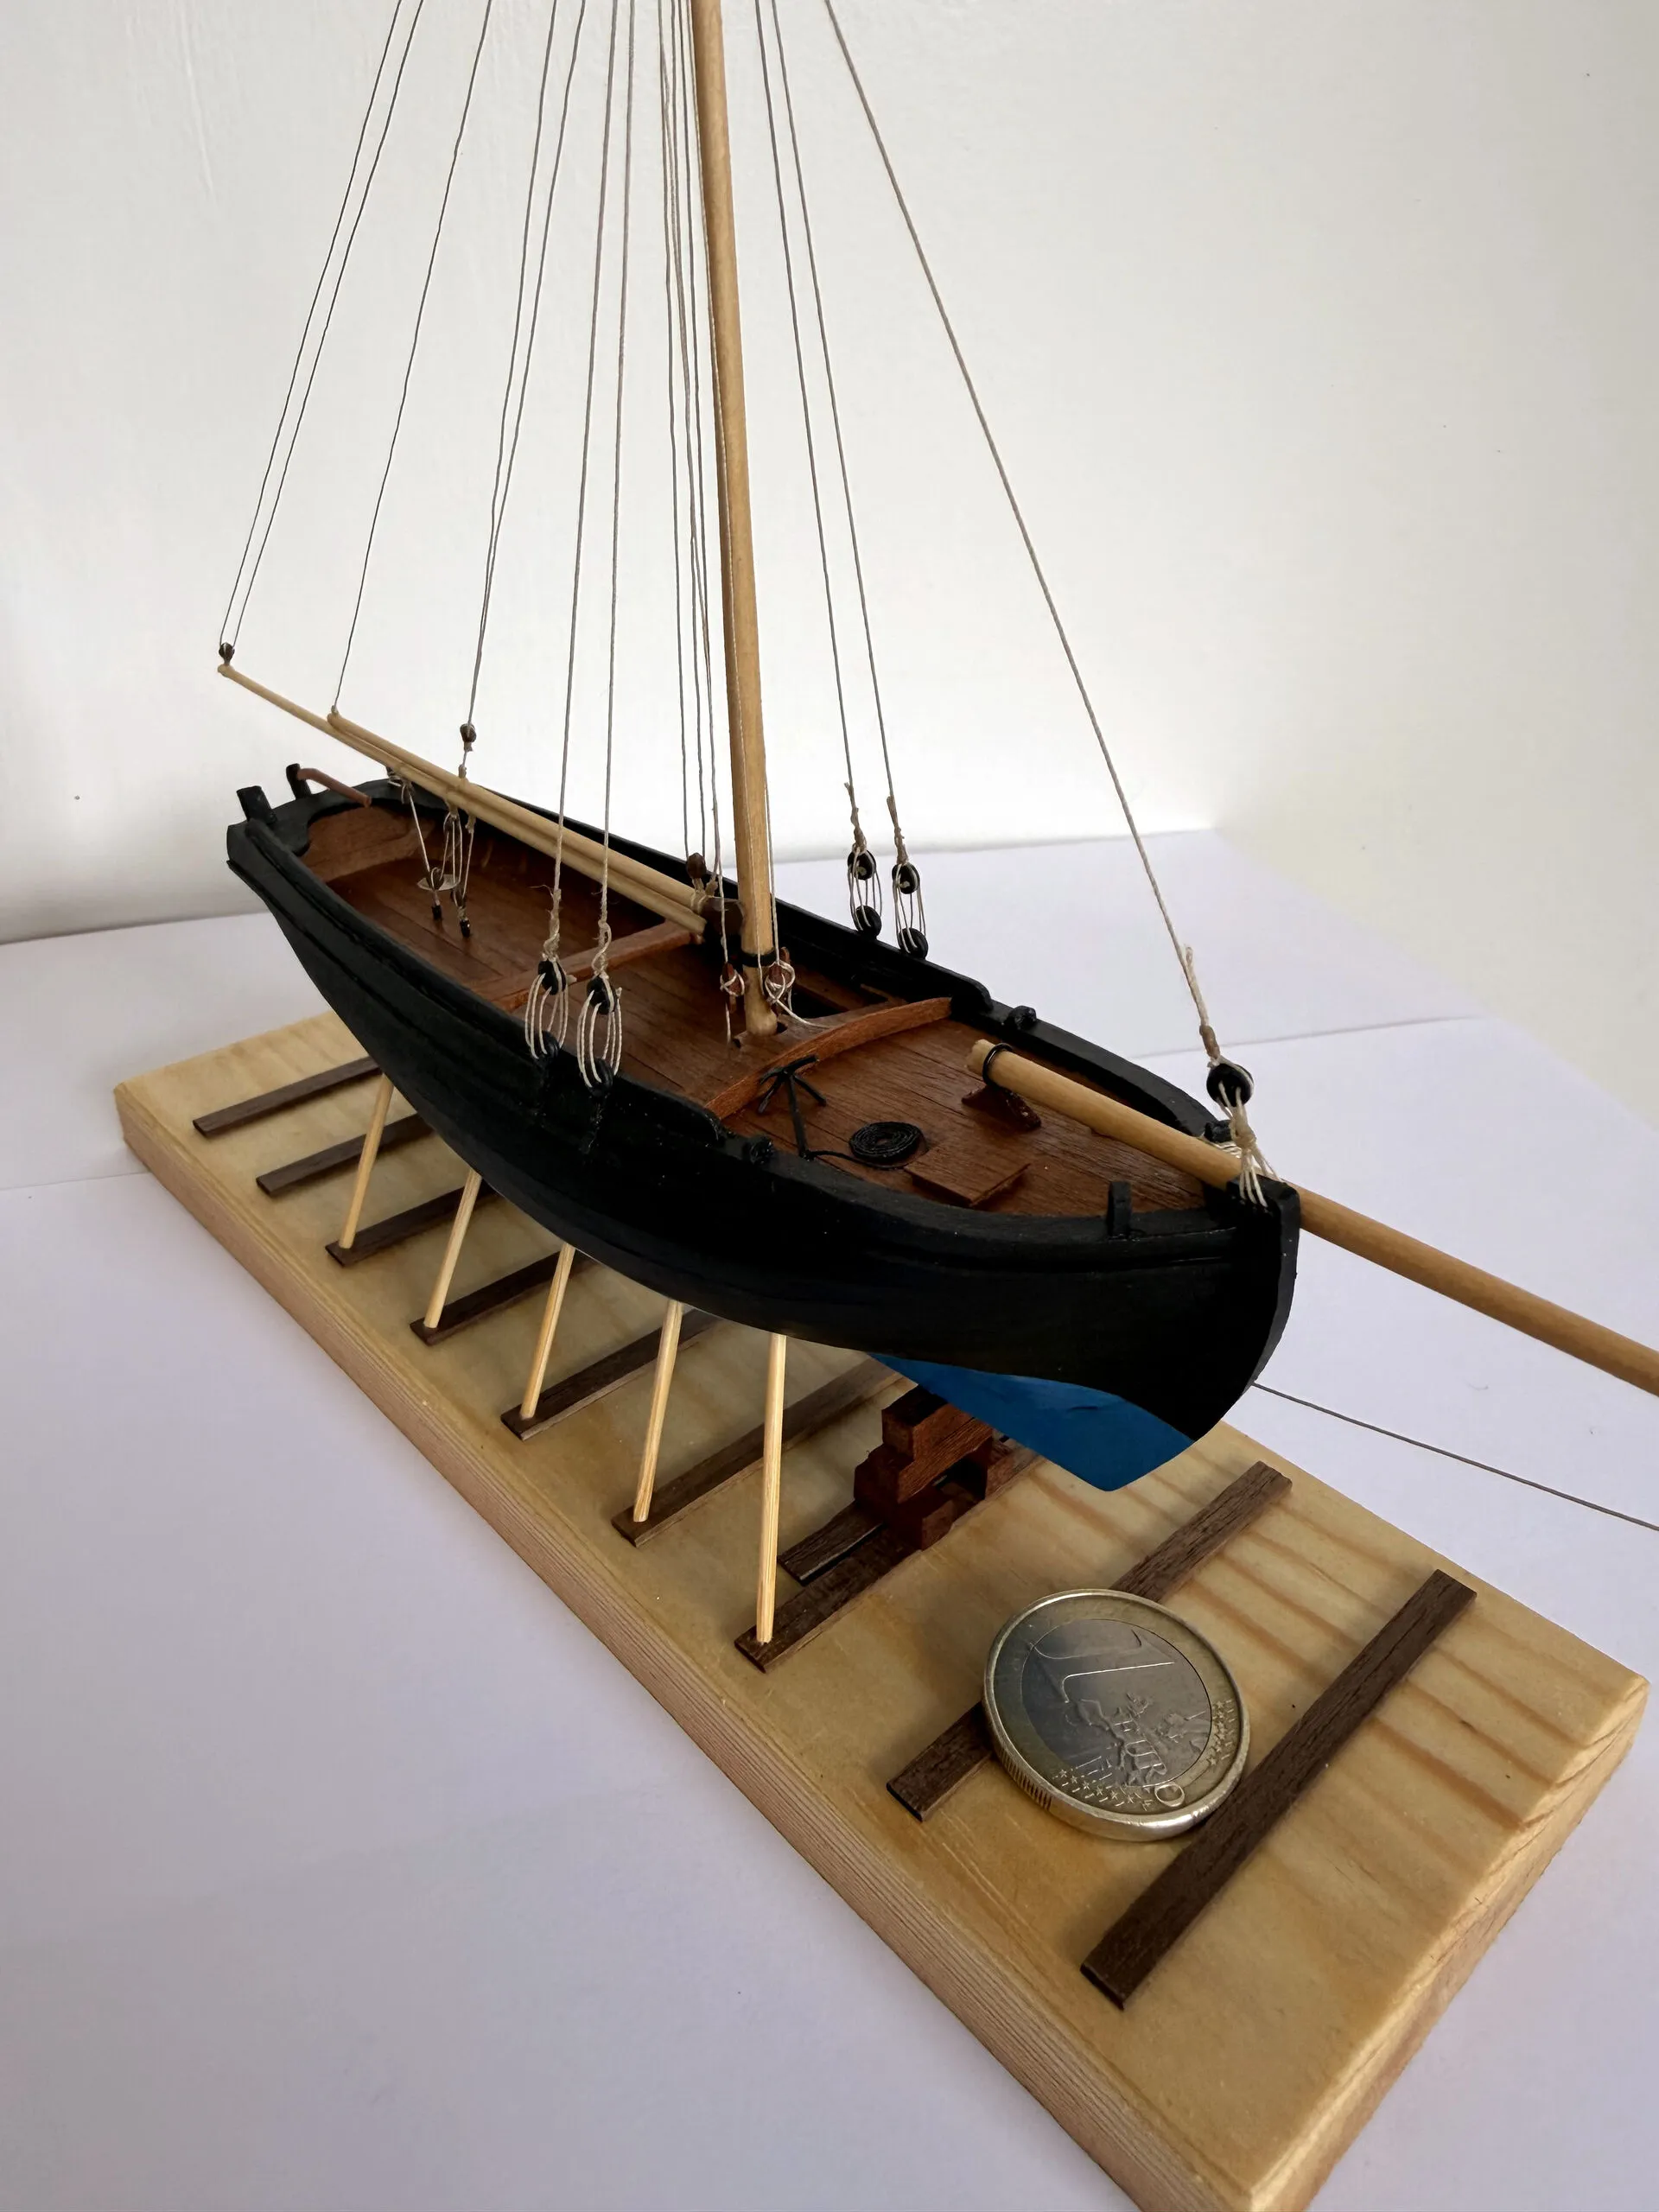
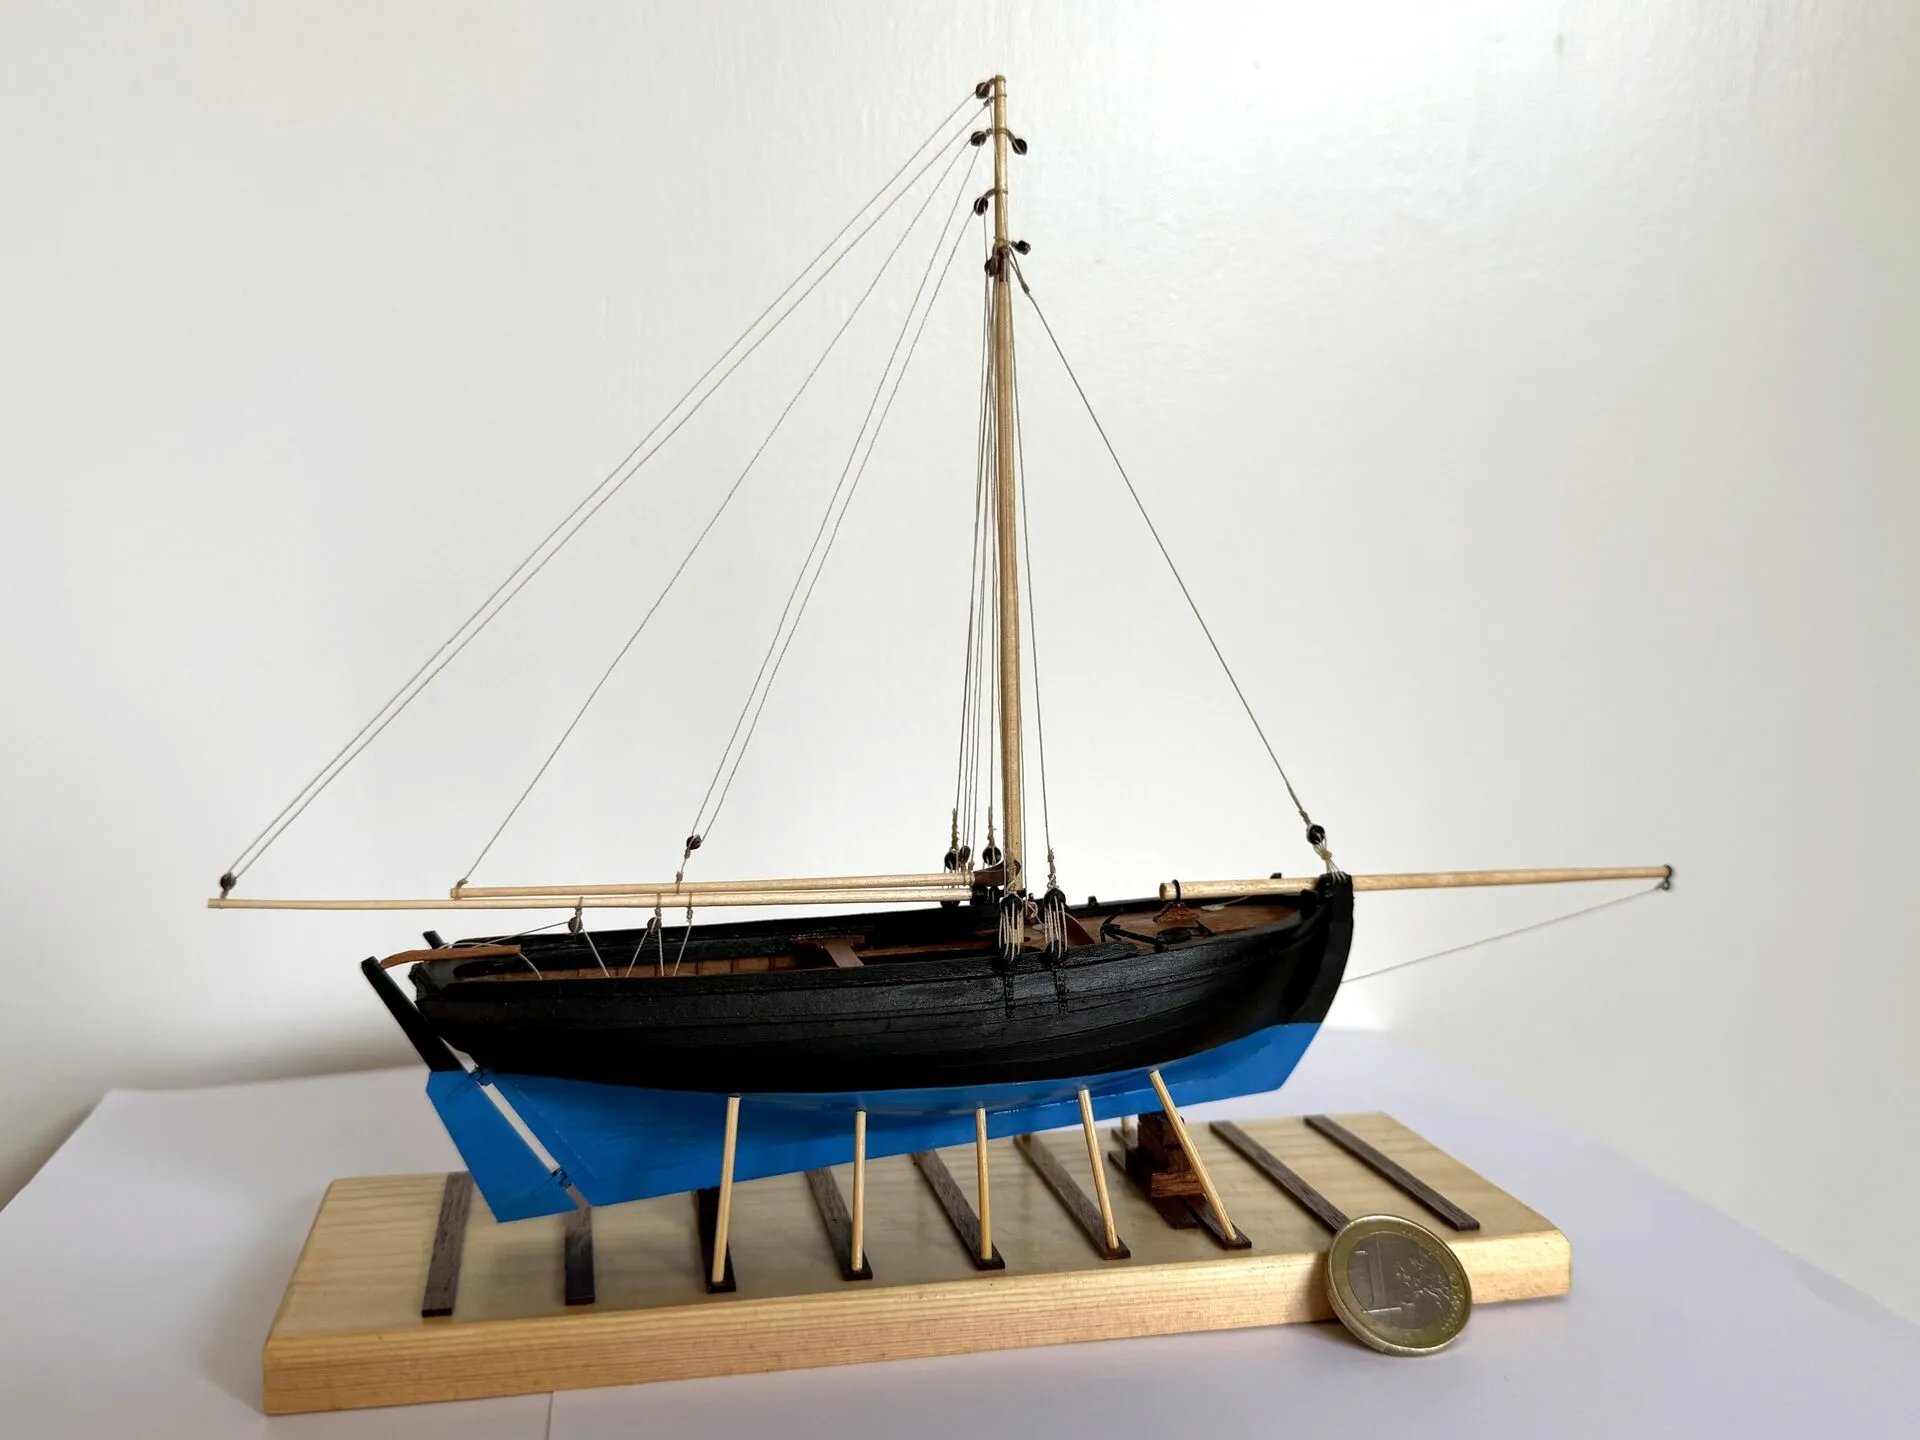
I decided to display the boat without sails, with lowered gaff. The idea is that I put the boat on blocks for display, as if it was pulled out for maintenance. Plus I had no desire to make the sails, at all. Not to mention that making model sails is very tough, and even more so in 1/72 scale.
Base
For the base I used pine wood leftover from the watch box I made some time ago. Simply sealed it with Danish oil since I love the warm colour of the natural wood.
To imitate the blocks of a dry dock, I used walnut planks left from Amati Lady Nelson build, and sapele left from OcCre’s Terror build is used for blocks.
I think the combination of those three different wood colours looks awesome, and works well with the cherry used on the boat herself.
For the support poles I used bamboo toothpicks, worked a charm and was easy to add.
Conclusion
The plan was to build this paper kit in about two weeks.
I ended up replacing almost everything with real wood, and the build took me about four months.
Now when I look back at the project, I think I should have bought the kit, scan the hull parts, scale them to 1/48, and scratch-build it from wood.
Outside the base hull frame I pretty much did it anyway, just in a smaller scale, which made the process more challenging.
Still I’m very happy with both the result, and the fact that I now have a model of this wonderful piece of Irish maritime history.
And I also learned a few things:
- Paper models are not my cup of tea. I struggled to make anything useful out of paper and card stock, too soft and pliable.
- Scratch building smaller boats is very much a viable option for me. But it takes an order of magnitude more time, and it is crucial to have the reference material. Like in this case, with two highly specific books that I had.
- 1/72 scale for such small wooden boats is really pushing my limits. Just like the 1/700 Liberty Ship build showed me that I much prefer 1/350 for somewhat modern ships, this project shaped my opinion that 1/48 or even 1/24 is the way to go for smaller sailing boats.
Gallery