Since I started building wooden kits, I looked at the Plank-on-Frame models with great awe. Exposing the internal structure of the ship with all the beautiful complexity is extremely appealing to me as an engineer.
This year my wife convinced me to take the plunge and try to build one myself.
After building 10+ wooden models I felt confident enough to attempt building some small and well-made POF kit.
Seeing a group build for this model on Ships of Scale forums, along with the positive reviews and acceptable price (around 600EUR after import taxes) helped me to make the decision in favour of this kit from the new Chinese manufacturer Trident Models. It is their first kit, and they don’t even have a website, but every single person who built it seem to be happy with the model.
And what’s also important to me is that according to the announcement topic on the Model Ship World forum, the kit is clear from the legal standpoint, completely original design.
My wife happily bought the kit for me as a Christmas gift, which got delivered from China to Ireland in less than 3 weeks.
The Naval Cutter Alert 1777
The ship is well documented thanks to the surviving plans and a book in the *Anatomy of the Ship series, by Peter Goodwin. To me the main attraction was just how graceful and beautiful this cutter is. But the fact that it is so well documented is a big plus.
Model quality
It is pretty remarkable. Good 4 kg of mostly CNC-cut cherry wood. I carefully examined the content and everything was in order, no defects on the wooden parts, or cast metal bits.
By the way I love that most of the parts are cut by CNC, not laser, it was one of the reasons to start with this kit. Don’t get me wrong, I am a big fan of Laser Cutters, and have access to one myself at work. I regularly use it for various things like storage cabinets, boxes, tool racks and such.
But cleaning the char is definitely not my favourite pastime. I know that if I ever attempt a laser-cut POF model, I would need to buy a disk sander.
Anyway, going back to the kit quality - metal castings seem to be of pretty good quality as well, and even include the galley stove.
What is not good is instructions. They are written in very broken English. Hopefully the pictures and existing build logs should be enough.
Build notes
I’m in awe of the complexity of this kit. It took me an hour just to go through the part list and check that everything is in order. I didn’t clear the sawdust, it would have taken another hour.
I’m frankly intimidated by the complexity of this relatively small Plank-on-Frame kit.
Keel
Started with the keel assembly, as per instructions. It consists of around 20 parts, as on the real ship. Can’t get much cooler than that! It was daunting for sure, but very exciting and satisfying differently from the HMS Flirt which I’m building in parallel.
CNC cut parts are very impressive and require little clean up, but I’m very careful not to damage anything, so it still takes some time. Interestingly enough the CNC cut is not perfectly vertical, and just as with laser cut there is a slight angle that needs sanding to ensure good fit. Hopefully I’ve done a good enough job with the keel. It is assembled in a laser cut plywood template, which really helps with the alignment. I was very cautious not to sand the parts too much, making sure they sit perfectly in the template. Which of course meant sacrificing the tightness of the fit between the parts, which would make the whole assembly slightly smaller.
The wood is said to be Cherry, of very high quality, and I love it. Very easy to work with, very smooth with small grain.
Sanding the deadwood for the rabbet was rather easy, especially given that the kit provides a template for it, quite convenient.
Glueing another stem piece proved very nerve wrenching, I tried to make the fit perfect but only made it worse, and spent many more minutes trying to somehow make it better. I think I succeeded, and in this particular part the ideal alignment is not necessary.
And more importantly I learned my lesson and will avoid trying to make curved parts fit perfectly, it is too risky. Rest of the keel assembly was easier, did both lower and upper halves (or rather quarters, as each was also split in half for convenience), then did a rabbet line on them. It was done by hand, mostly by via the sanding block, with some scraping with the scalpel blade to achieve sharper lines. Nothing difficult, just slow careful work, rather enjoyable because the wood is very pleasant to work with.
Finally, all the keel parts were glued together inside the plywood template, while laying flat on the table covered in plastic food wrap, and clamped with massive spring clamps.


Next part of the keel assembly was quite laborious and requiring very careful work. I needed to shape the wing transom by using (very handy) paper templates stickers. Took good few hours, but looks pretty good in my opinion, follows the stickers perfectly and fits right where it should.


Shaping the cant frame supports was much easier, just a bit tedious as again I was very careful and all this was done by hand.


The complete keel assembly turned out great, and after a small rabbet line clean up and a couple of fillings with dark wood filler I call it done.
Jig
Next step is installing the keel in a building jig, and assembling this jig is a serious task. It took me at least 3 hours to build it, with big chunk of time spent on sanding all the joints ever so slightly, otherwise the fit was too tight. I sanded the parts where keel touches the jig, and then brushed a coat of acrylic varnish to make sure there will be no char marks on the keel. Same varnish was applied where frames will sit in the cradle.


Bow cant frames
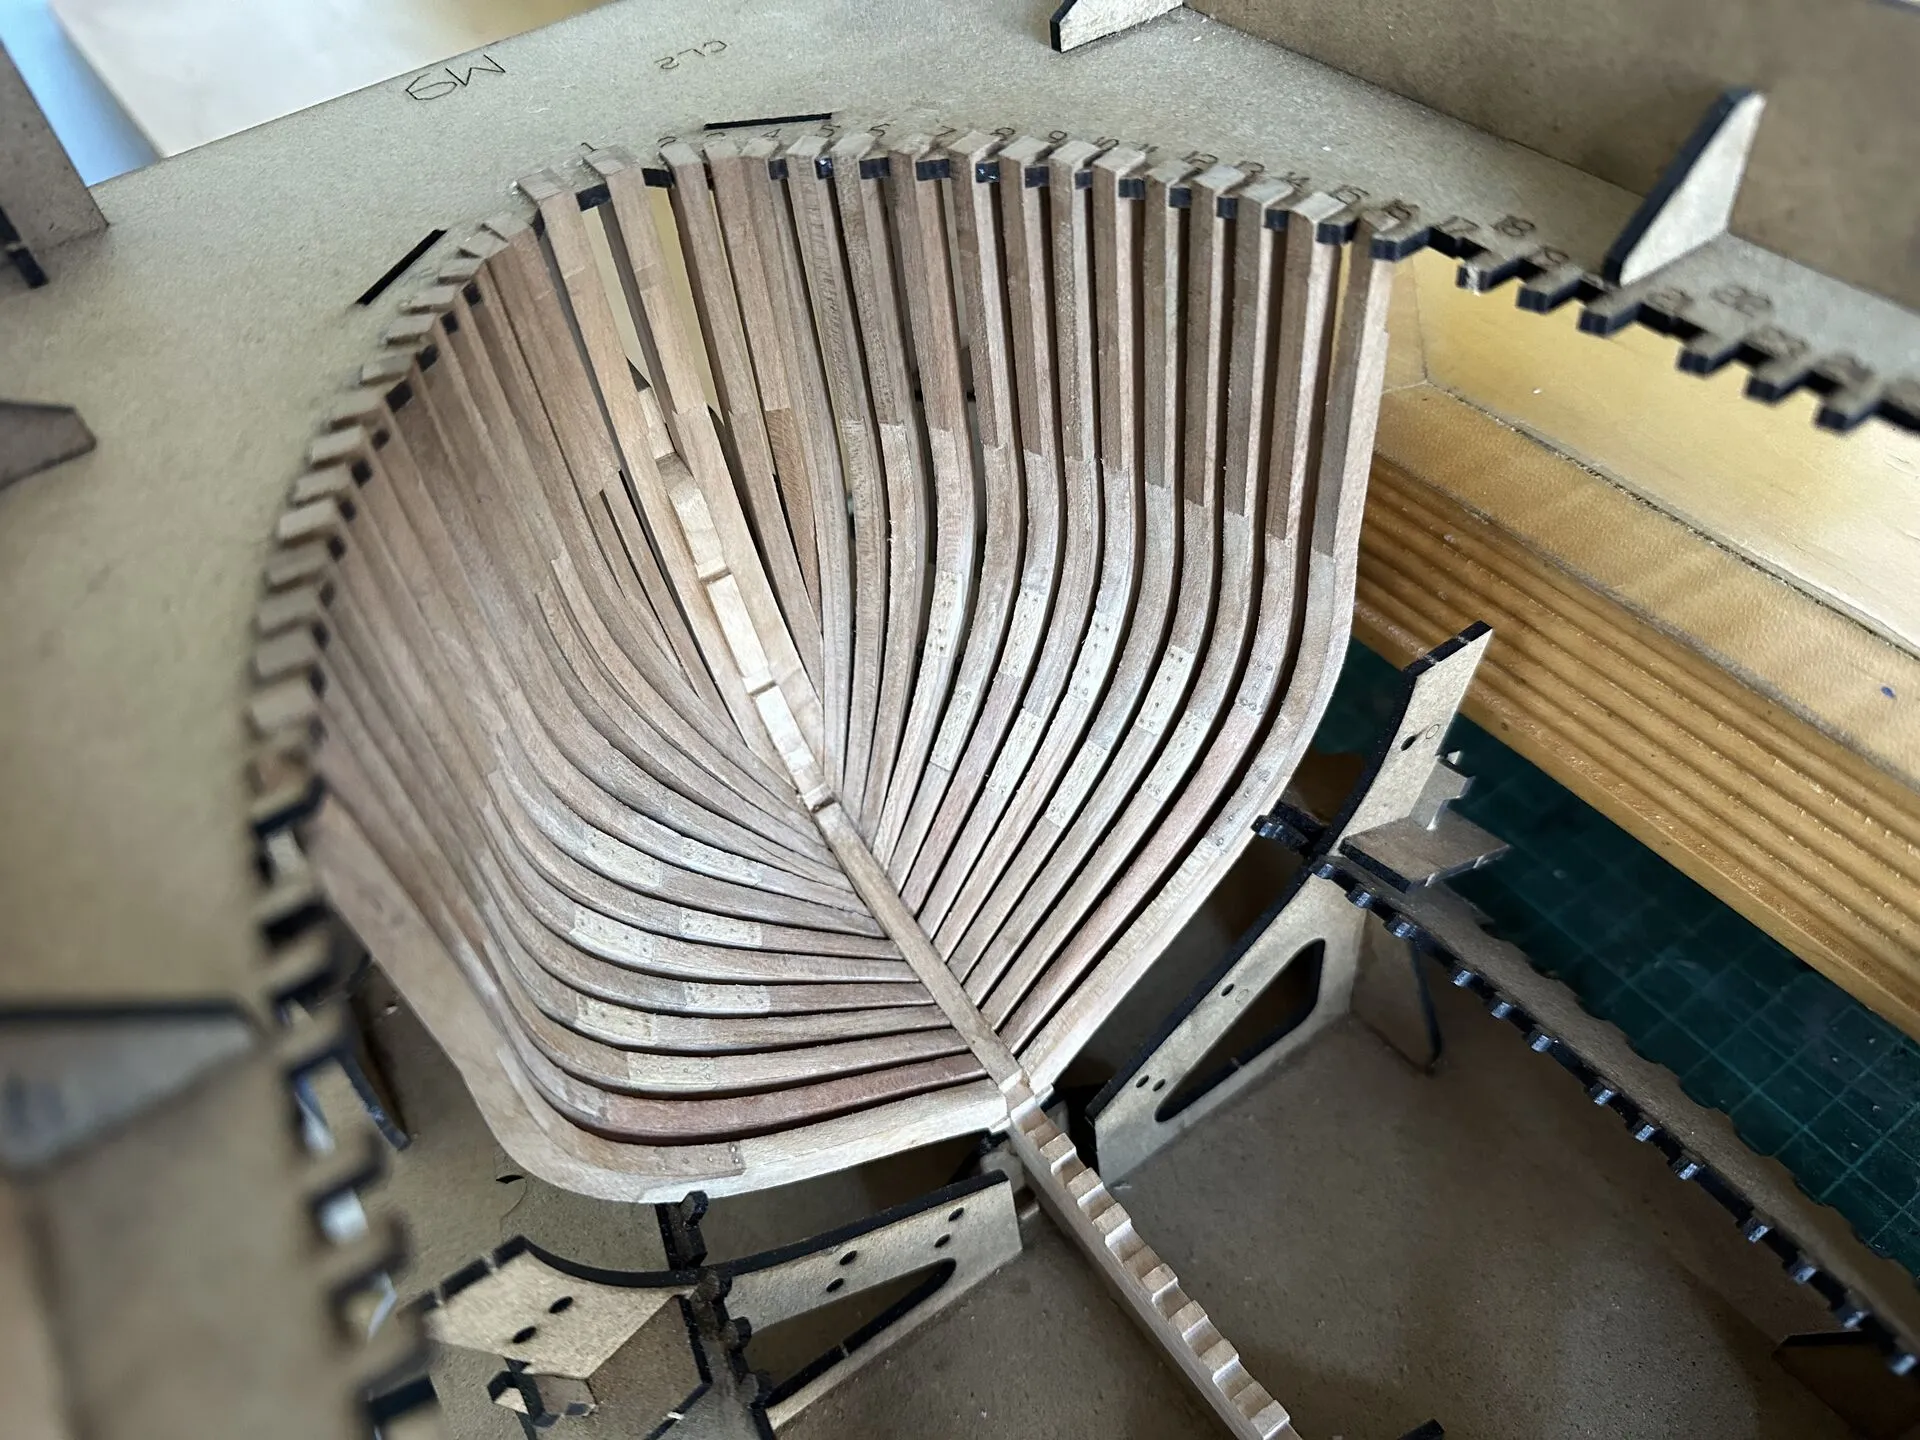
After assembling the cradle and the keel, I can say that the engineering of this kit makes me very happy. As an engineer myself I definitely dig the design and all the thought that went into it.
Like how with cant frames (those at the bow of ship) the kit provides sticker templates that help with shaping the frames. As a result I prepared and installed two foremost frames in just one hour, without any stress, just pleasant careful woodworking. Simply awesome, and cradle makes sure they are properly positioned.

Although I have to say that those foremost cant frames are a tricky thing. It took some serious effort to install the rest of them (especially number 3), and plenty of tinkering and tweaking the shapes, so it all sits properly. I’m almost happy with the fit, just couple of frames (damn frame number 3!) has noticeable gap between its foot and the keel, mostly because wood on those two pieces crumbled when I tried to shape the sharp point.
Thankfully I learned to accept my mistakes and imperfections and move on. I’ll add some filler or a plug at the finishing stage, so it becomes practically invisible.
Surprisingly frames 5+ are a joy to install, very easy to shape with the provided templates, and equally easy to install into the deadwood with some trivial adjustments necessary.
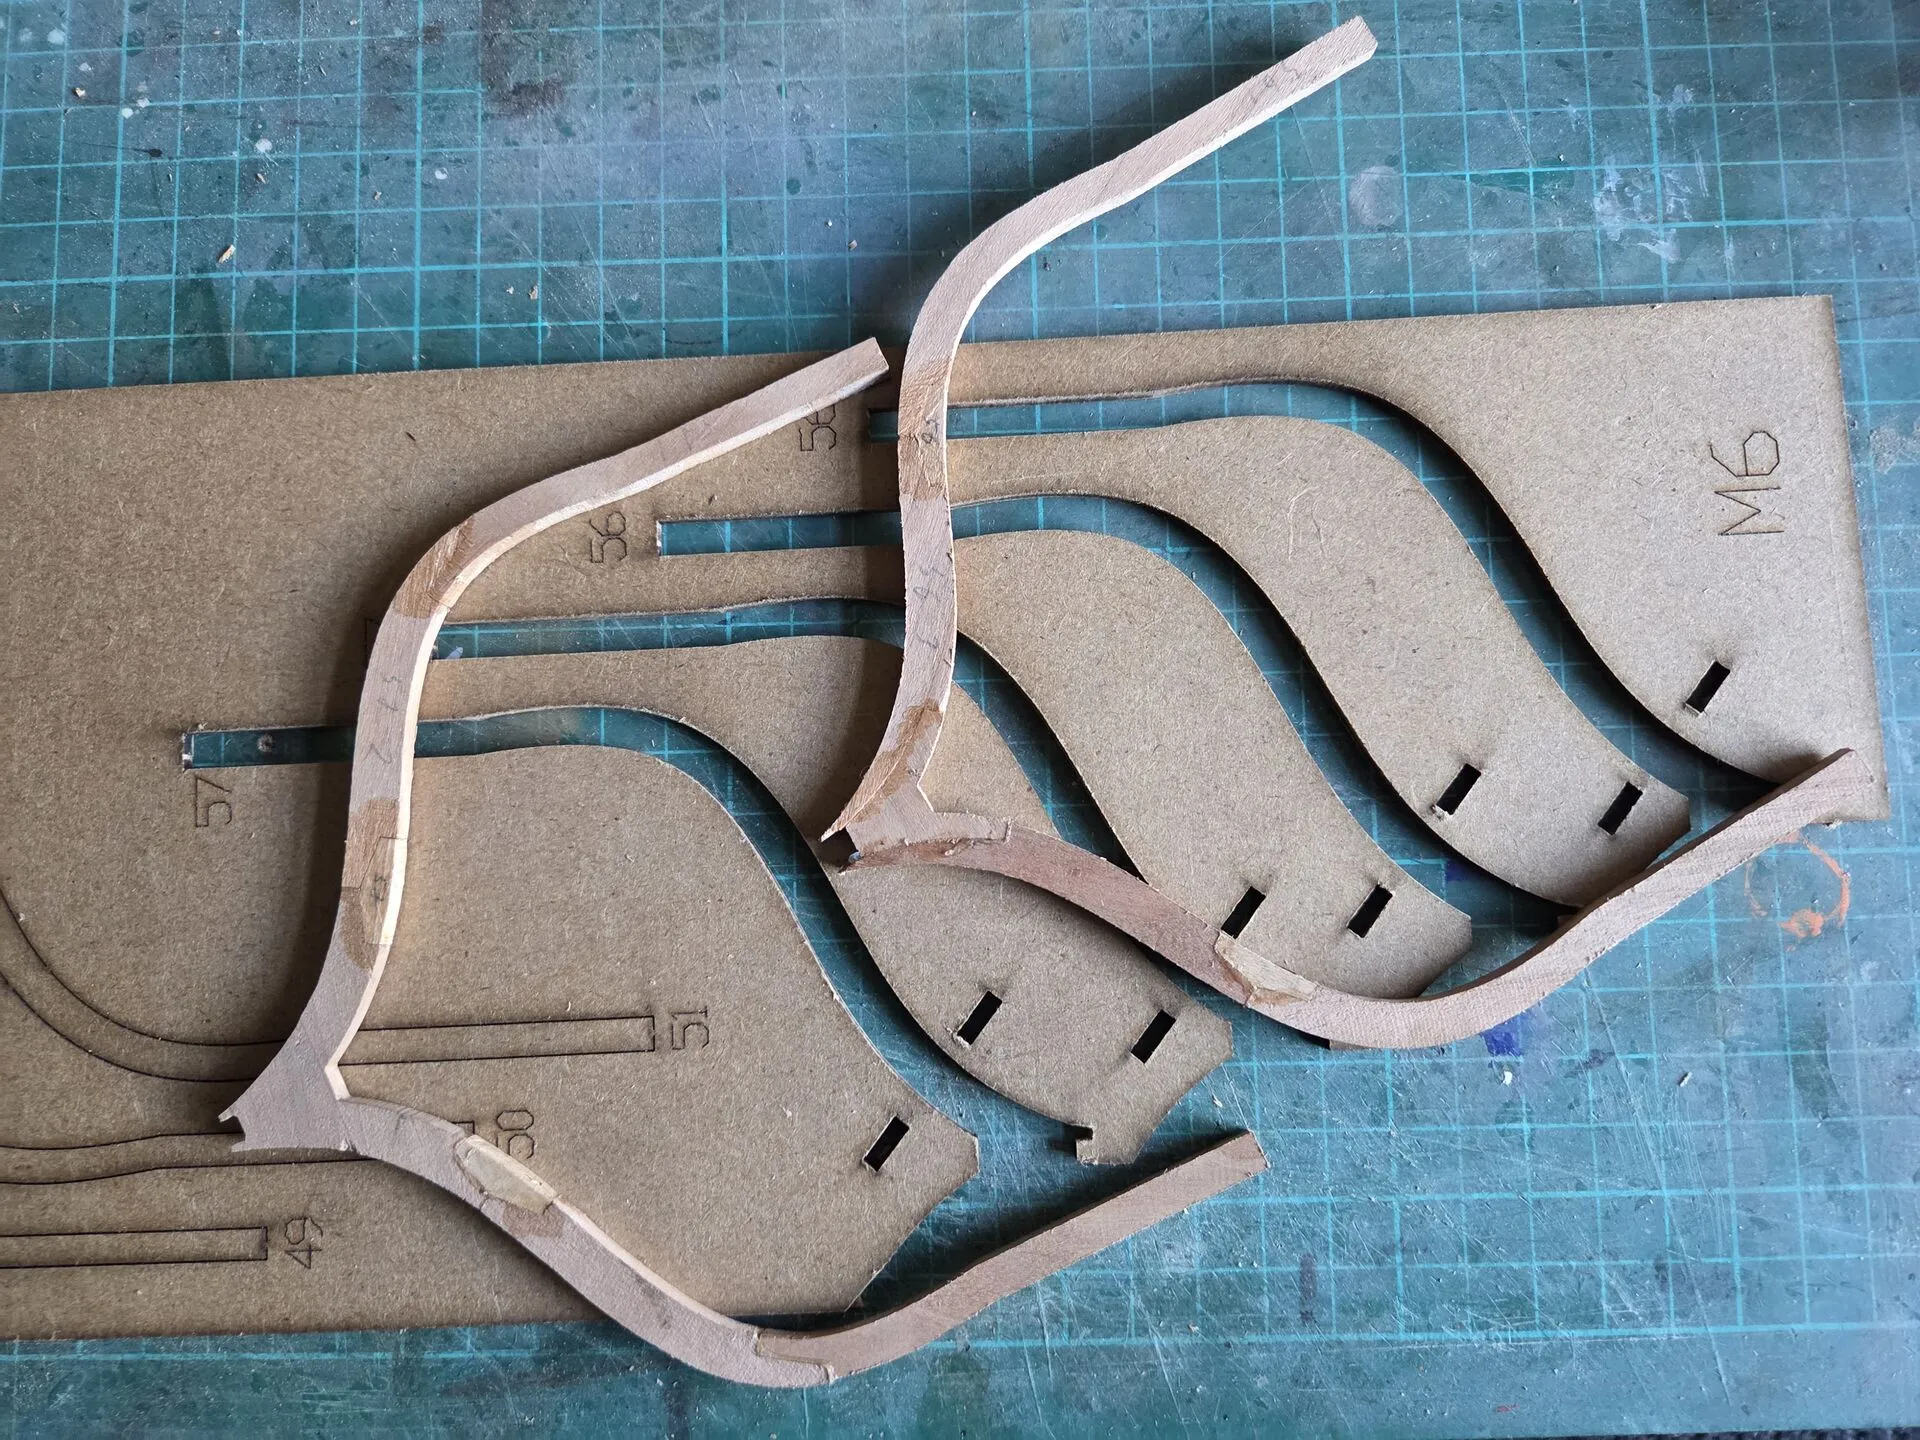
Frames 7+ are where the fun begins in earnest, as they are the first compound frames, each built from three pieces.
Thankfully the excellent design of this kit made building them as easy as possible.
Not only the kit provides the shaping templates, but also the laser-cut jigs to perfectly and effortlessly build those compound frames.
Just a little plastic food wrap for the isolation layer, and first two pairs of multipart cant frames are assembled.
You may notice that one of the frame 7 is a bit out of shape - this is the first error in the kit that I’ve encountered, where one of the two 7-1 parts was weirdly cut. As far as I can tell, after the final shaping it doesn’t look too bad, so I didn’t plan to re-do it.

Little did I know! Few days later I was shaping the second frame 7, the one for port side, and didn’t notice that I applied the templates incorrectly. As a result, I ended up with two starboard side frames number 7, and to make the best of this situation I replaced the slightly misshapen one with the second I erroneously made.
The correct port side frame had to be built from scratch, using the shaping templates and wood from the side of the plates containing the CNC cut frames. Nothing too complicated - a bit of coping saw action and whittling plus sanding. Quite proud with myself, the result looks indistinguishable from the original one, and given that I only used hand tools it is pretty neat
Would be better if it was required because of my silly mistake, but at least I was able to fix it myself.
From my observations it takes about 2 hours to find parts for, prepare and glue 4 pairs of cant frames. I don’t know if laser cut frames would take longer, but at least I don’t need to sand anything, so CNC cut parts seem preferable.
Shaping and glueing in one cant frame takes another 20 minutes, so the set of 4 pairs will take about 3 hours to shape and install. Combining those numbers shows that just the 16 pairs of cant frames in the bow of the ship took me about 20 hours to install, which is quite impressive given that typically a medium-sized model like HMS Flirt takes around 100 hours to complete, including rigging.
But after initial struggles, I found the process of building the Plank-on-Frame model very calming and soothing. Making small progress in roughly one hour is perfect for how I approach model building, and with each frame being unique it doesn’t become boring like ratlines for example.
Here is the bow of the ship complete with all cant frames in place. It will receive some light sanding once all frames are installed, but even now it looks quite ‘fair’ thanks to the provided templates. Excellent engineering from Trident Models.

You may notice that I decided to add imitation of bolts to the frame chocks. Used 0.4 mm brass wire, and 0.3 mm drill. As it proved to be impossible to properly align exit holes, I decided to drill both sides individually half way, to simply imitate the through bolts. Very happy with the resulting look, after sanding it looks spectacular. Working on the bolts finally got me to use Stanley desk mount vice and Archimedes drill which I had for years but hardly used.
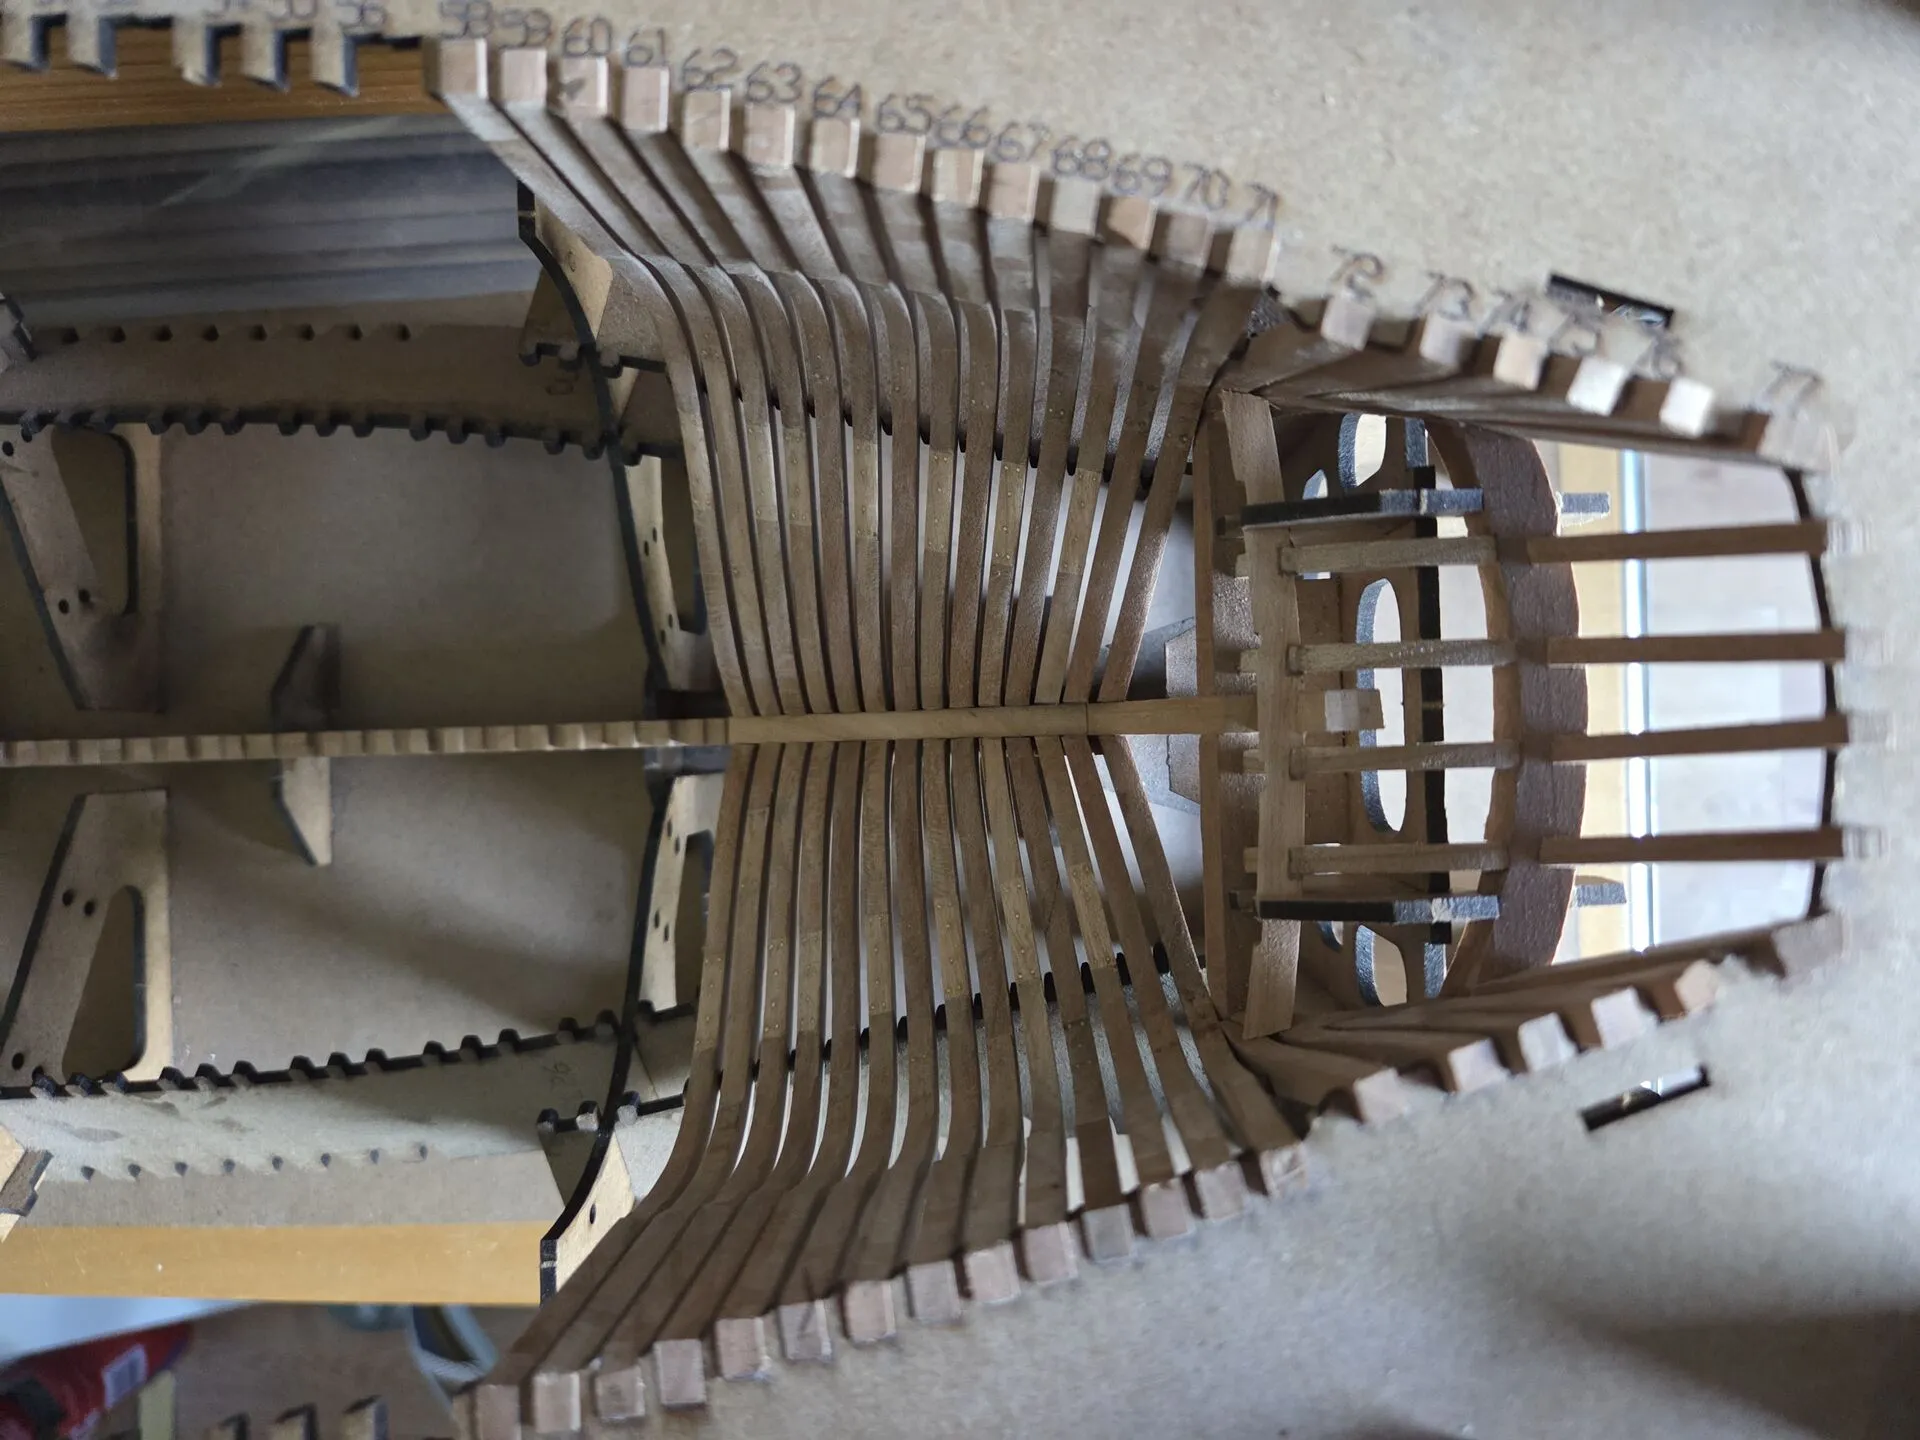
Aft cant frames and transom
Installing the first stern cant frame was quite exciting - it needed to fit both frame supports and wing transom at precise locations, tricky stuff. The more exciting it made the process, and the result looks fantastic.
Adding another transom with side supports was even more challenging.
It took good couple of hours to shape and install those three parts, and side supports are actually laminated to get the required thickness.
Thankfully the kit provides sticker templates to shape them, as they are quite tricky to manufacture.
Still managed to complete this part to a satisfactory level, with little finishing sanding required.
Overall working on the stern details was as much fun and challenge as I imagined. Definitely a great experience, and another reminder of how fragile the stern assembly was on a real ship compared to the rest of the hull.
When working on the other cant frames, I managed to ruin yet another part by absent-mindedly cutting off the important piece while removing one of the stubs. Had to make a replacement from scratch, which was not hard but took awhile.
In general, the work continues slowly but steadily.
As I’ve said before, shaping and glueing in one pair of cant frames takes up to one hour, and that’s on top of actually finding, cleaning and gluing the frame parts together.
Eventually I’ve got to the point when all the cant frames, both bow and stern, are now manufactured, fared and glued in place.
The stern looks pretty good to me, and all together the aft cant frames installation went rather well, nothing particularly tricky, which is good.
Full frames
Gluing up the full frames turned out to be not that different from the cant frames. It’s just a touch more difficult since I’m dealing with the bigger pieces, and the glue-up itself takes two steps.
To be continued…