This model attracted me because of graceful, beautiful lines, and my desire to try a recent model by famous Chris Watton. After all, I quite enjoyed his design in Lady Nelson, and the kits from Vanguard Models had glowing reviews on a Model Ship World forum.
HM Brig Sloop Flirt
There is nothing remarkable about ship herself. She was built in 1782 and had a relatively uneventful career in the Navy.
‘Brig’ in the full name means that she had two masts, both with a square rig, and ‘sloops’ was a class of small support vessels.
Model quality
The design seems quite good so far, but the plank quality was all over the place, and there was barely enough of them.
Build notes
Built all the bulkheads and false keel in just one day, including lower deck and false deck installation.
Very good engineering throughout - longitudinal reinforcements make aligning bulkheads and making them square to the keel very easy. It’s practically impossible to somehow twist the hull with such design, very well done and makes the build faster and easier.
All parts fit amazingly well, no gaps, no need to sand pieces to reduce thickness either.

So far the only issue I had was that the instructions said that bulkheads will have etched lines for sanding, but in my case they didn’t - I suspect that few of my plates came from Speedy which is a bit older design.
And how cool is that - my first model with a lower deck, and VM provided a great looking laser etched birch deck, even with the door down there, despite it being barely visible through hatches.

Faring the hull was easy (it always is when MDF is used, plywood is much harder to sand), but applying gunport patterns was utter shitshow. I have no idea how one could bend them into submission, so they lay properly on the bulkheads. Spent two hours on this stage, hated it all the way and the result is far from good. Hopefully I’ll just sand all the bumps and bulges away after the first layer planking. Still this stage is poorly designed, and I expected better experience from the advanced Vanguard Model kit.
Nails included in the kit are weird - the head is too small, and most importantly they are not magnetic, which makes using them with the nail pusher a pure exercise in frustration. Luckily I have tons of OcCre nails which are tougher and magnetic.
First layer of planking went easy, no issues except for the aforementioned nails.
Sanding on the other hand was the part I didn’t look forward to. To me, it is always one of the most mind-numbingly boring parts, and quite messy as well.
I always try to do it outside, thankfully it’s easy when you live in a house. Still few boring and tedious hours spent in the cold is not something I can enjoy.
And first attempt at sanding didn’t go well at all - I clumsily dropped the hull and broke the stem piece, and the rain started and prevented me from doing any real sanding.
So instead of sanding I repaired the broken piece. Some days later I managed to finish the sanding without doing more damage.
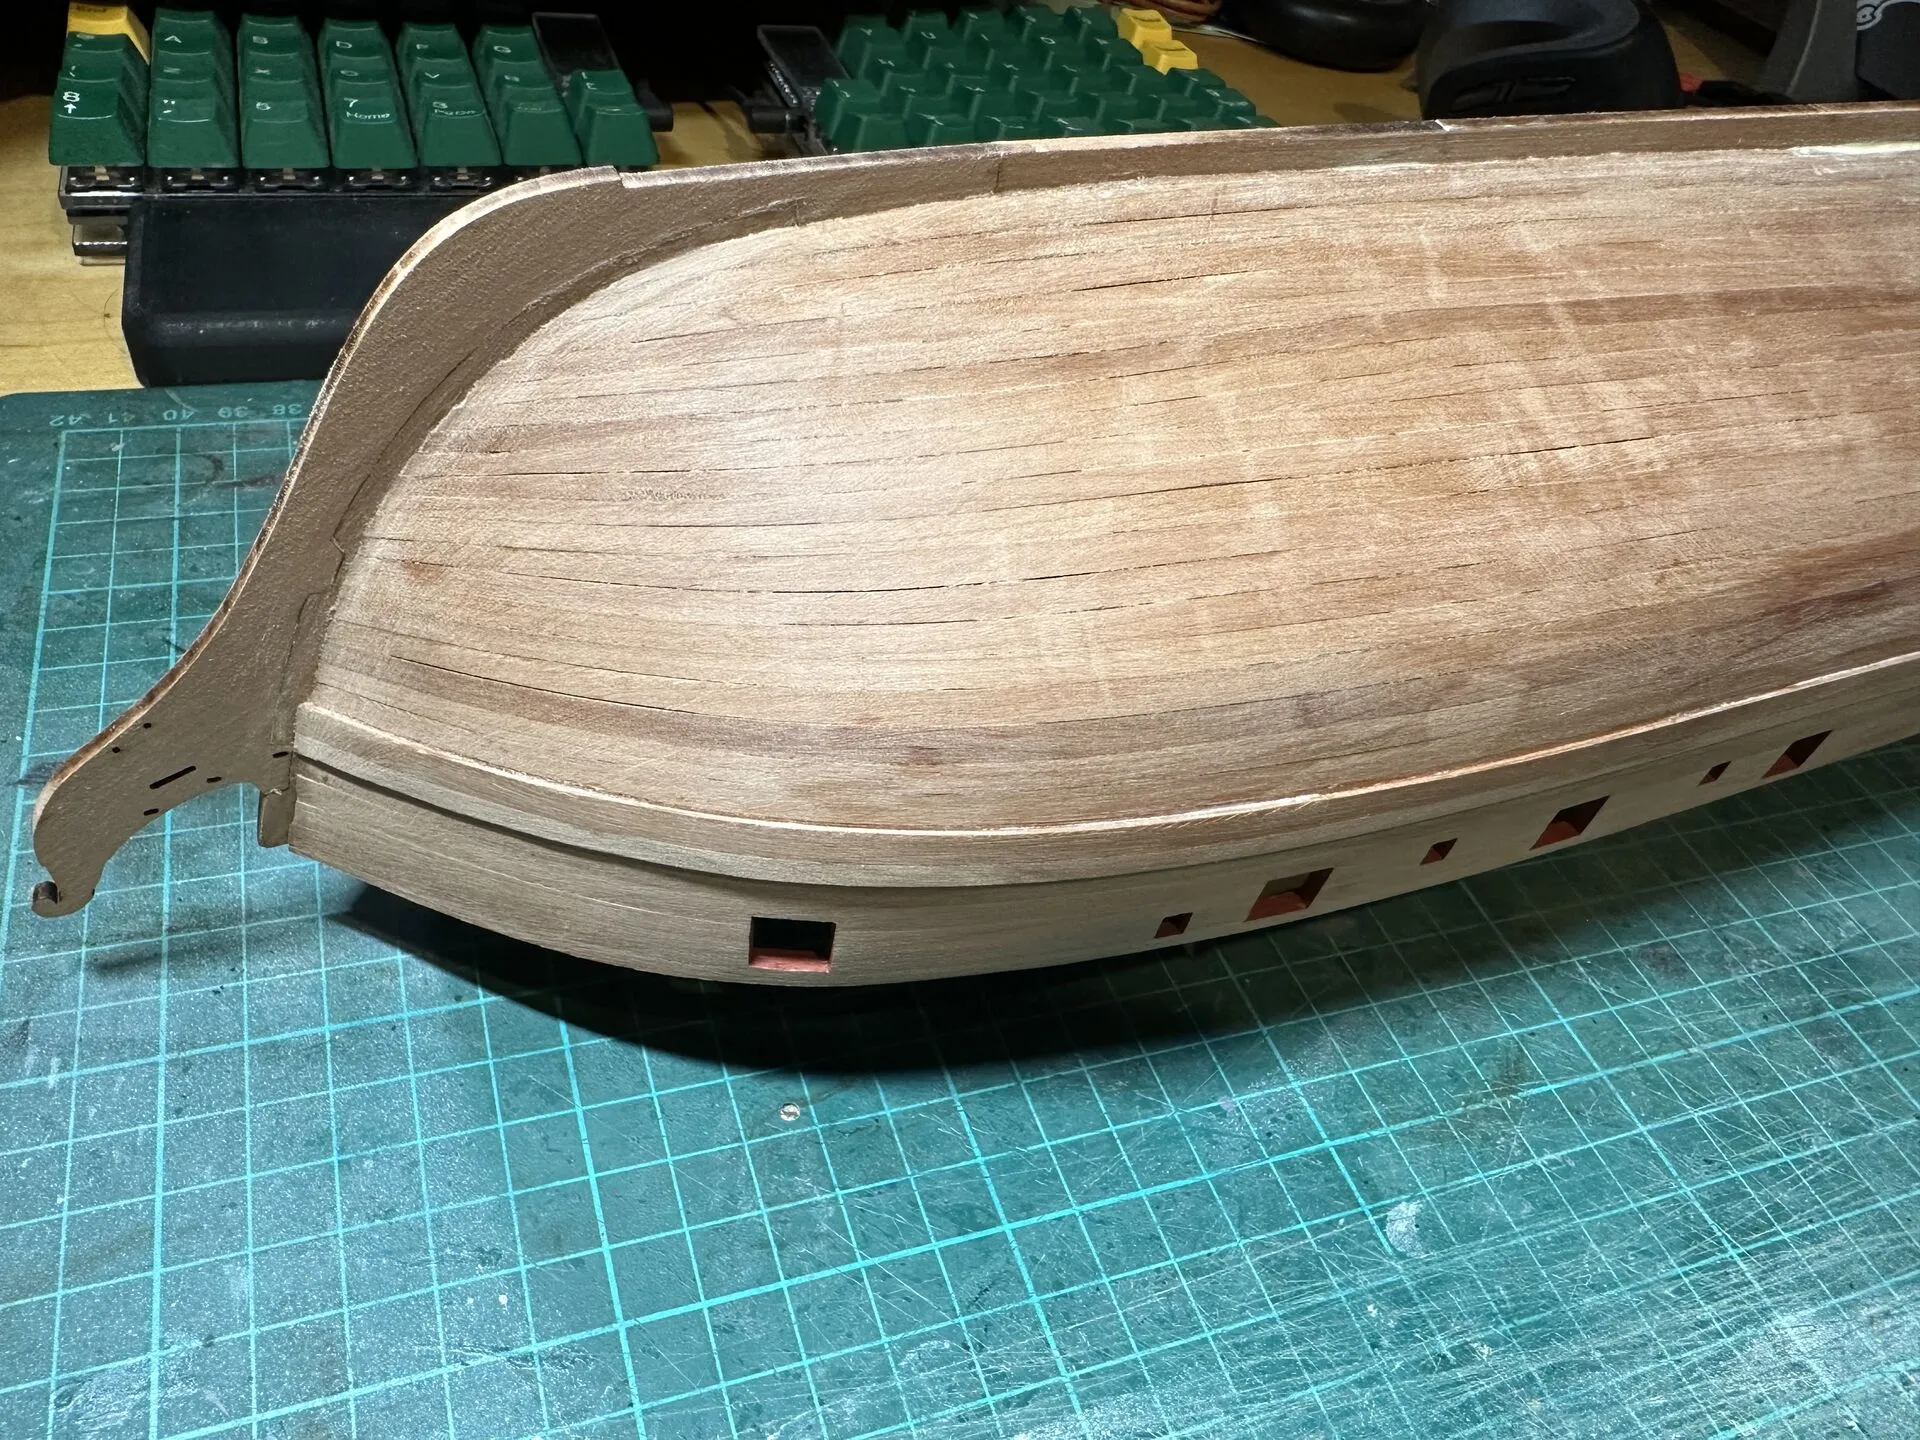
Thankfully after the sanding first layer of planking looks splendid, and I was eager to start with the finial layer.

Here you can see how I thinned the deadwood area in the stern. A bit too much actually, I had to build it up a bit with a wood filler before the second planking.

Second layer is made from pear, which is a very pleasant wood to work with.
I’m a rather disappointed with the plank quality in the kit. While all the planks have equal width, thinness varies, and plenty of planks have imperfections like dents or saw marks.
Still it is a nice wood, and quite pliable as well, which allowed me to continue spiling the planks free-hand so to speak, without using specialized jigs or soaking planks in hot water. I did the usual calculations for the spiling (what width should the plank be at which bulkhead), but based on my experience with the first planking layer I went with ’natural flow’ approach. First layer went so well and the hull shape is really easy to plank that the natural planking looks, well, more natural!
Second planing went quite well. ‘Natural’ method worked remarkably well, the bow looks pretty good. First time used stealer planks for the stern (I simply used wedges before as this area is painted anyway) simply because I wanted to try it. Doesn’t look half bad, and wasn’t much harder to make than wedges.
Very happy that this messy, lengthy, tricky process is over. It is too easy to mess up, and it just takes so long, plus I am tired of having my fingers covered with CA glue. And in general I much prefer PVA, but with it the planking would have taken forever.
Sanding the second layer was as boring as with the first one, but luckily there were no issues or surprises.
Next photo is from the later stage, but shows the bow planking nicely.
Gluing the laser-etched deck was trivial, used plenty of clamps and some extra weight to make ensure good bond. I lightly sanded some slightly charred parts of the deck with 1200 grit sandpaper, which was enough to remove the char without damaging the etching.

Planking the inside of the bulwarks was a nice change from slightly annoying outer planking, as I switched from CA to PVA. I want the best possible bond around the gunports (so that the planks don’t detach when I cut them open), and having glue residue is no problem as it will all be pained anyway I pre-painted the lower plank to avoid masking the deck afterward, and left the rest unpainted in the anticipation of sanding. Also, it was again confirmed that one cannot simply have enough clamps!
Planking the bulwarks on the outside I also did with PVA for same reason - good bond around all openings. Took longer but I’m confident in the result.
Sadly it became clear now that I don’t have enough of 4x1 mm pear planks. I needed another two for wales (they are 3 + 4 mm, and I have 3 mm with spares but none 4 mm left). Will use remaining butts that I cut off during the planking, the wales are painted black anyway, but it is quite disappointing to have such basic issues with a 300 pound kit.
Also, it’s really weird that in the plans the wales are 8 mm wide, and the laser cut parts attaching to them are designed for 8 mm, but the instructions clearly say it’s 3 + 4 mm. Confusing at best, but as I don’t have enough materials to make them 8 mm I’ll go with the instructions.
I have also noticed that the transom on my model looks slightly different from what is in the instructions/plans, more curved. Don’t know what went wrong (if anything), but that was the only way to fare the bulkheads when I was building the hull. I’m completely fine with this small difference, it will simply mean I’ll have to bend the wales more, and probably modify one part for the stern decoration.
Building the wales was easy, although I had to build up the lower 4 mm strip from 3 pieces on both sides simply because I completely ran out of 4x1 mm pear strips. No biggie, still turned out great.

Glued in the stempost piece, decent fit, although I expected better. Even before the laser char removal there were few 1 mm gaps. Again, no biggie as it will be filled and painted anyway. Left the glue to dry overnight as per instructions, glued in the rest of the keel next day, and fully painted the bulwarks. I love using the Admiralty Models paint, it is pretty much perfect for the brush application on wood.

Made a rudder with the tiller handle, interesting how the pintles are designed as a separate PE part, first time I’m seeing something like this.
Masked the hull to paint the wales, used Tamiya tape as always. Did the same for the hull at the waterline. Both black and white paint are acrylics, and this time I didn’t bother with the airbrush - just took a big brush and painted the hull white in several coats.
Took longer, but I had few reasons to do it like this:
- First, my ‘paint’ (which is actually an AK Interactive White Primer) is old, and last time I tried to use it with the airbrush it clogged a lot, and cleaning the airbrush was really hard and miserable.
- Second, my whole mindset when working on the wooden models is to focus on doing the actual woodworking. Hand tools, absolute minimum of painting. If I can avoid disrupting this state of mind - I will, and using airbrush with all the noise and extra prep/cleanup definitely feels quite invasive to me. So doing multiple passes with the brush is much better for me, and it’s quite meditative for me - double win.
- And lastly, I try to do good job with my hull planking, which means I don’t want to hide it with filler/paint. I don’t get the smooth finish on the wooden models when they depict an actual wooden hull. My planking is decent, no wedges, nice curved and edge bent planks - I want it to be somewhat visible under the paint.
Next step was adding some bow and stern decorations, very easy and pleasant. Did some touch-ups in wales, and now it is time for the capping rails.

Installing them was a bit tricky, at least in my case. Maybe I messed up a bit with the hull shape, but I definitely had to edge bend the pre-cut rails to fit. It turned out decent, although a bit of trimming/sanding of the top planks was required to have decent and even overhand.
Here is the most problematic part of the hull before the adjustment.

And here is the same part after I scraped and sanded the planks beneath the cap rail so allow reasonable overhang.

By the way I really liked the method to install the rails described in the instructions - using brass pins to ensure proper fit and alignment, it worked very well and allowed me to use PVA.
I also pre-painted top plank in blue, because about half of the planks above the wales would be painted this colour, and this way I can avoid delicate painting around the capping rails.
After installing the cap rail, I started marking the border for the blue paint using the decoration pieces. Then I realized that I will be much easier to scrape the excess rather than add missing paint, so painted a bit more so that I definitely don’t have unpainted surface above the decorations. The decorations themselves were painted black while spread on a piece of masking tape. Gluing them in place proved to be rather laborious, as they are quite flexible and thus can easily get twisted or bent, so the alignment needed close attention.
All in all I think that pre-painting the planks blue was unnecessary. The act of gluing the decorative pieces inevitably leaves glue residue. I used PVA, and even with careful clean up some traces still affected the paint. I can imagine it would have been even worse with CA. Which of course meant adding another coat of blue paint, and related paint touch ups of black paint. If I had skipped the pre-painting step, I would avoid scraping the extra blue paint below the decorative pieces.
Similar impression left adding the decoration pieces, which you first paint yellow ochre, then glue to the hull. Nice in theory, but in practice with glue residue and paint scratches there is significant amount of touch ups required. I think it would have been better to just glue them, mask around with tape and paint in-place.
But now with cap rail painted and decorations added the ship looks quite nice and clean.

I have installed the catheads, which was rather easy. I’m disappointed because the instructions do not call for imitating the sheaves there, which is quite puzzling as any other kit I built had them. Of course, I still drilled the holes and cut the groves to imitate the sheaves, just puzzled as to why is this detail omitted in such highly detailed kit. Especially given that catheads have PE cleats and amazing PE crowns that look fantastic.
Adding the bow decorations was also easy, although I stepped away from the instructions again. The way it is proposed to add the wooden side pieces makes little sense - there is almost no contact between them and the hull, and adding a cathead knee on top of that is just ridiculous (and it looks silly in the instructions photo). Instead, I cut out pieces of existing black wood side decorations, so that the new curved pieces can be properly glued below the cathead, laying flat. This way not only it looks more logical, but also the knee has something to rest on.

Adding steps and depth marks was easy, simply marked the exact spots (determined with the ruler) with the pencil, and carefully glued things.
Varnished the painted part of the hull with Humbrol Matt Cote, my favourite varnish ever. Smells horribly, but leaves awesome hard matte finish and really protects the paint.
I painted the depth marks copper (True Metal, wax based paint that looks great when polished with a cotton bud).
I also re-painted the rudder pintles and gudgeons black instead of white that instructions called for. With this I took some artistic licence, but after looking at my Lady Nelson model where I did the same I realized that it adds such a nice accent on a white hull underside that I couldn’t resist doing the same here.
Next thing I did was installing the belaying pin rails, which was an easy job, and preparing all the photo etch. As it requires blackening, which is a somewhat messy procedure involving poisonous stuff, I prefer to do all parts at once. So I removed all the parts (which is a lot), cleaned them, and blackened using Brass Black. Preparation took 3 days, quite mind-numbing if I’m being honest, but now it’s done, and I can proceed with the other deck furniture and fixtures.
Adding the ring bolts was easy once all is blackened, drilling holes is trivial, and having a full ship plans in the same scale as the model is just delightful as it is so easy to check where anything is. So much better than modern step-by-step video instructions which can leave you guessing the exact position of the part!
Similarly installing the chains was easy, all marked on the plans and the chain boards are nicely laser cut.
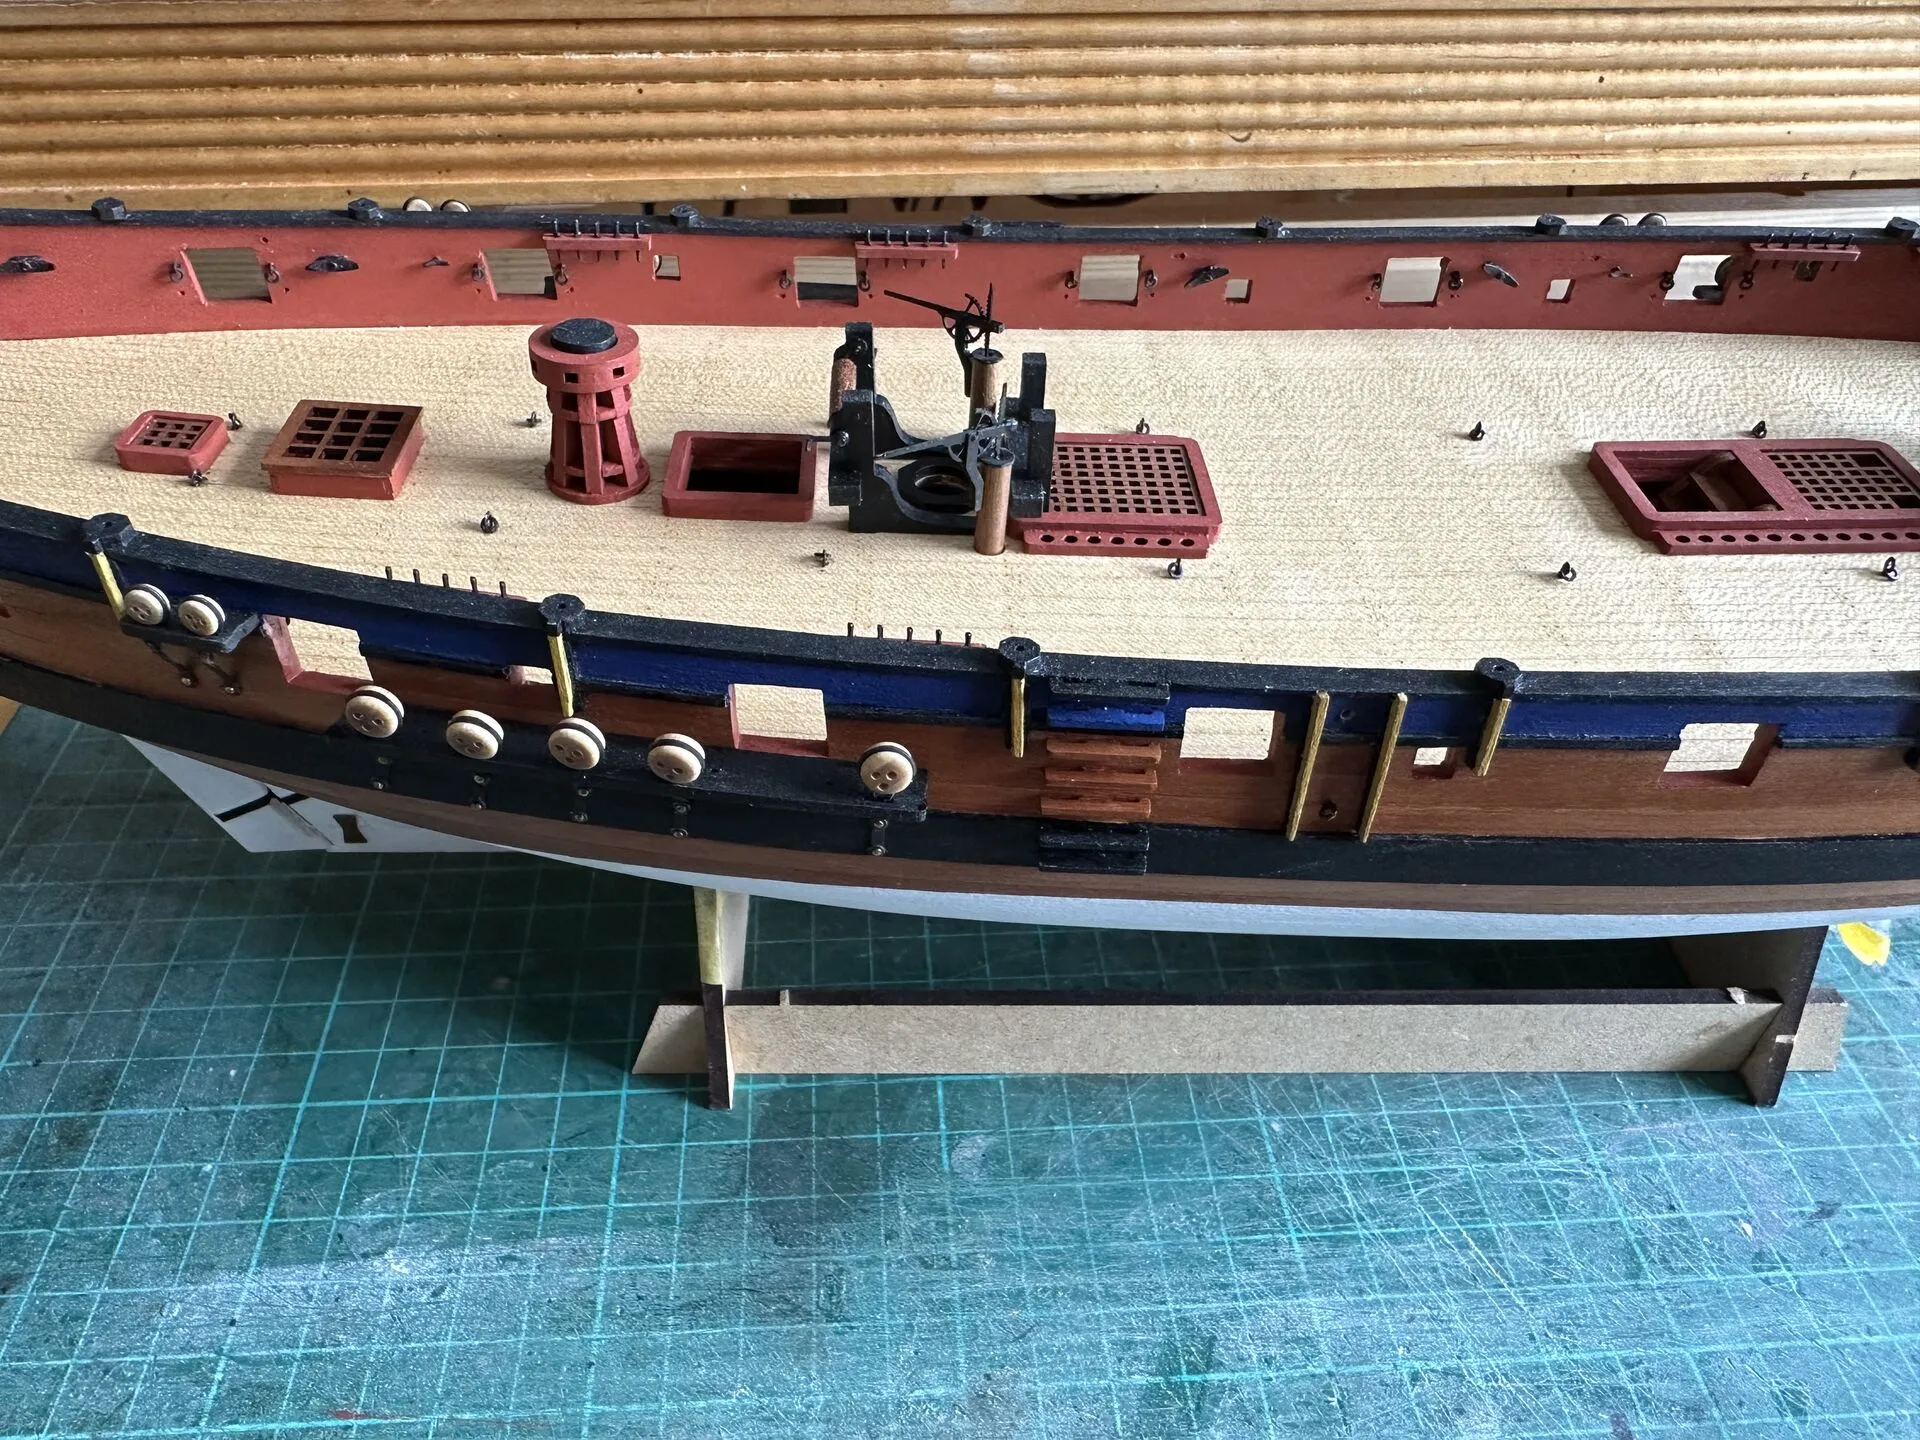
Now it was time for the deck furniture, capstans and hatches. And here the kit absolutely shines.
The capstan is a delightfully designed, very cool sub-assembly and looks awesome. Hatches and grates are laser-cut, no way to make mistakes, very easy assembly. All the bitts and stuff are laser cut as well, and are a joy to put together.
Very happy with this stage of the build!

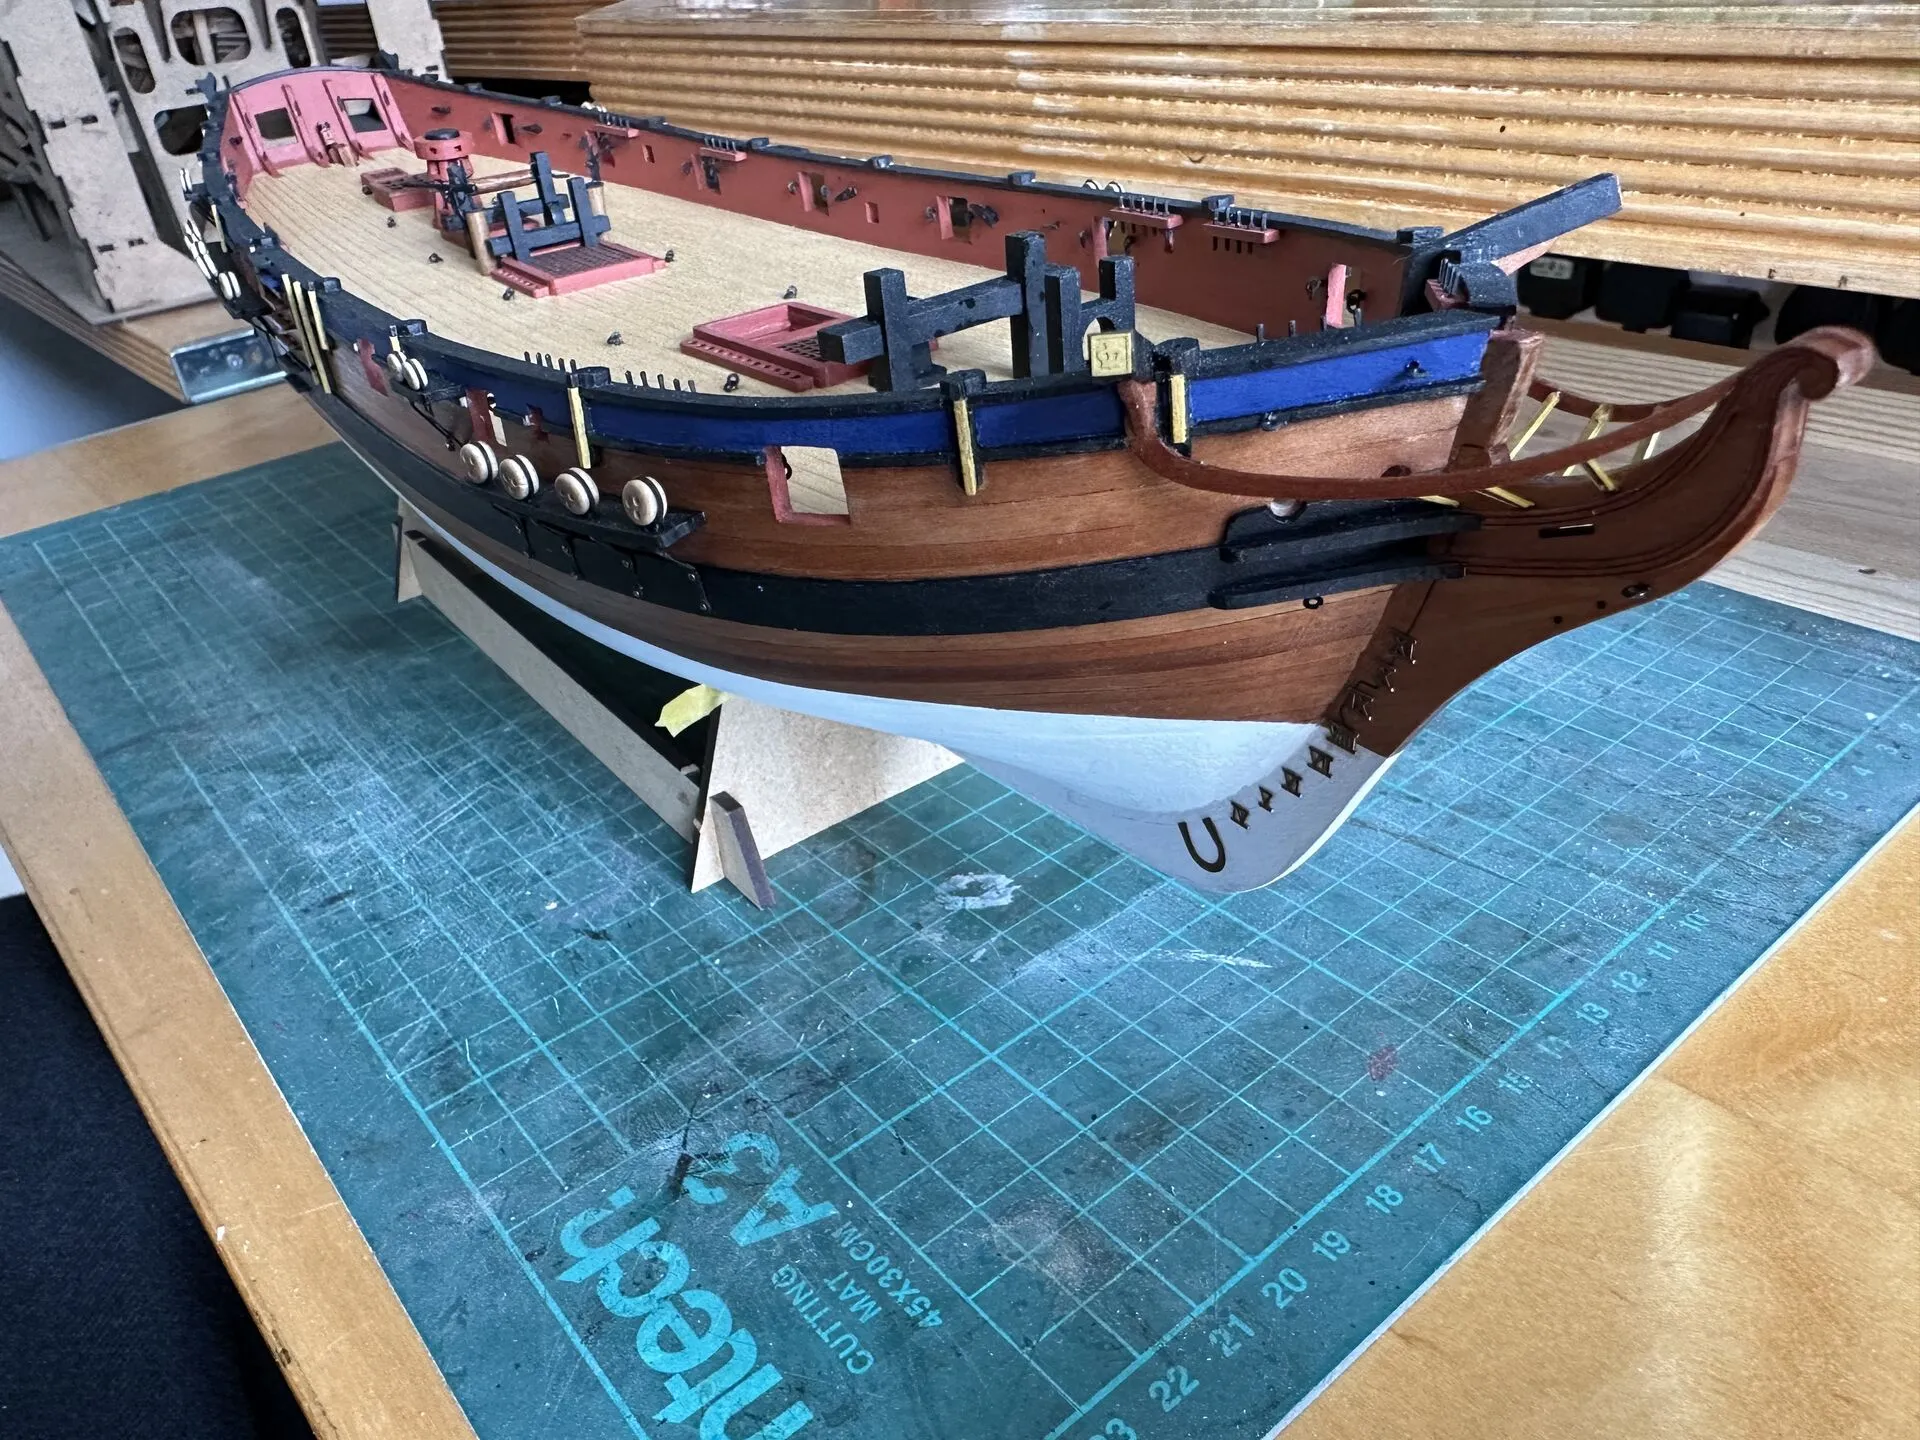
Once all the deck furniture was in place I could finally apply the Danish oil on the deck and sides of the hull.
I love the finish and protection oil gives, the only problem is that you can’t properly use glue with the oiled wood, so it can only be applied after the assembly is done, or it would need to be scraped off at the glue joint.
Of course oiled pear looks amazing, very happy with how the hull turned out.
The one-piece laser cut deck on the other hand looks too uniform to me, I actually prefer when the deck is made from the individual planks. It is much more work to produce, but the slight colour variation between each plank makes a big difference in my eyes.
To be continued…