Ever since I was a passenger on one of this things thanks to Viking Splash Tours, I wanted to build this model. It’s remarkable that truck/boat hybrid built 70 years ago is still able to move, and even sail.
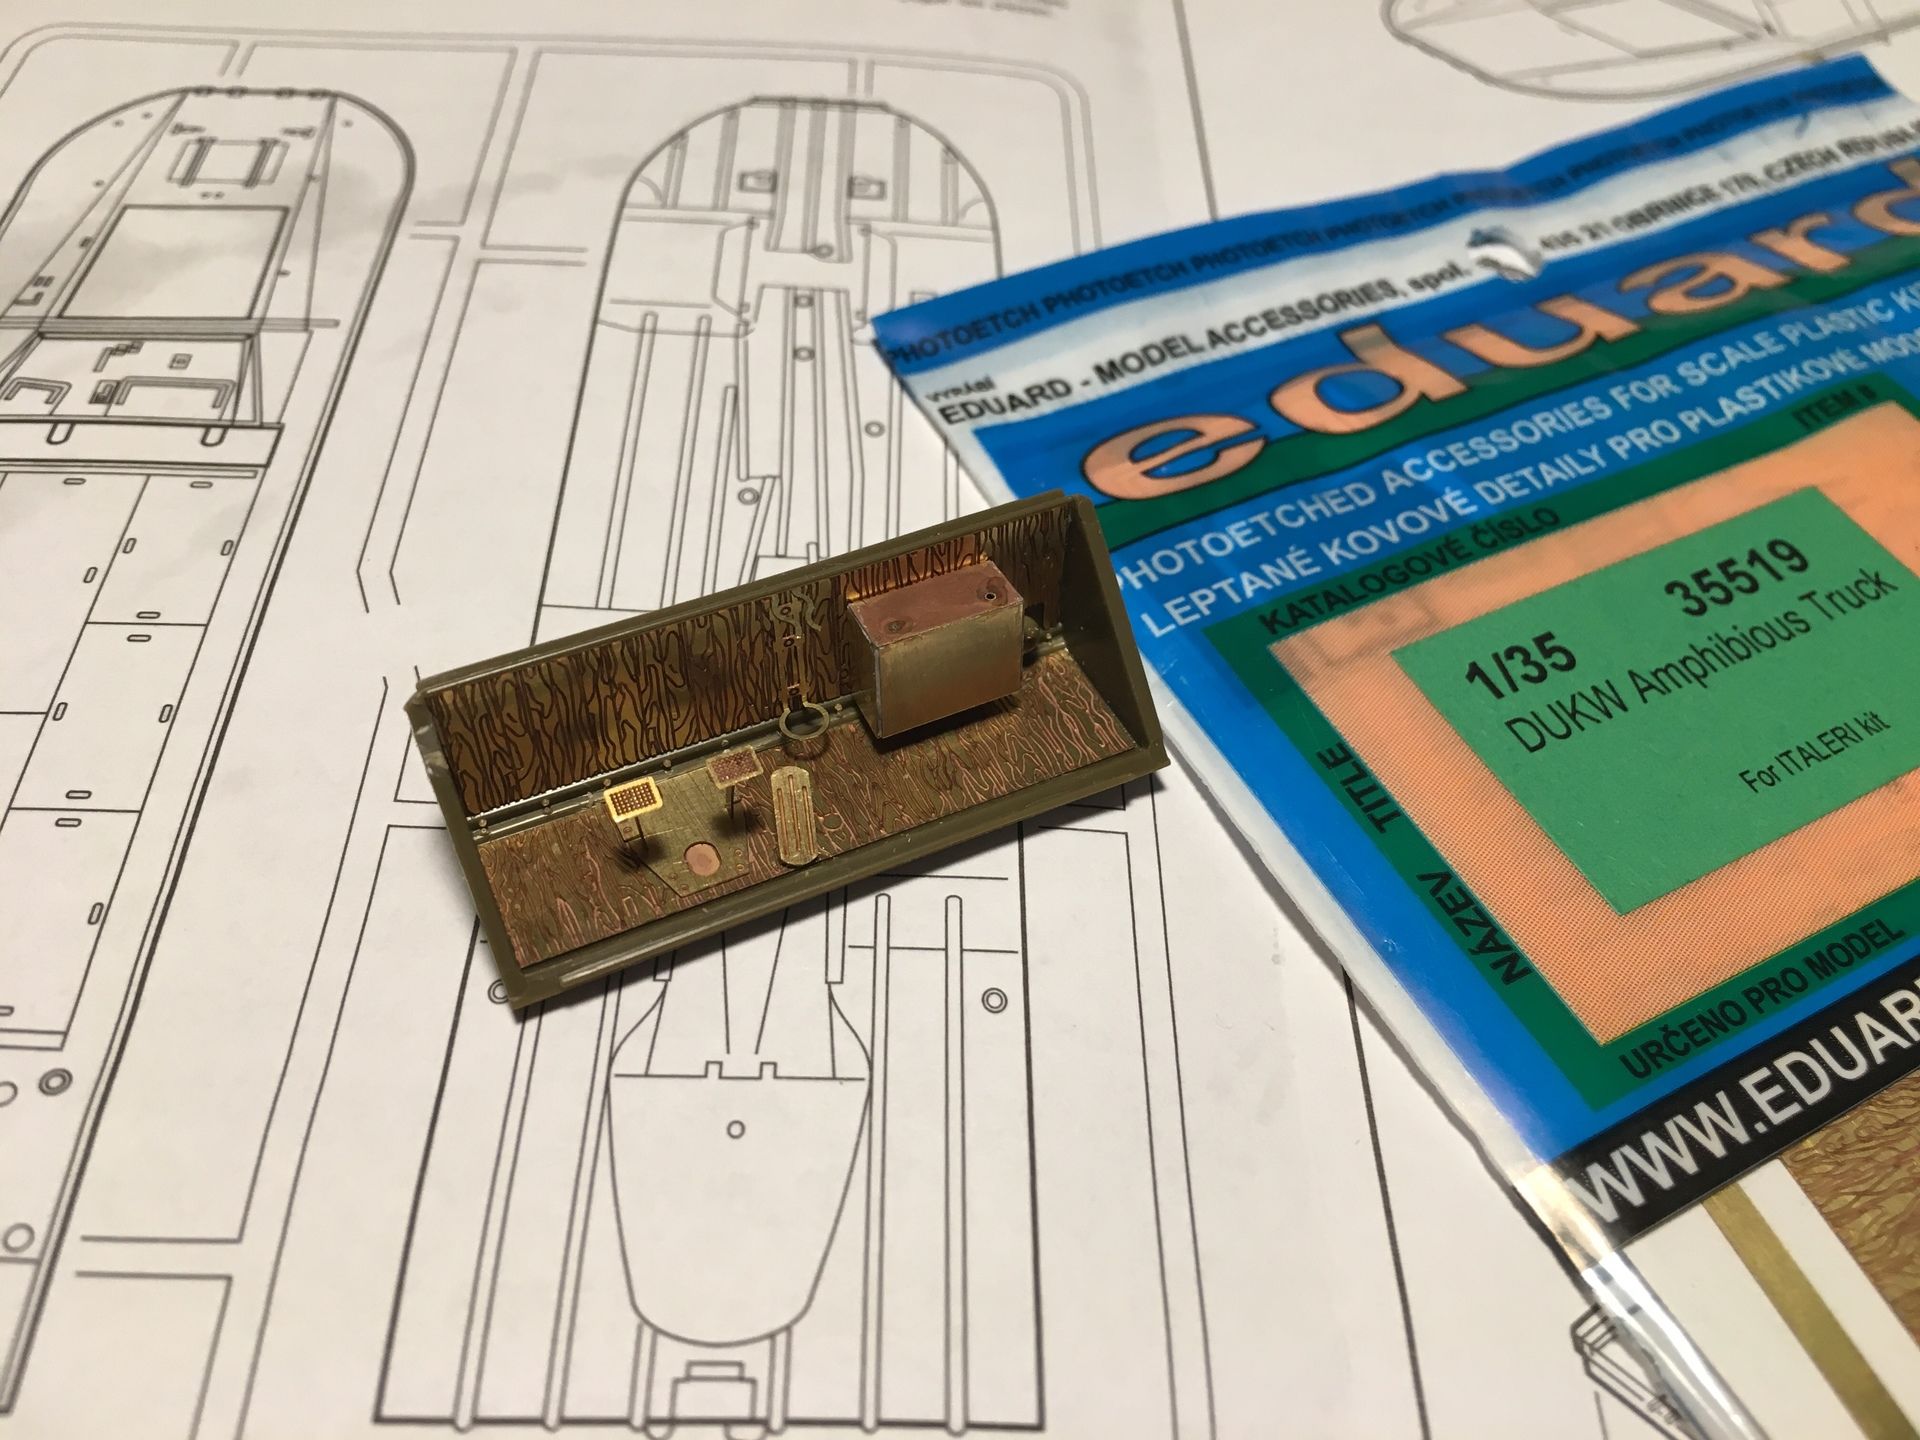
As for the model, I’ve got Eduard PE kit for it, because I really enjoyed working with PE while building HMS Hood, and it adds so much to the look.
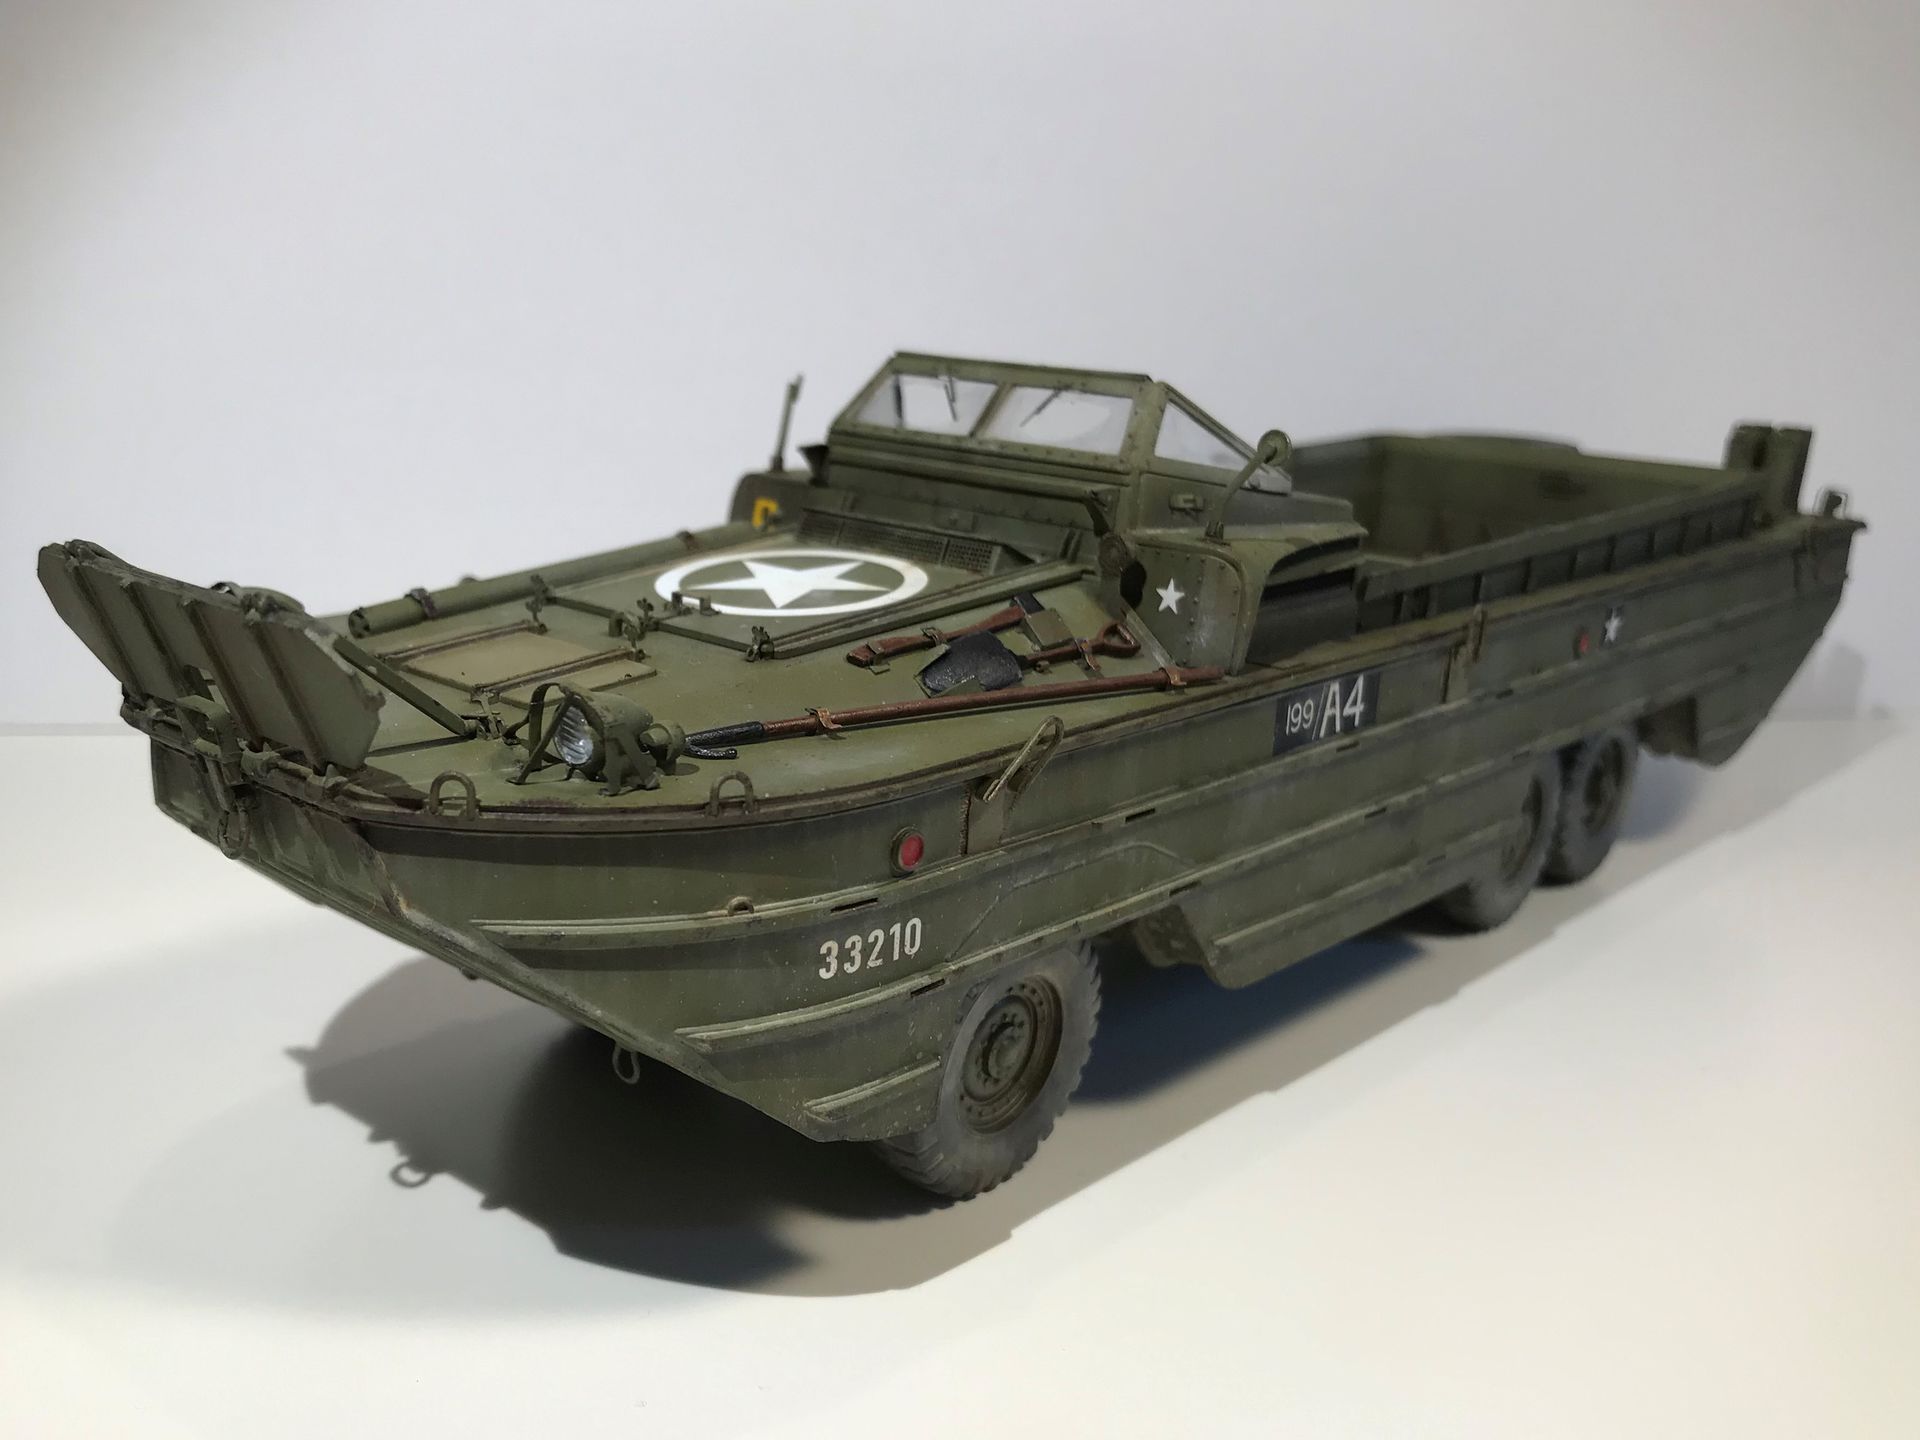
The Mighty DUKW
This remarkable vehicle is a modification of CCKW truck, and DUKW comes from:
- D, Designed in 1942
- U, Utility
- K, All-wheel drive
- W, Dual-tandem rear axles
As you might guess, everyone called this six-wheel-drive amphibious truck simply Duck.
Wikipedia has a great story about the early history of this truck:
It was initially rejected by the armed services. When a United States Coast Guard patrol craft ran aground on a sand bar near Provincetown, Massachusetts, an experimental DUKW happened to be in the area for a demonstration. Winds up to 60 knots (110 km/h; 69 mph), rain, and heavy surf prevented conventional craft from rescuing the seven stranded Coast Guardsmen, but the DUKW had no trouble, and military opposition to the DUKW melted. The DUKW later proved its seaworthiness by crossing the English Channel.
After riding this thing in Dublin and seeing how well it can run on water I can easily believe this story.
Model quality
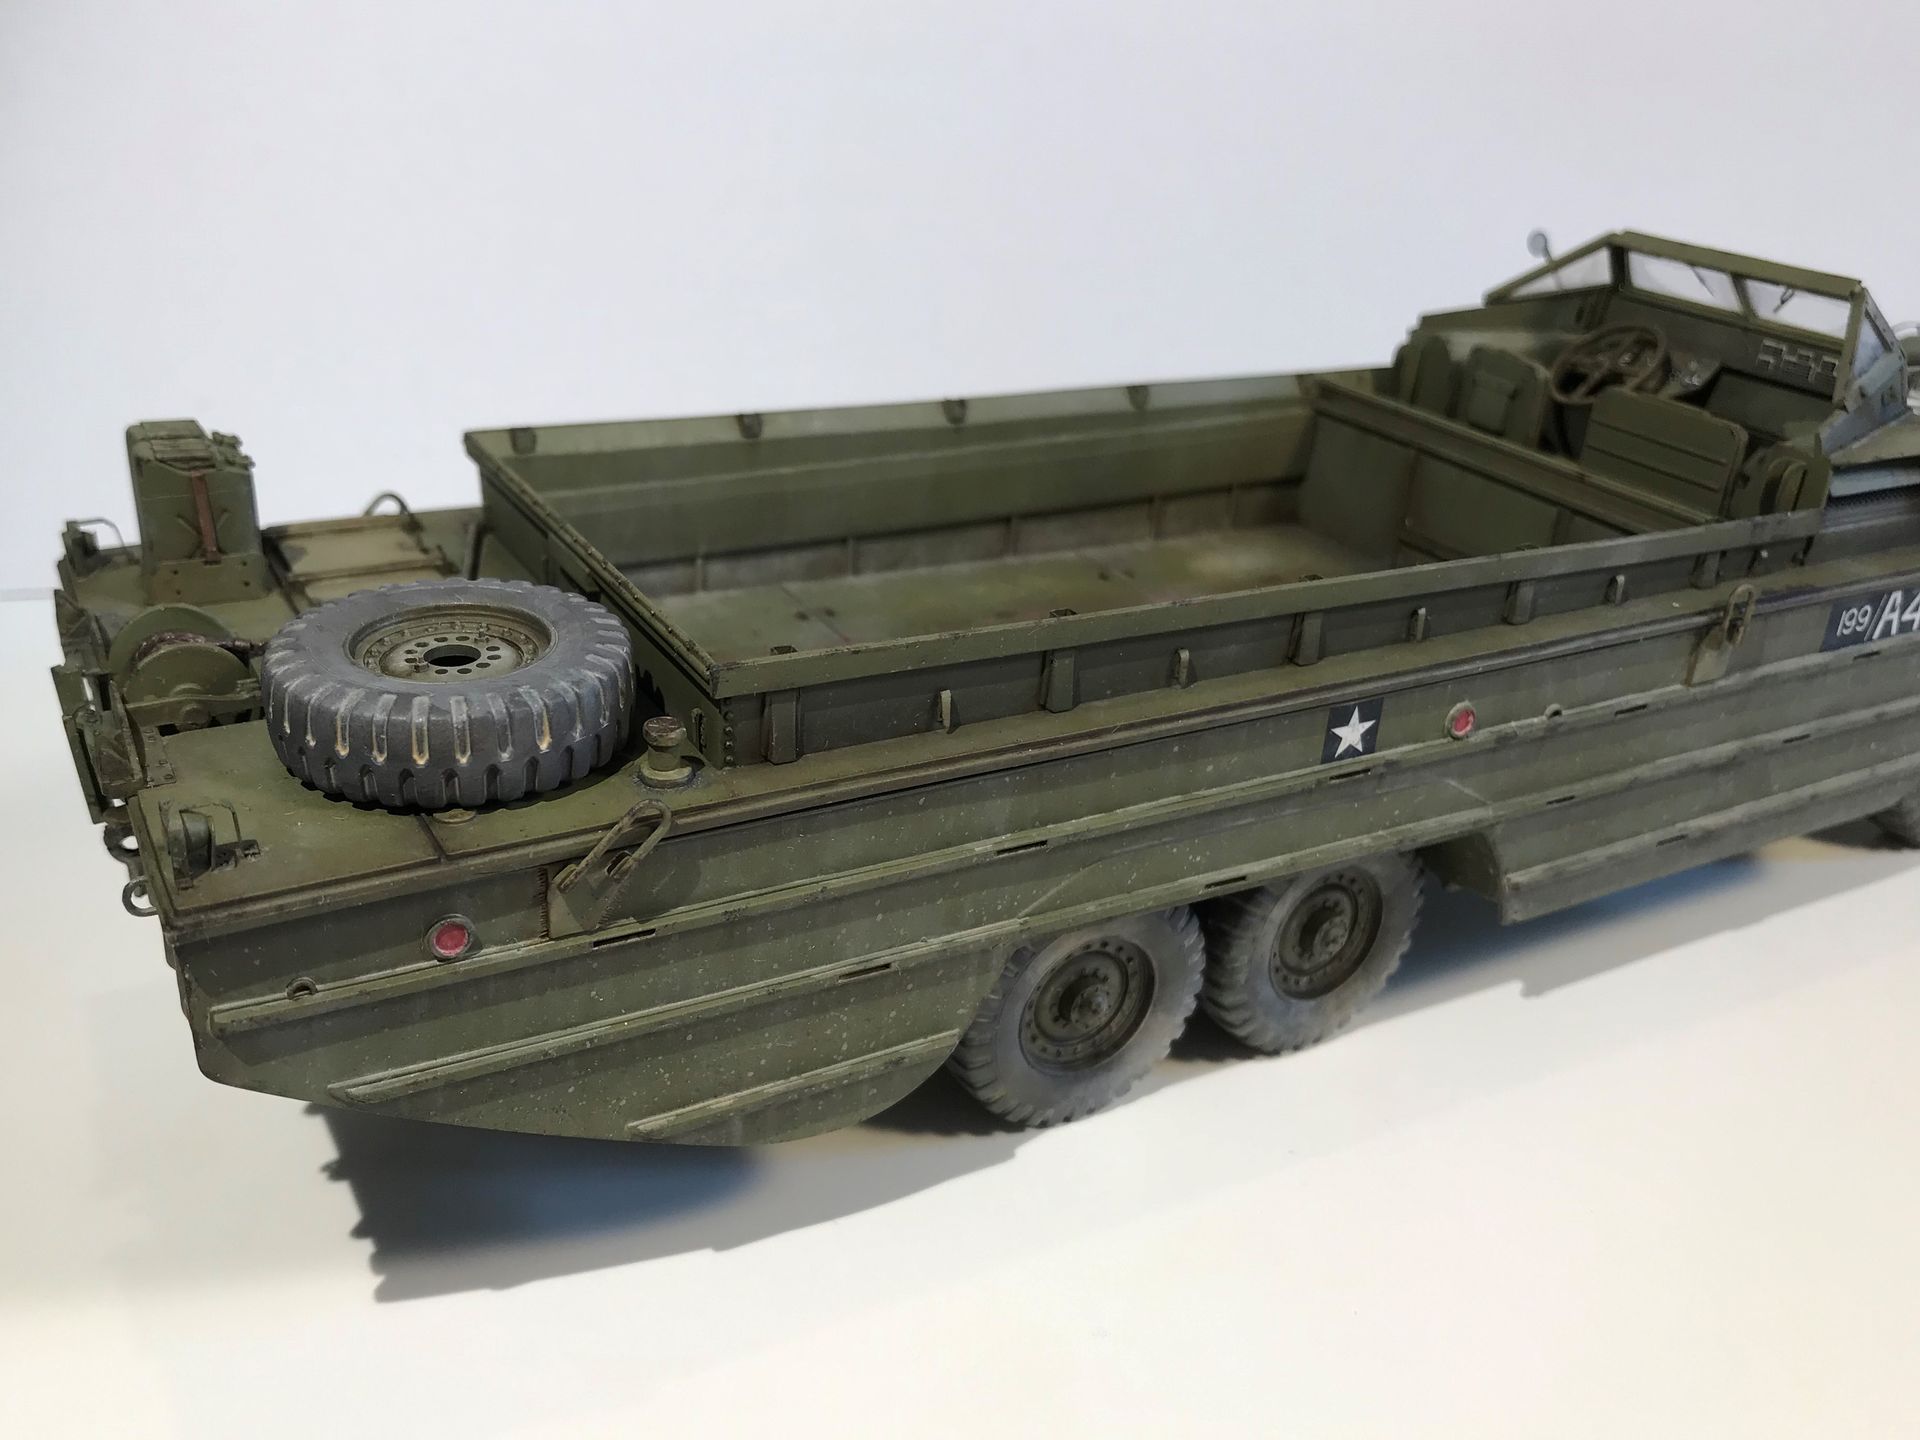
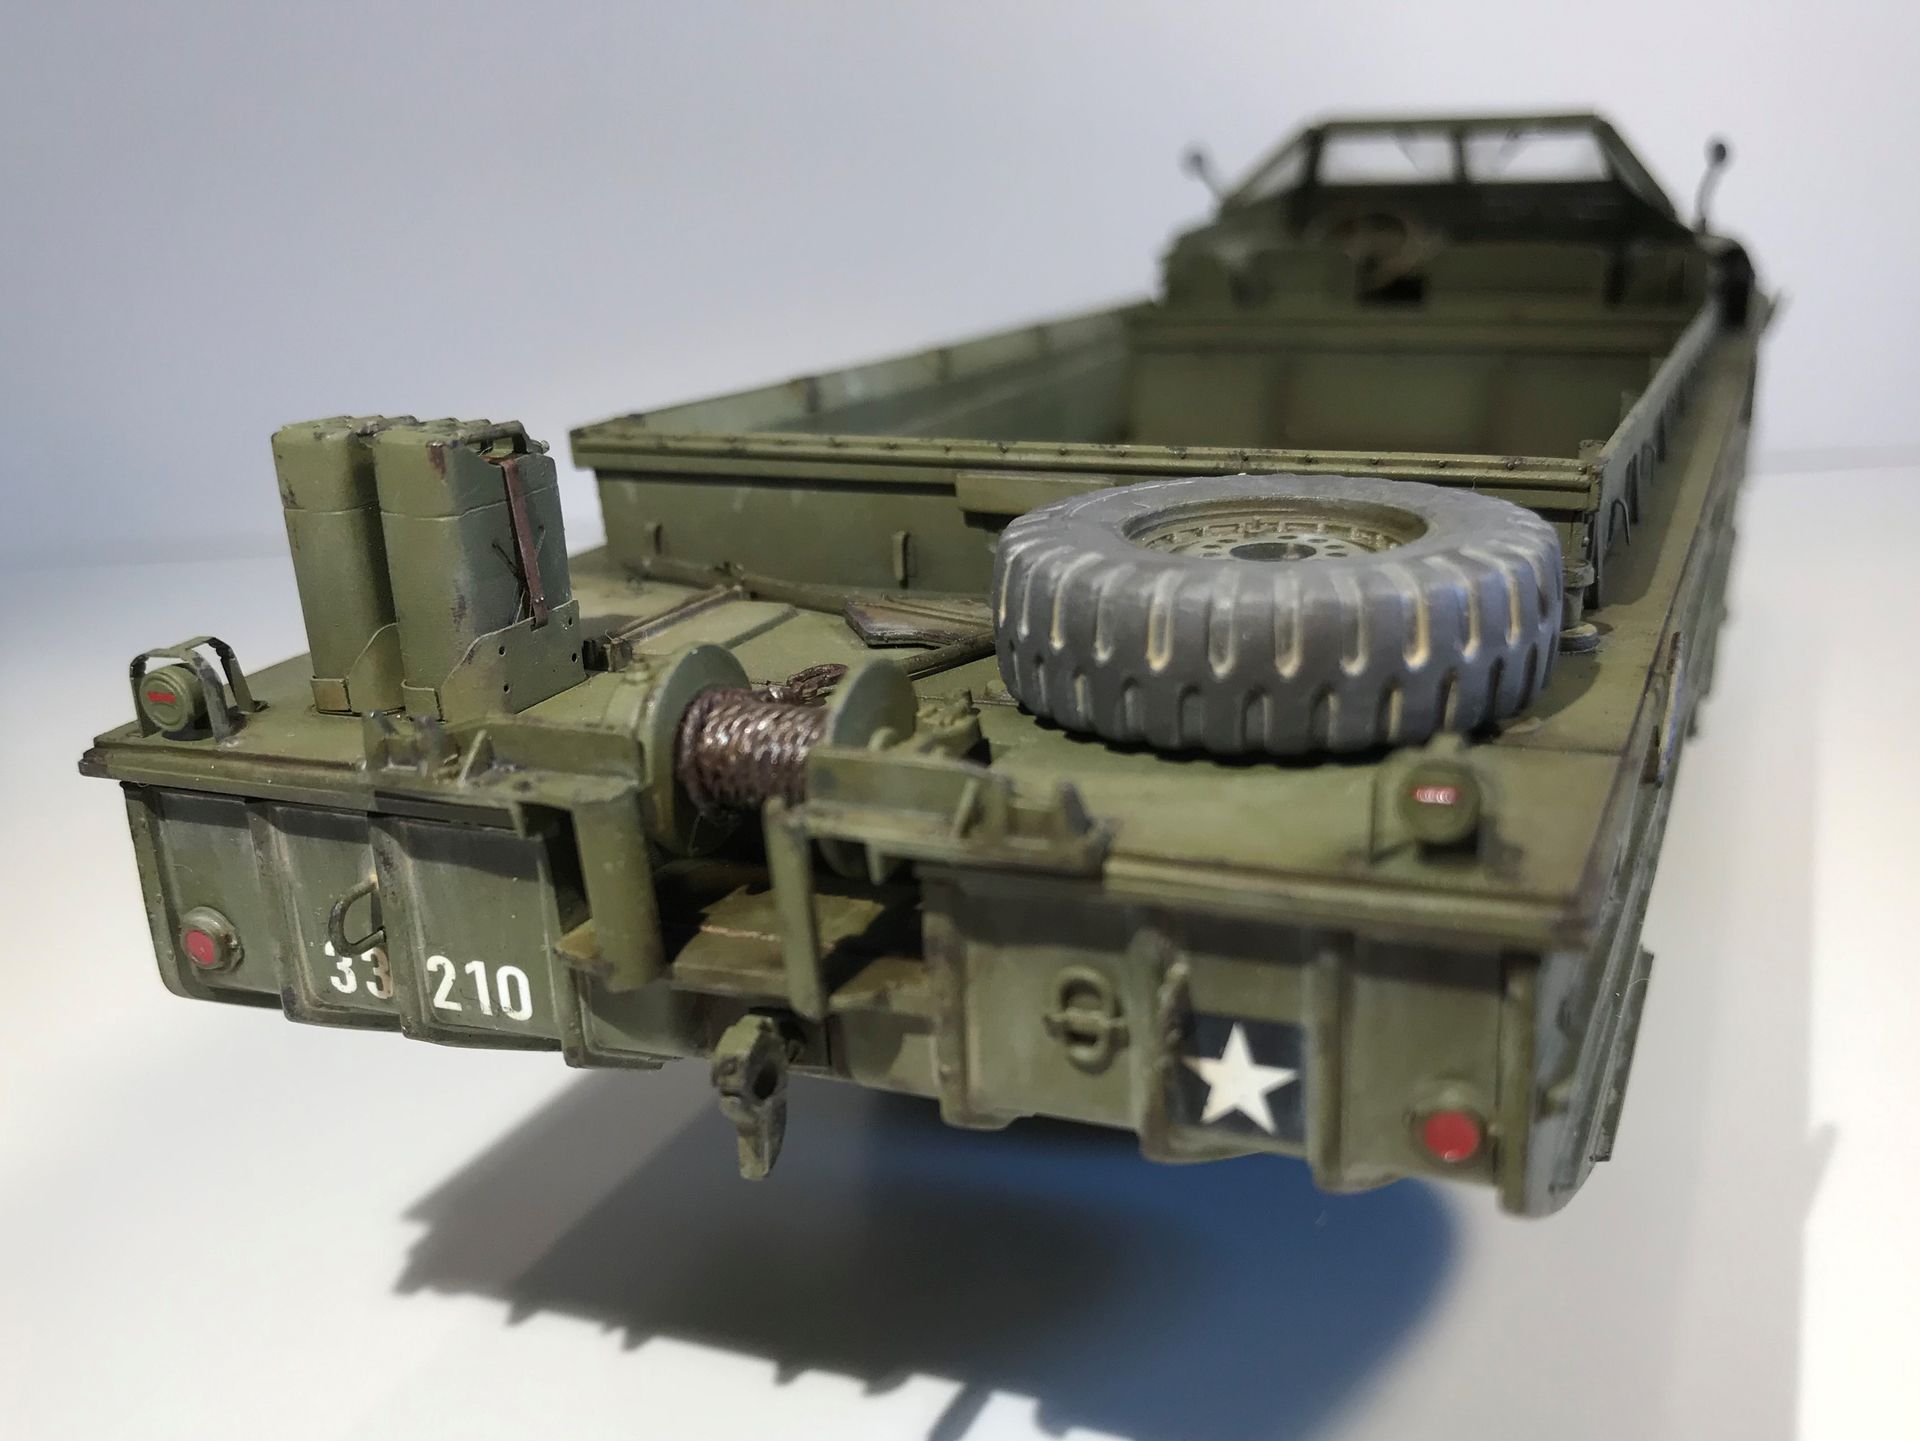
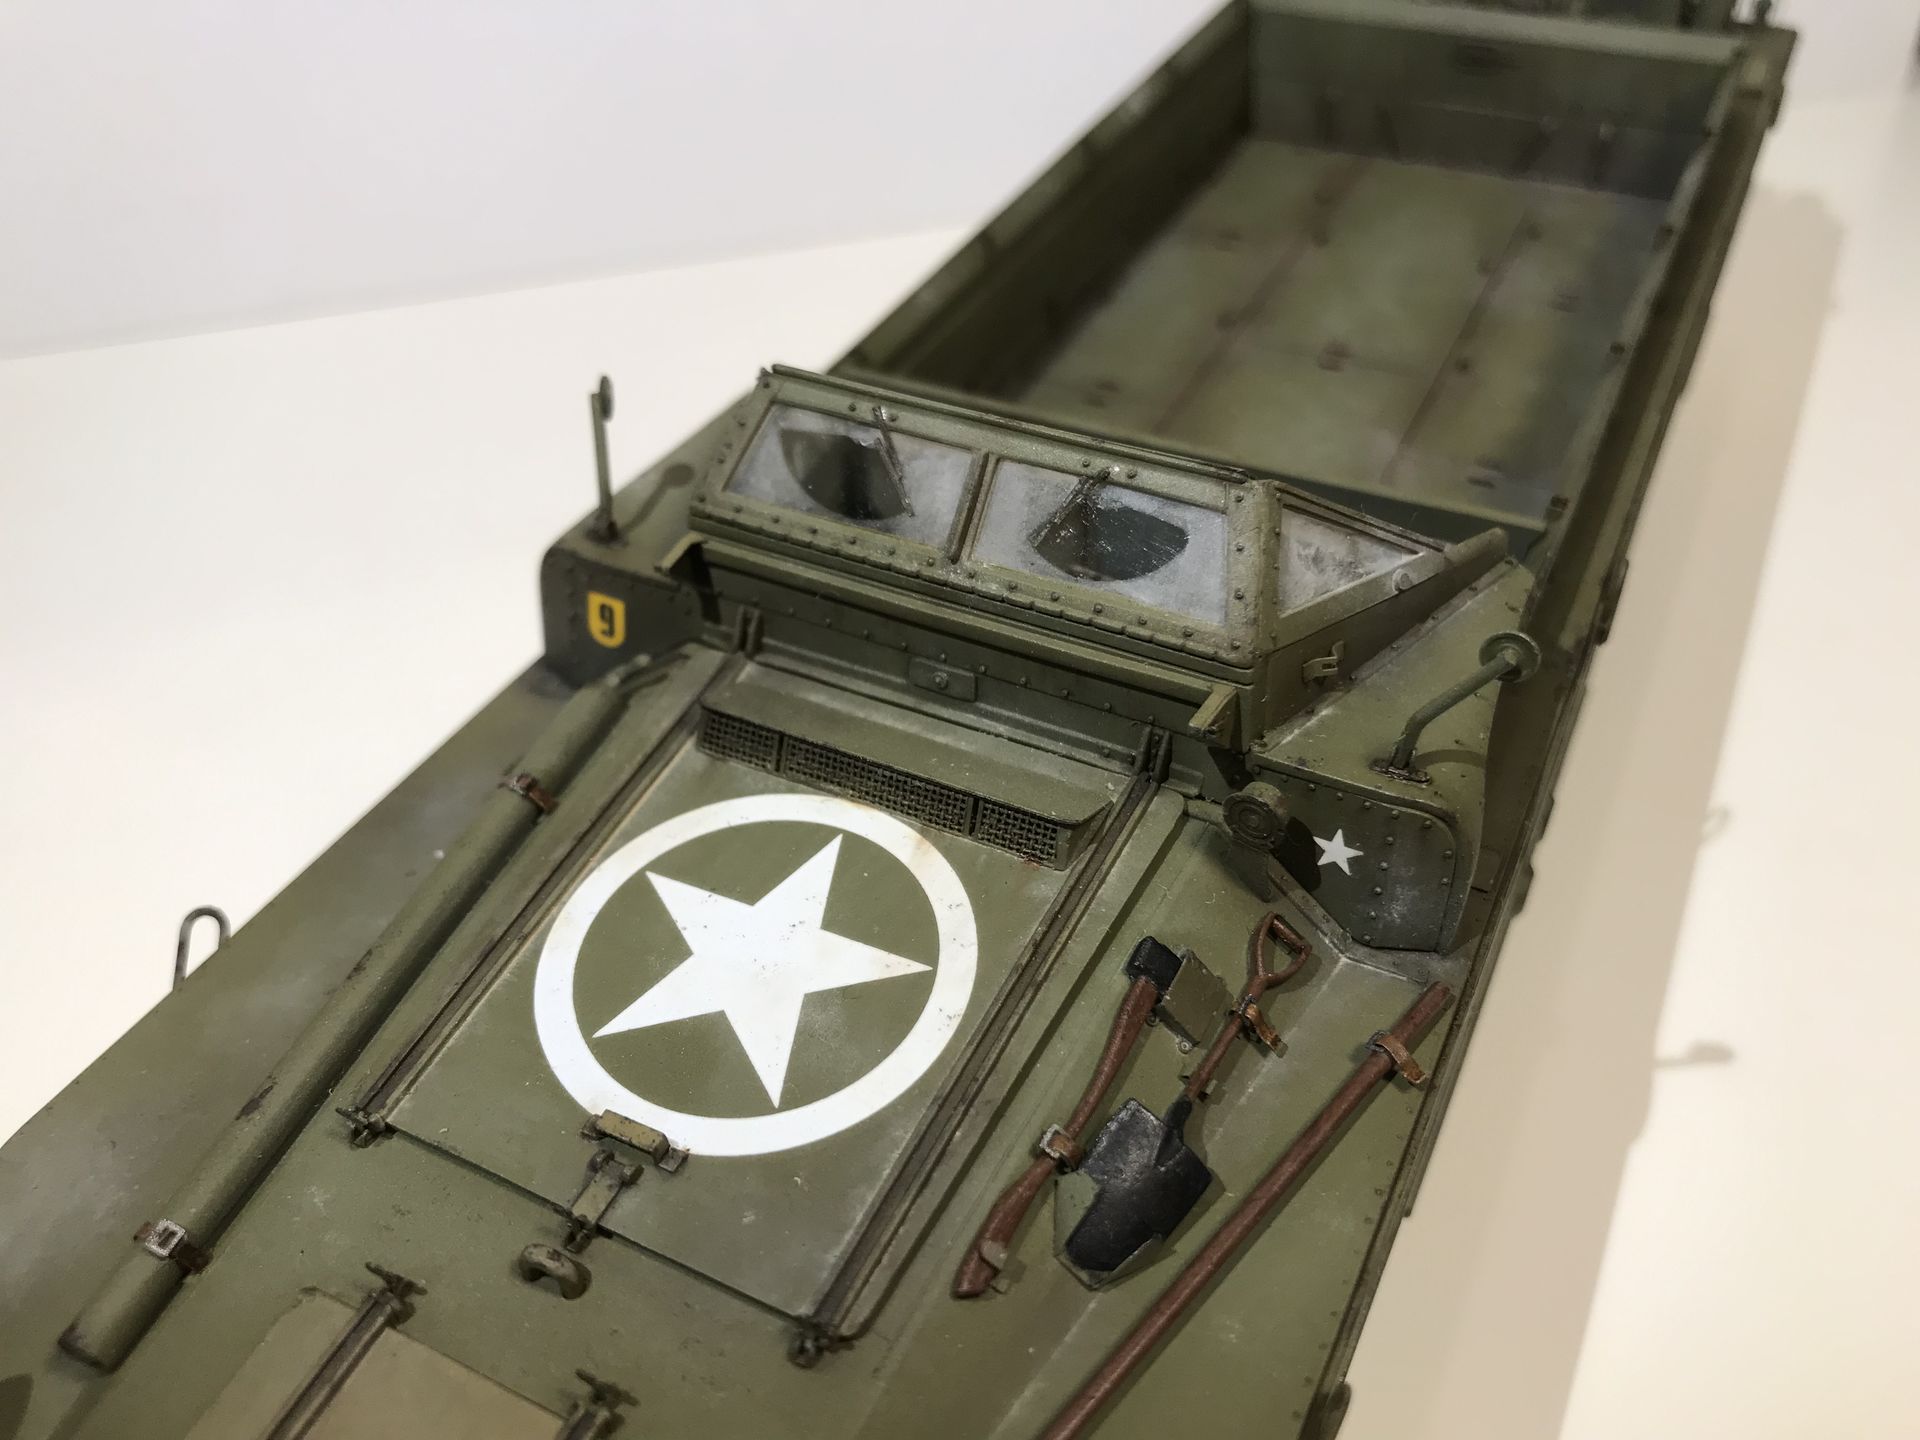
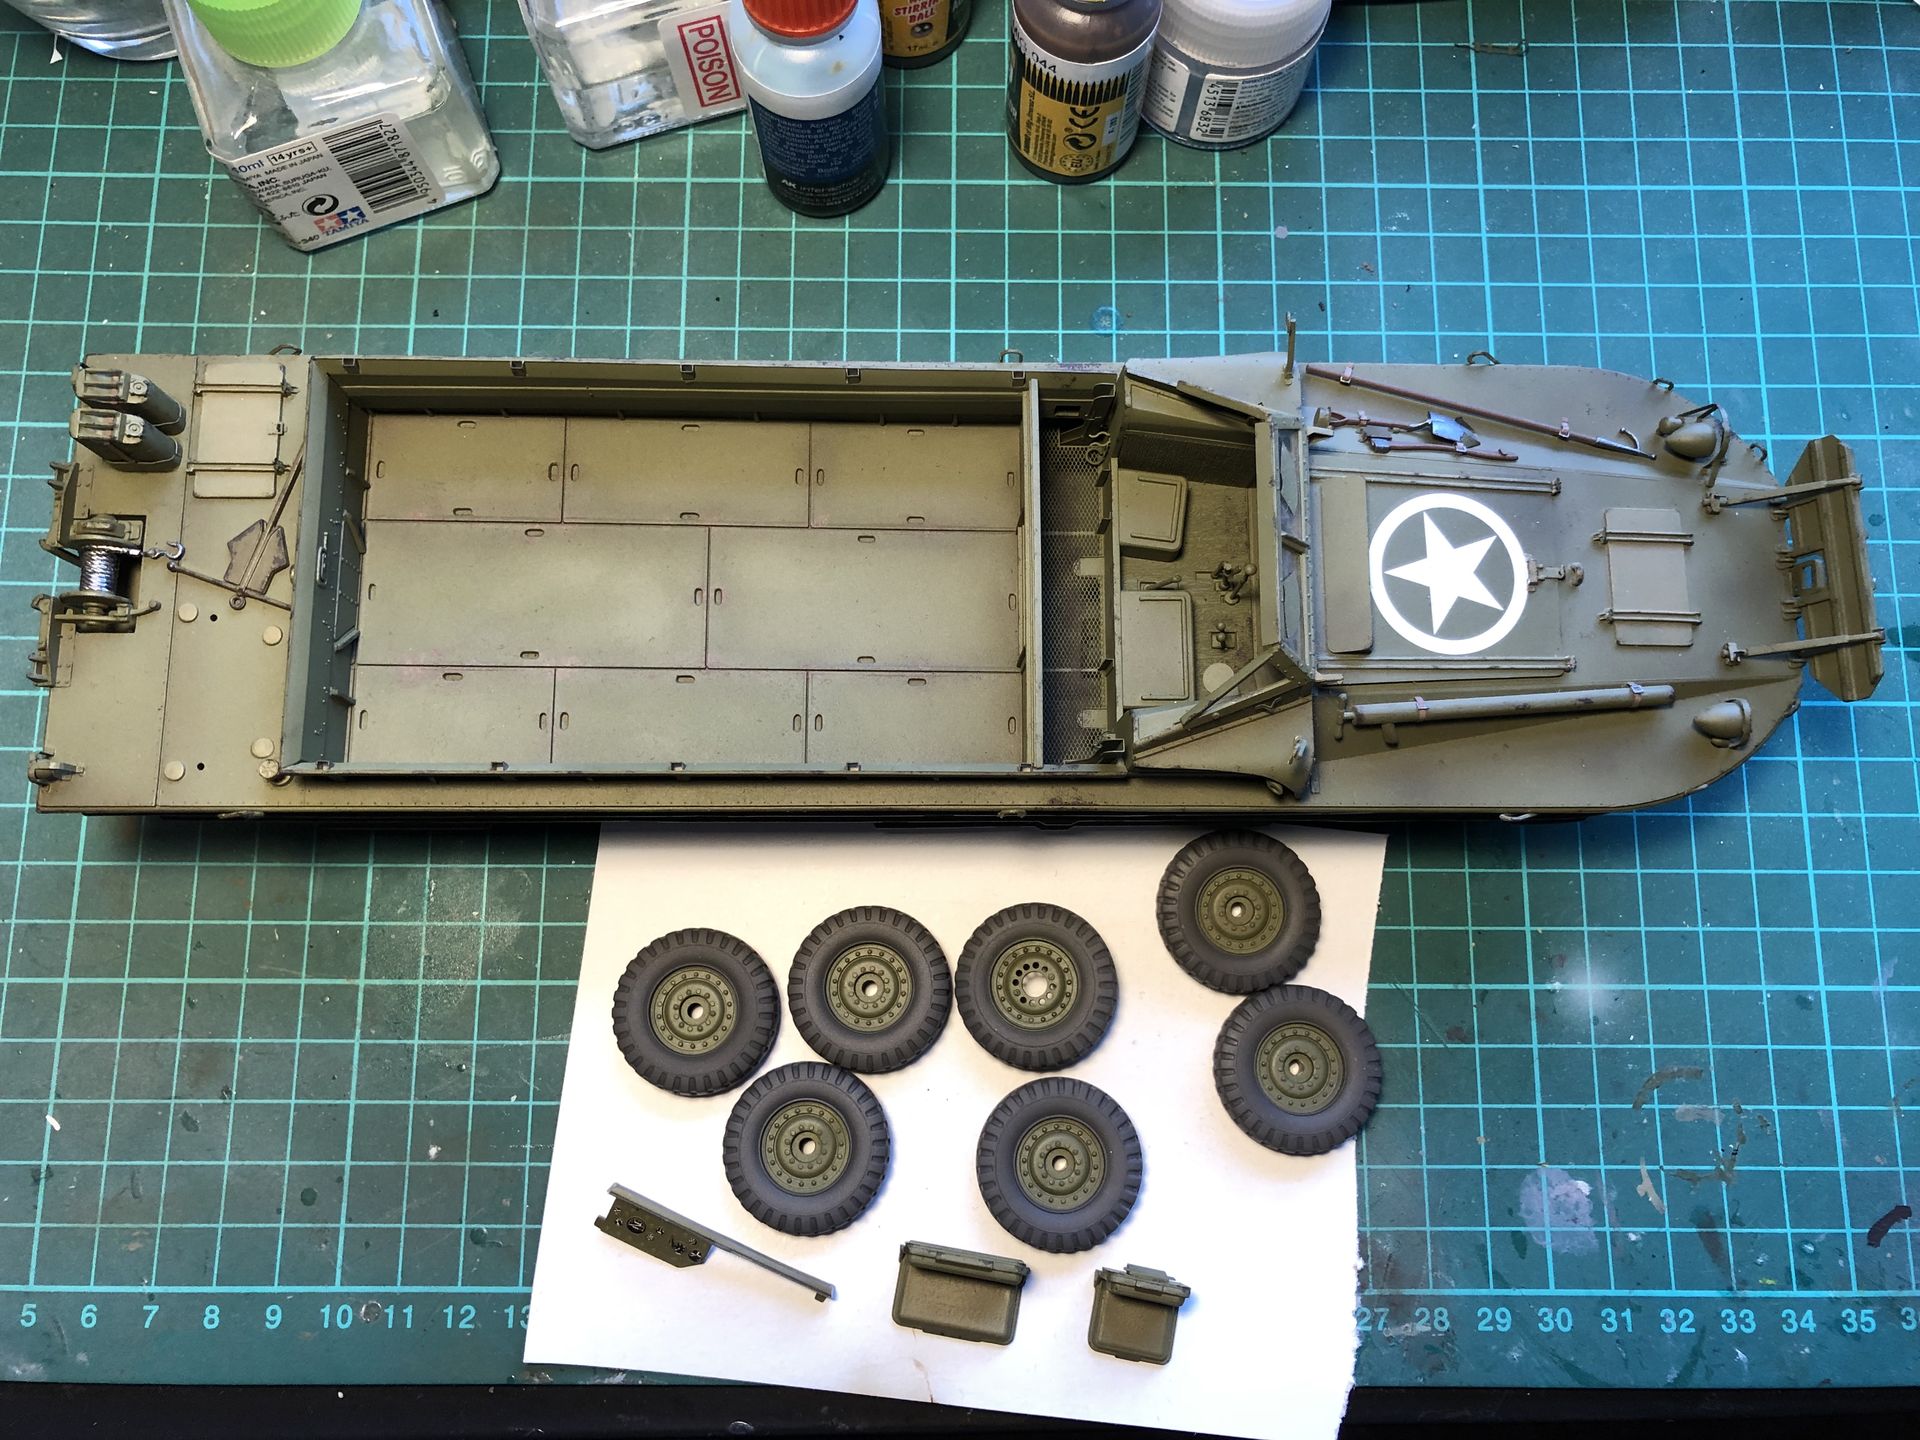
Nothing really special, decent quality overall. No flash whatsoever, but occasional mould shifts make cleanup not so pleasant. PhotoEtch kit by Eduard is remarkably good though.
Build notes
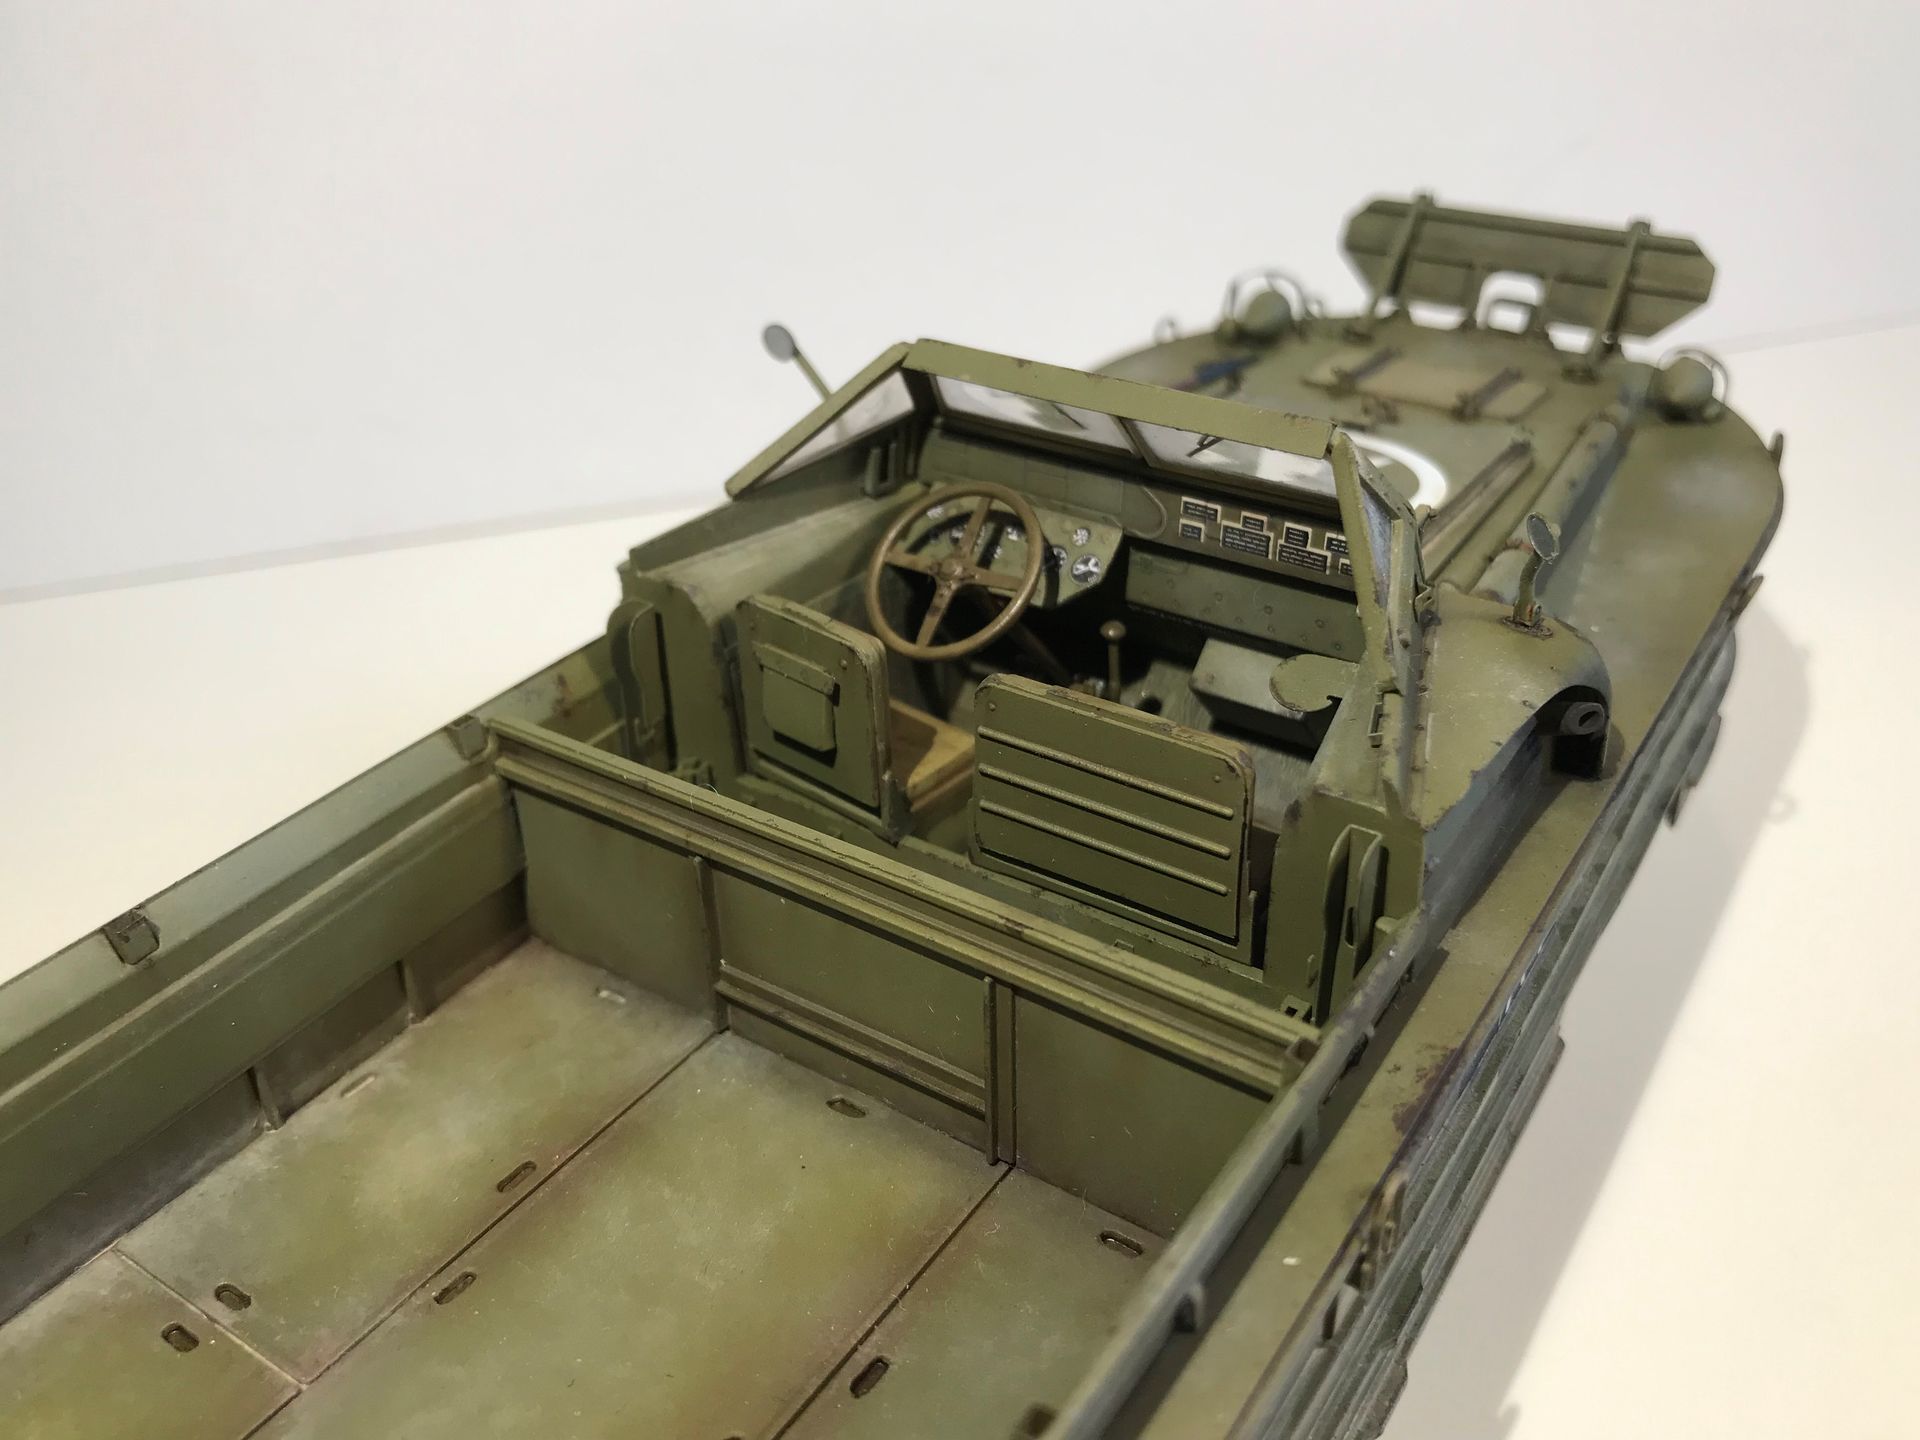
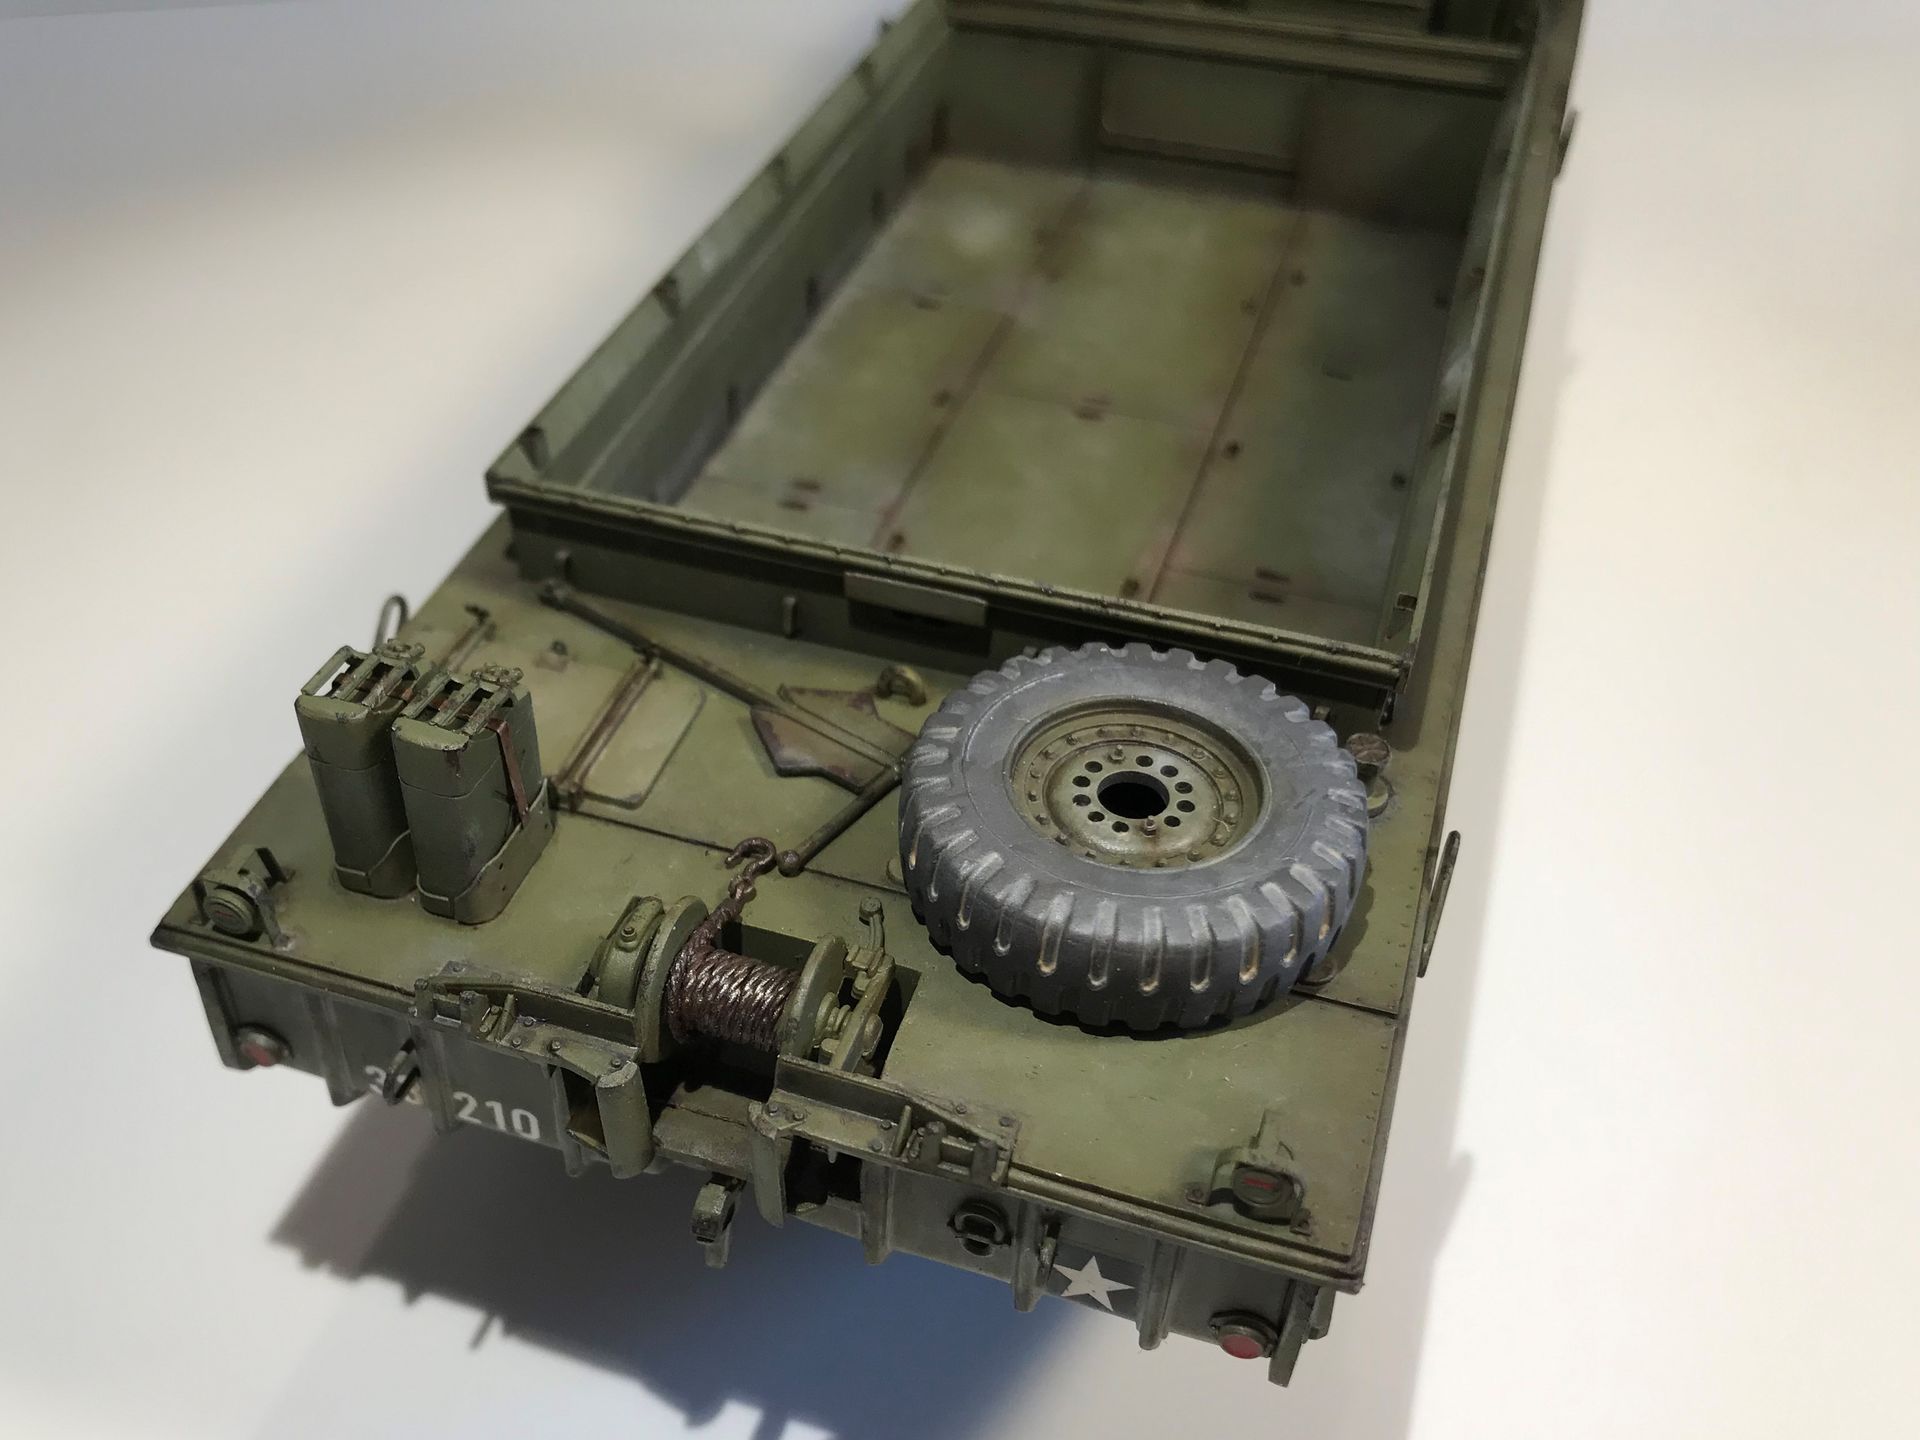
Built cabin floor, looks fantastic with PE.
Spent about a month building whole thing with gazillion of PE details, and ended up so tired of this model that I simply stashed it in a ‘ready for primer’ state for next 9 month.
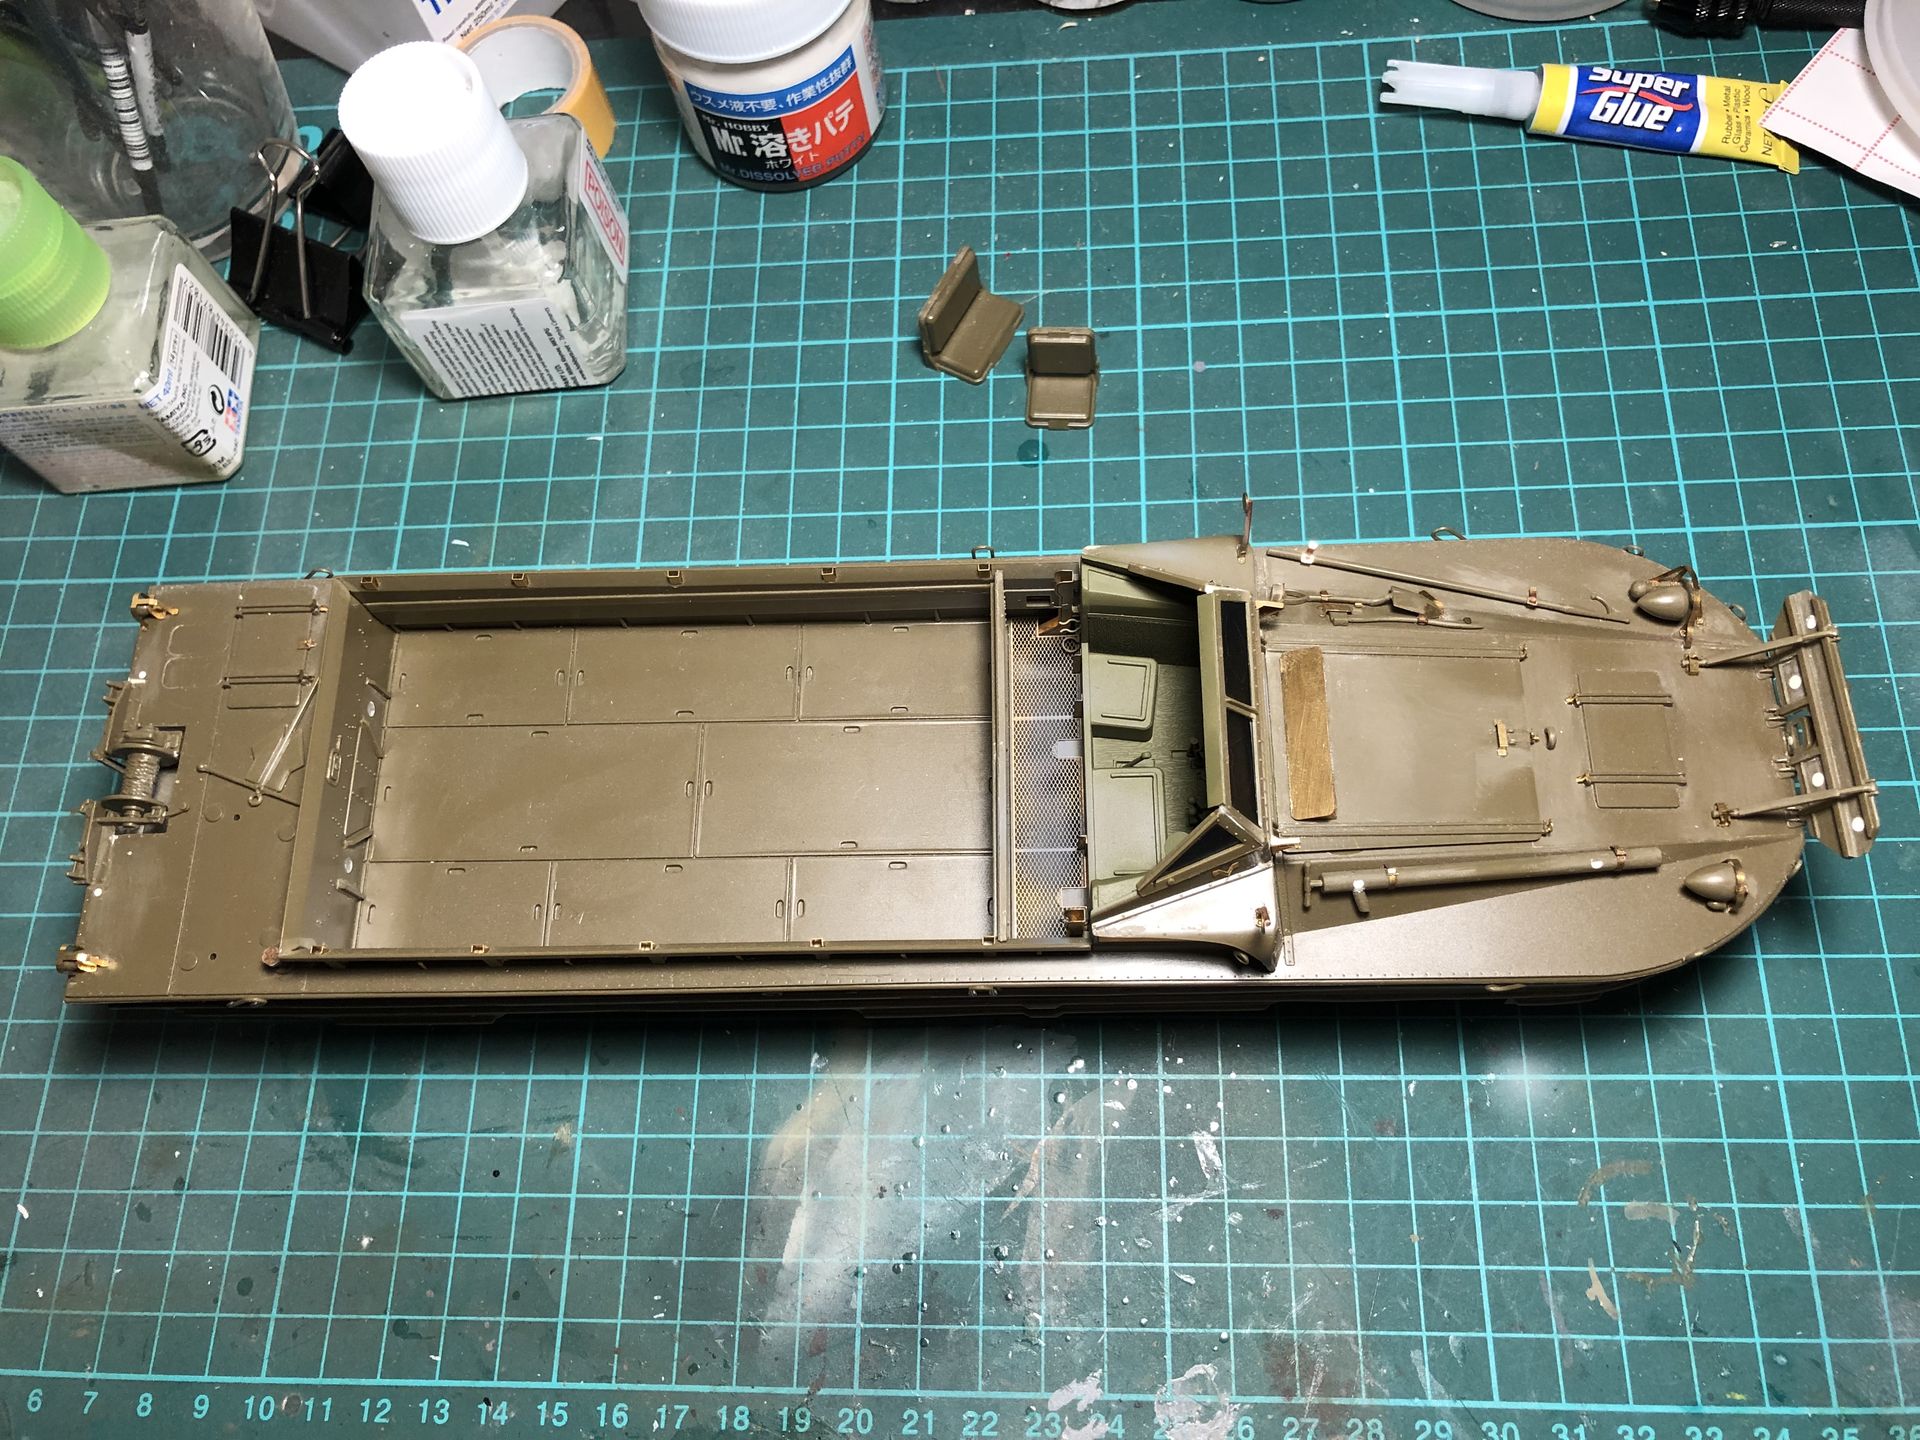
While it was stashed I always worried that those delicate PE parts will fall off and become lost forever, but the sheer size of the model intimidated me enough to leave it stashed.
However after I switched from Tamiya rattlecan primer to OneShot primer from AMMO MIG that you can simply airbrush I felt confident enough to continue with mighty DUKW.
So in December I dug it from the stash pile, fixed back some PE parts that came off loose, masked windows with masks provided by Eduard in a PE set, and finally primed it.
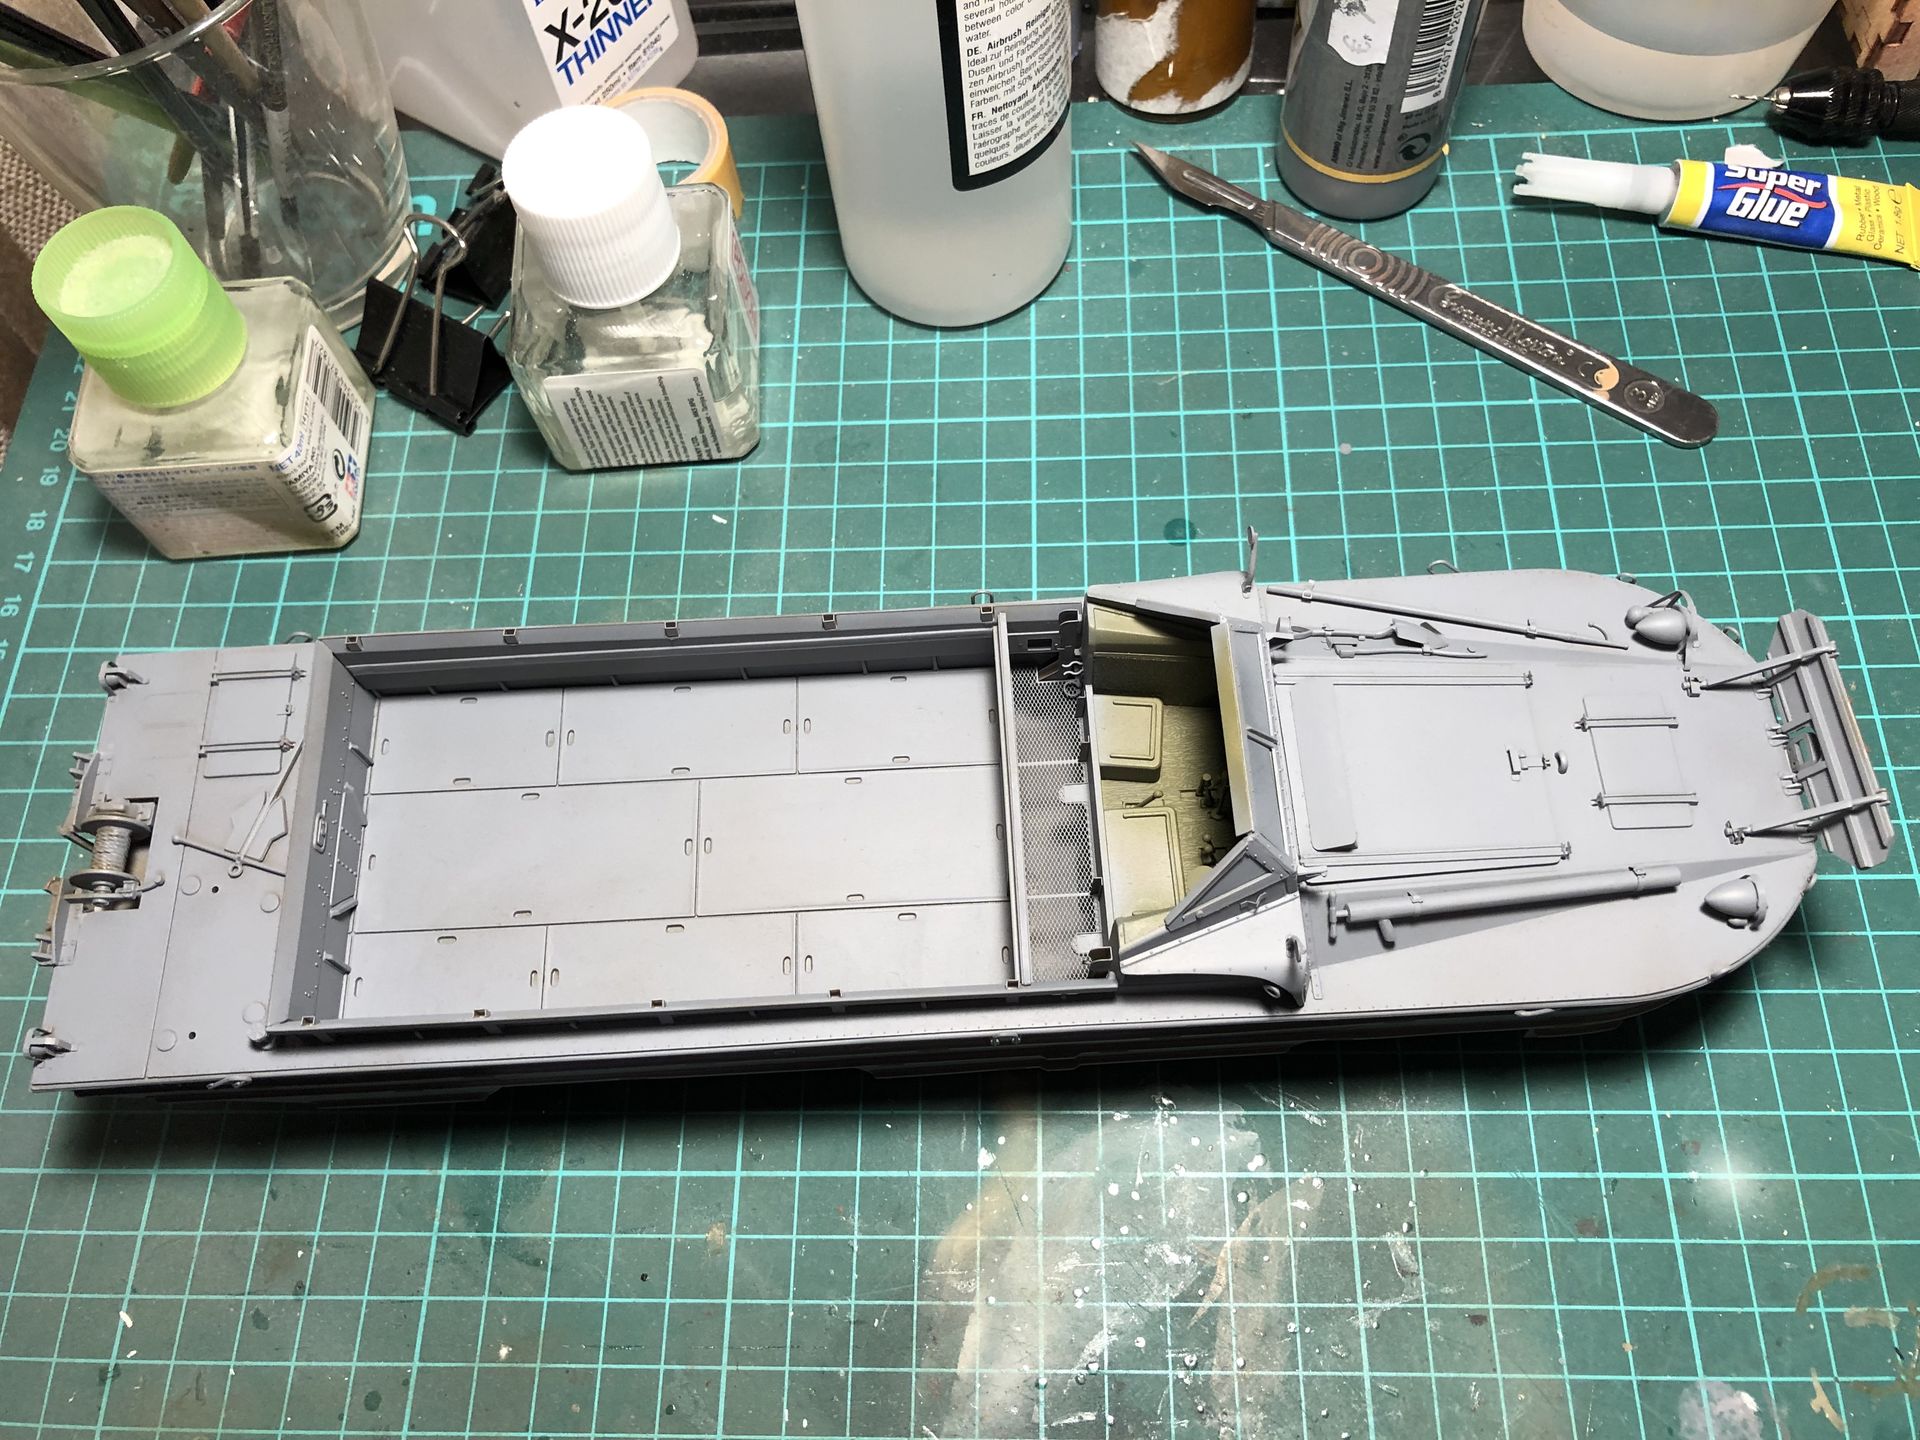
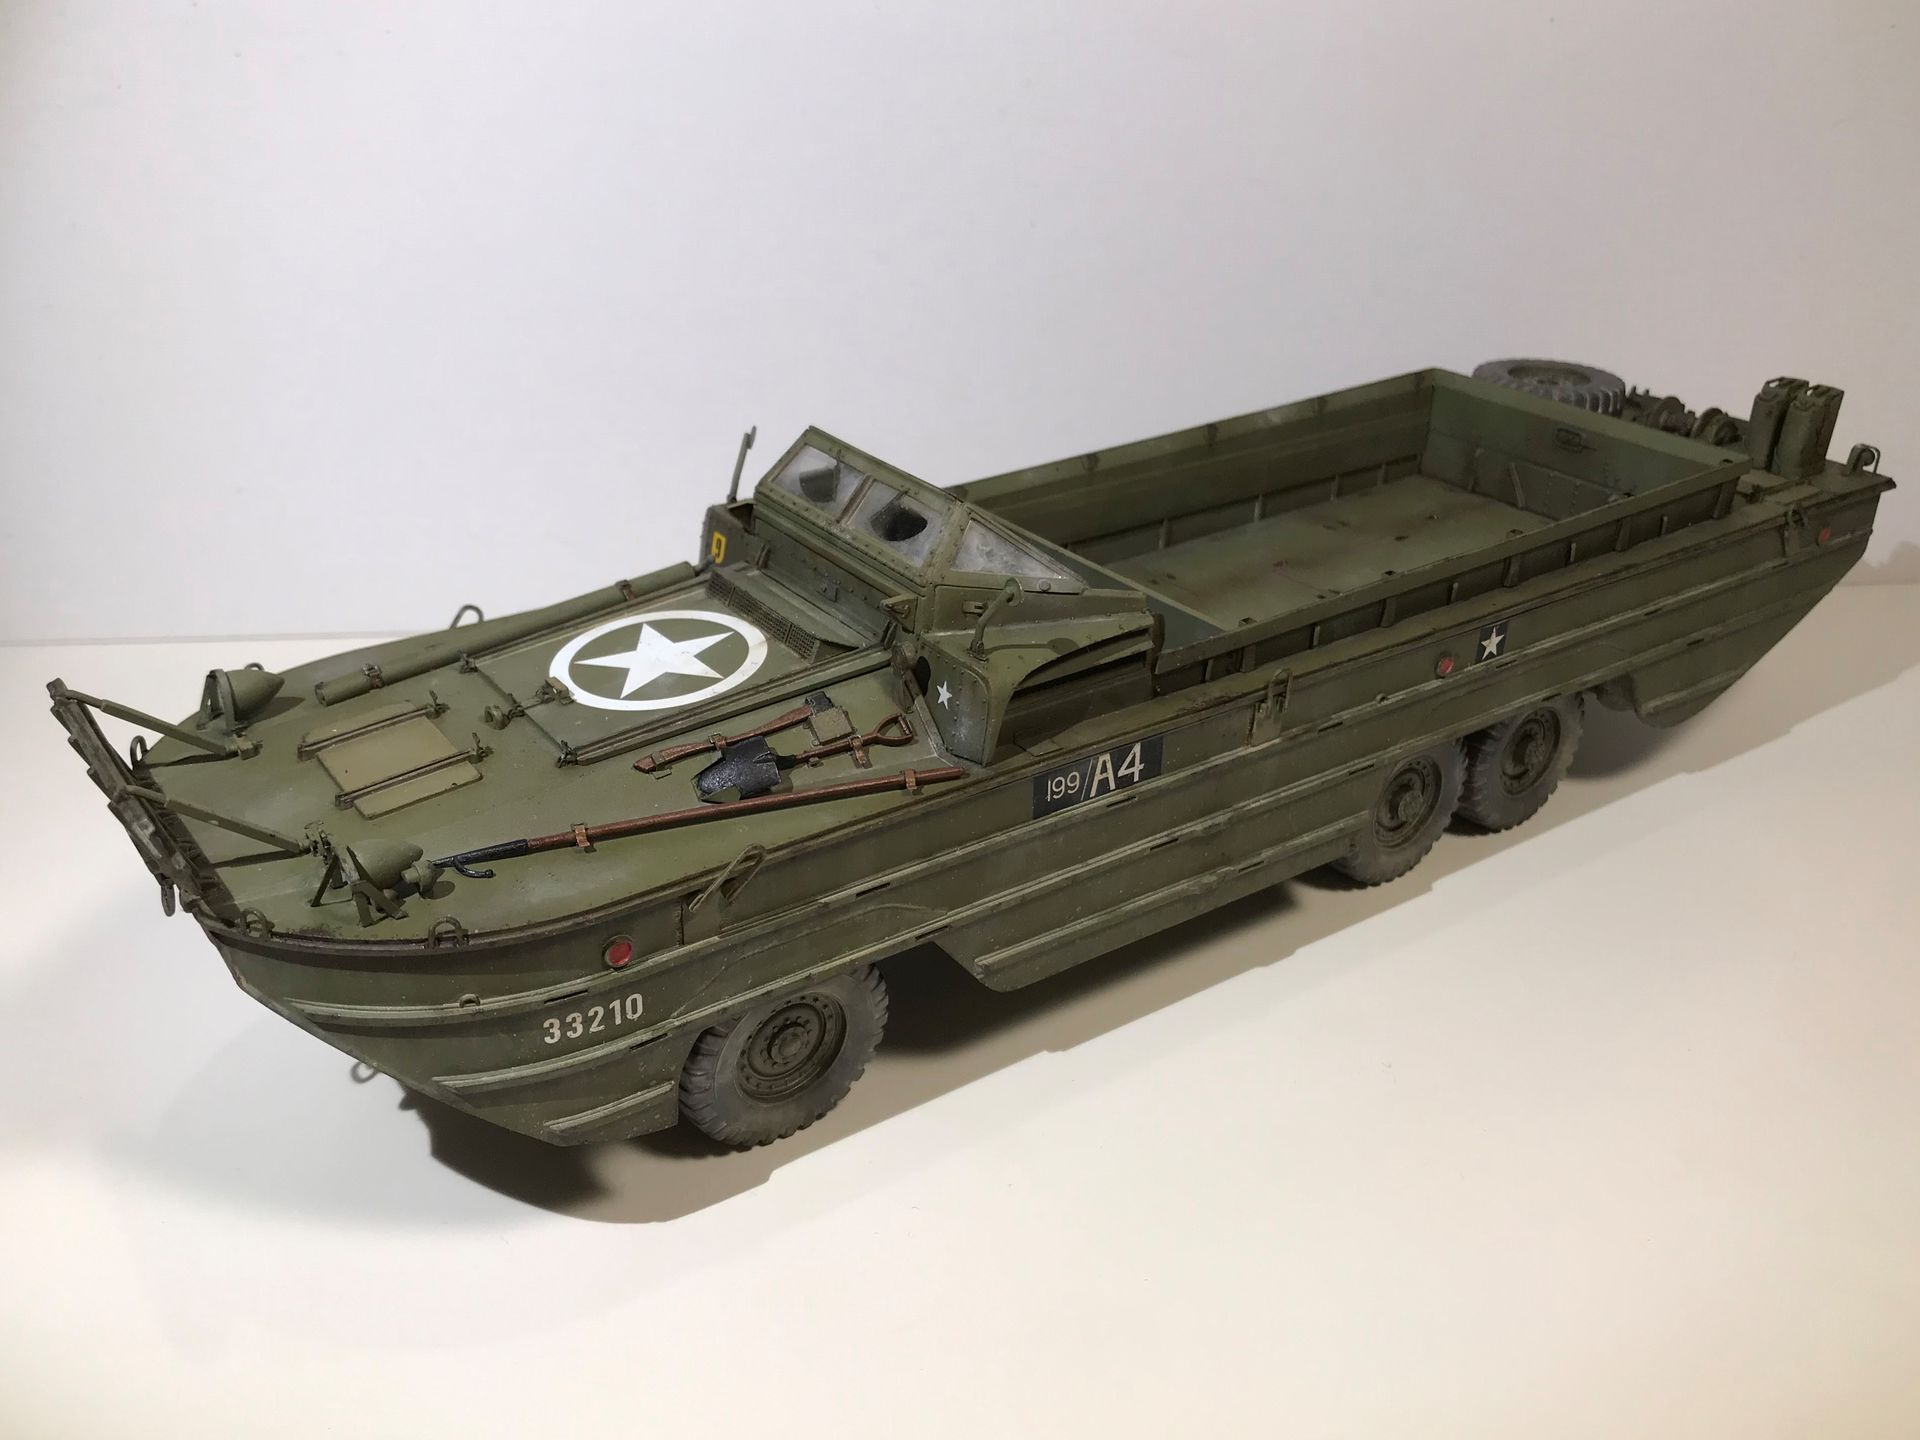
Looking how good this monster looks primed was a huge relief, and following paintwork came naturally.
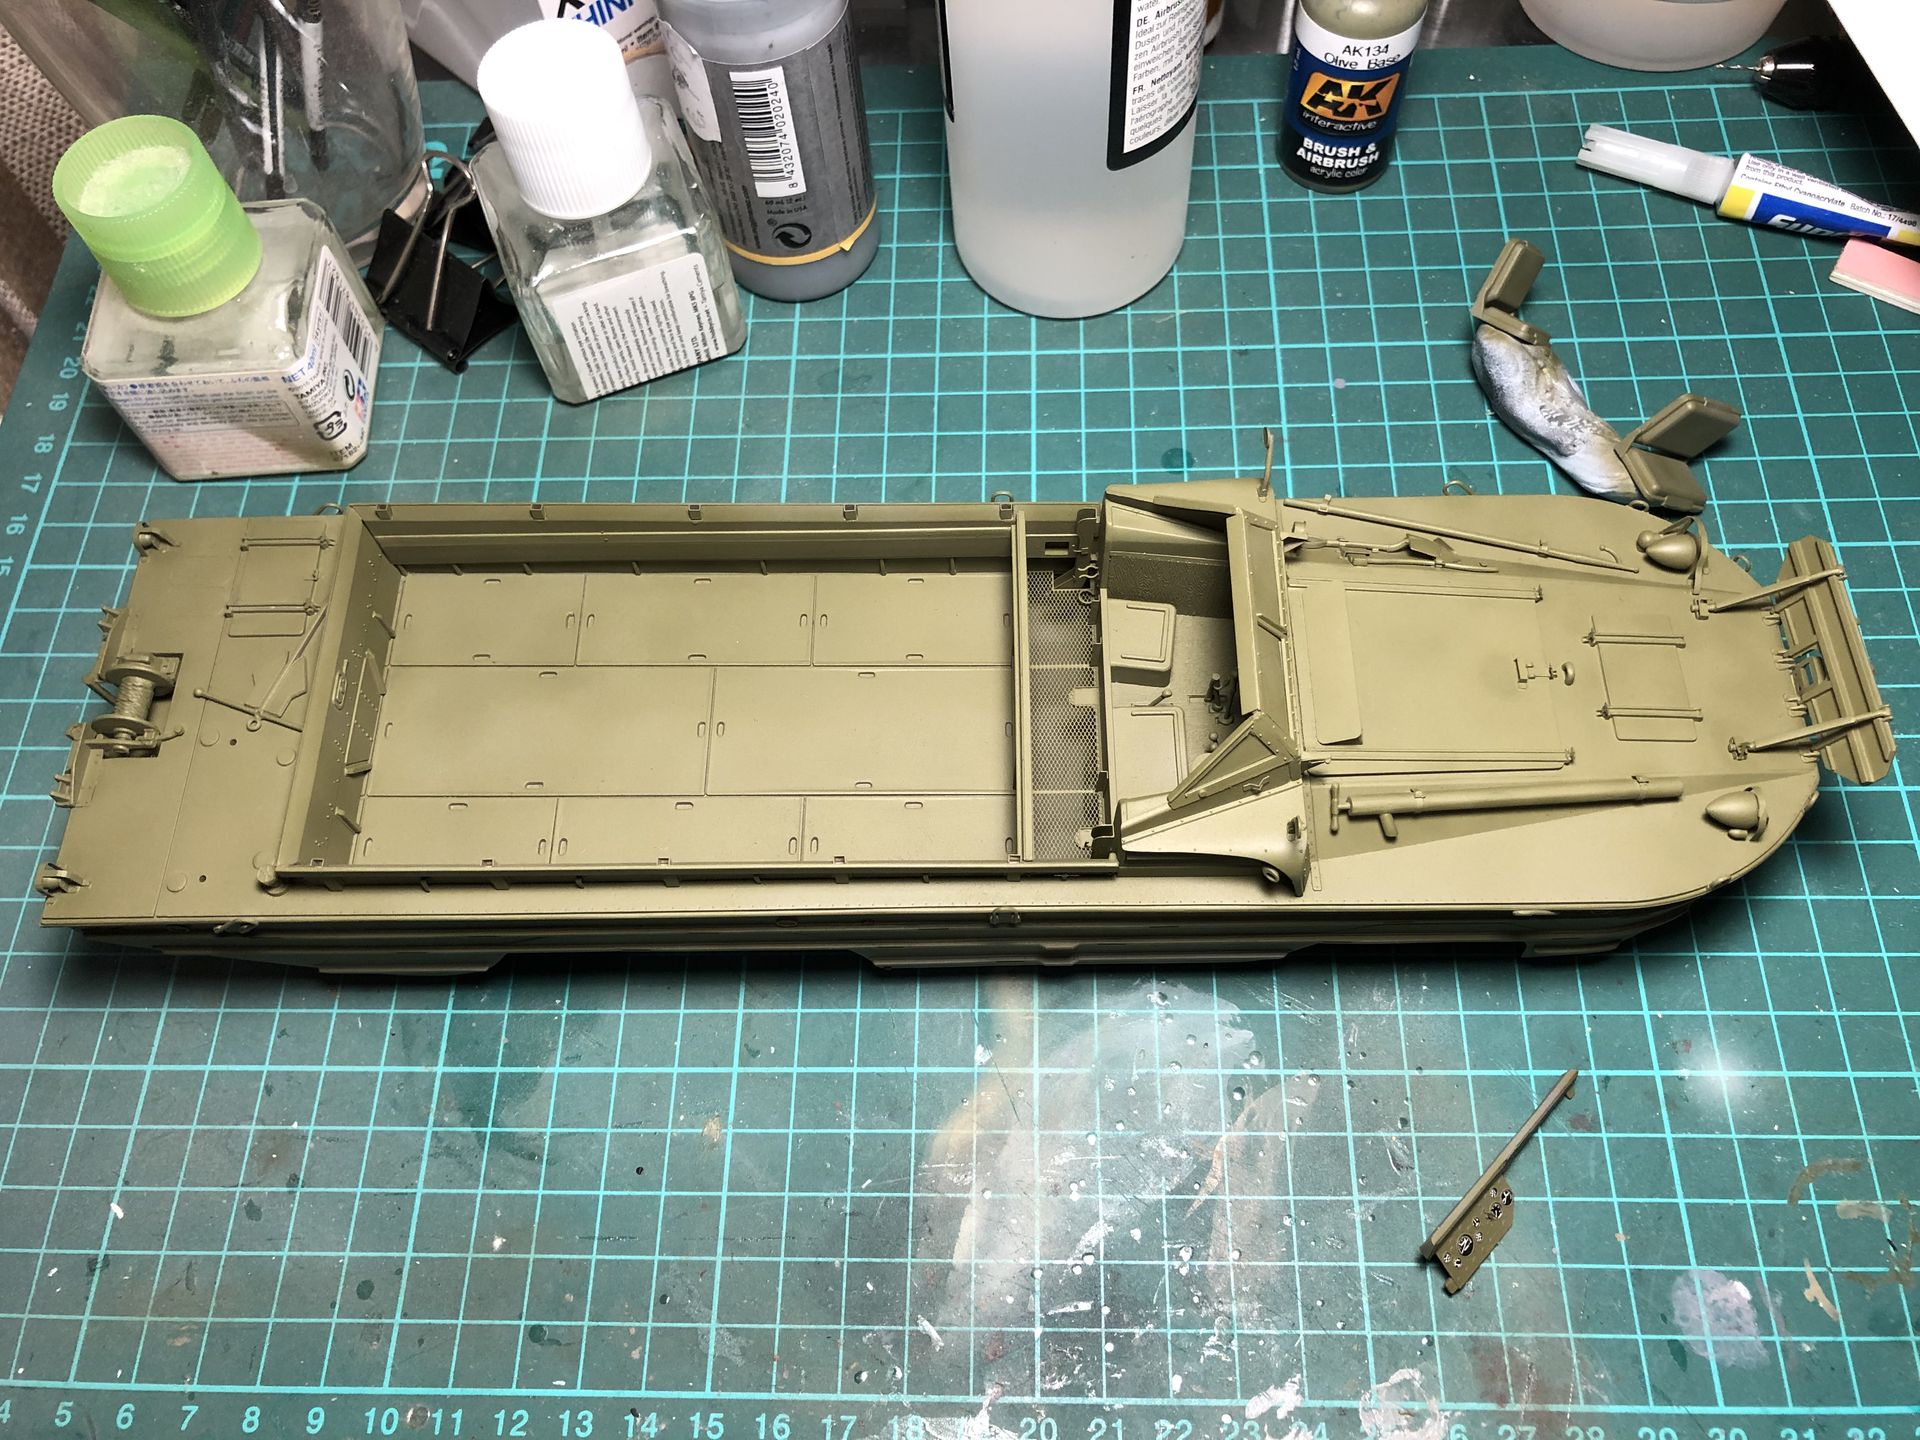
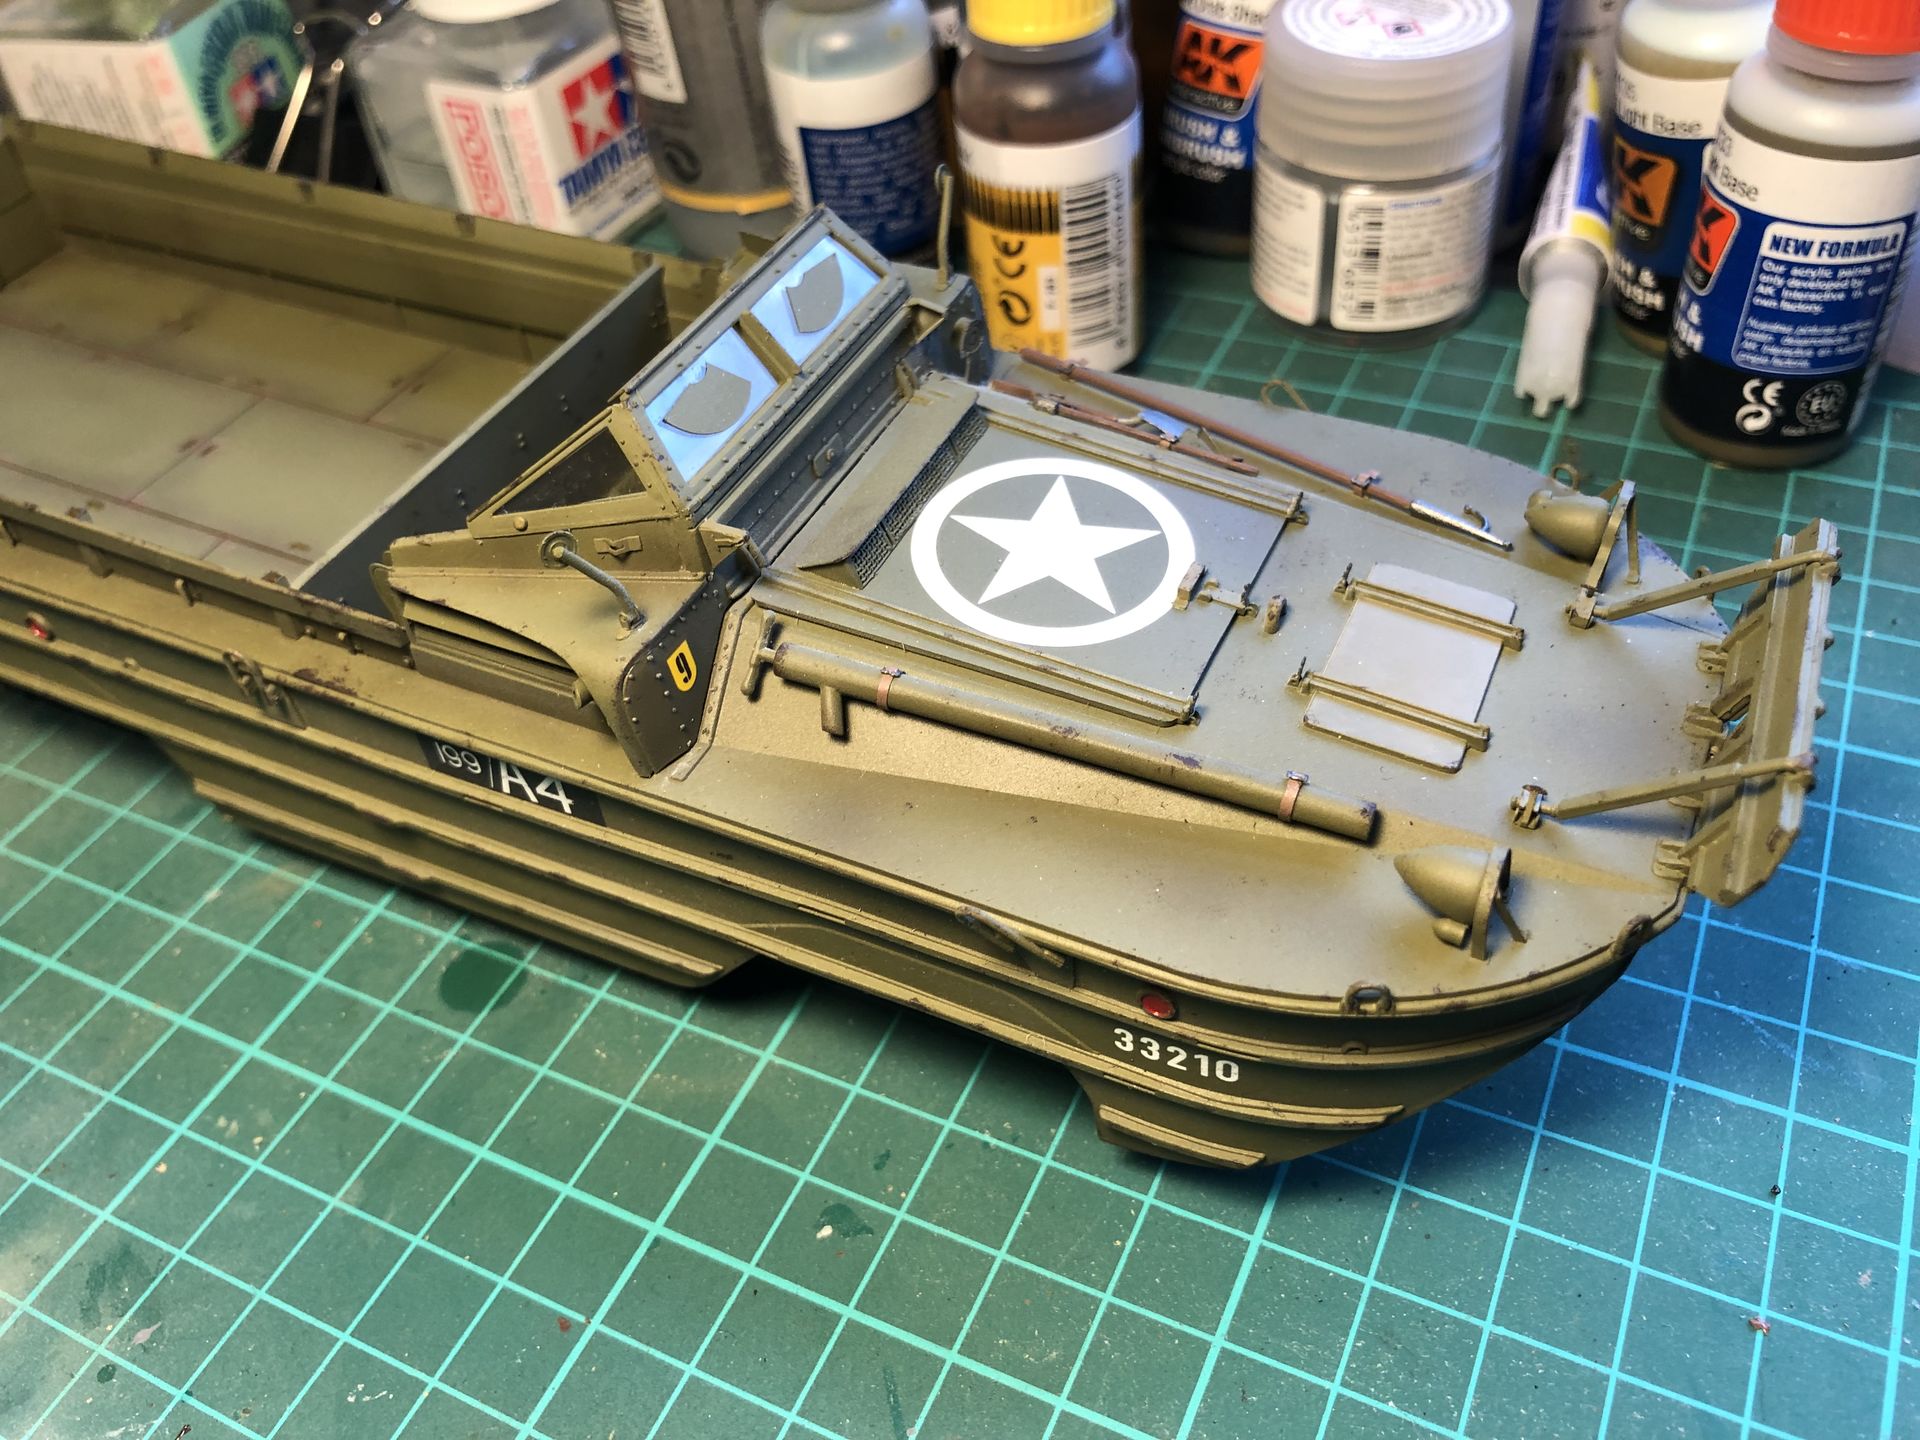
I used brilliant US Olive Drab colour modulation set from AK Interactive, spraying straight from the bottle.
It was my first time using colour modulation technique I read about in fantastic Adam’s Armour book, and I’m really happy with the results.
Then I sprayed Tamiya Semi Gloss Clear in the places I needed to apply decals, and used Humbrol DecalFix to set them. Afterward I made the surface flat again with Tamiya Flat Clear.
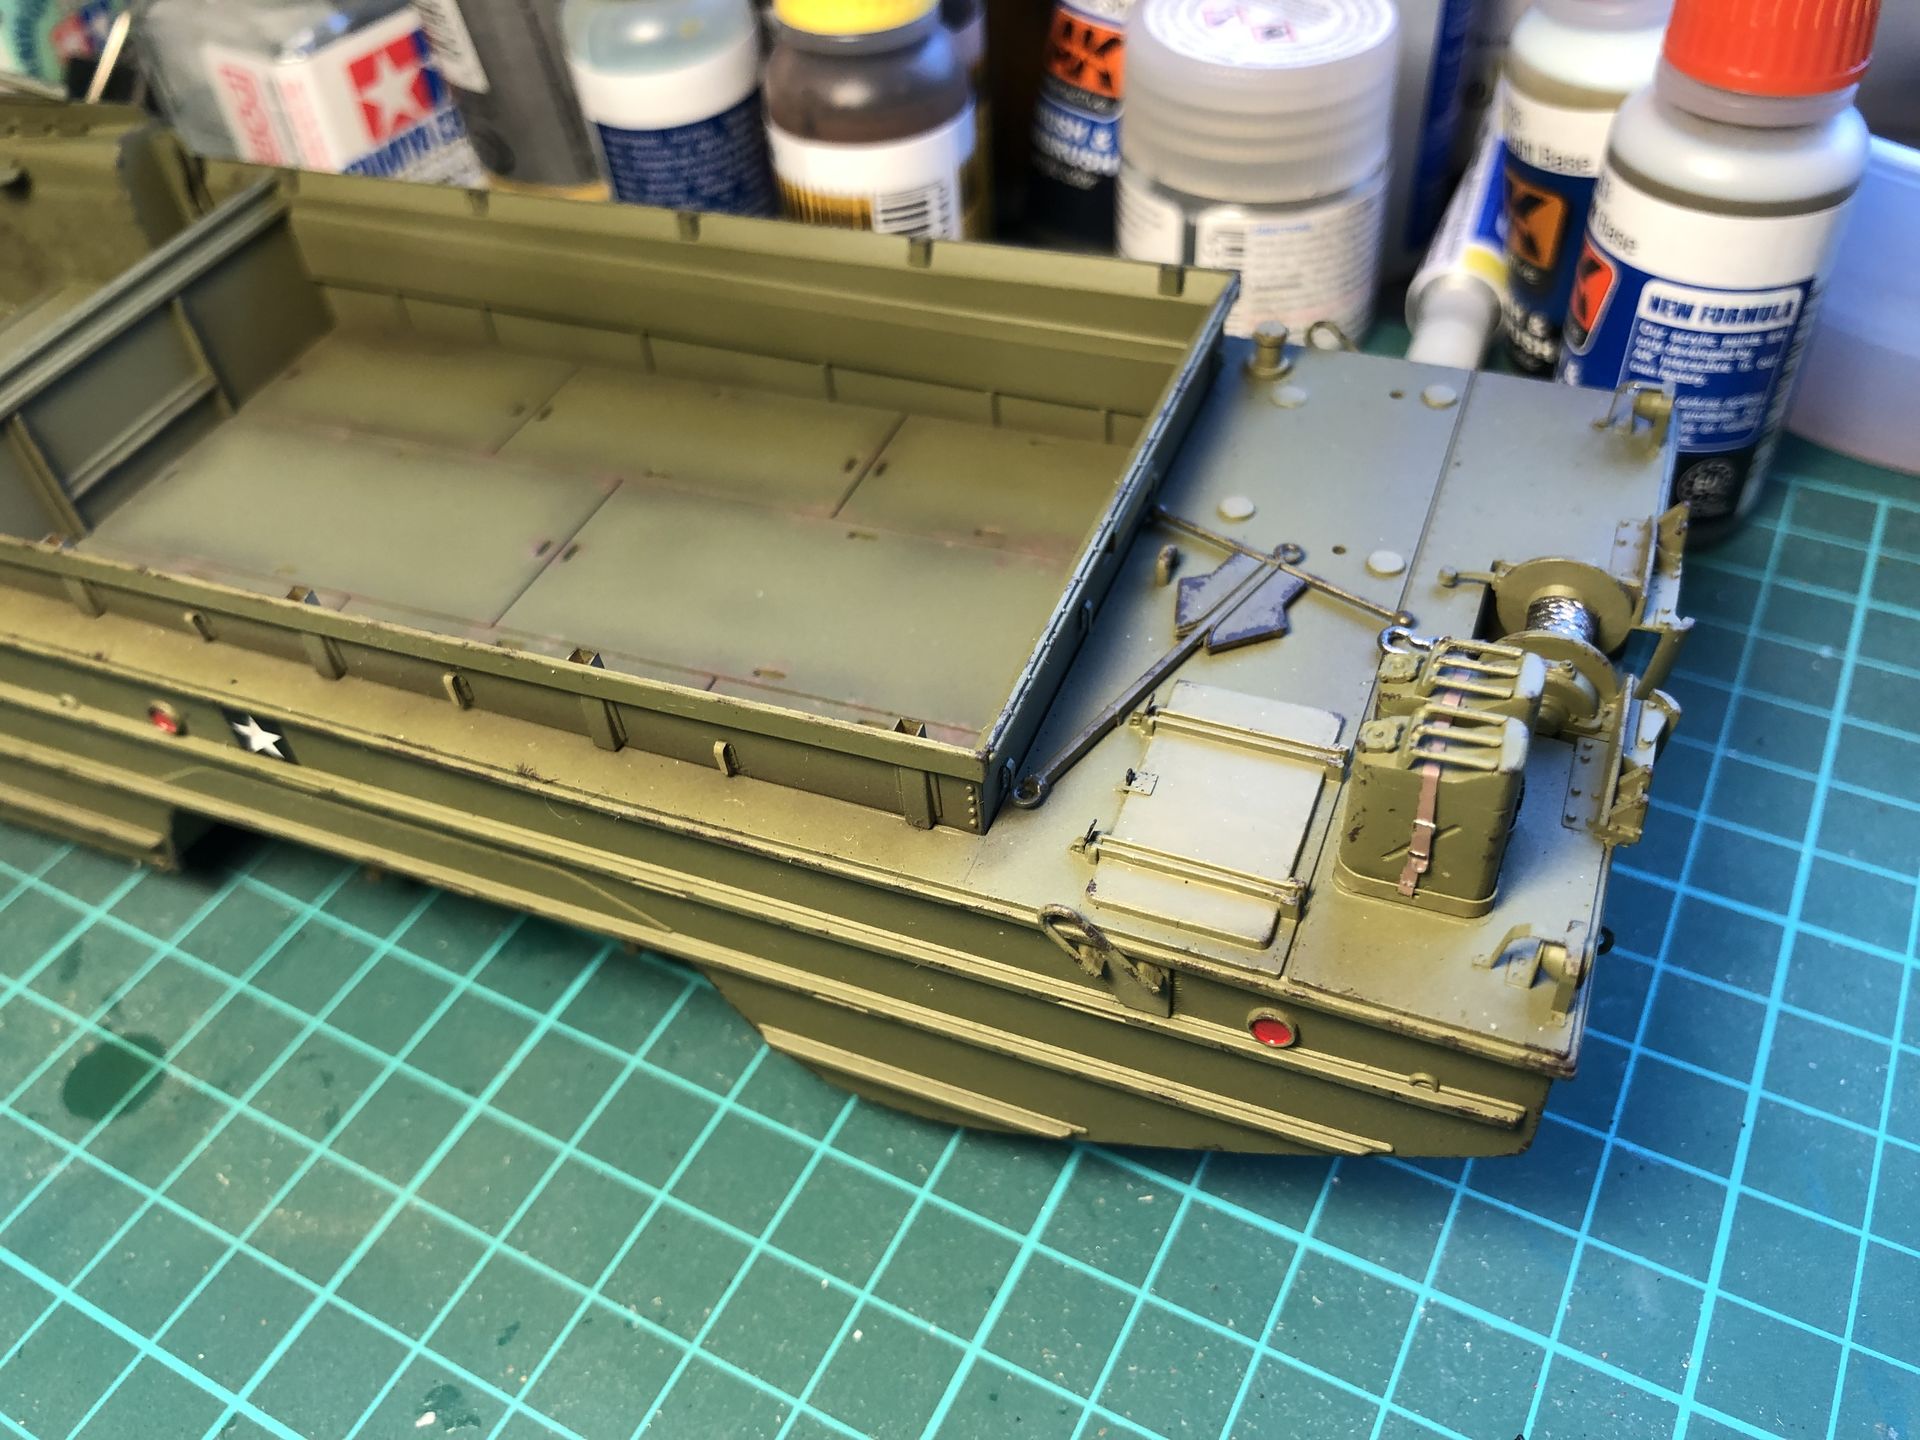
Once all cured I spent couple of hours painting tools, winch and jerry cans. Then I’ve spent another couple of hours with a sponge and AMMO MIG Chipping colour adding metal chips on all edges and corners, and then switched to Tamiya Flat Earth and Red Brown for chips on wooden floor. After I’ve tried both ‘hairspray’ and ‘sponge’ chipping techniques several times each, I definitely prefer sponge, it’s much more effortless.
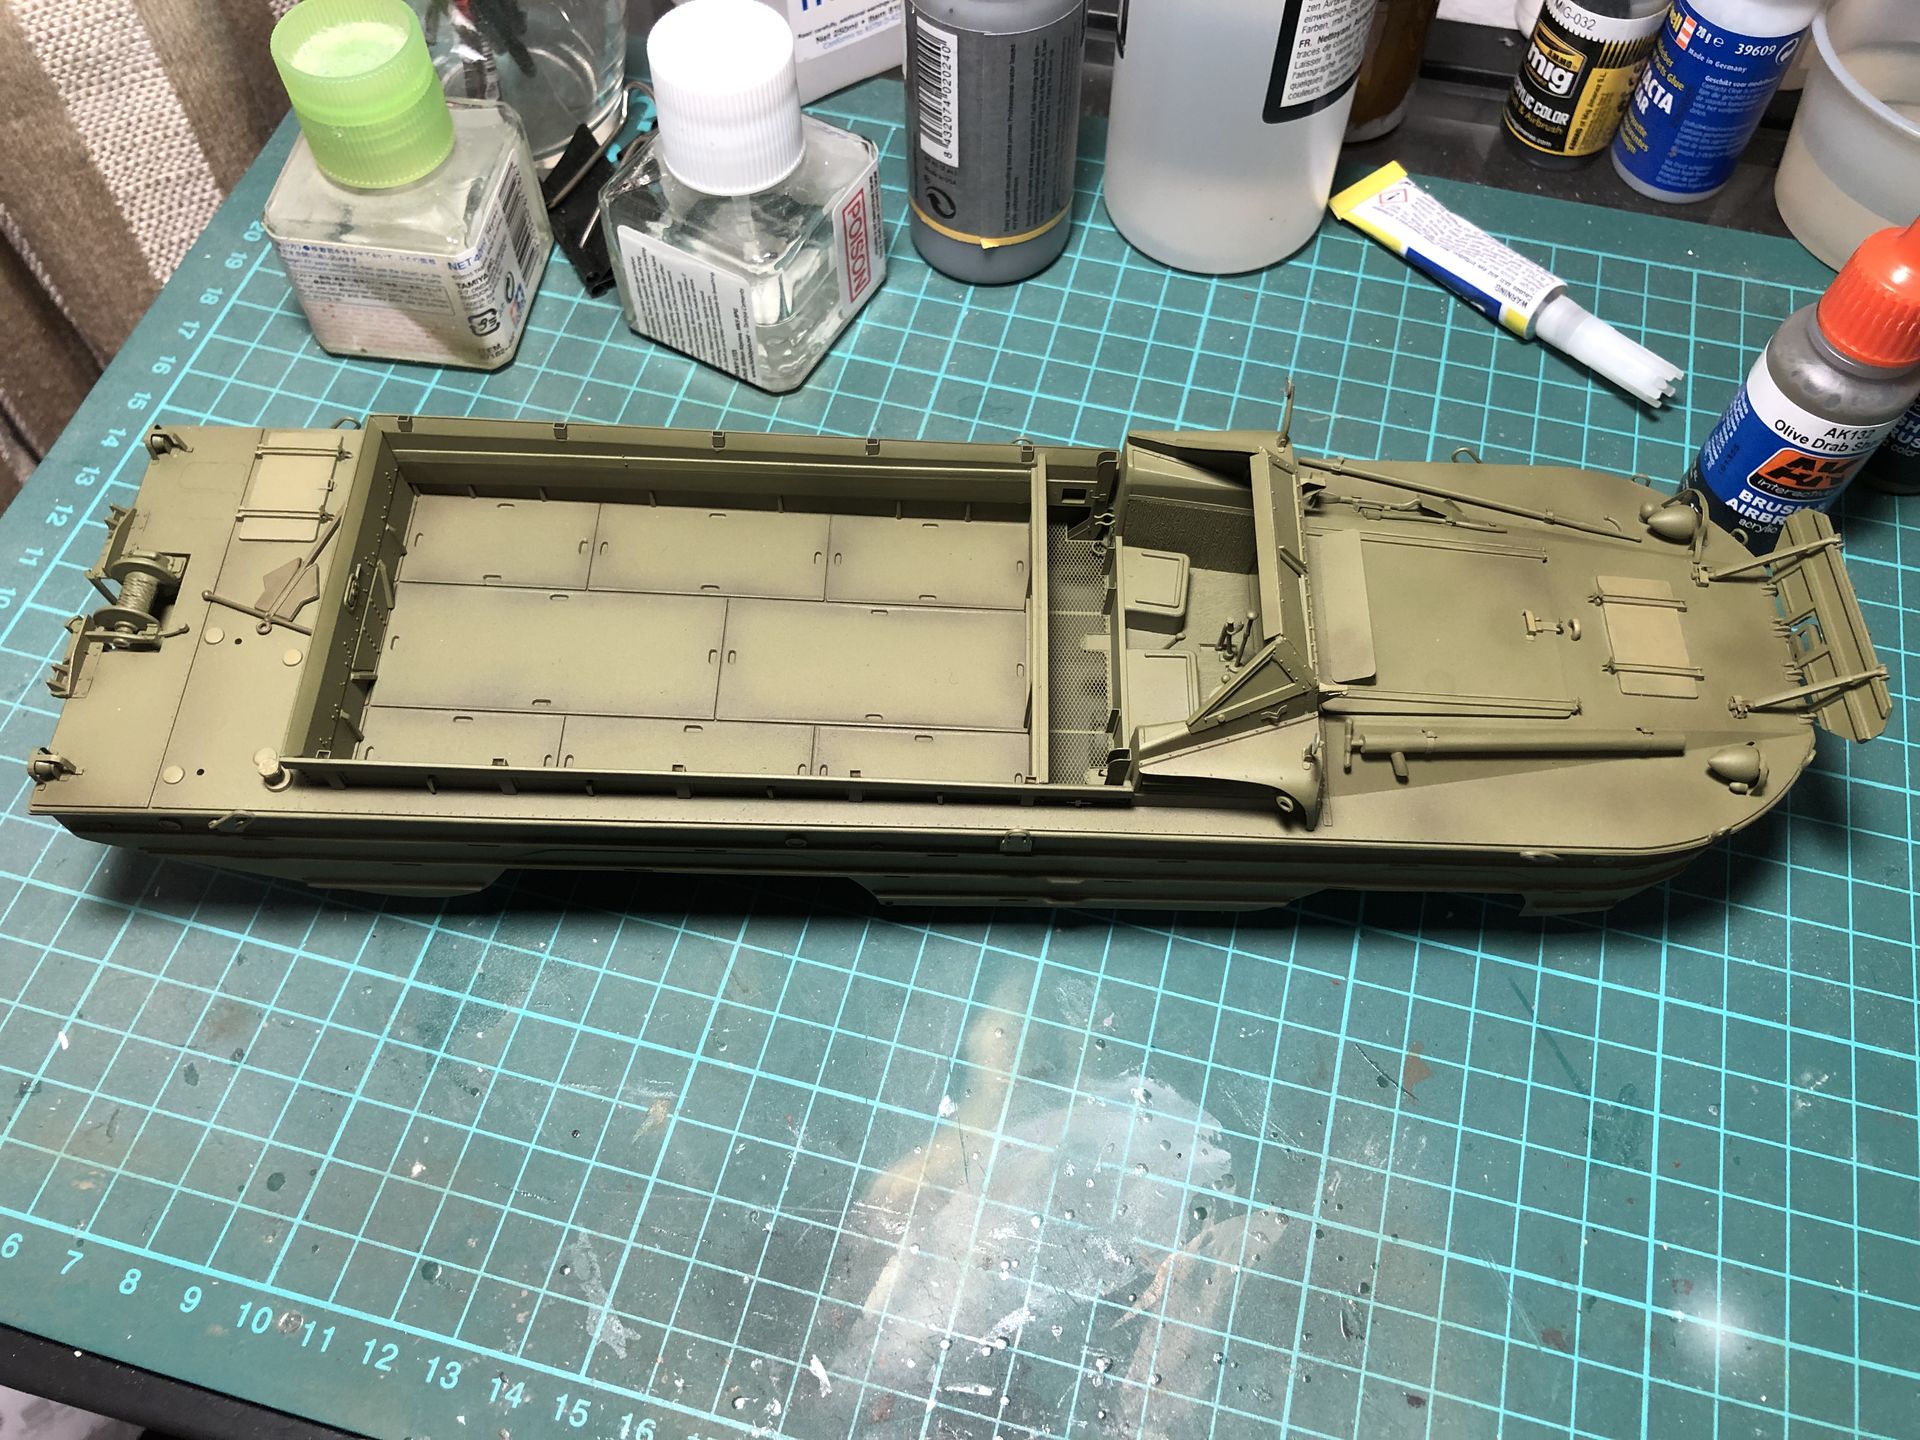
Now everything is ready for next stop of weathering - adding rust, dirt and dust.
Weathering took quite some time and required another break as I was really tired with monotonous process of adding dust to this monster - seriously, this model is just too big!
I used streaking and dust/earth products from AK Interactive and AMMO Mig, didn’t bother with oil paints this time. Humbrol pigments were used to add more subtle dust effects.
Conclusion
I’m happy with the result, and especially with the fact that I managed to finally finish the model. It was first time I tried colour modulation and PhotoEtch on vehicles in 1/35. Loved both parts, but in future will try to stick to 1/48 scale for any WW2 armour and vehicles, 1/35 just feels too big.
Gallery