Once I built up some confidence with wooden kits, especially after St. Gabriel I felt confident enough to start the ‘proper’ wooden ship. Like you know, one which you have to plank manually and scratch-build most of the stuff. As you probably know, picking the right subject you are really interested in is the key to success. Especially when built is expected to take many months. After careful considerations and reading Model Ship World a lot, I picked this kit from OcCre.
I chose it for several reasons:
- First and foremost, I really like the look of the ship
- I was already in the Arctic expedition’s theme, thanks to Bering’s ship St. Gabriel
- OcCre as a company had relatively good reviews and feedback on modelling forums
- OcCre did a whole series of 111 YouTube videos showing the construction of this model
- And finally, the kit was relatively cheap (compared to other wooden kits that normally start from 200 Euros and can easily go up to 800 Euros)
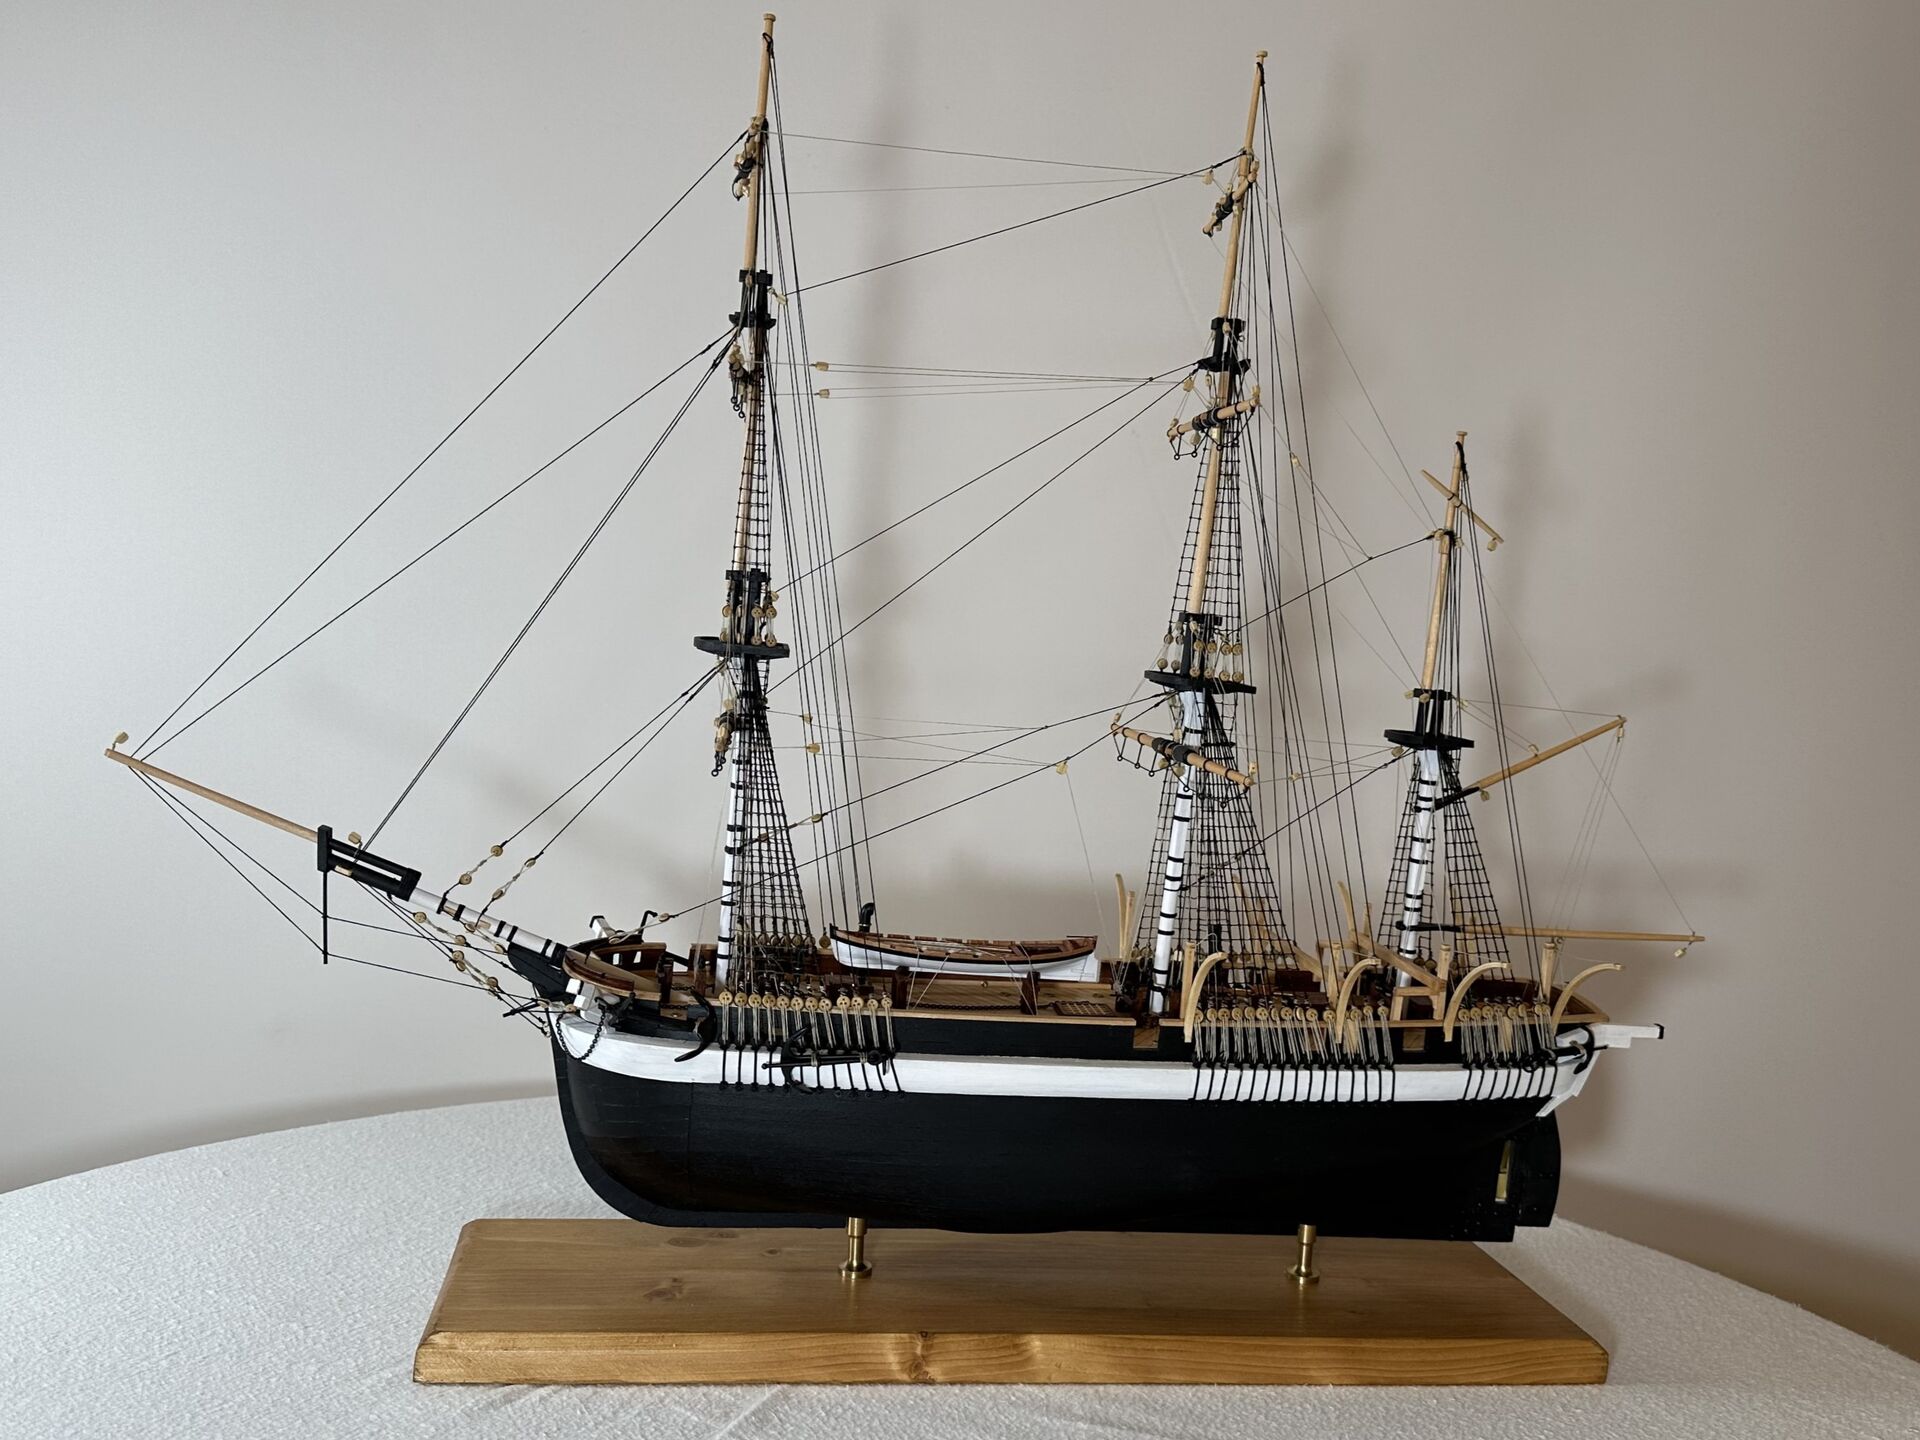
HMS Terror
HMS Terror was a specialized warship and a newly developed bomb vessel constructed for the Royal Navy in 1813. She participated in several battles of the War of 1812, including the Battle of Baltimore with the bombardment of Fort McHenry. She was converted into a polar exploration ship two decades later, and participated in George Back’s Arctic expedition of 1836–1837, the Ross expedition of 1839 to 1843, and Sir John Franklin’s ill-fated attempt to force the Northwest Passage in 1845, during which she was lost with all hands along with HMS Erebus. (from Wikipedia)
I bet now most of the people are familiar with the story of the ship from ‘The Terror’ TV Series, which I didn’t watch. But I read and enjoyed the book by Dan Simmons back in 2014, so one more reason to pick this subject.
Model quality
Previously I only had experience with Russian manufacturers and Mantua. I was quite disappointed with Mantua and impressed by both Master Korabel and Falkonet. This time I’m happy to admit that OcCre didn’t disappoint me one bit. All the wood is high quality, and it’s given in abundance (I can plank another ship with leftovers). All cast details are also nice quality, and nails are just perfect (especially compared to terrible ones from Master Korabel).
Build notes
First I’d like to notice that whole approach to model’s engineering is pretty different from my previous experience with Master Korabel kits. Here, it’s expected for modeller to practically scratch-build most of the parts. I mean, some parts are laser-cut, but even those you’ll have to plank. For most things you just have dimensions and maybe a plan. And I actually do like it this way! It scratches the itch for woodworking just about right. When in Master Korabel it felt like building a wooden model from kit, here it feels like building a model using plans and wood supply. Don’t get me wrong, building wooden models from kits is already challenging enough, so I’m happy I prepared myself by building those.
But this feels like next level.
And now to the build itself!
Note: this build took so long that I’m providing a timeline here.
2019
Of course, doing planking for the first time was challenging.
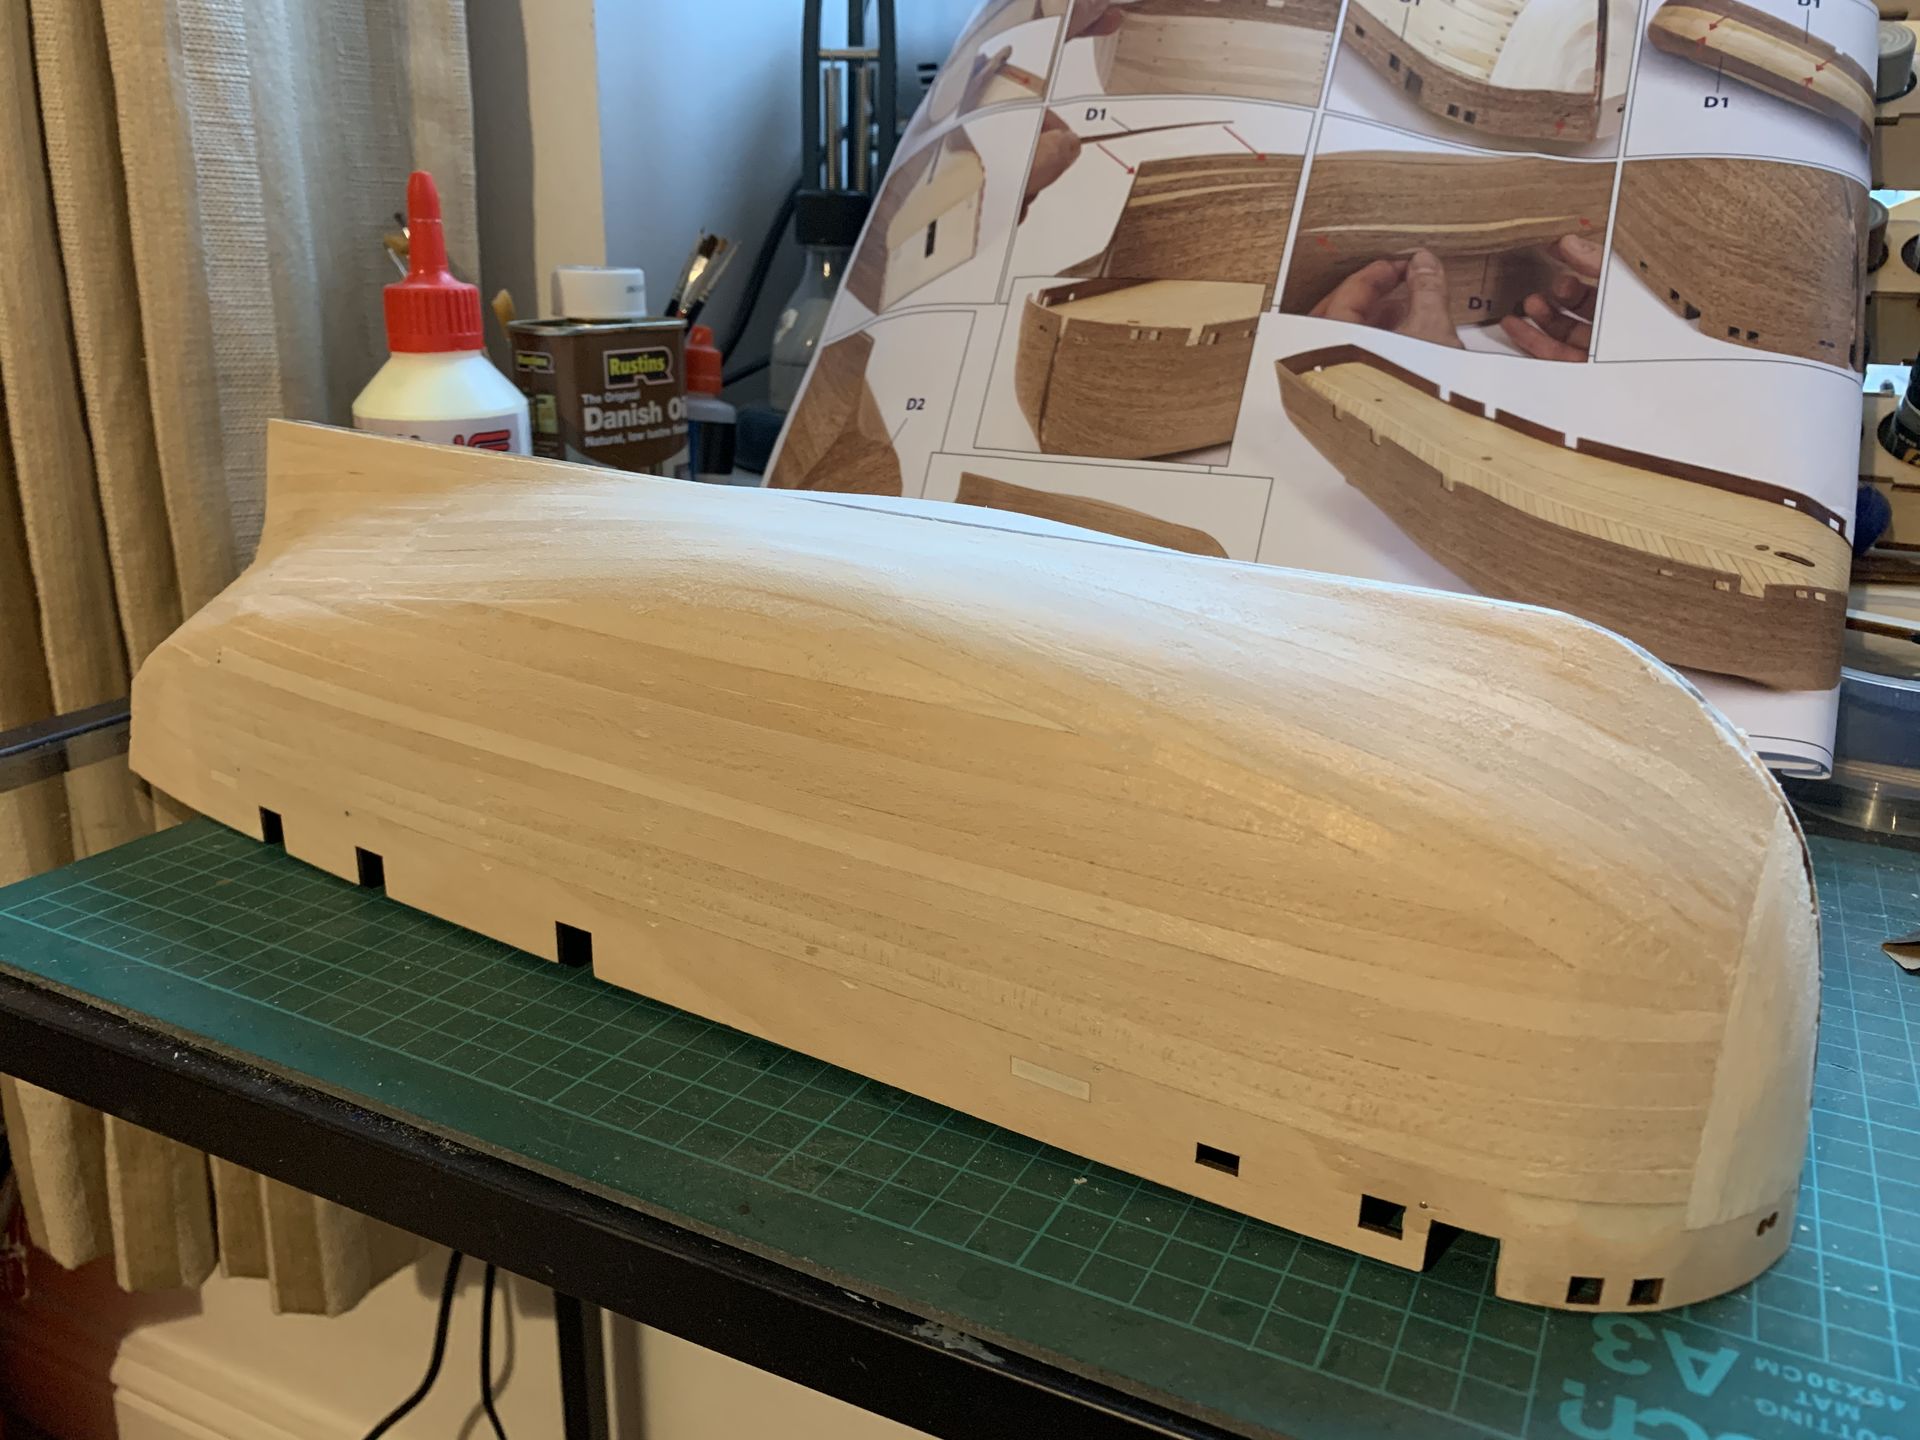
I even had to buy a big hand file to work on the bow of the ship which you have to shape from 4 layers of wood. Obviously I’ve made plenty of mistakes, but as for the end result - I’m quite happy with it! Given it’s my first time, it turned to be quite nice, I even almost completely avoided use of wood filler.
Next I worked on a second layer of planking and placed rubbing strakes. Before doing the second layer, I read plenty of articles and posts on how to do it properly. TLDR - it’s a huge pain in the ass if one really wants to replicate the look of real hull. Especially a complicated one like this. I decided to do it the easy way, like in the instructions. Why? Because I wanted to paint the hull anyway, and the bow will be covered with metal plates.
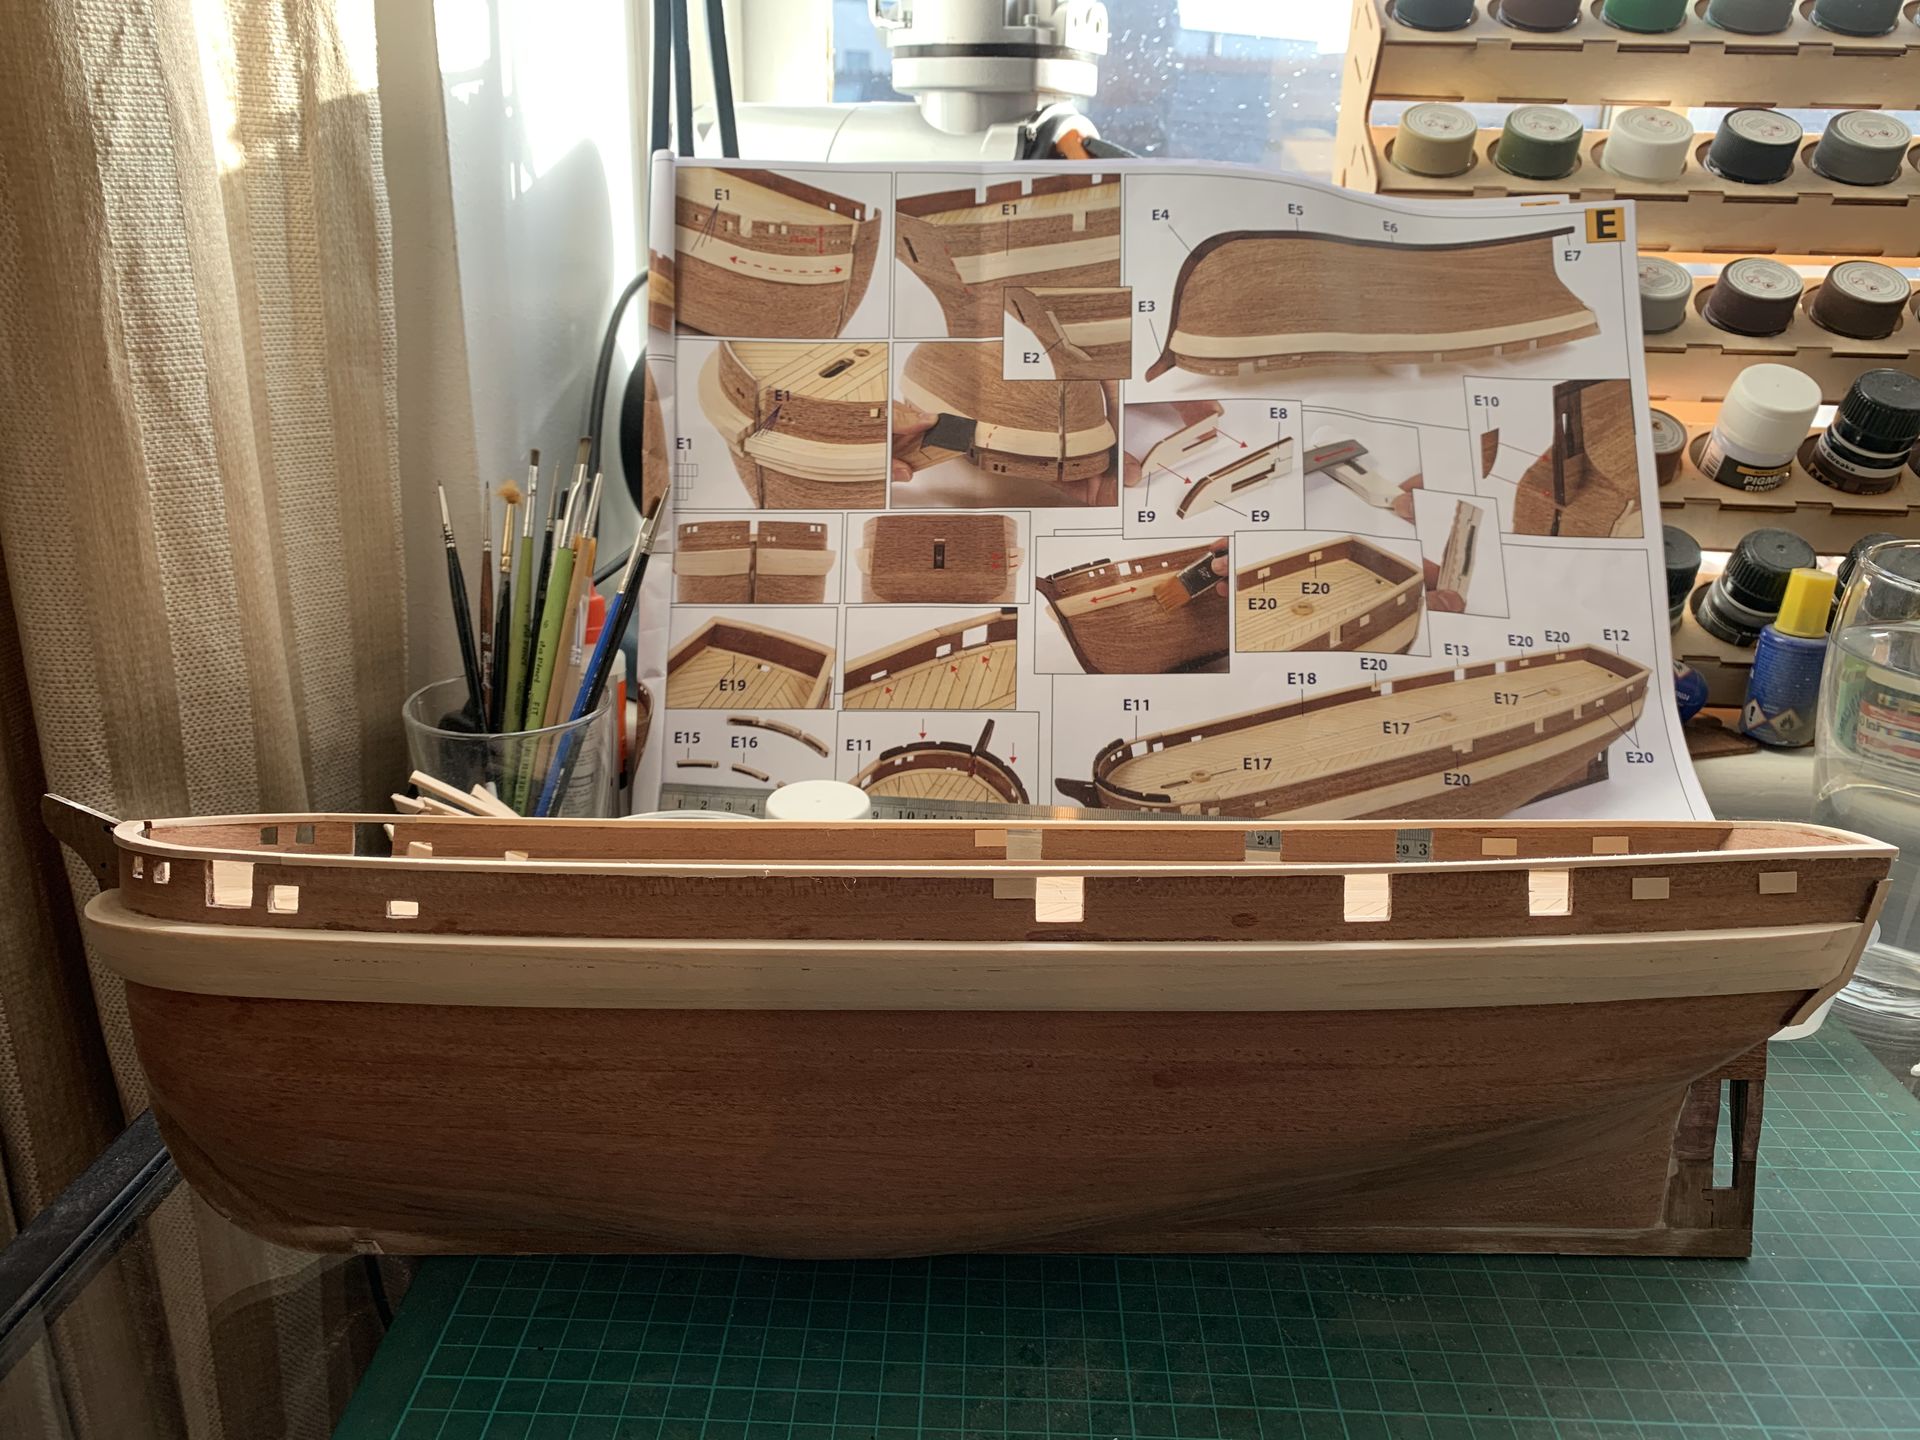
Here you can see planking complete with strakes and false keel. Looks lovely, I appreciate the choice of materials, would totally look amazing if left unpainted.
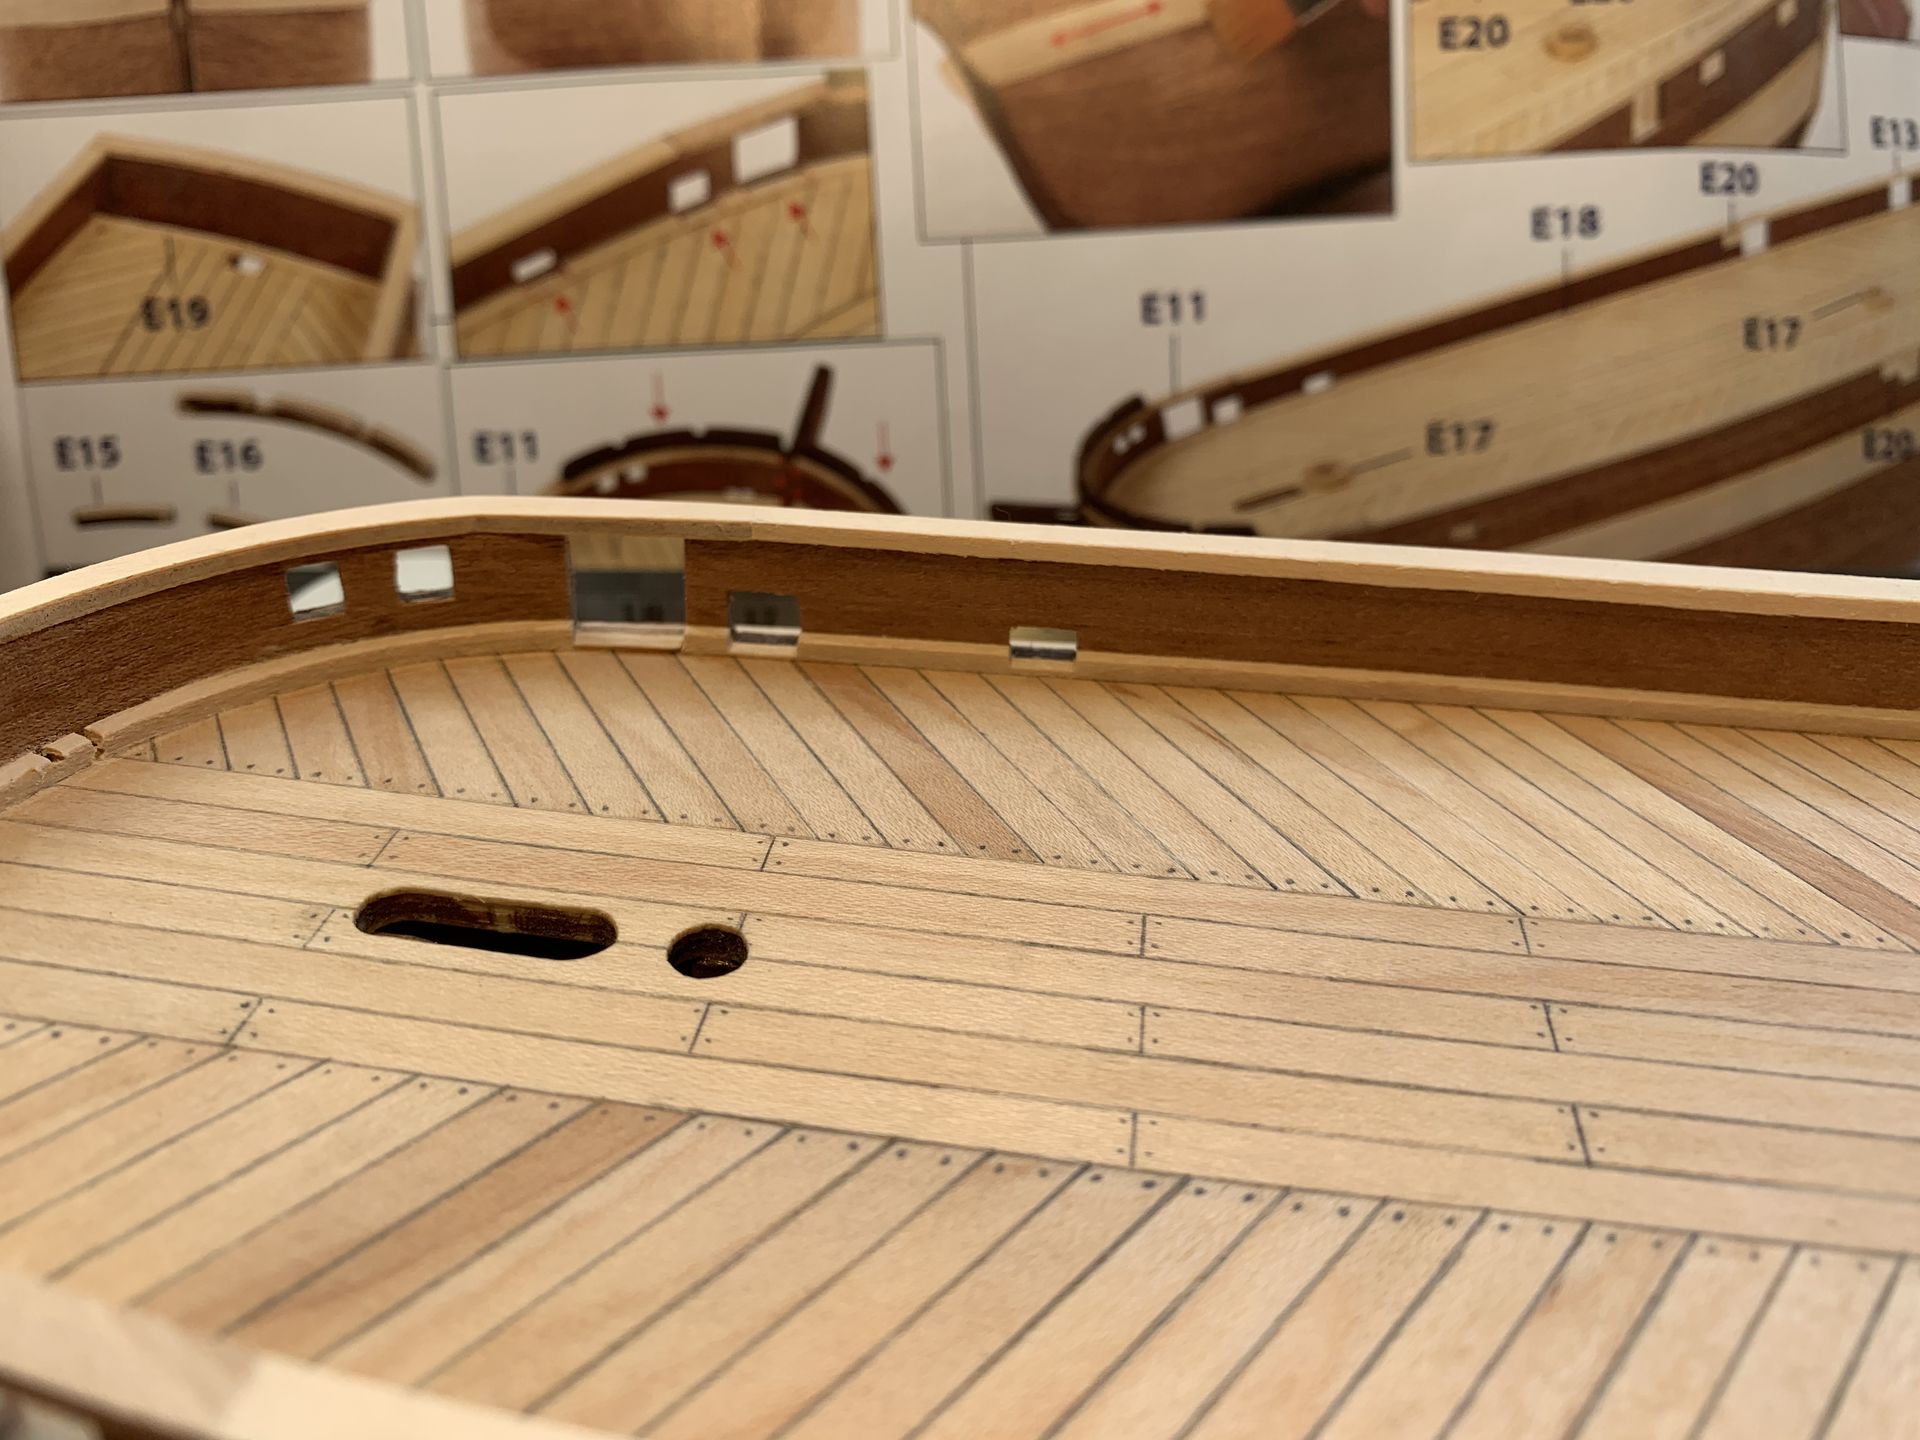
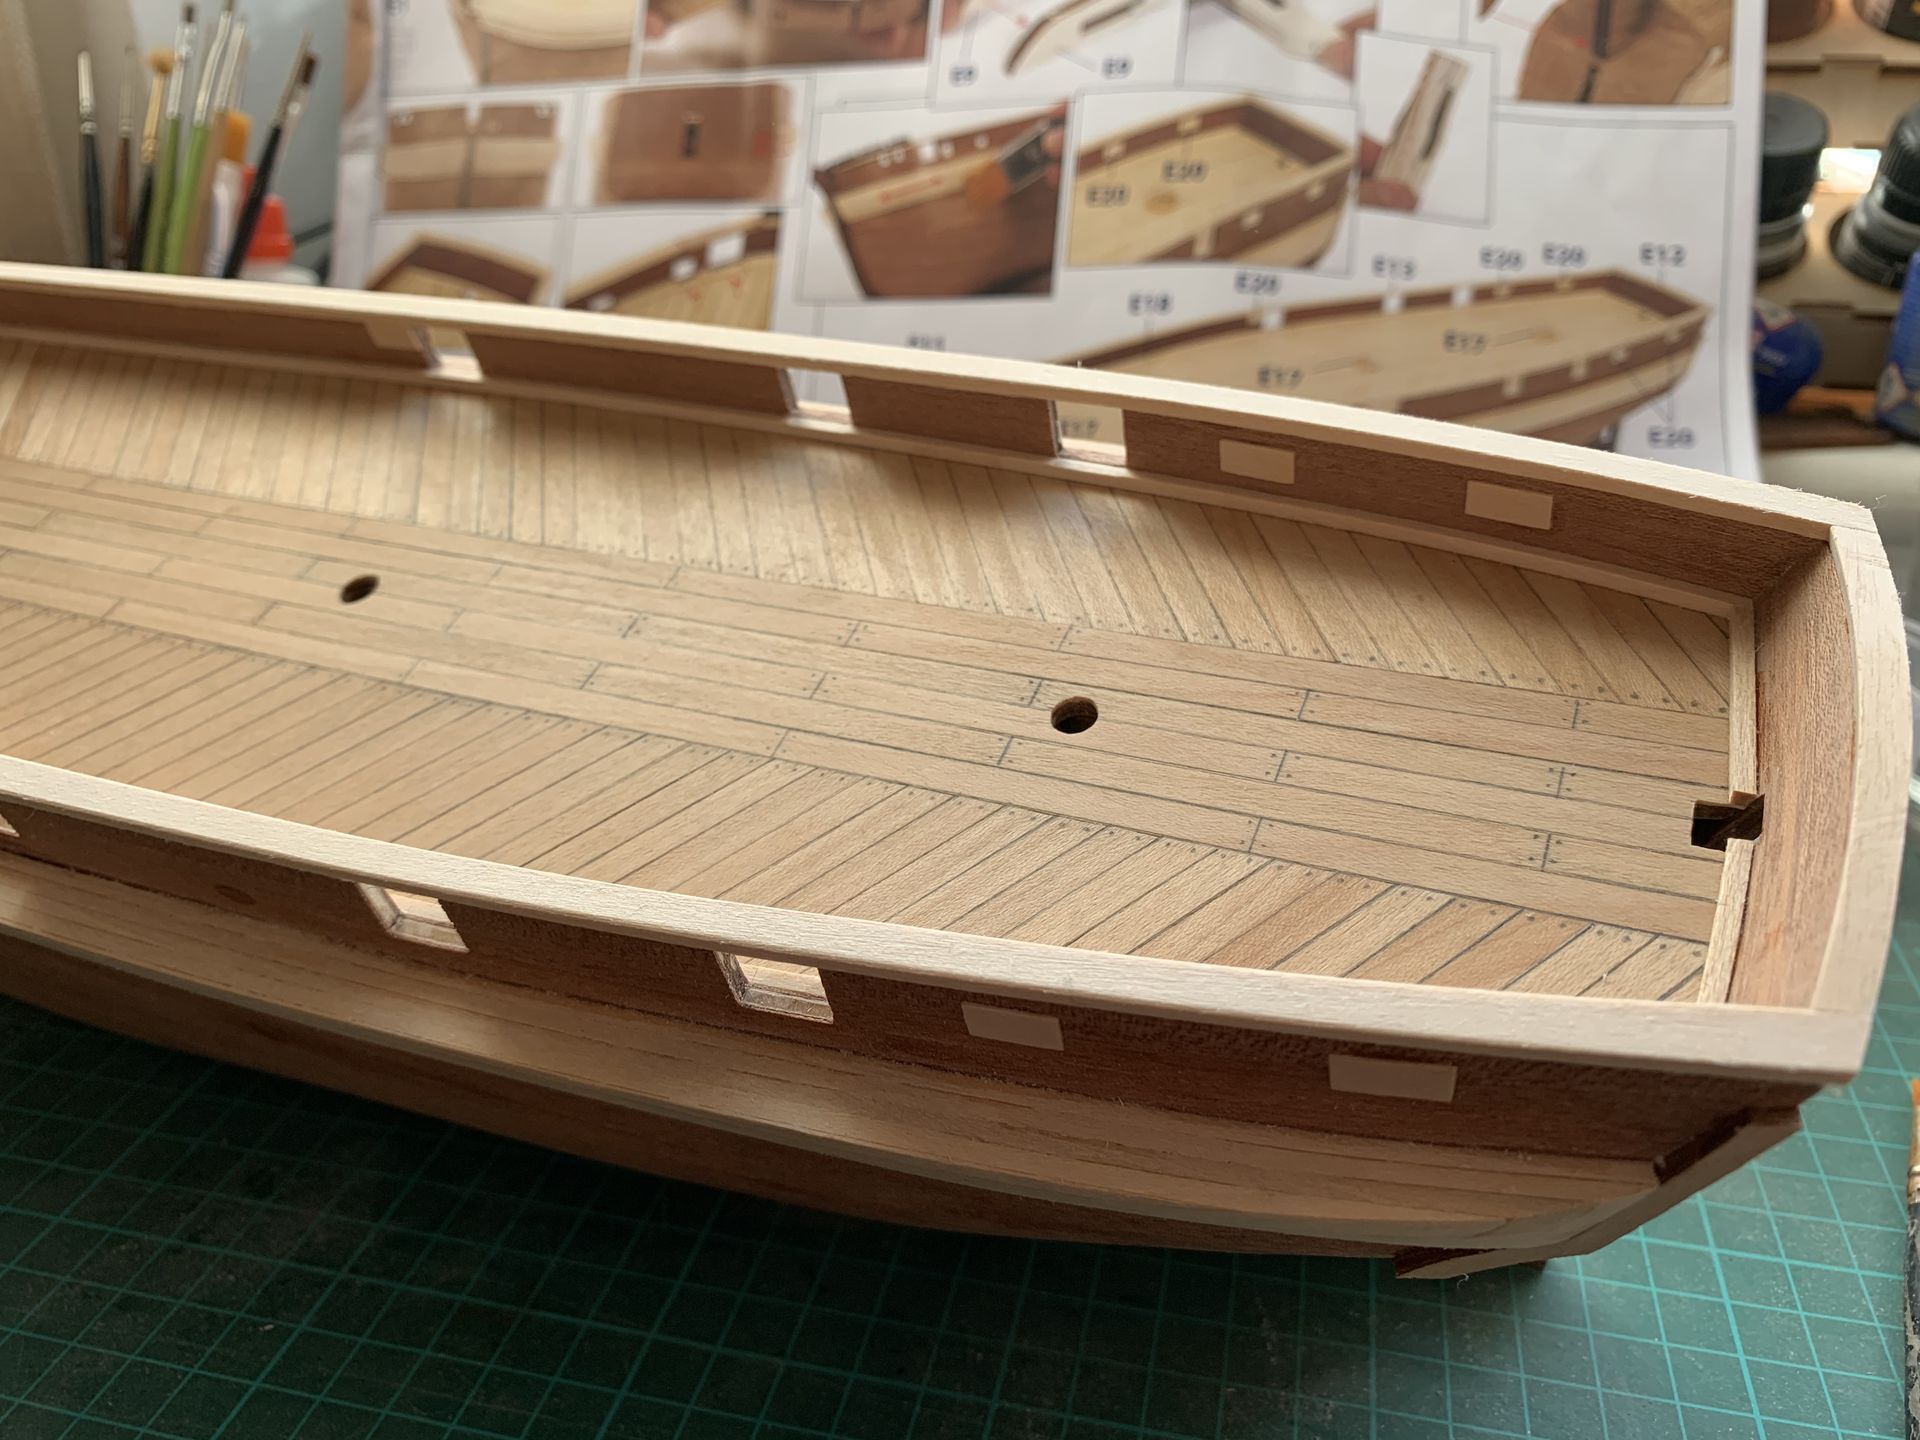
I loved the look of it so much that I decided to step away from the instructions and plank the inner side of the gunwale.
Instructions say to stain it, and it looks like this:
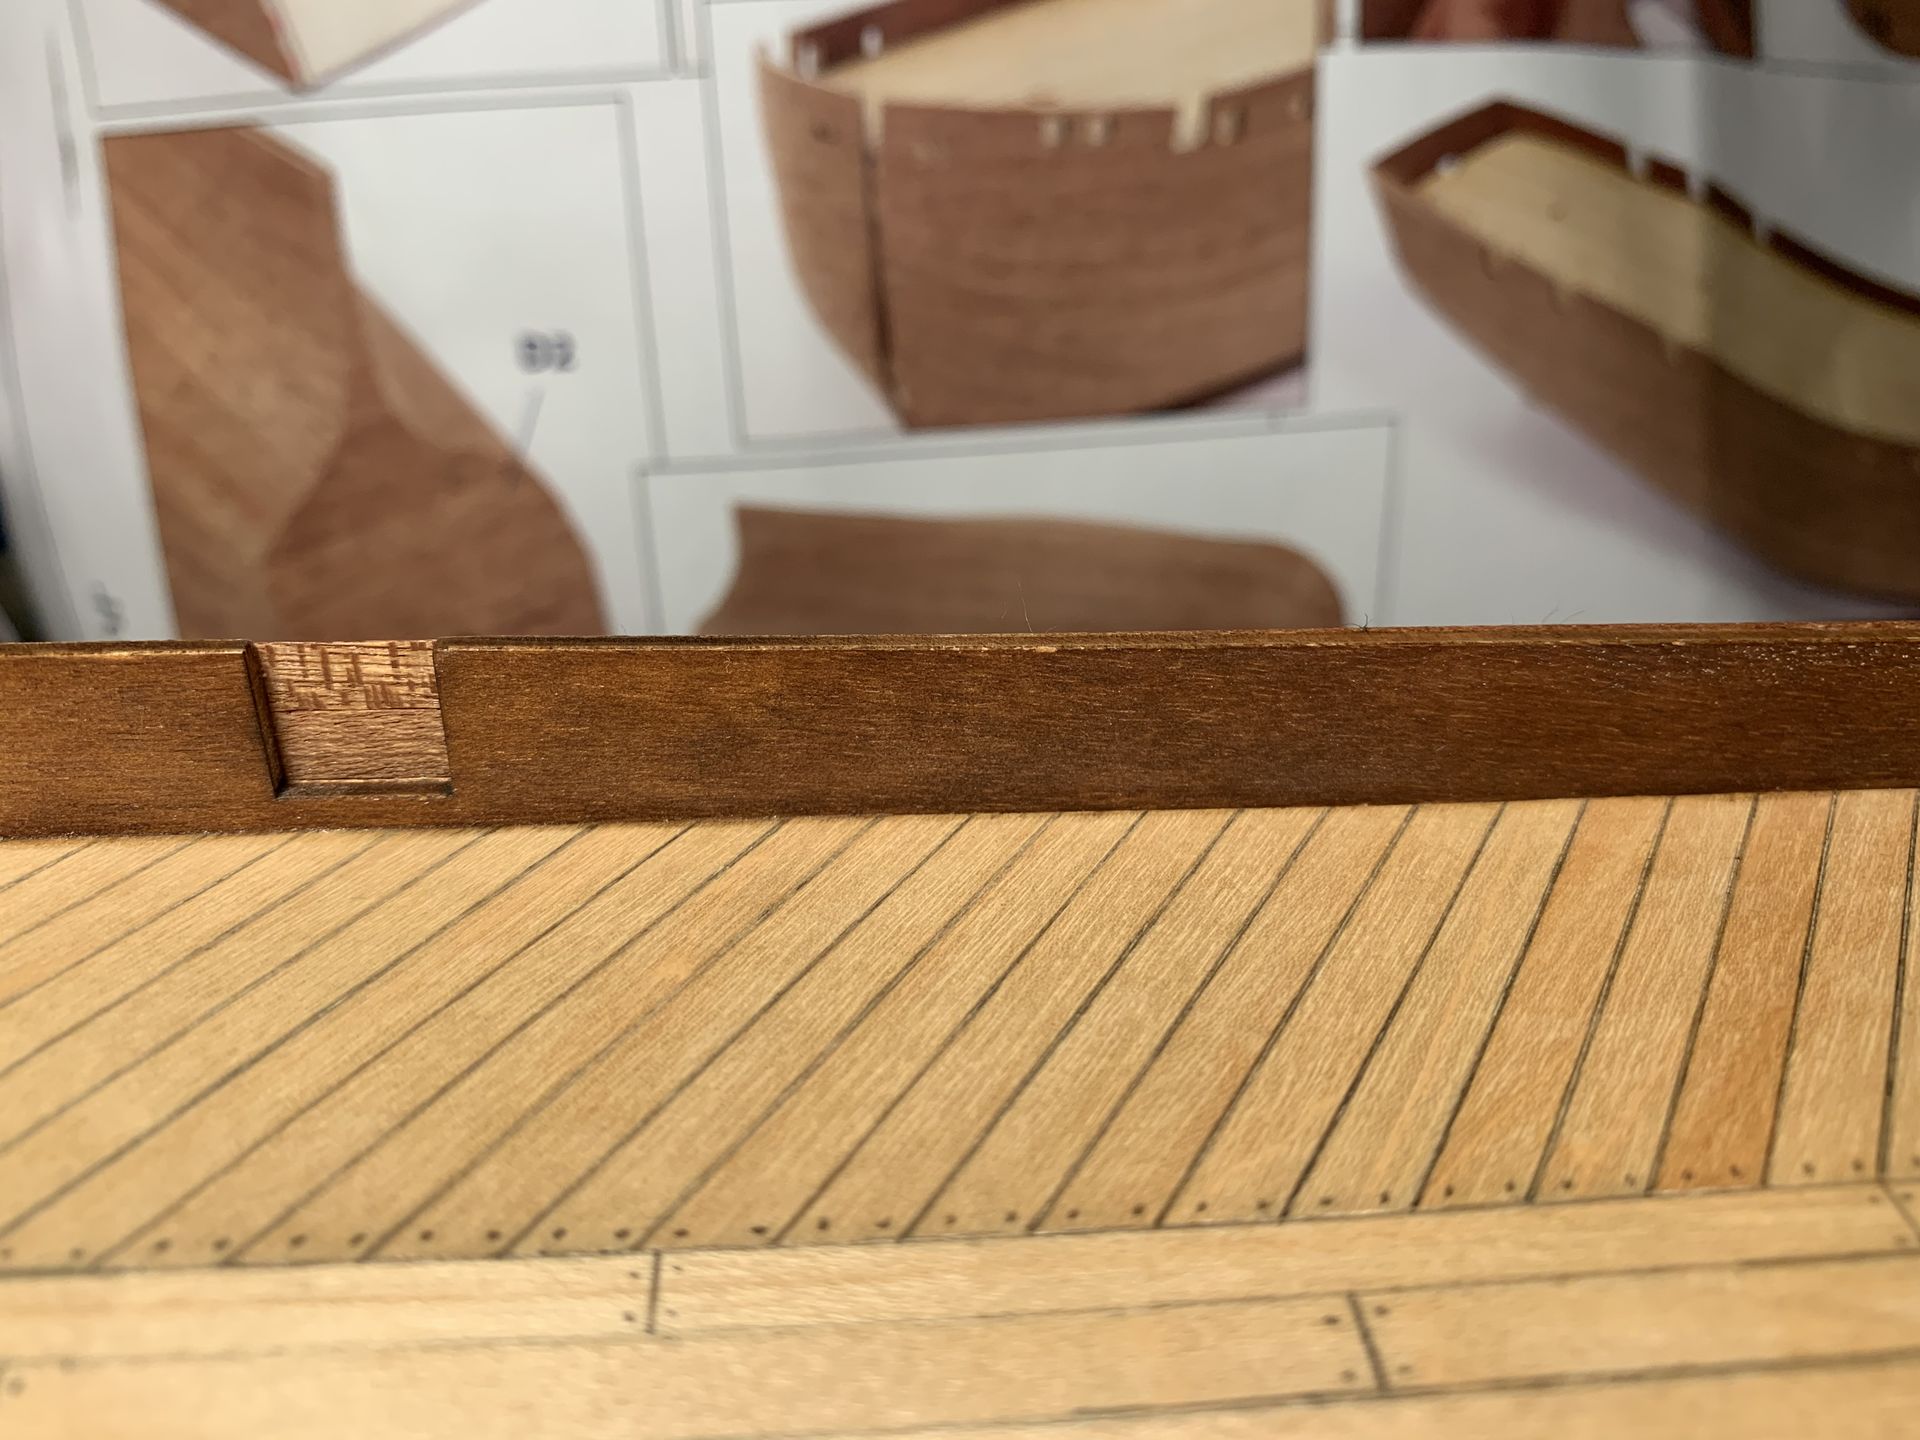
Not too bad, but still kinda cheap when compared to outer planks.
Thanks to abundance of material, I planked it, and couldn’t be happier with new look:
Once it was done I thought the most laborious part was over… I couldn’t be more wrong!
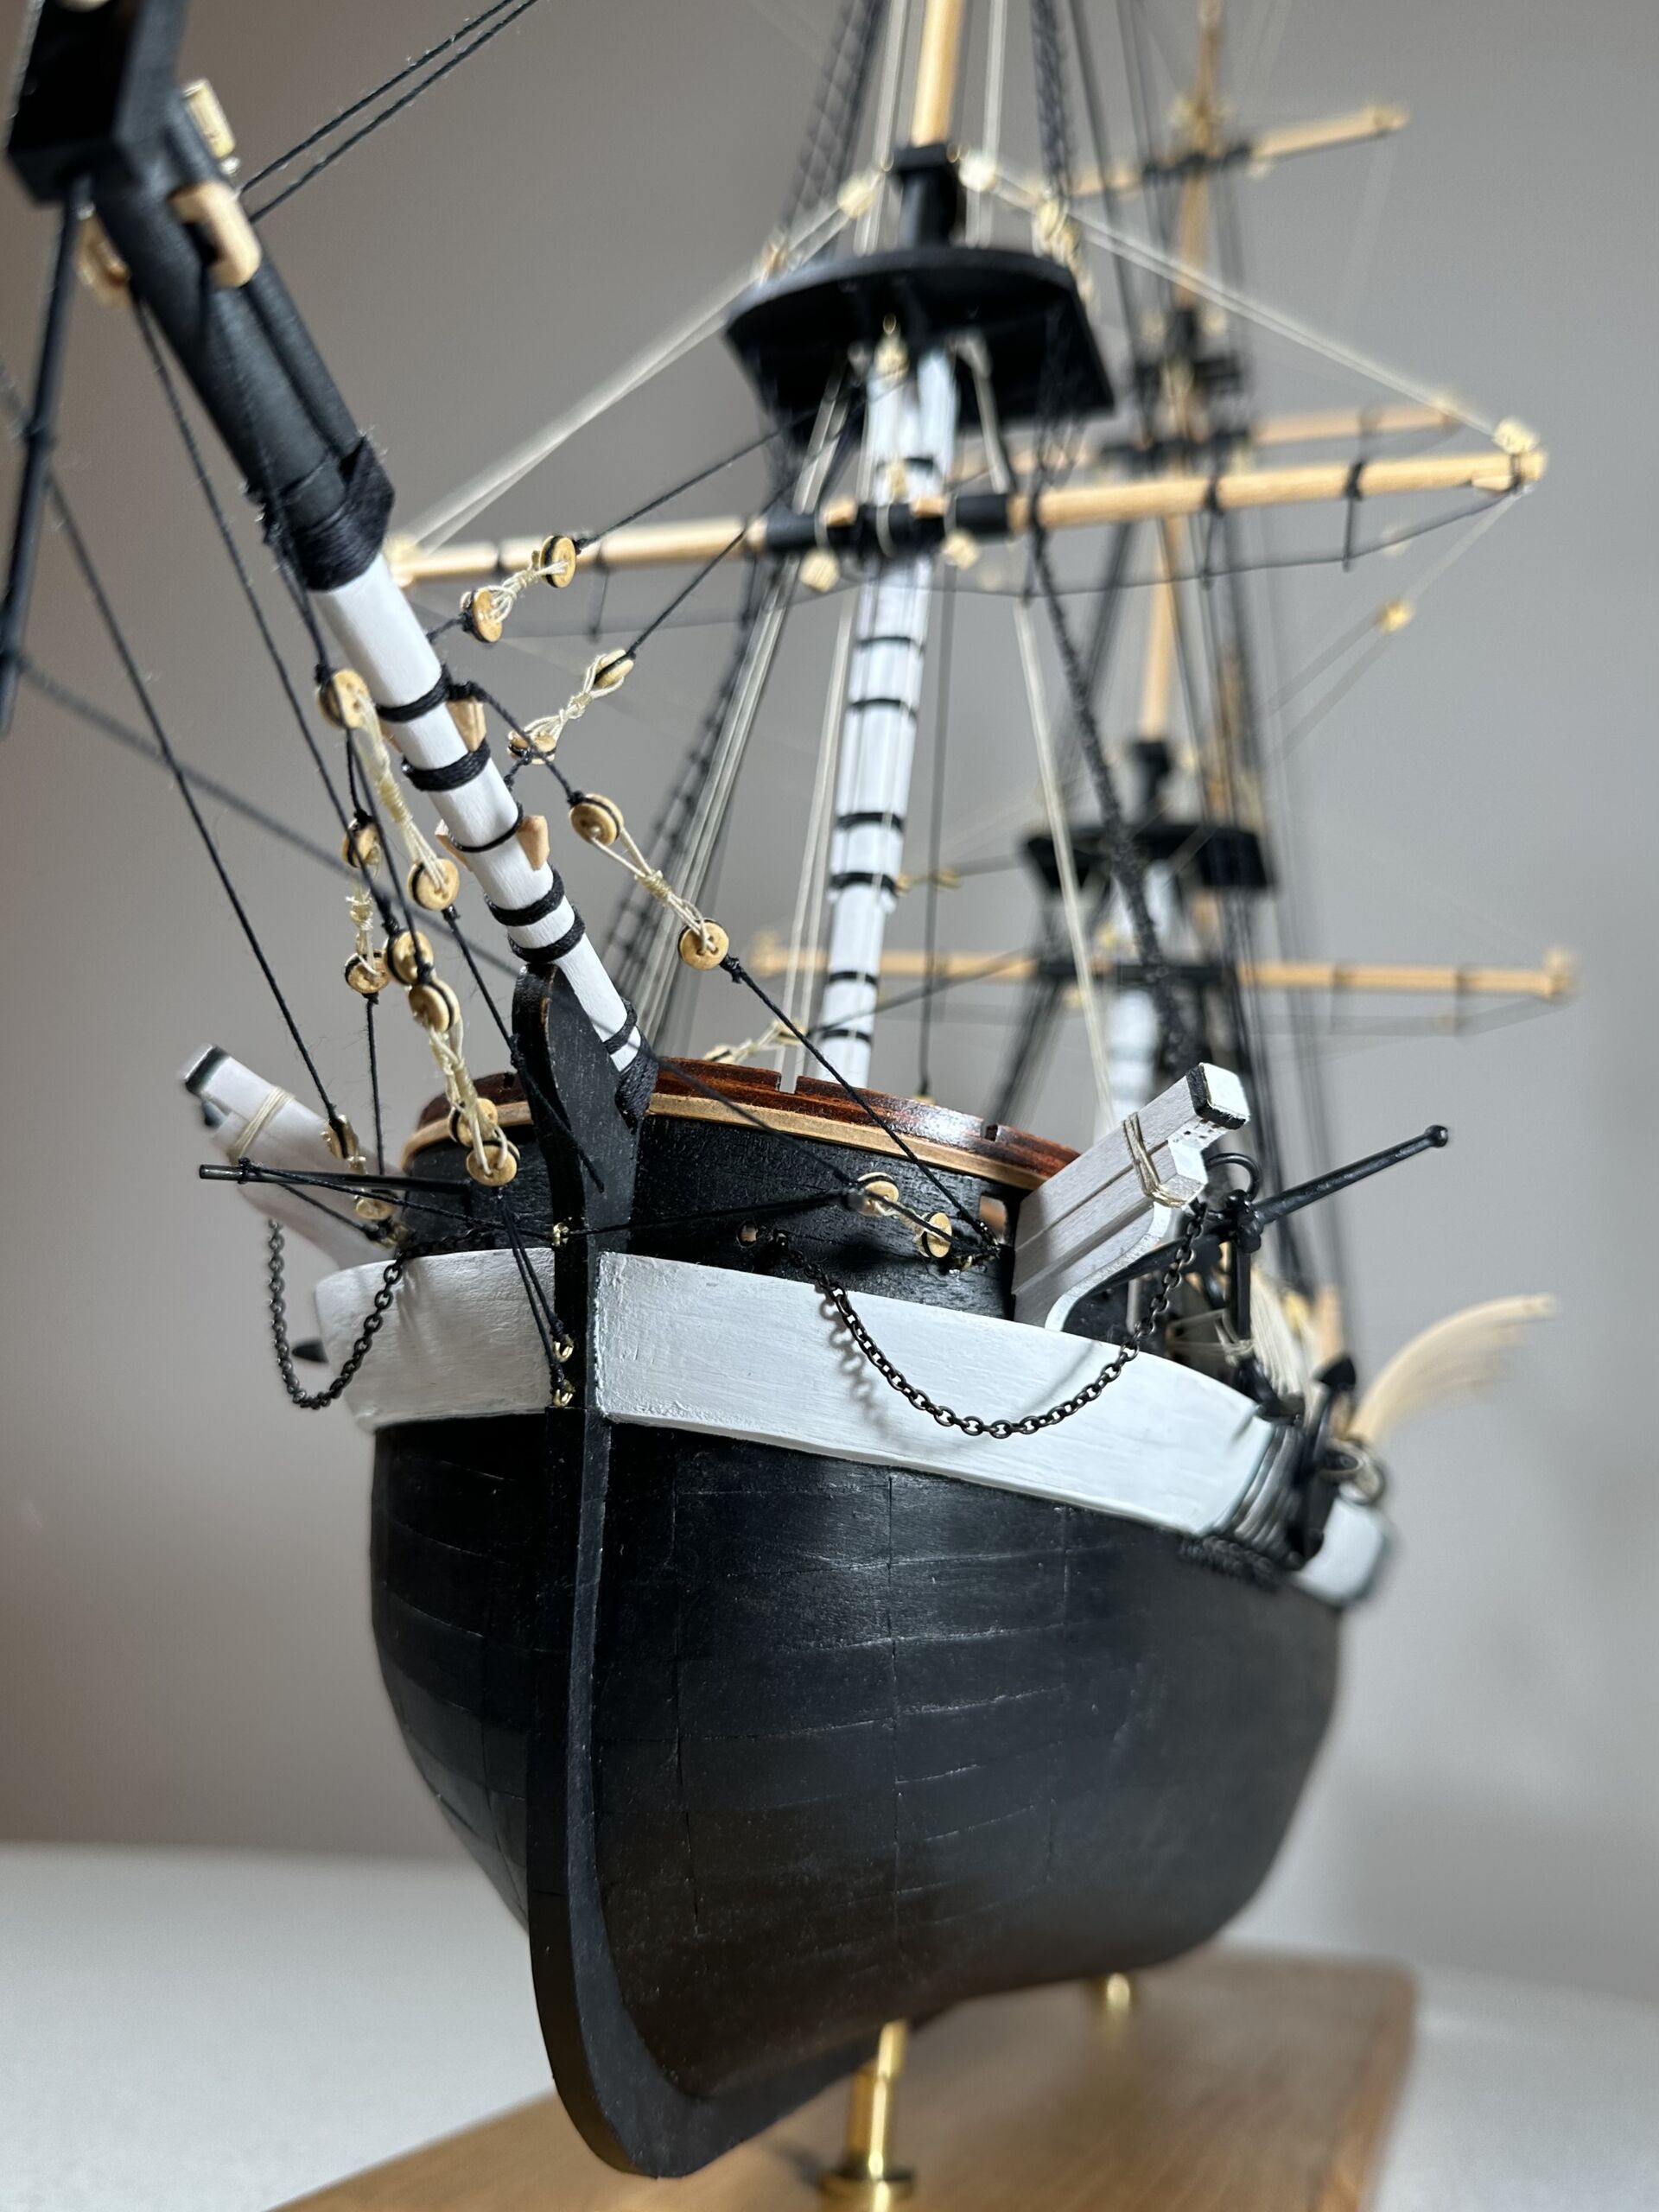
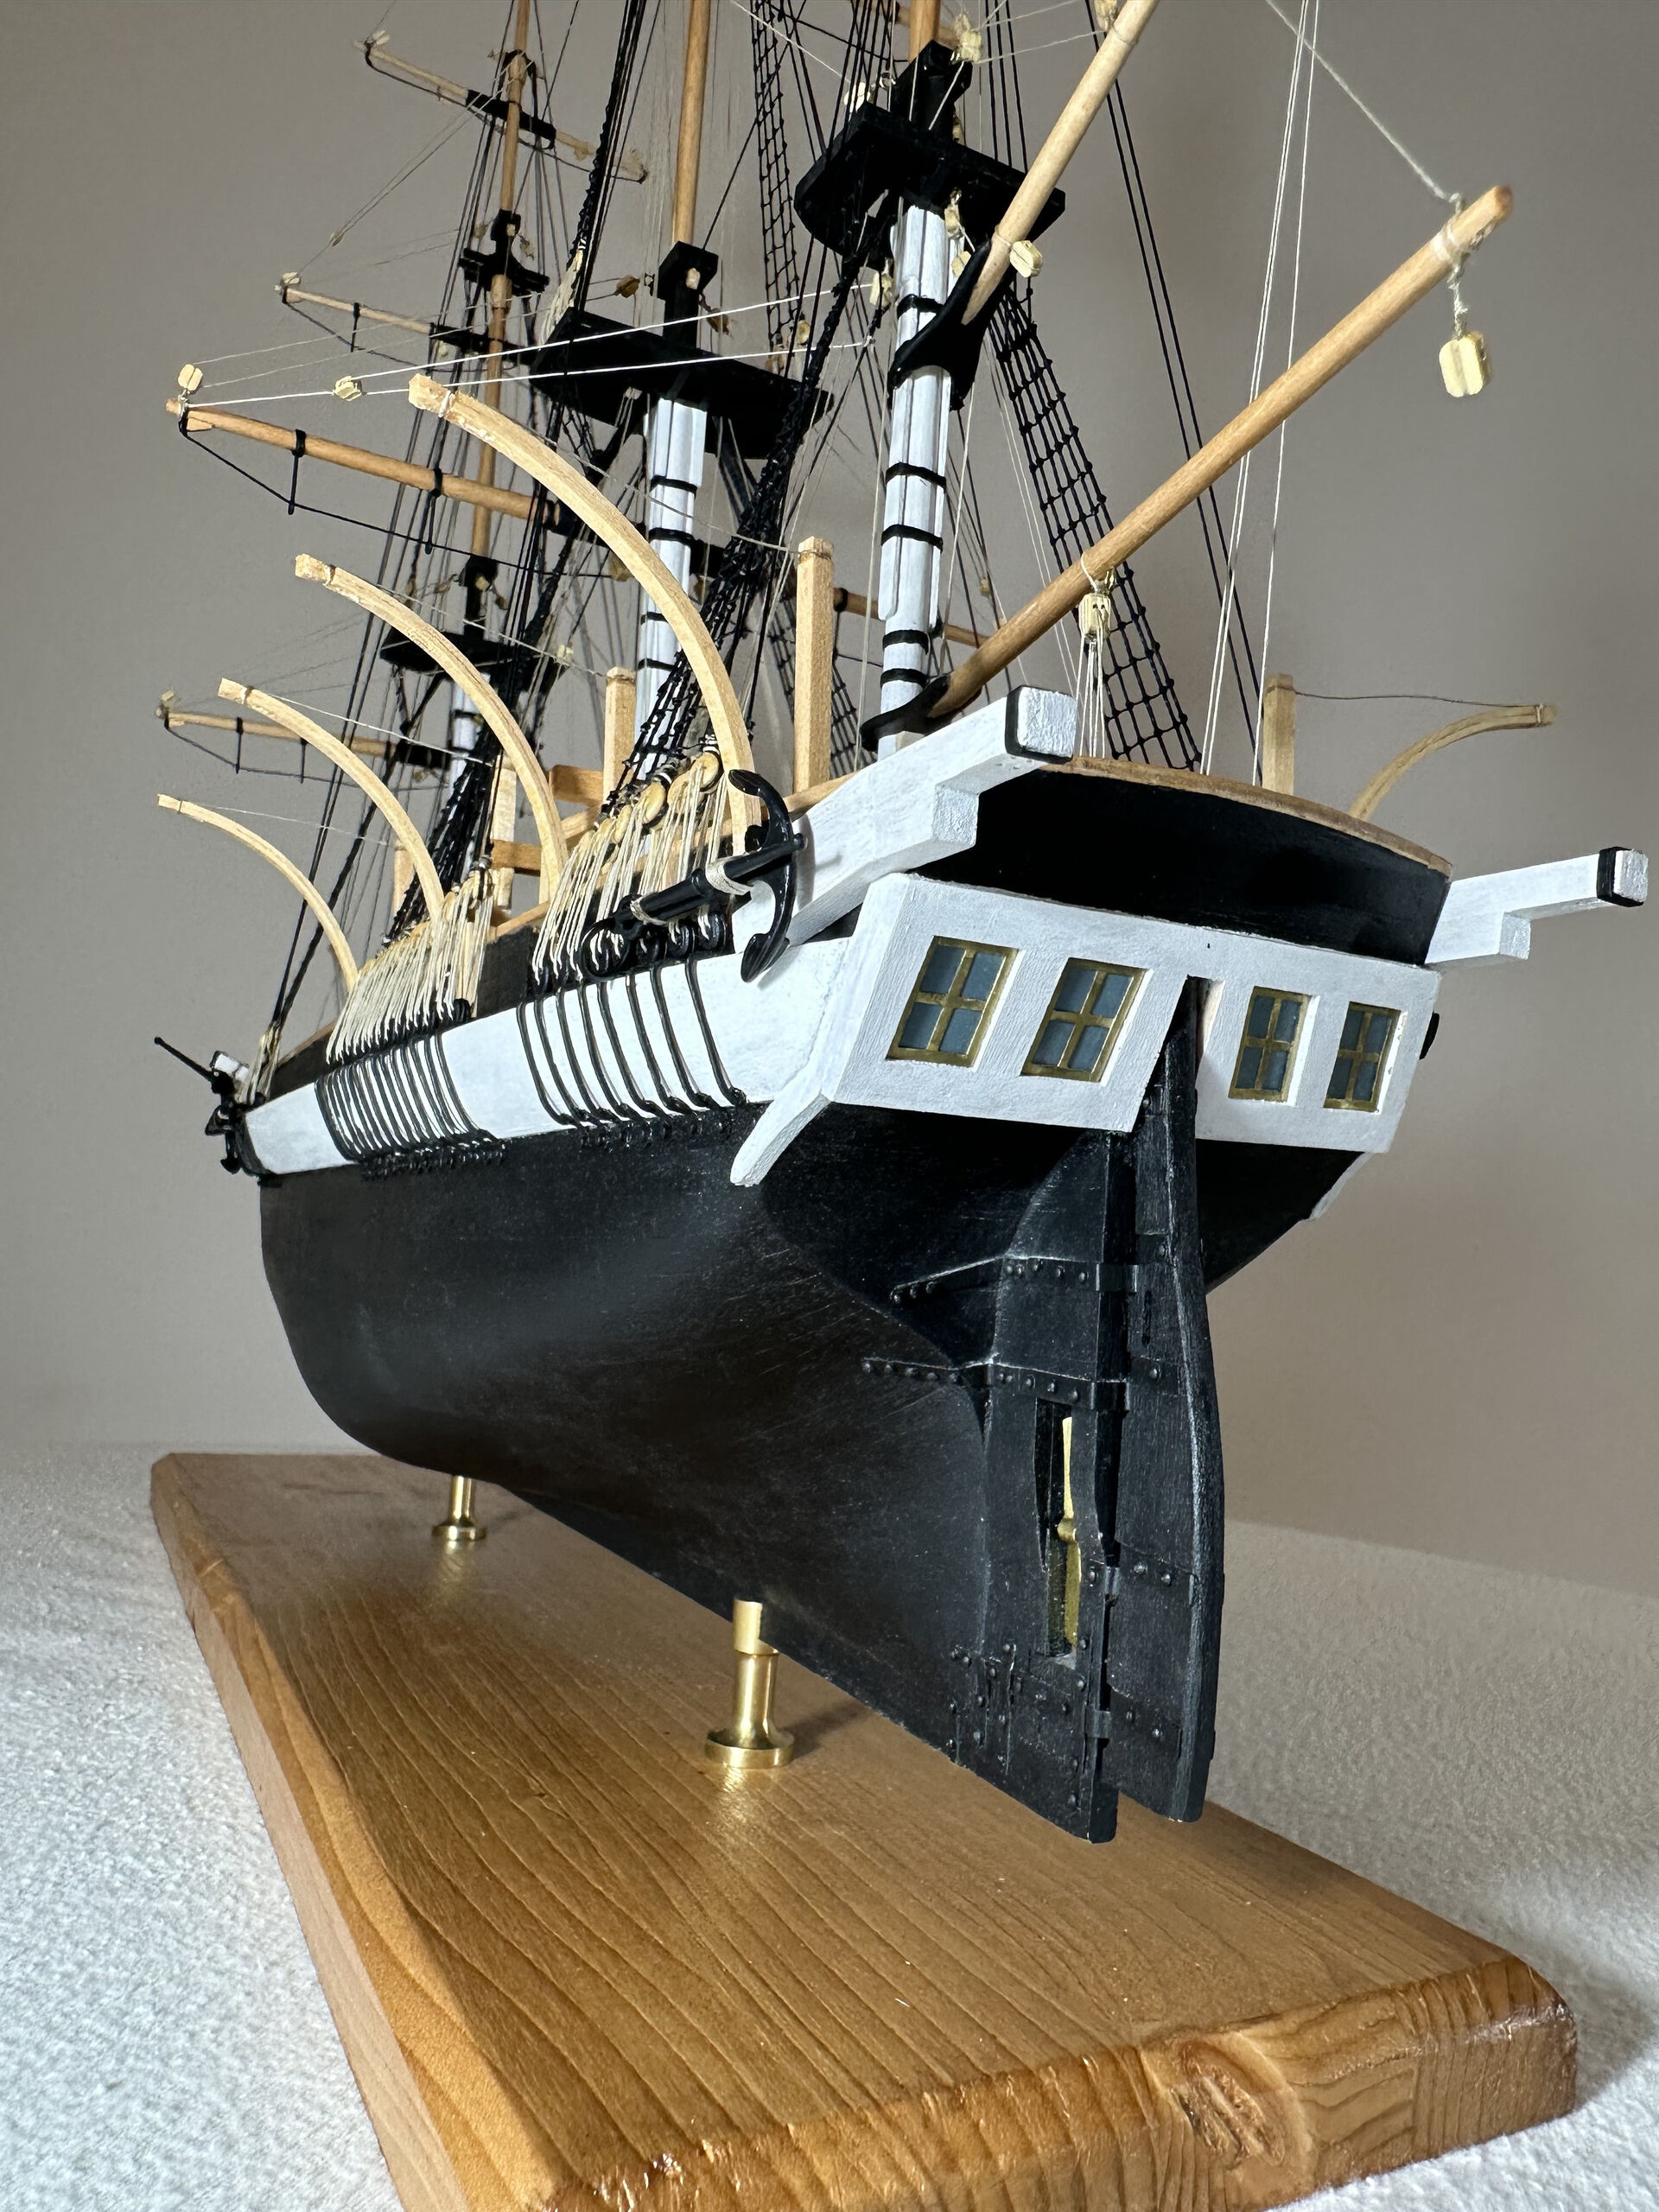
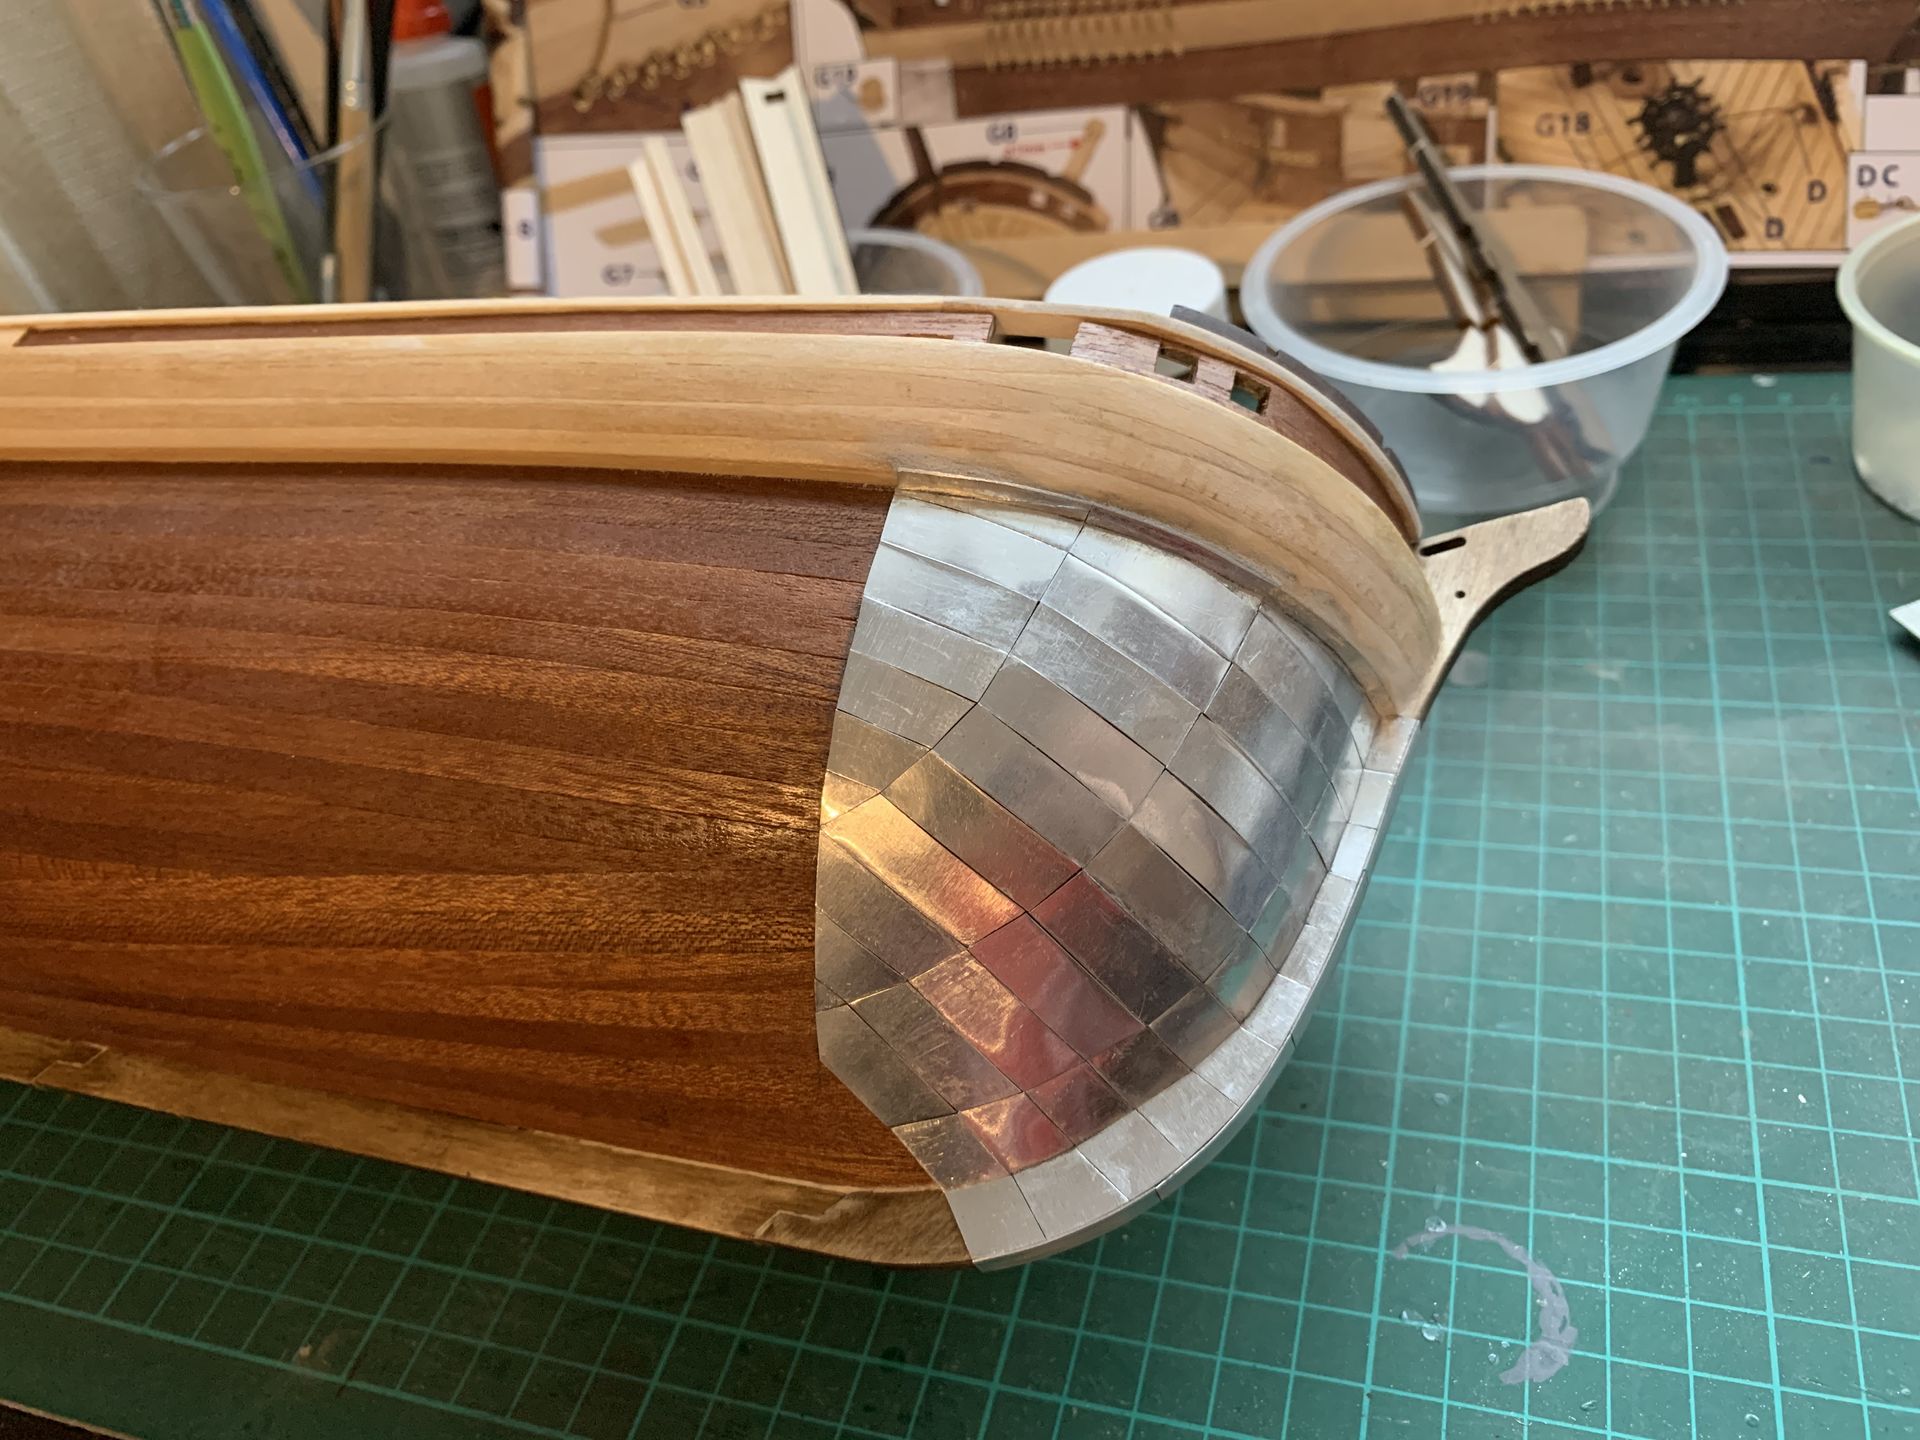
Plating the bow with metal - that was the difficult part. I spent two weeks working on it almost every evening! By the end it felt like a chore, so I even had to take a couple of weeks brake from the model.
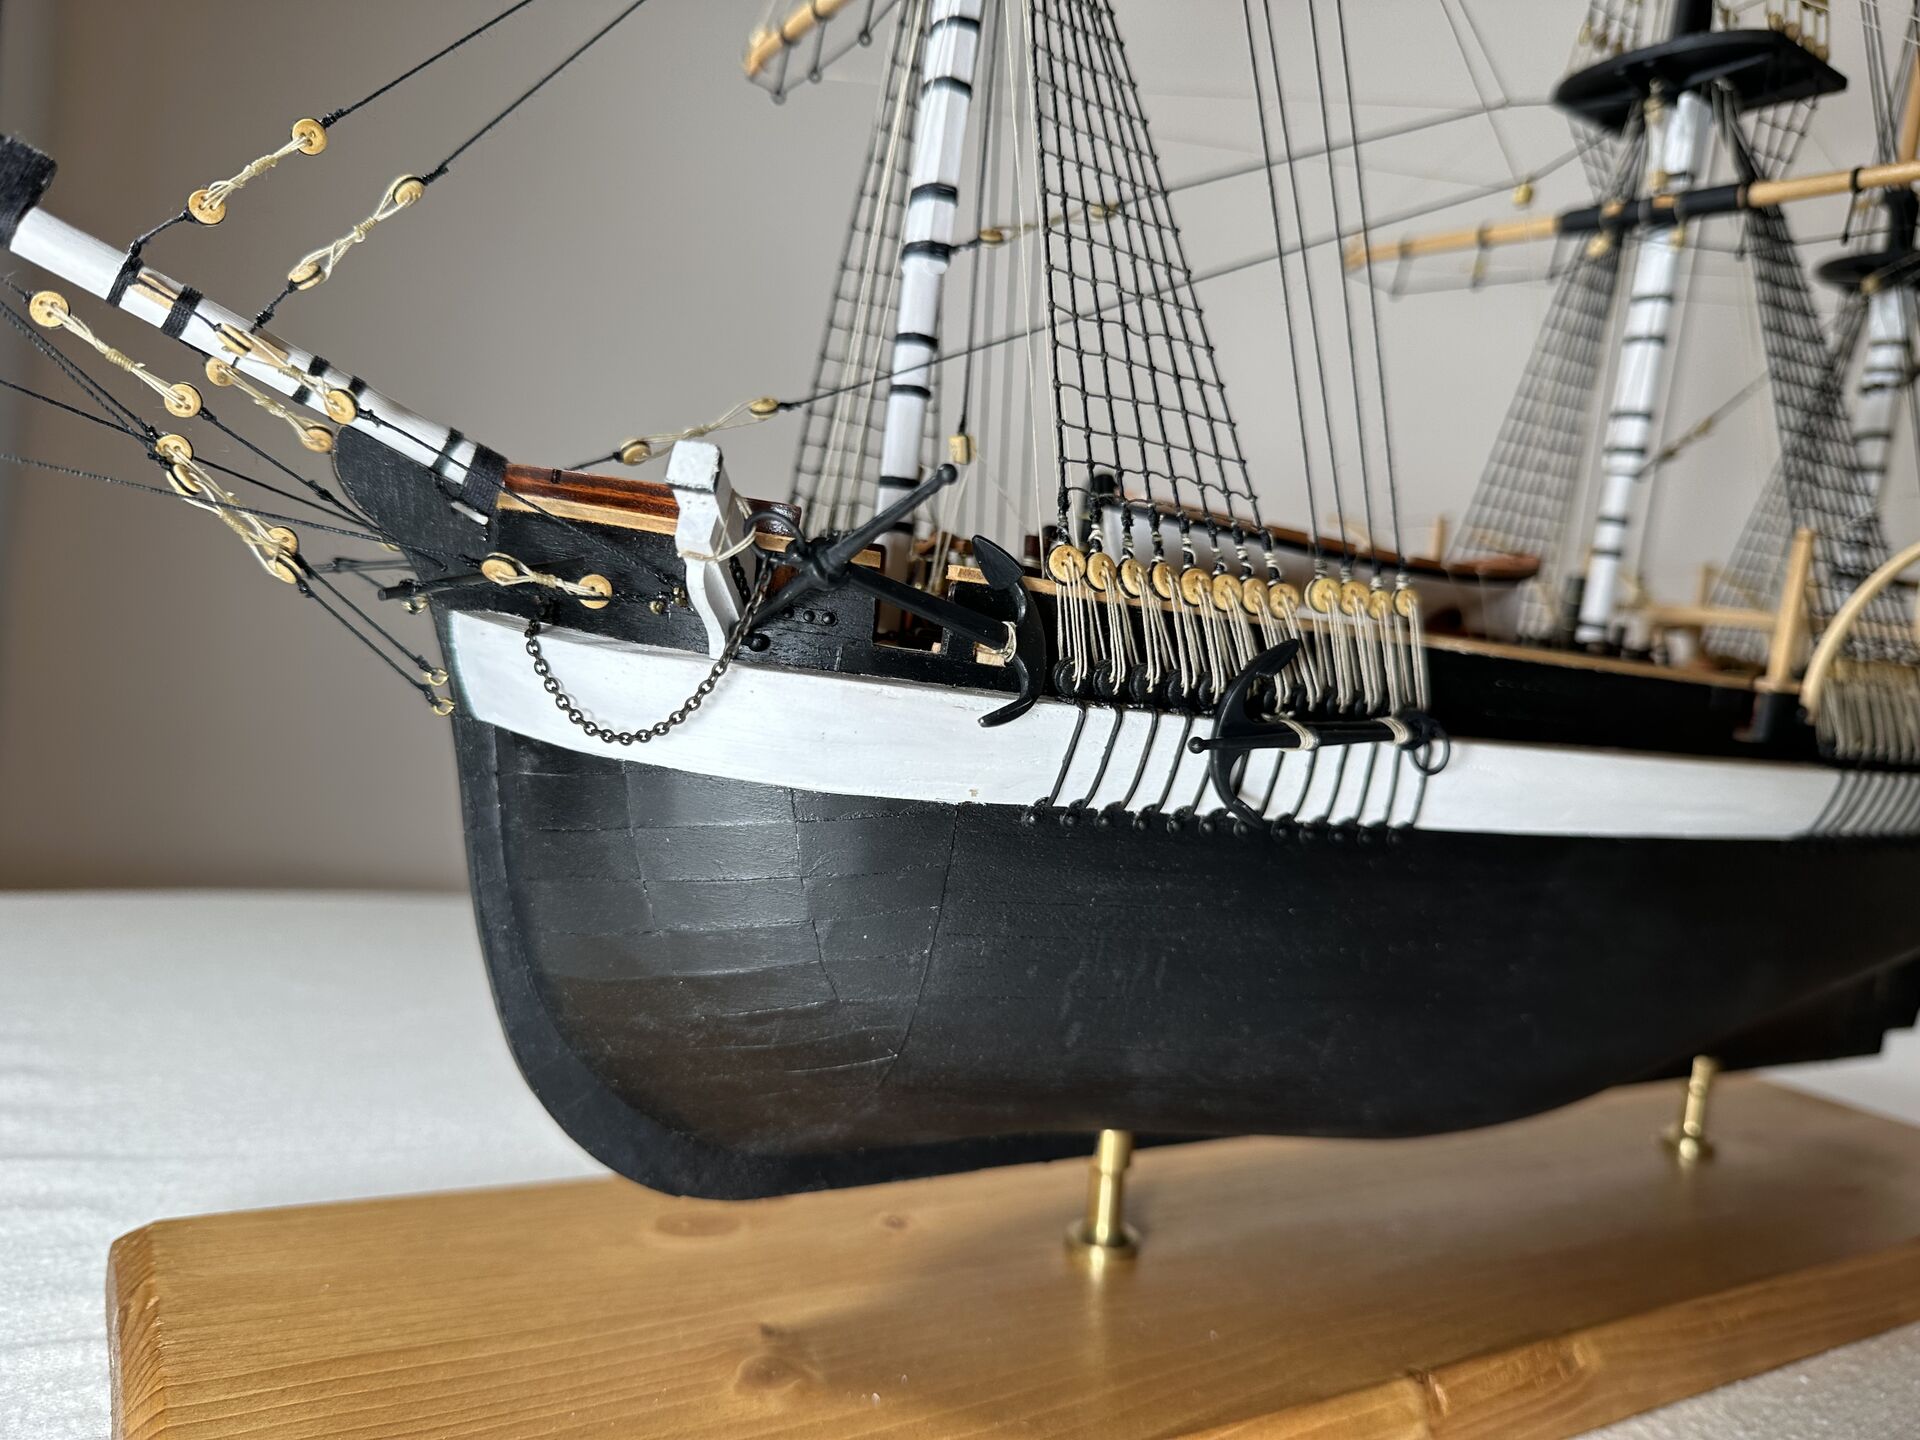
But the end result looks nice indeed, I almost reconsidered my decision to paint the hull.
2020
Next I worked on transom decoration and rudder, which you can see on next photo.
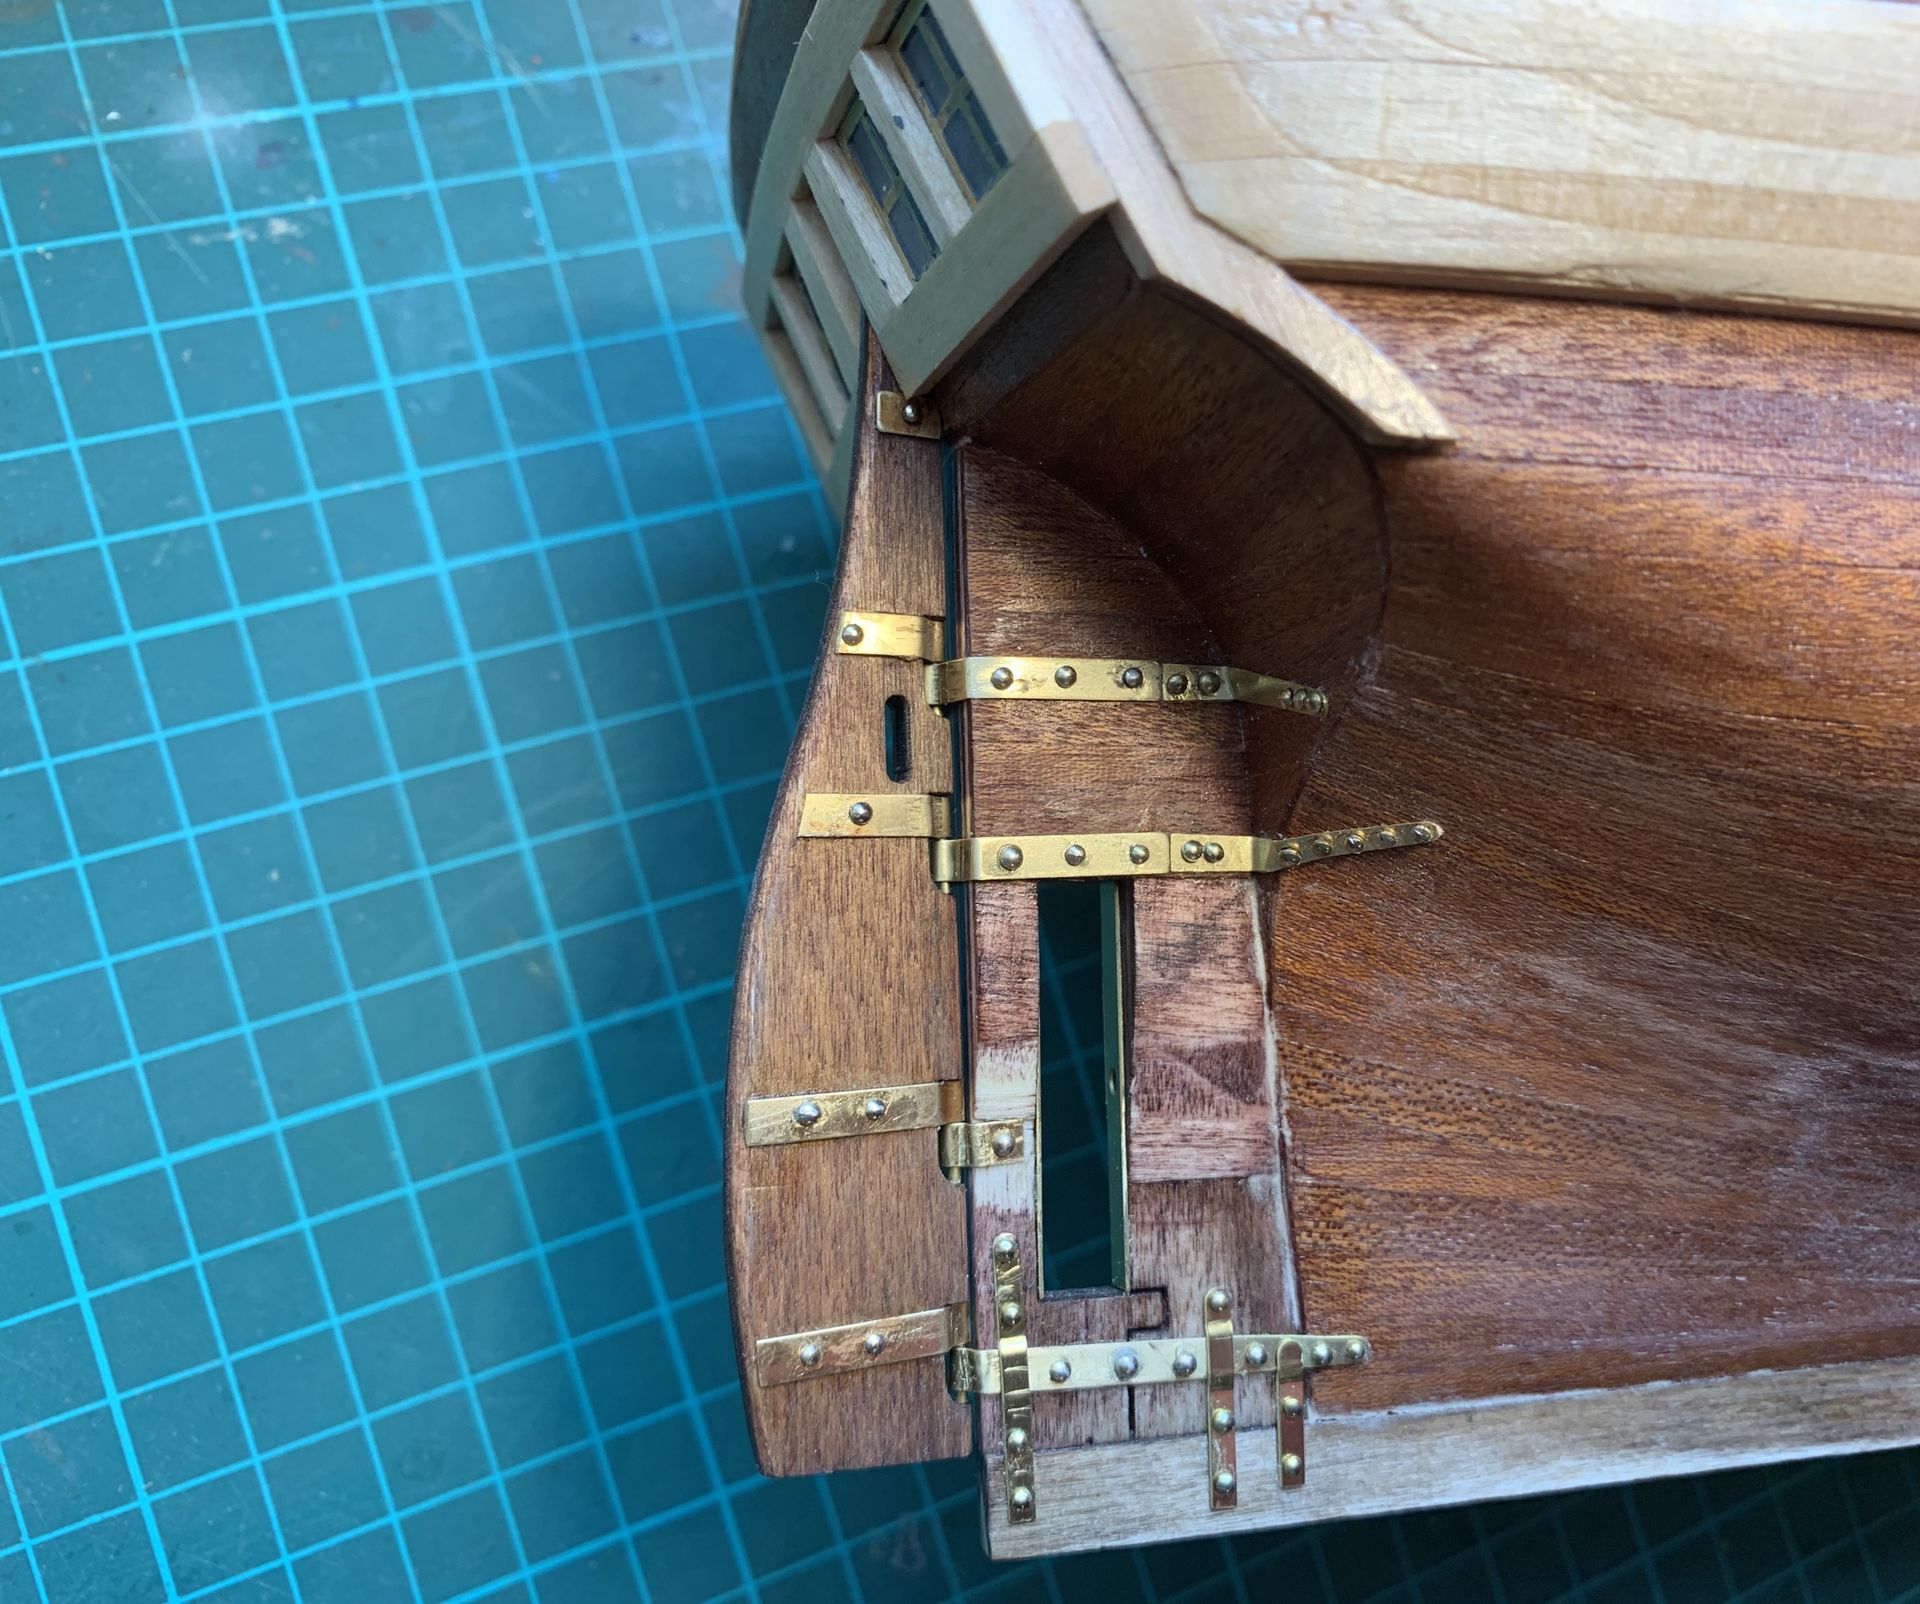
I’m glad OcCre supplies pre-formed hinges for the rudder, somehow Master Korabel does not, and making those from metal strips is not super fun.
Anyway, next I painted the hull and rubbing strakes, added the catheads, discovered that I placed the transom windows in the wrong place, and had to re-do the whole thing.
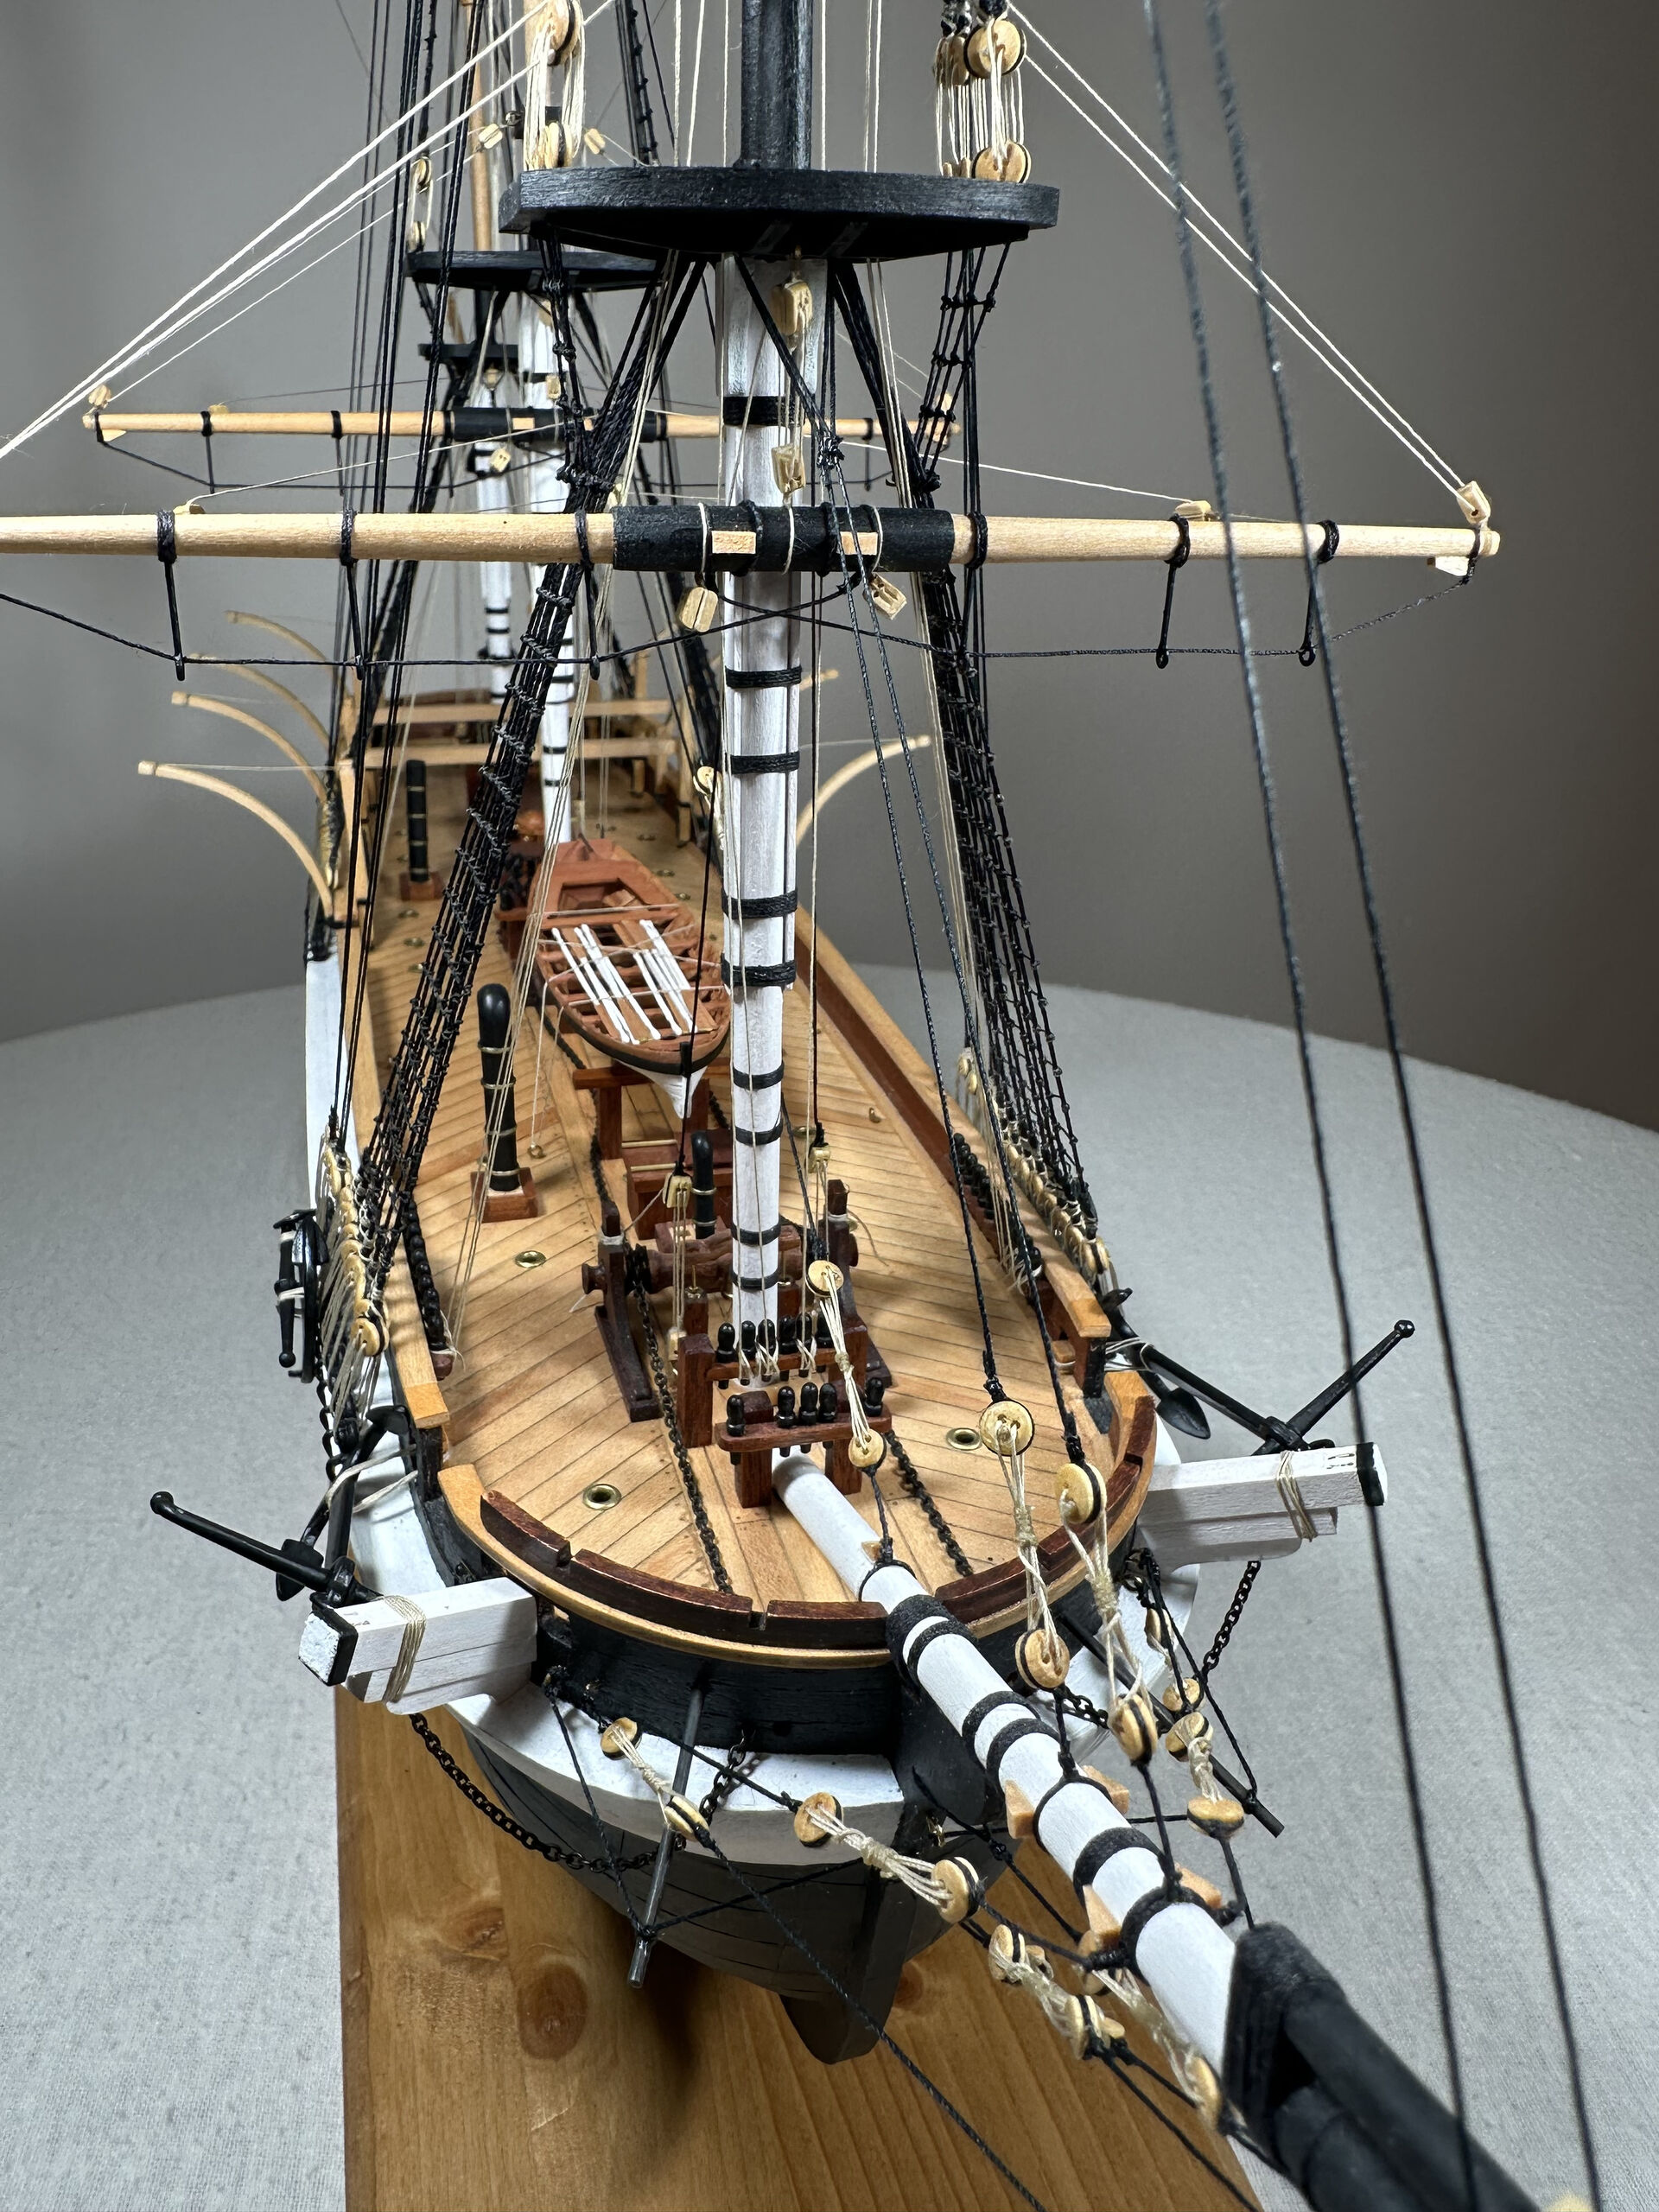
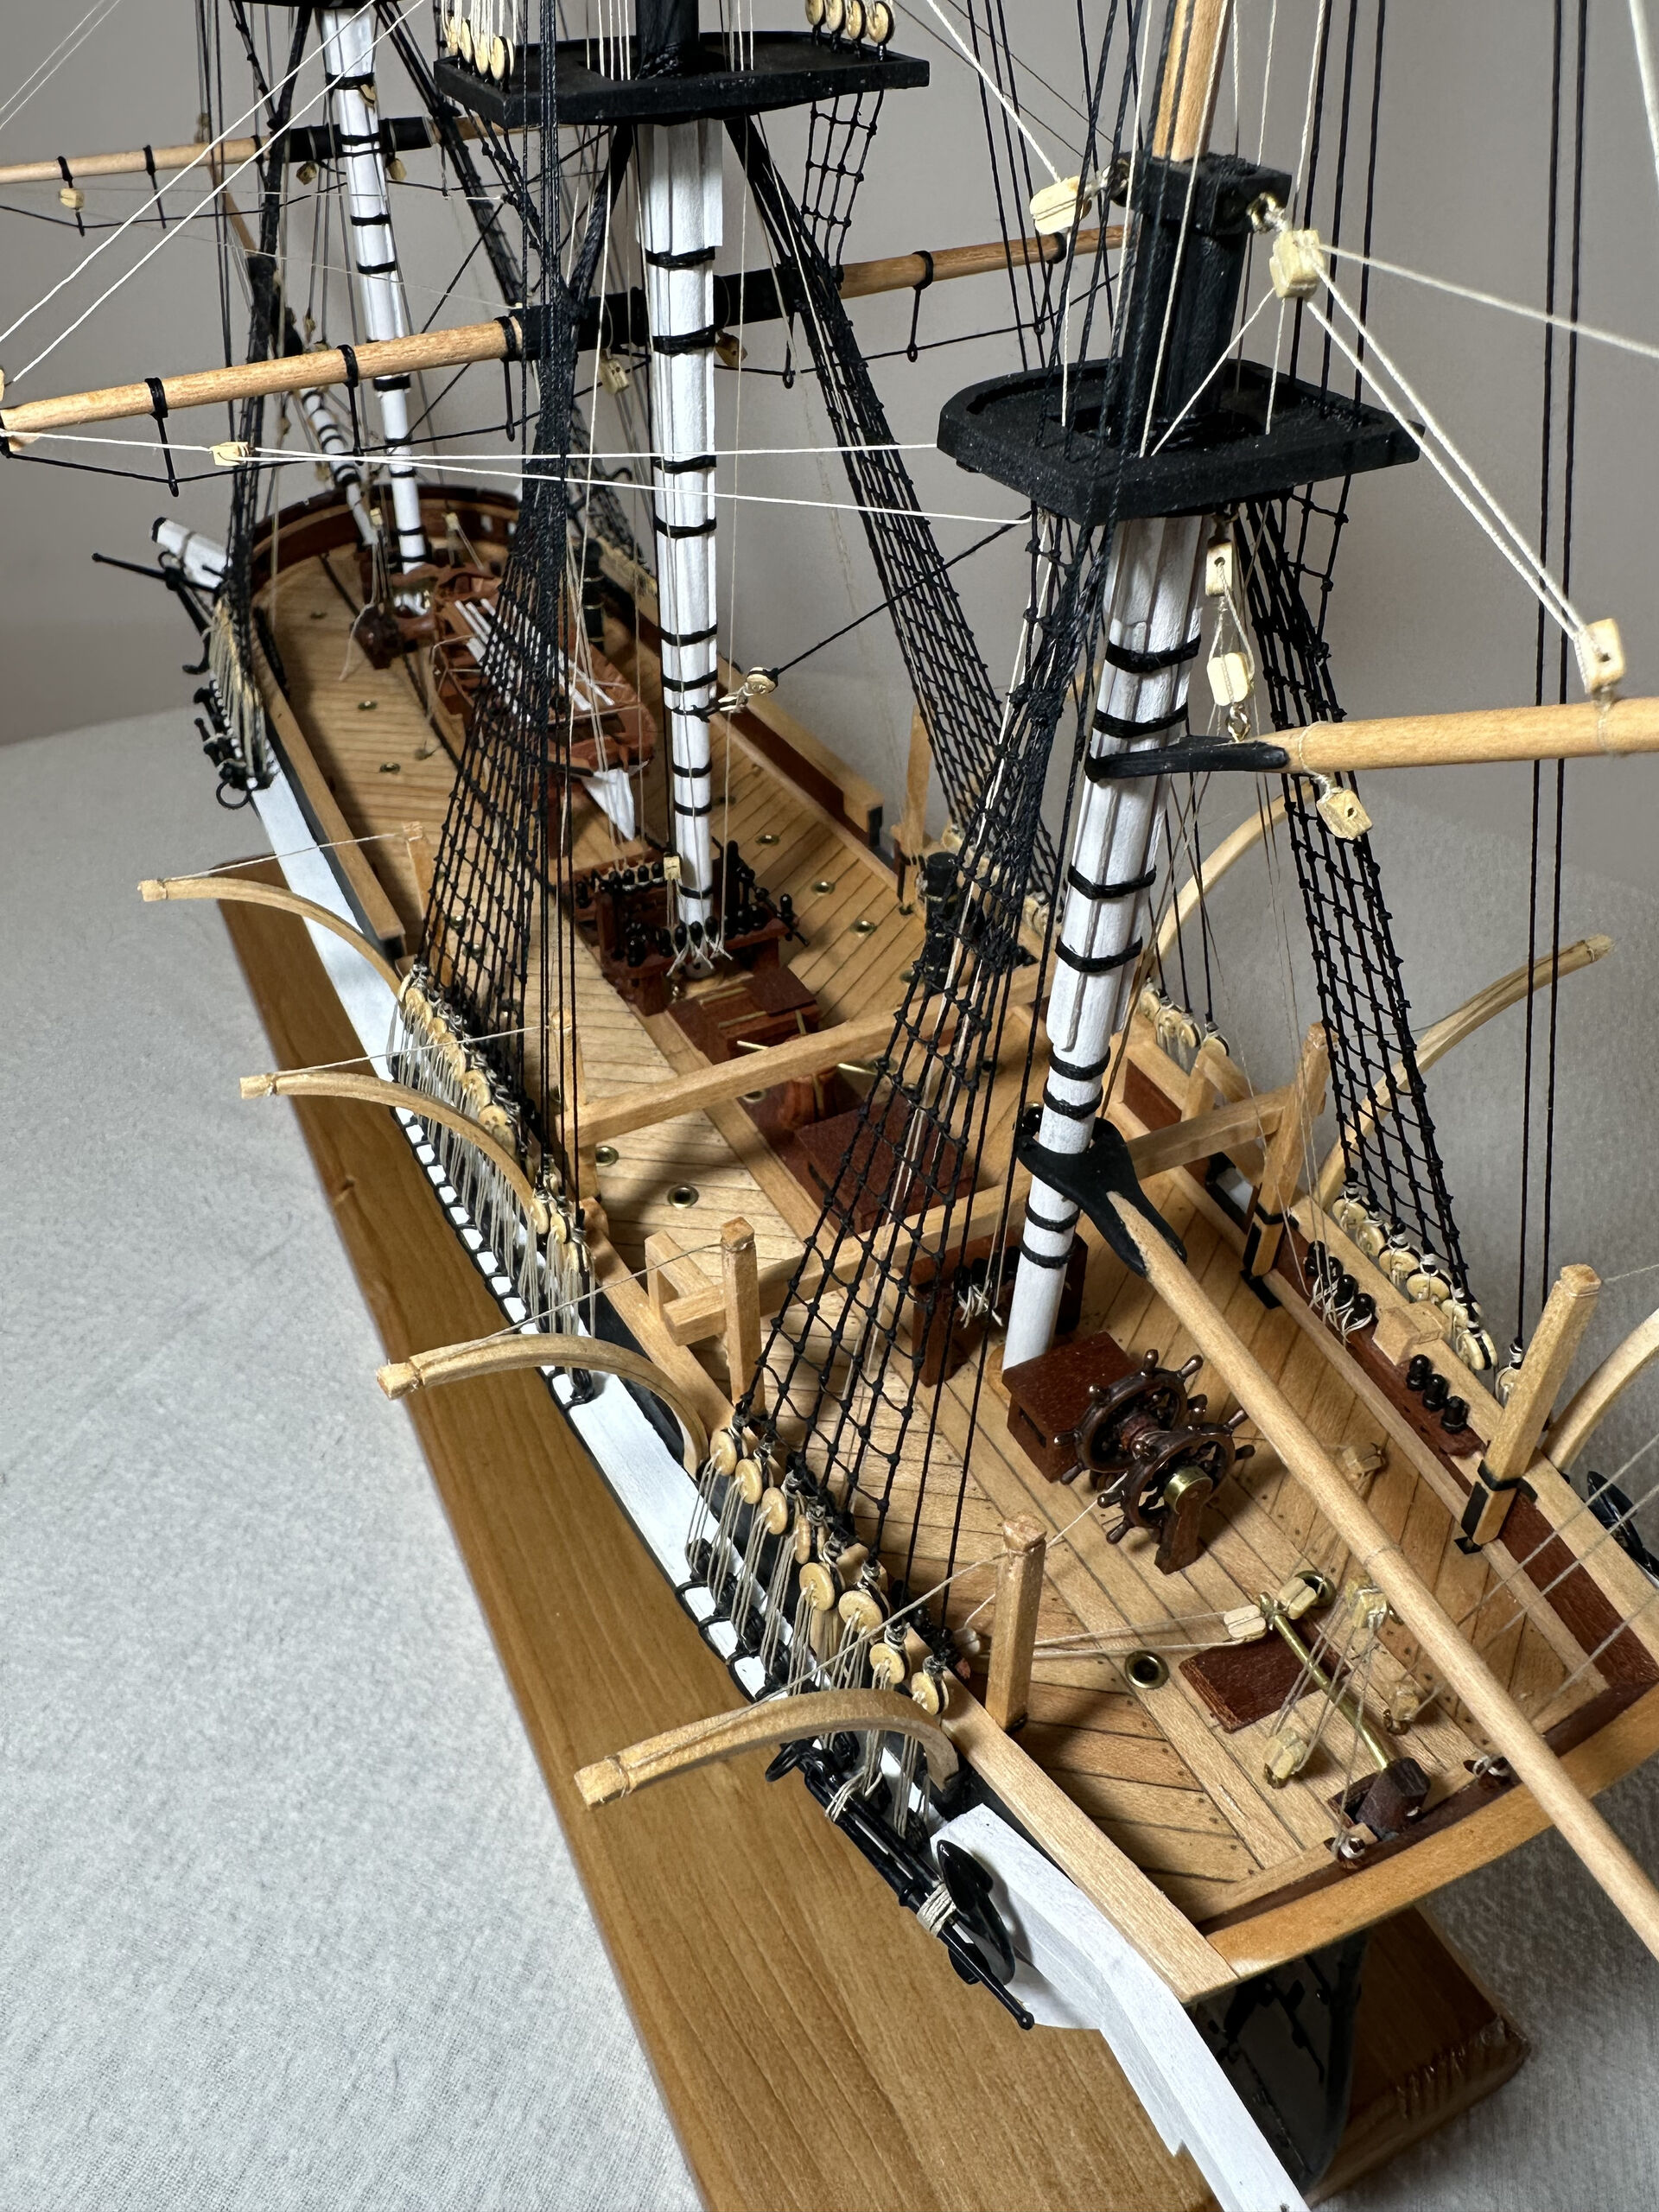
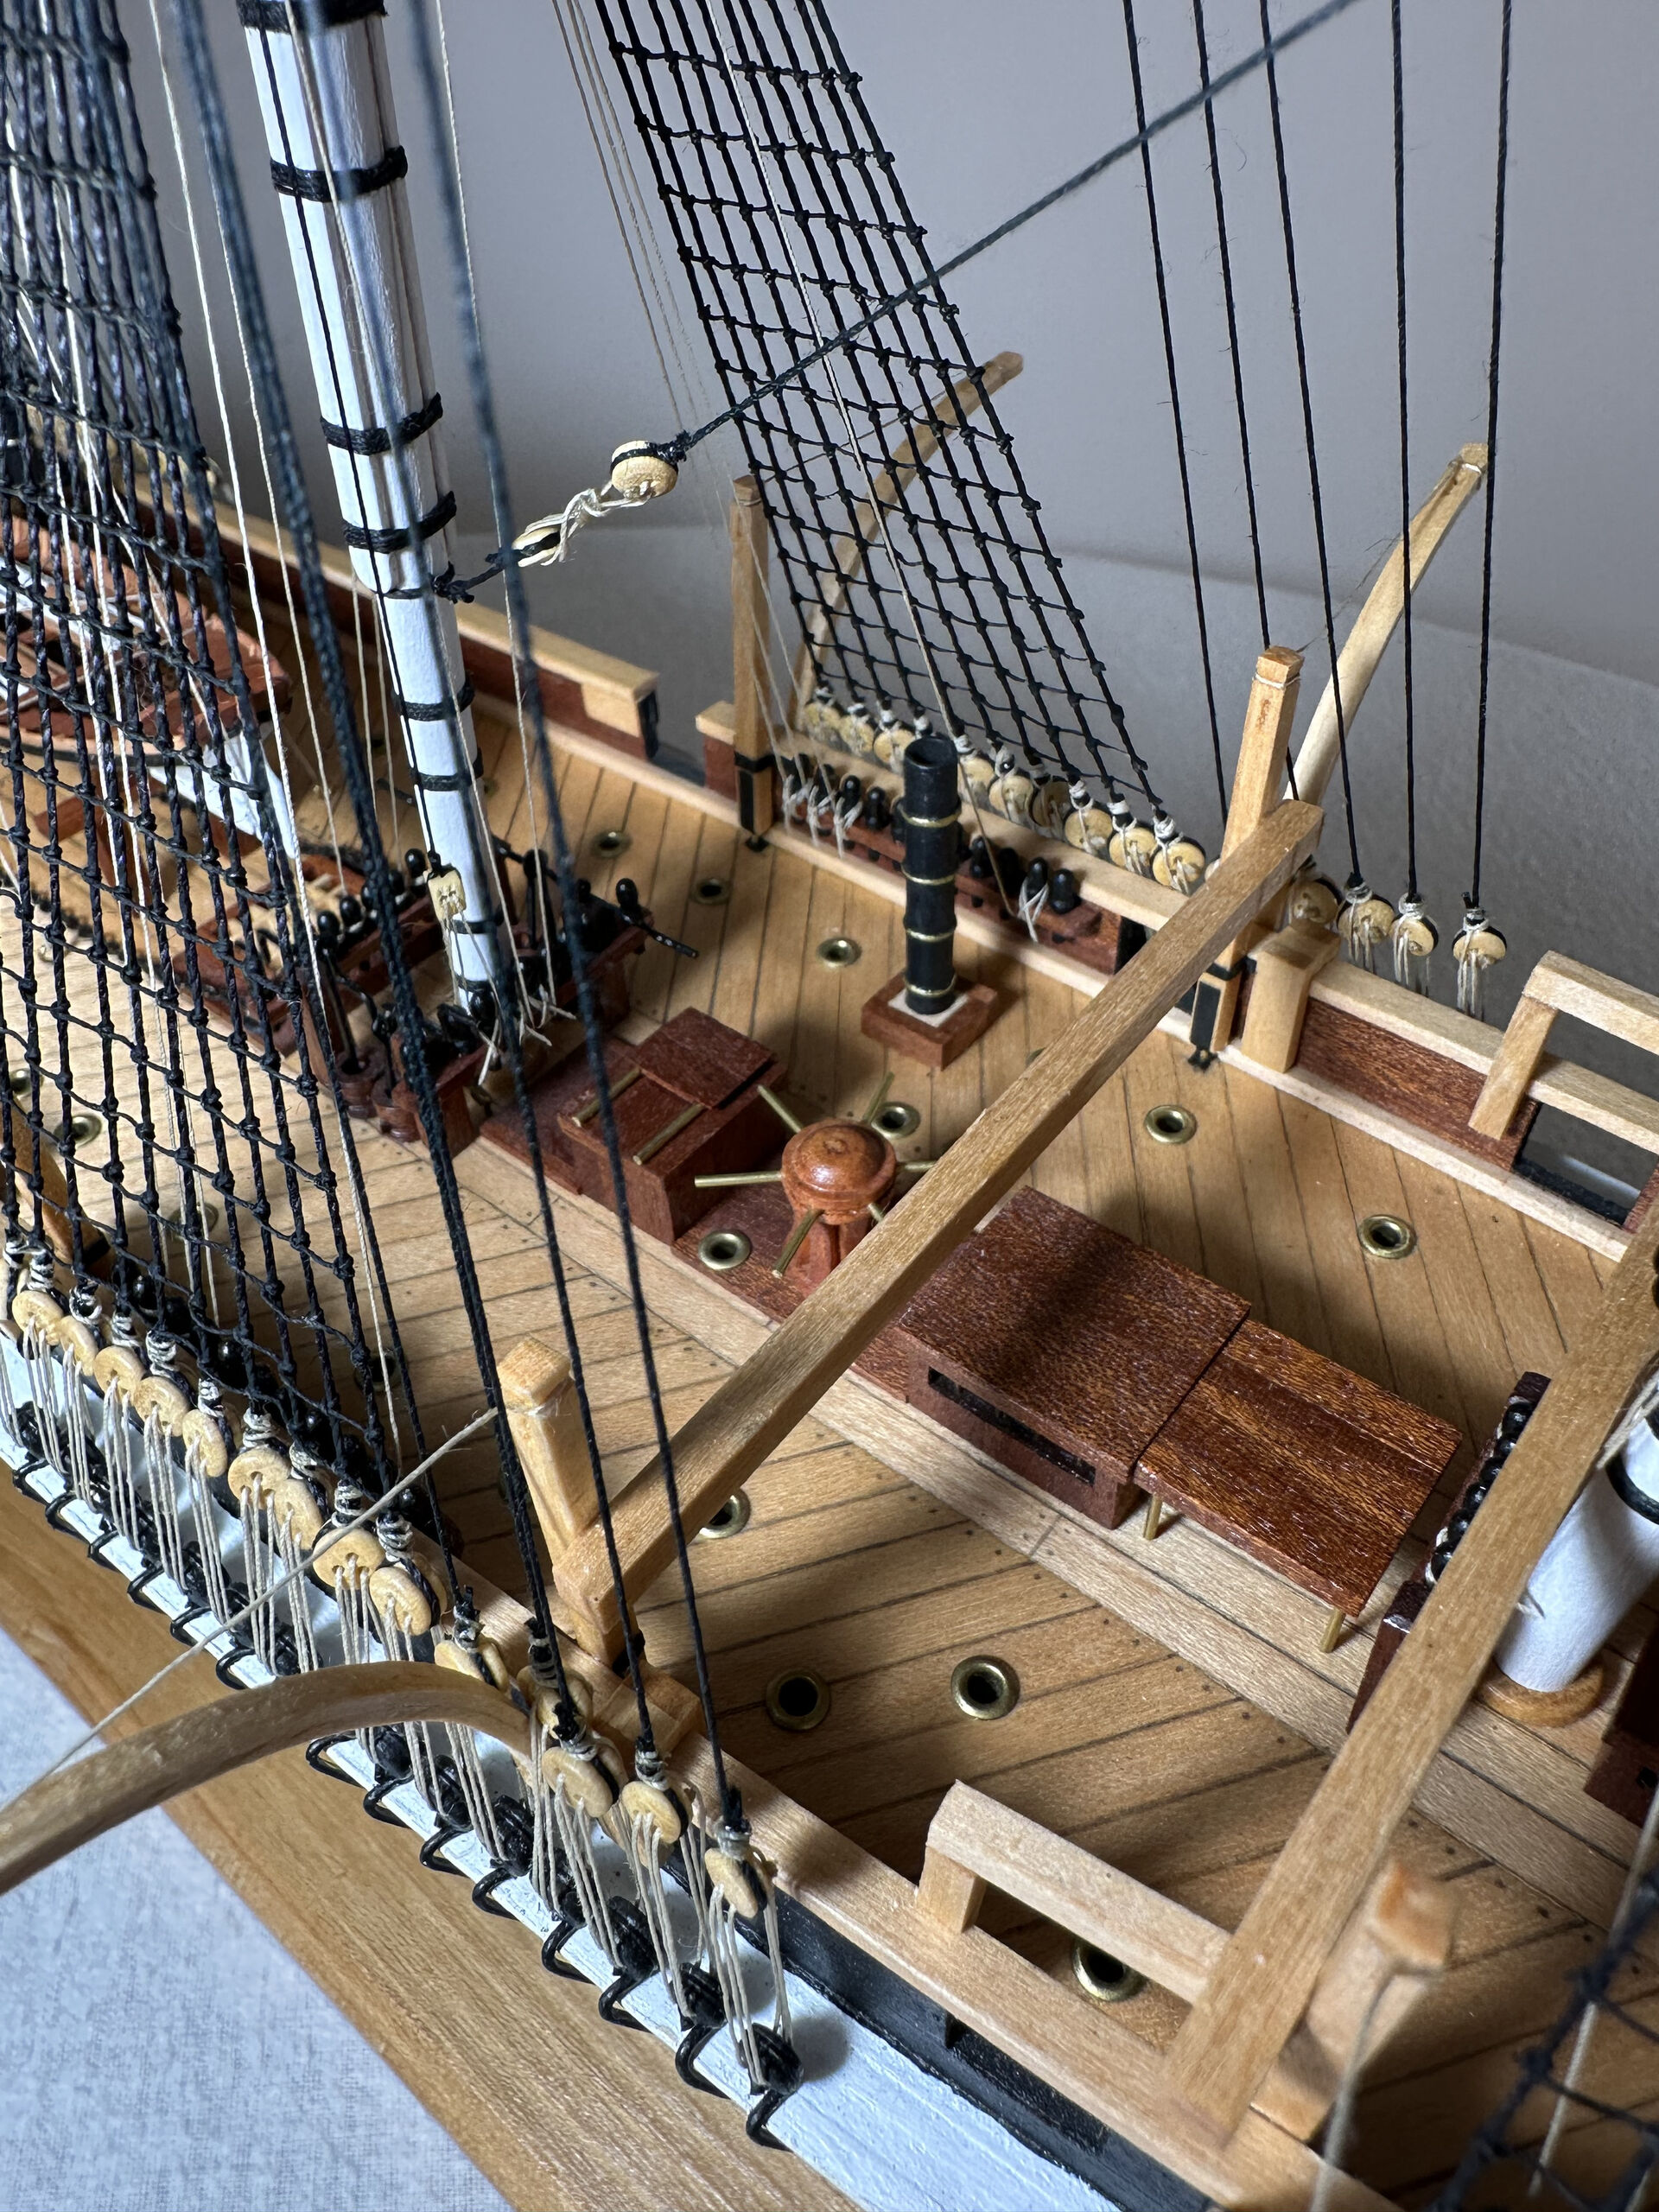
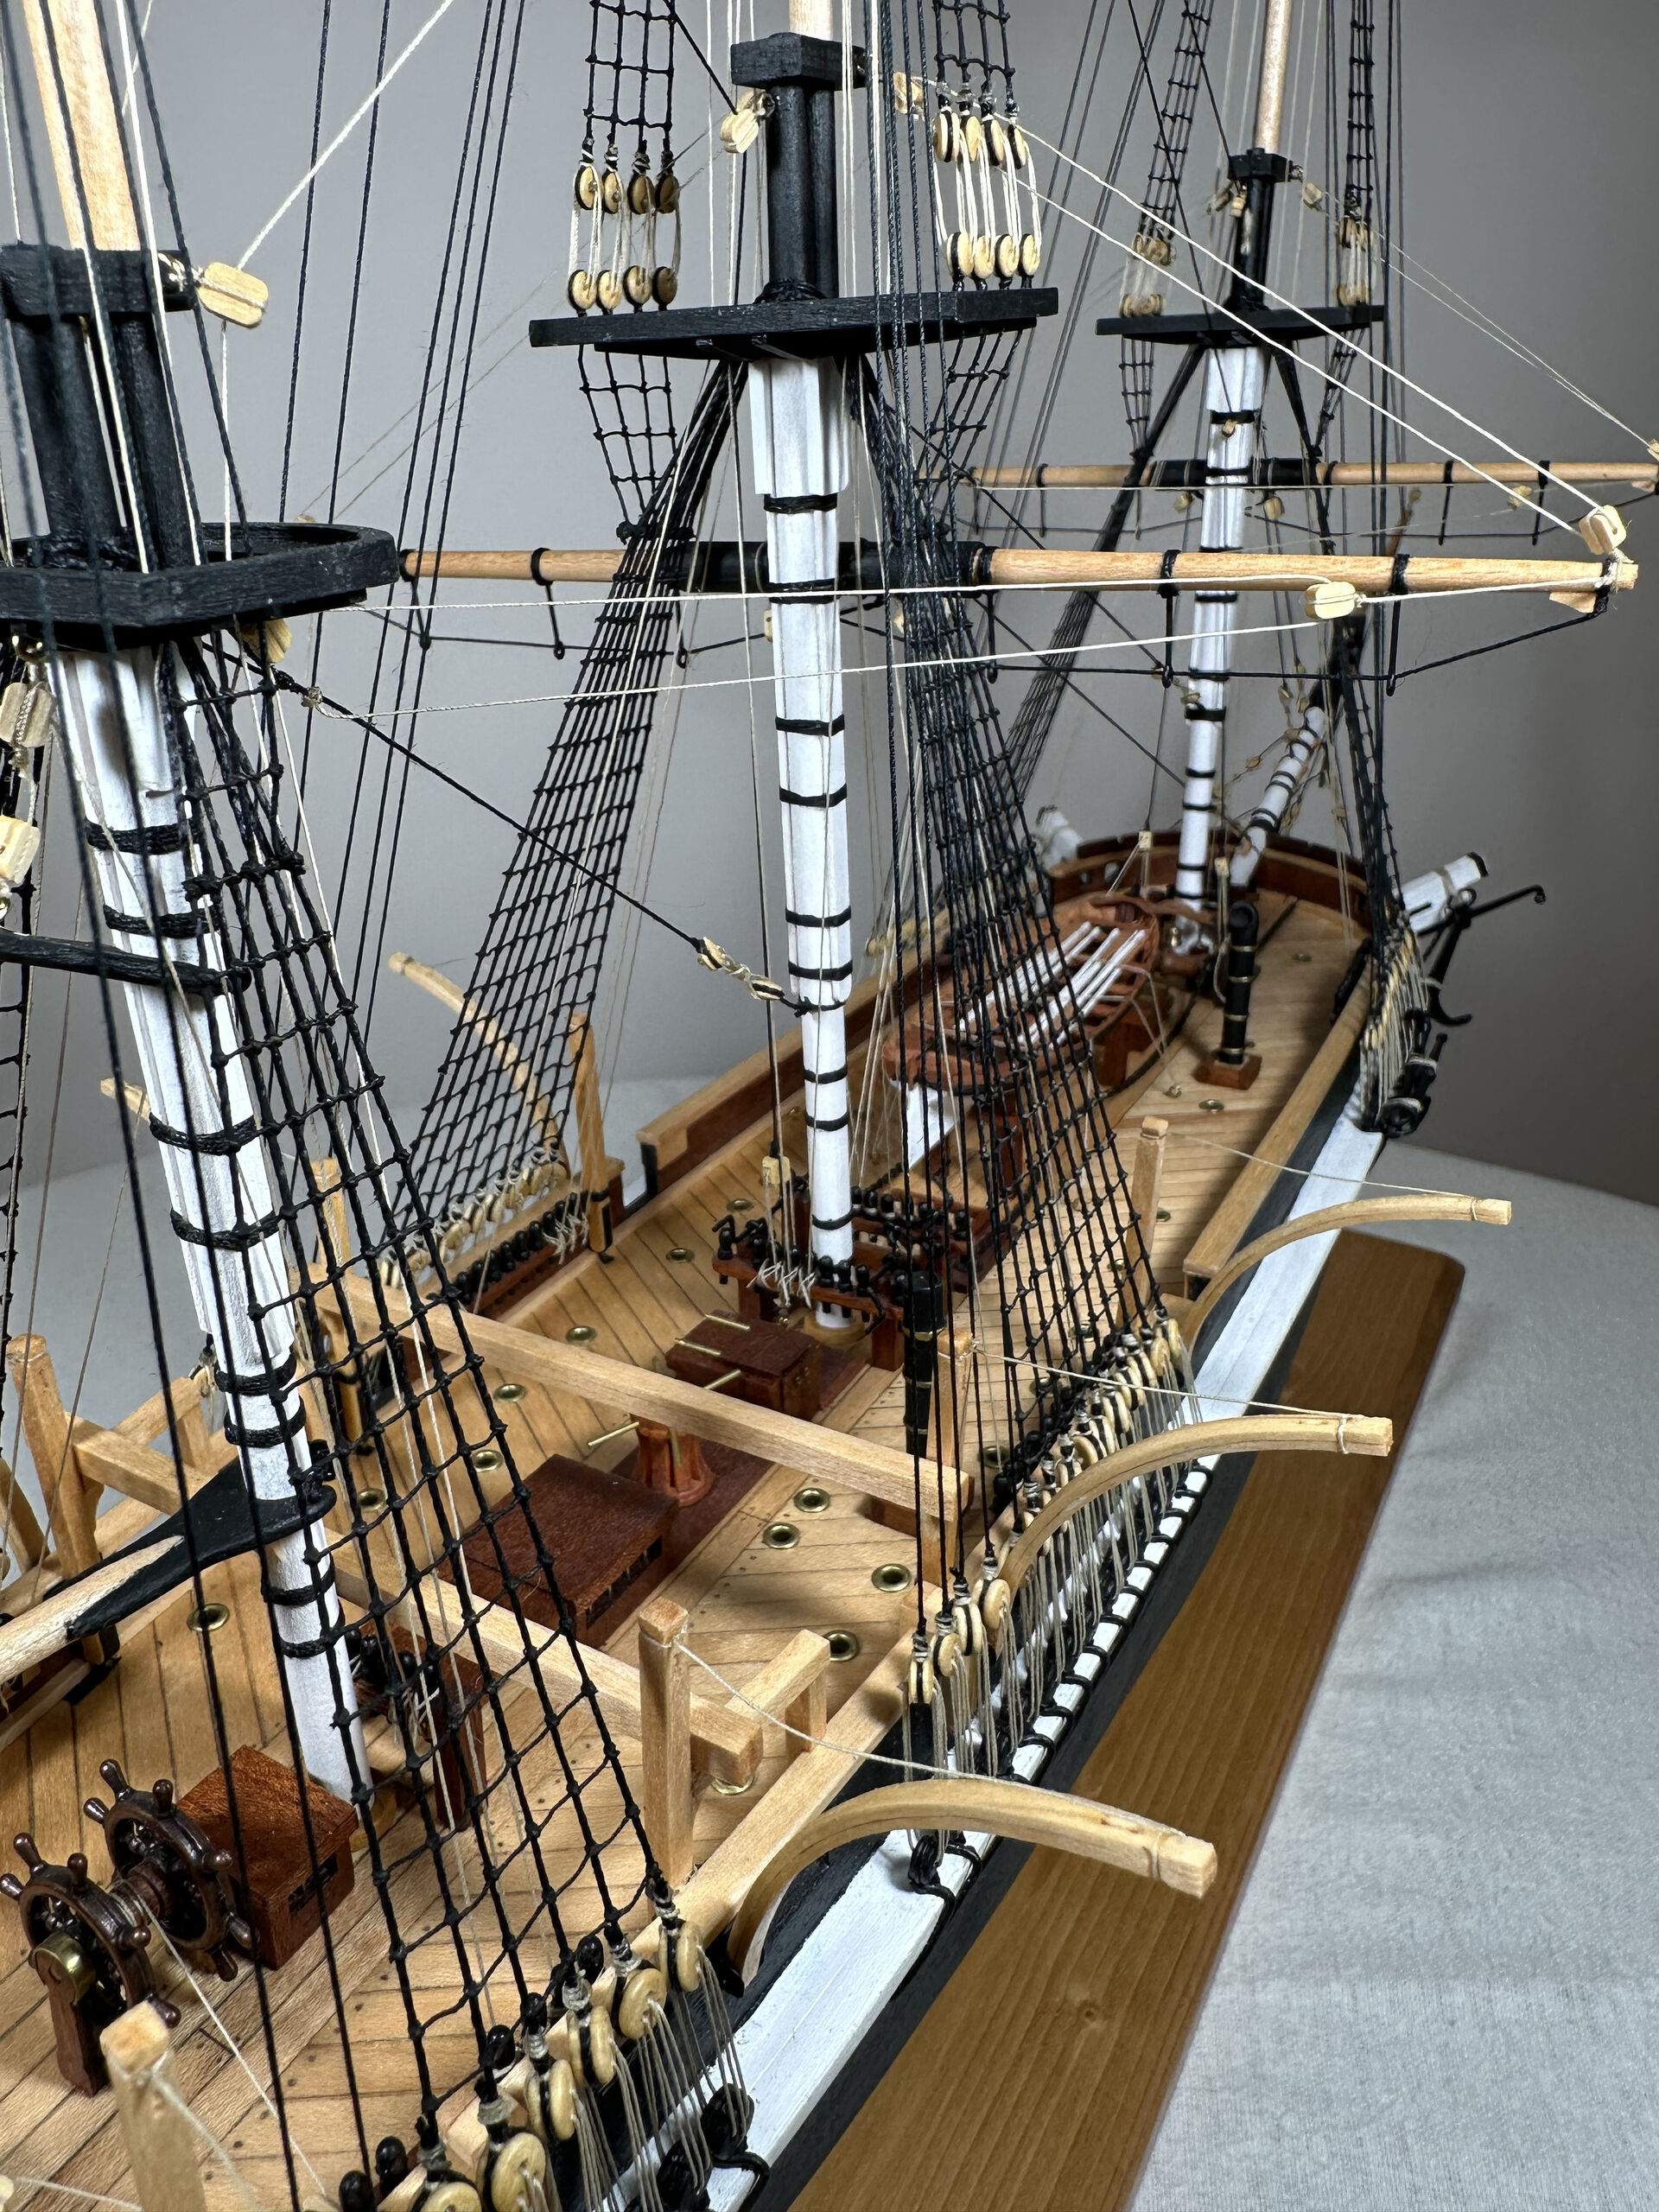
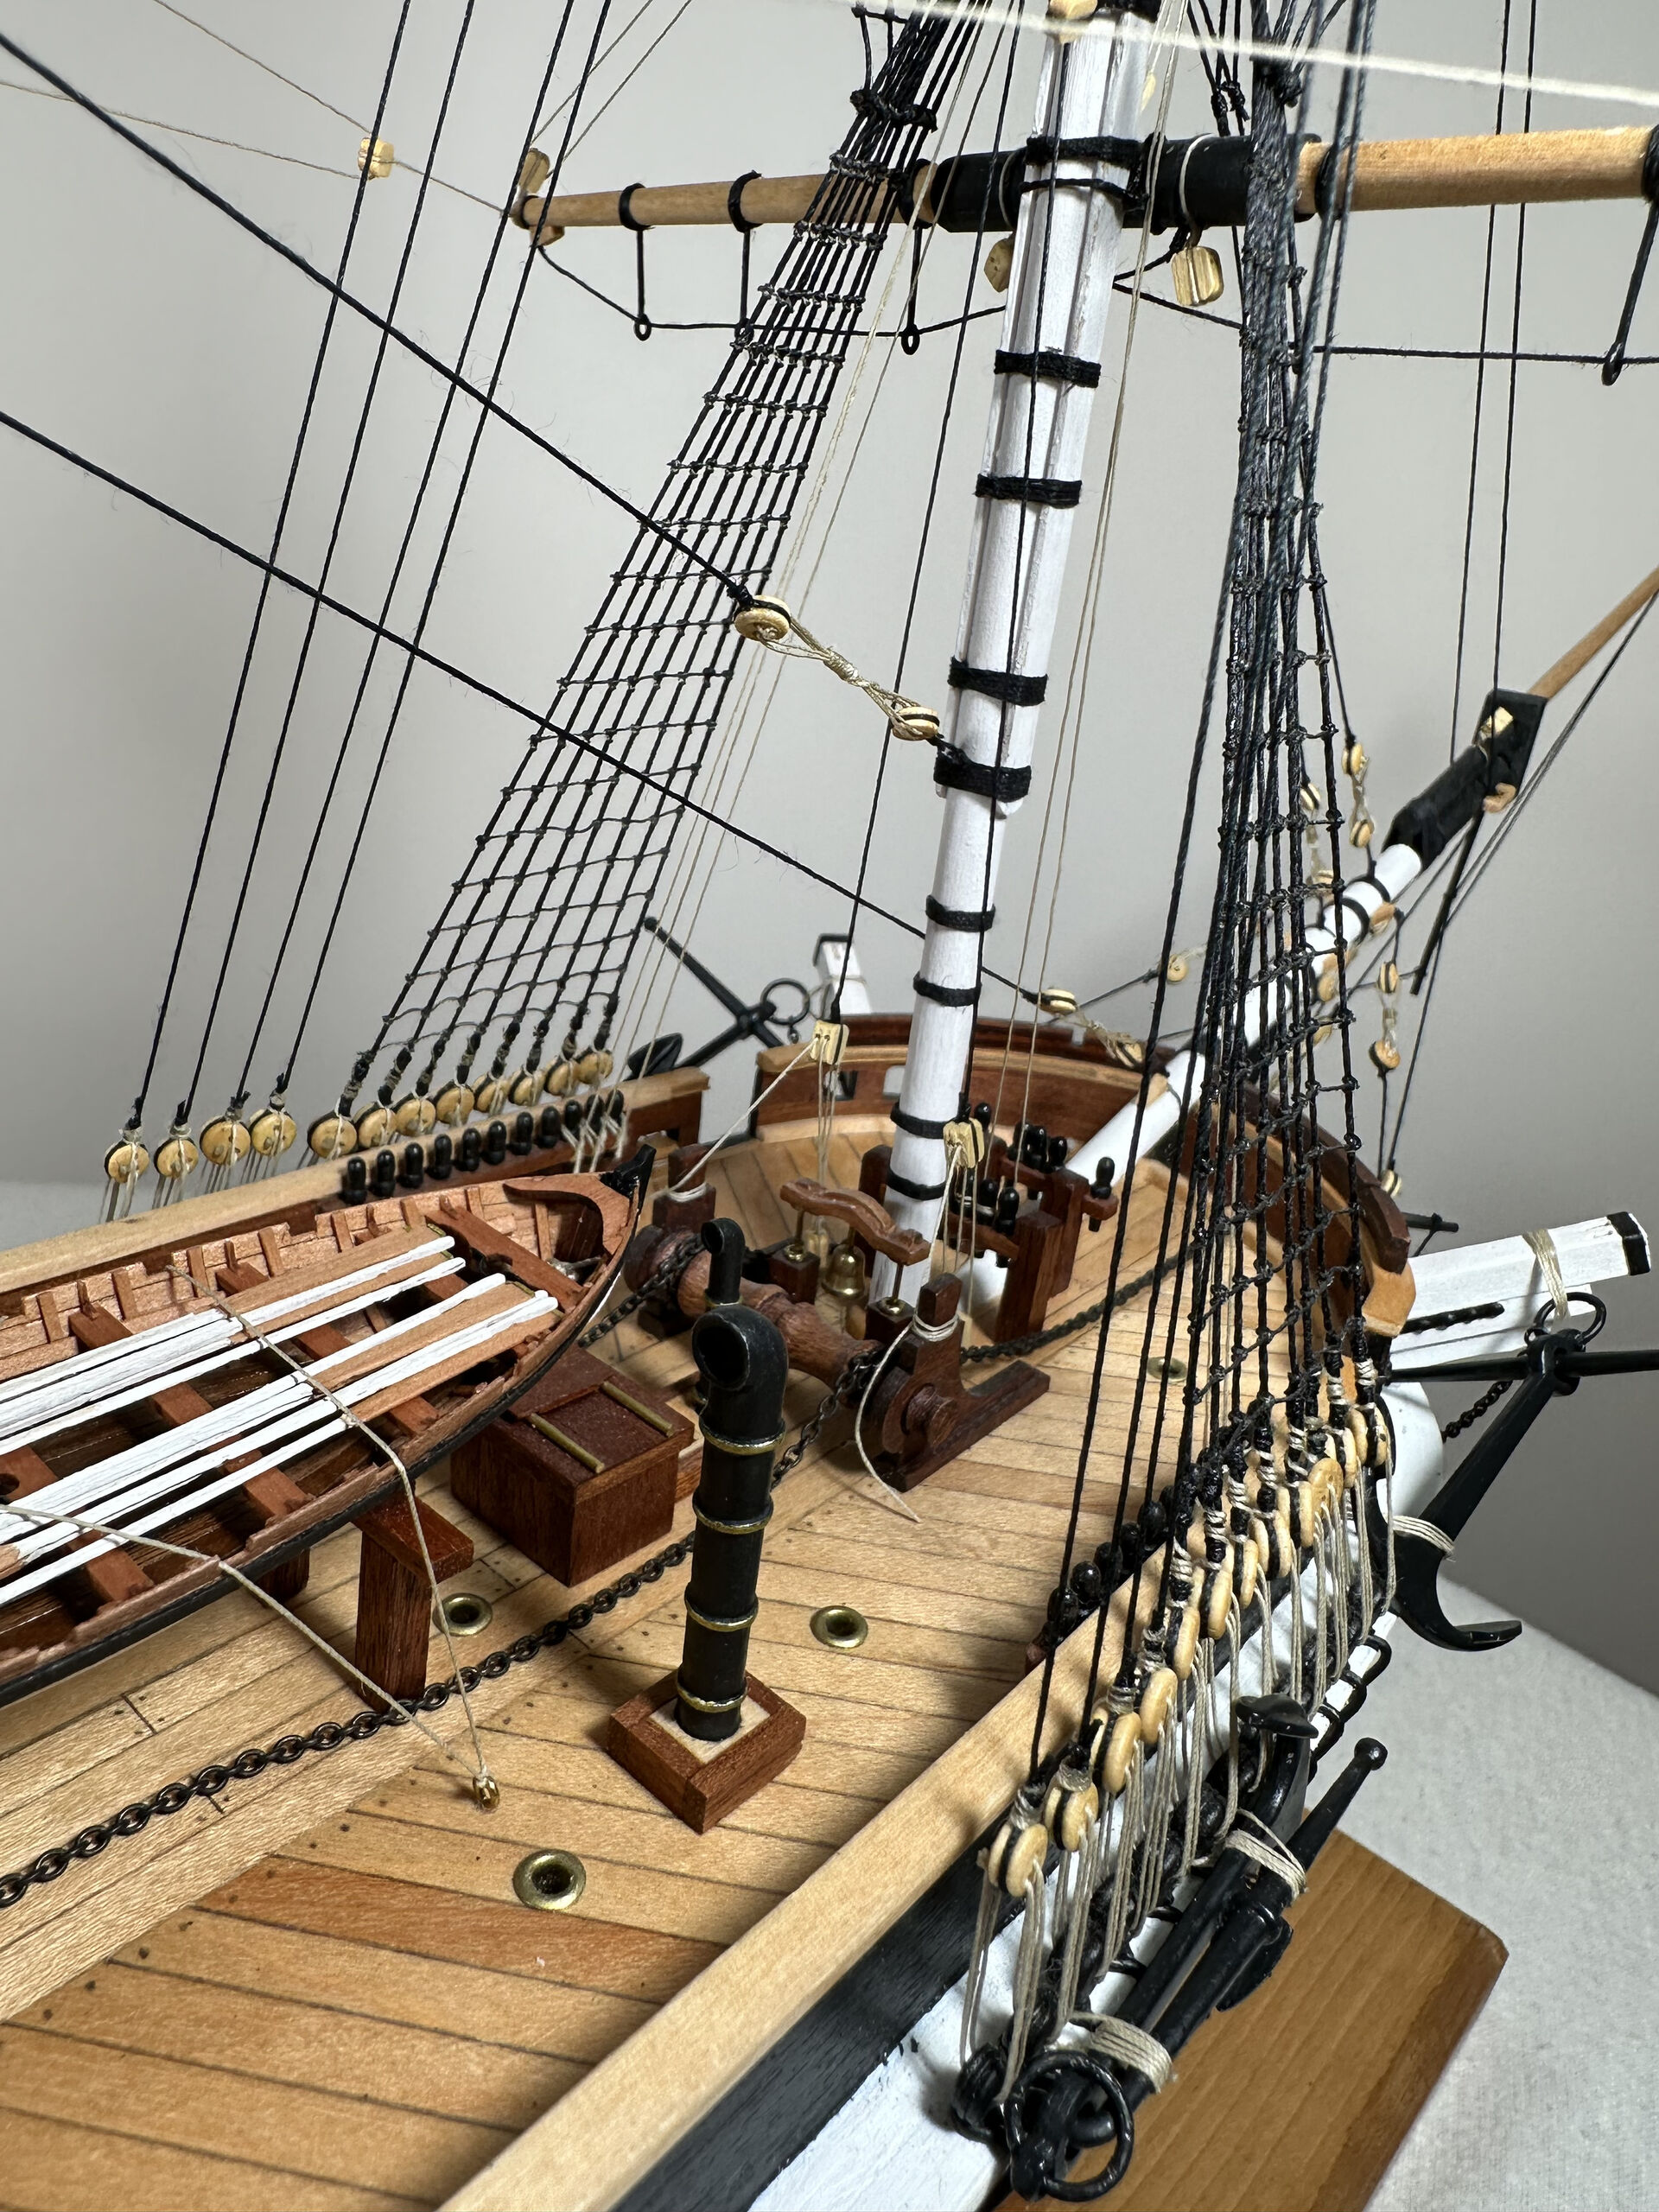
Many more hours were then spent on the deck furniture.
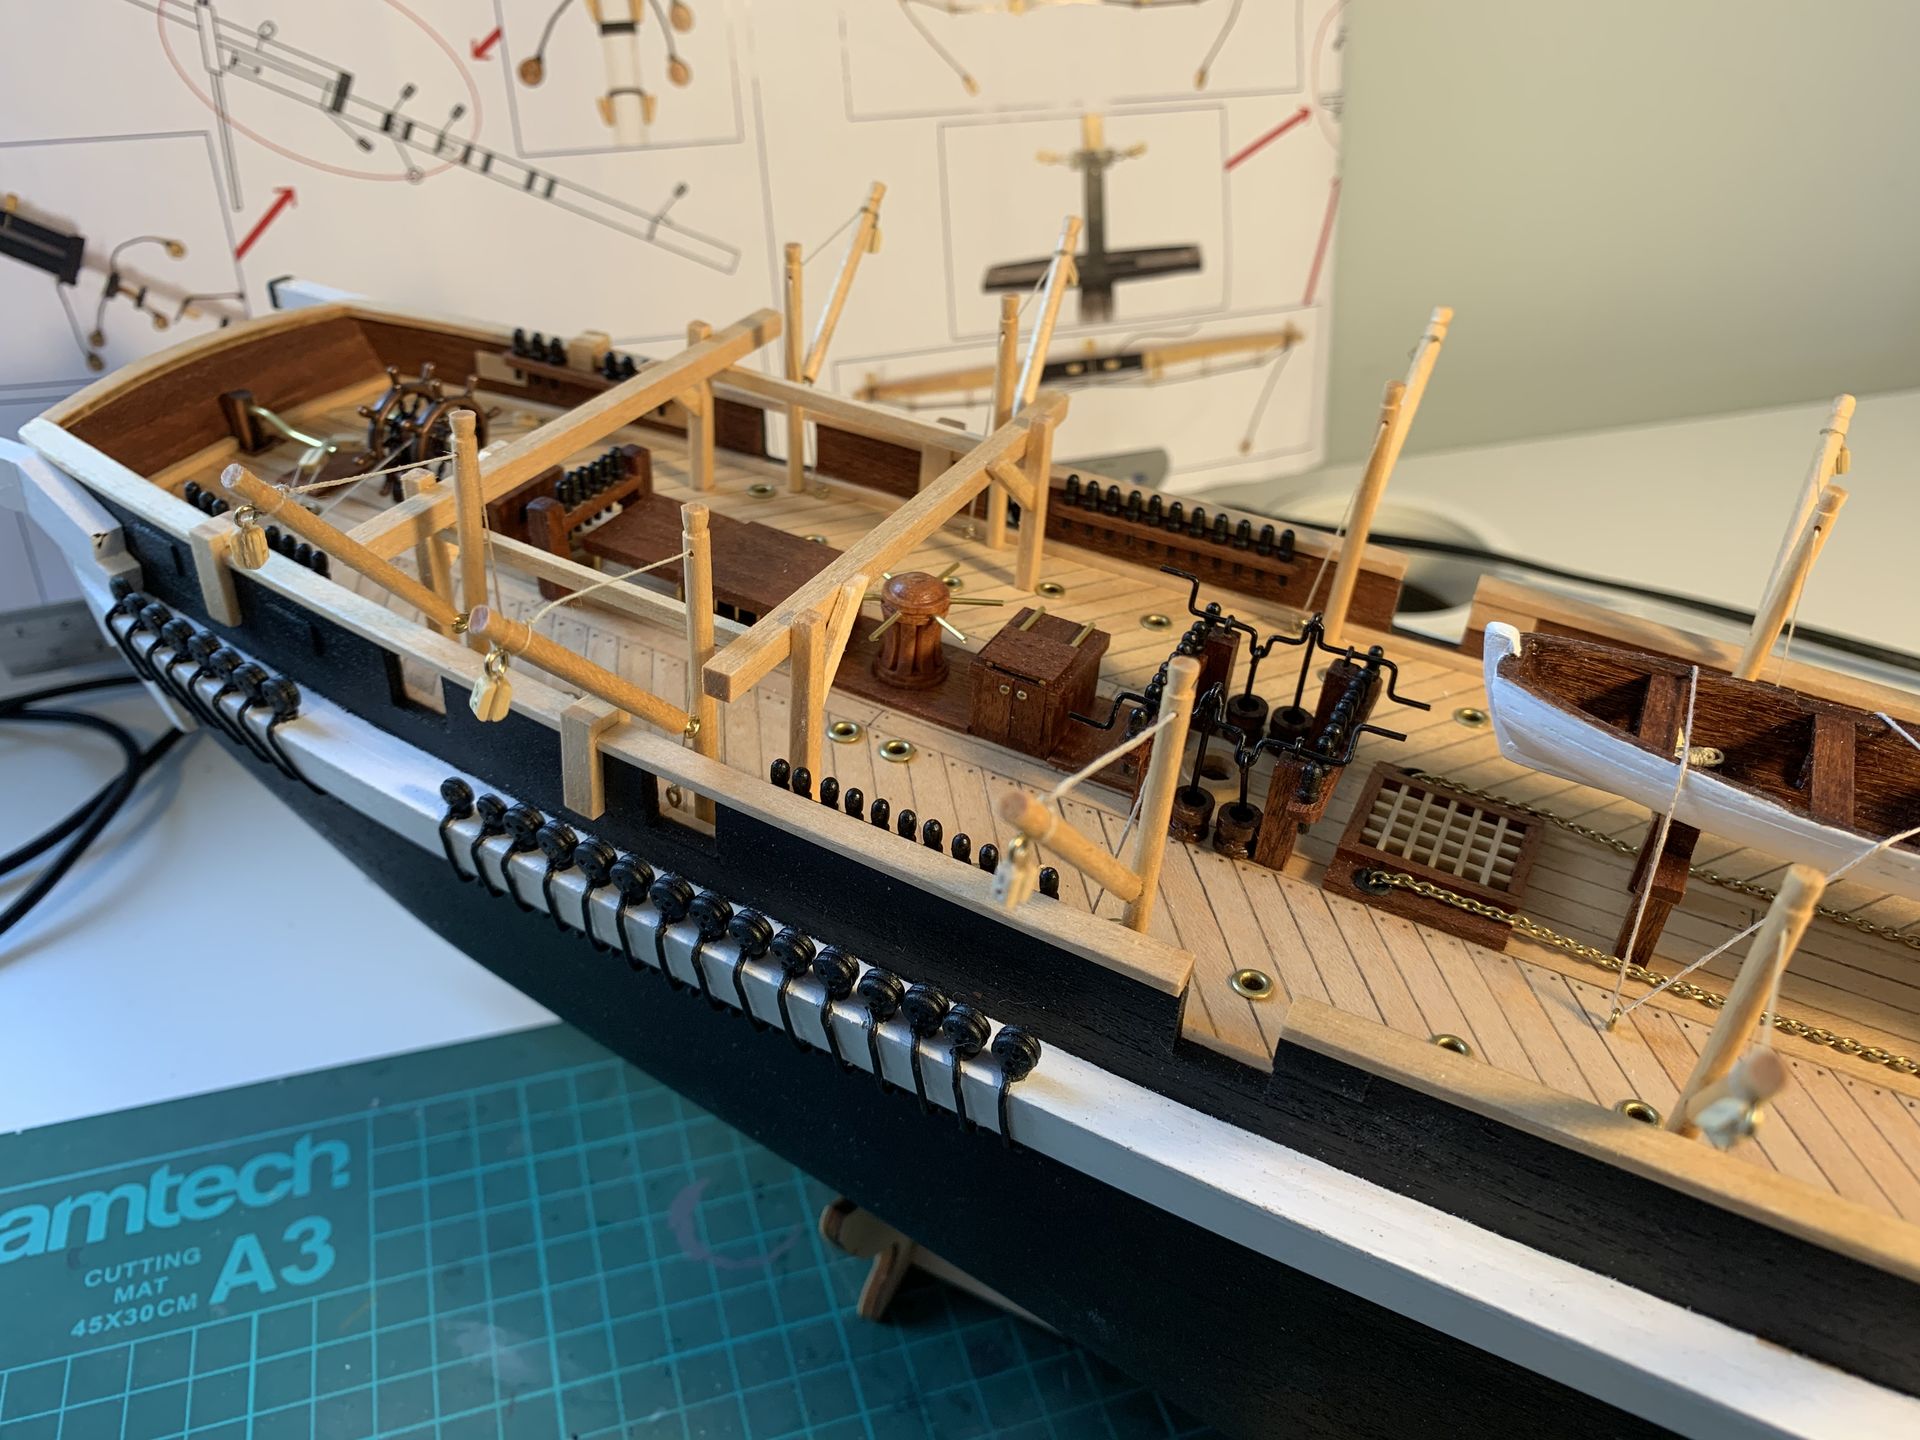
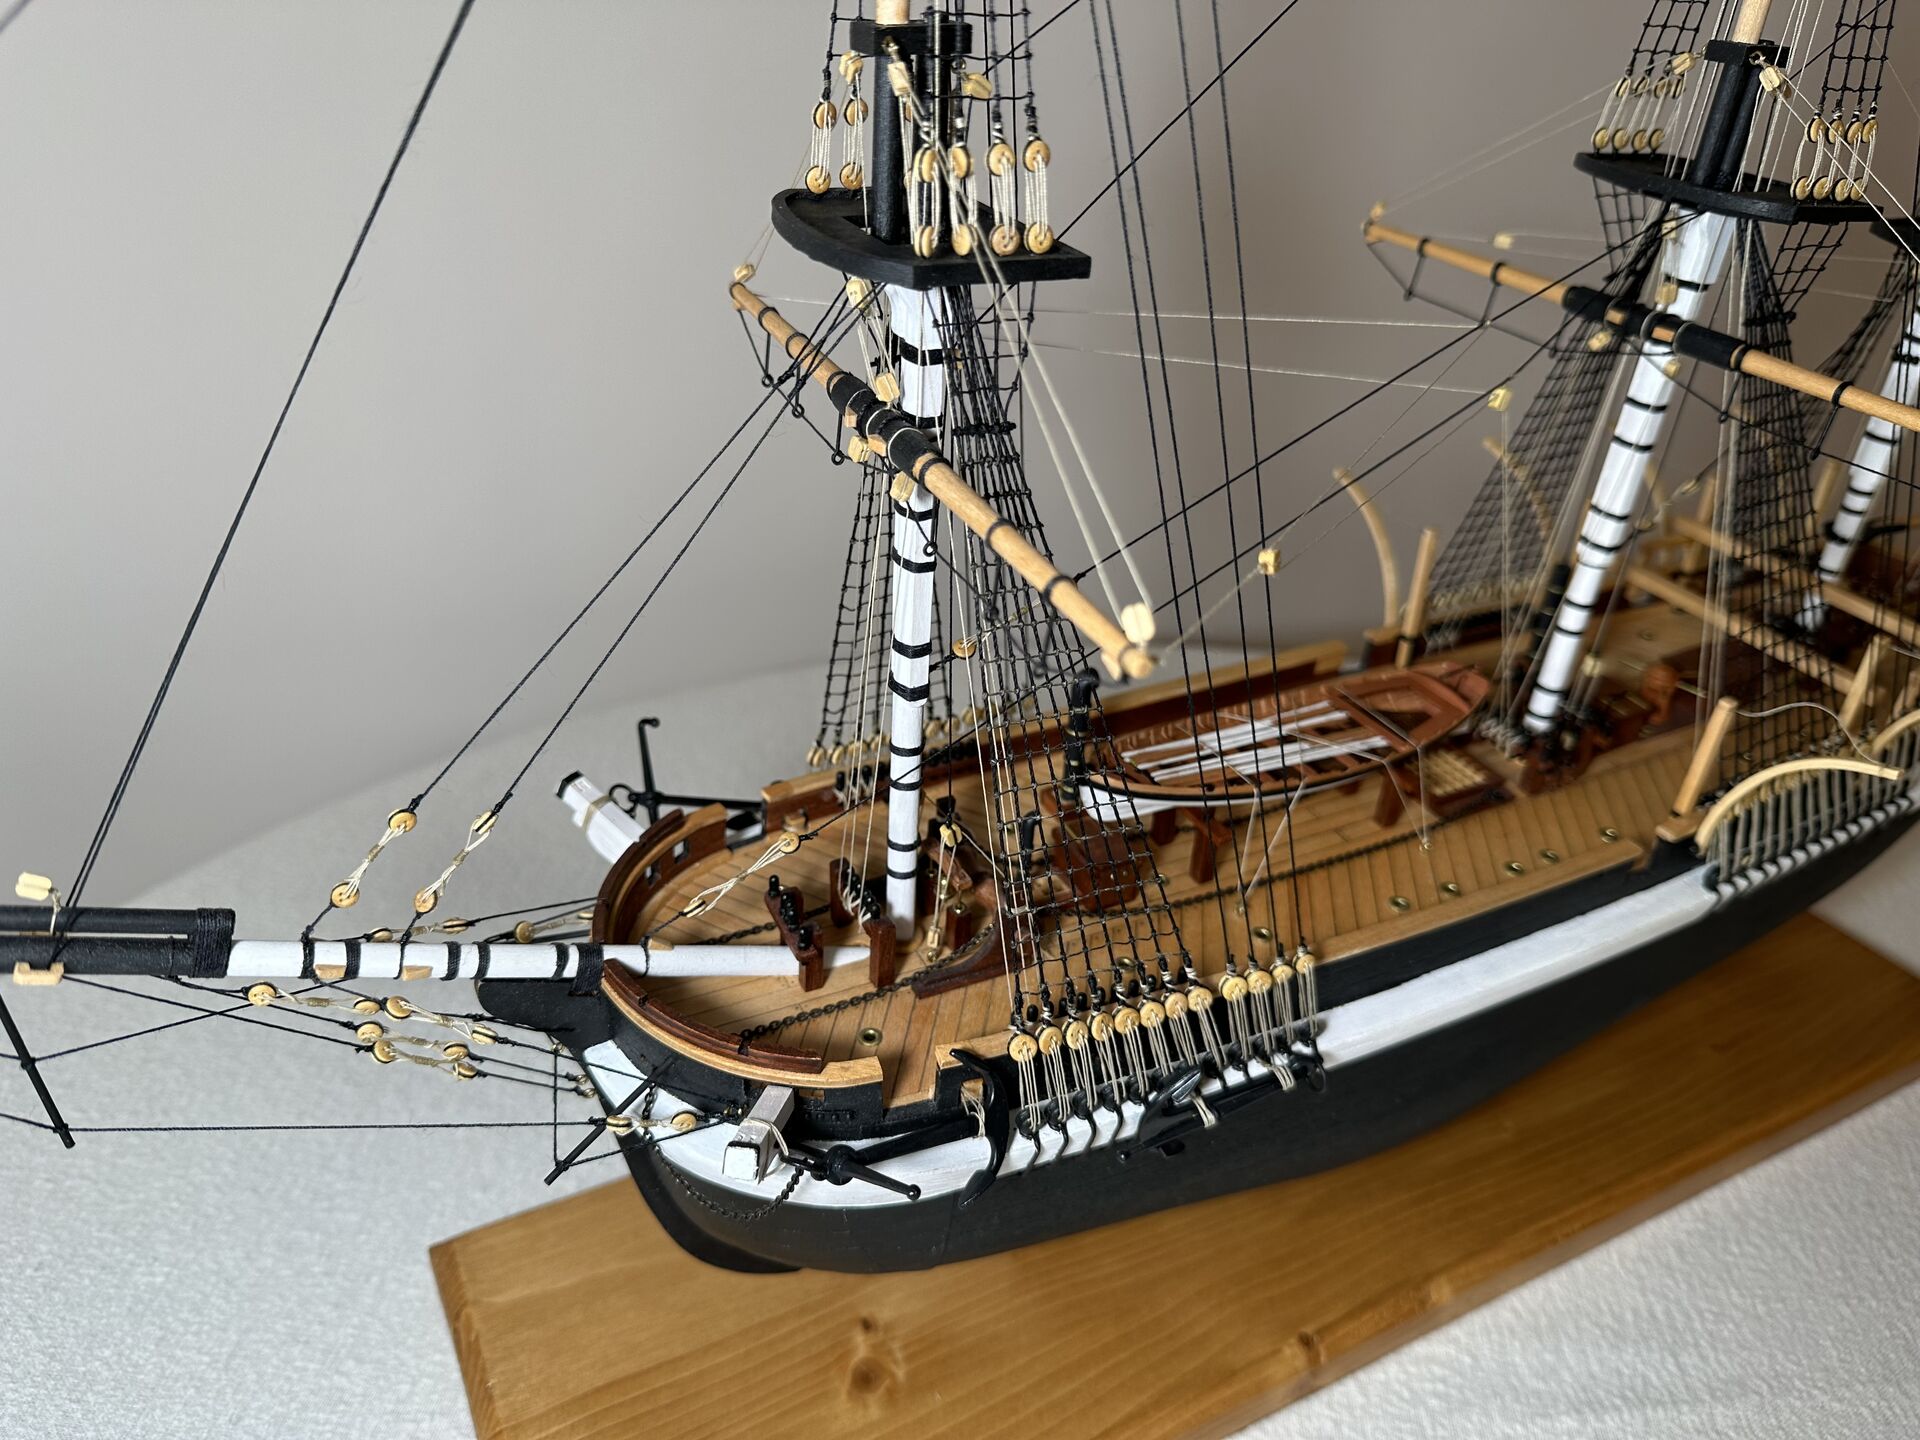
And finally I was ready to work on the masts and spars. Turns out, dressing the yards takes a lot of time, who could have thought!

But at last the bowsprit is installed.

Next logical step was rigging, and it broke me.
I made the shrouds and ratlines on the foremast, and it was just too much. Too many clove hitches, and I didn’t know that it is much easier to dress the mast before installing it on the ship, so working on shrouds was very laborious.
And of course I was simply burnt out with the build after a whole year of working on it.
2021
I made and dressed most of the yards that year, but didn’t work more than a couple of weeks on the Terror.
I knew that a book by Matthew Betts is to be released soon (I had it pre-ordered), and wanted to consult it before proceeding with the build, mostly because it was still possible to amend some things while the ship was not yet rigged. The book eventually was postponed to next year, my pre-order was cancelled and refunded by Amazon, and the project was shelved yet again.
2022
The long awaited “HMS Terror” book by Matthew Betts finally got released. I immediately bought and read it (along with somewhat complimentary “Erebus: The Story of a Ship” book by Michael Palin).
Terror book proved to be a wonderful source of details for the ship, along with the detailed plans.
It became very clear that while OcCre’s model is mostly accurate enough, some important parts are either missing or are greatly simplified.
As I was already at the very late stages of the build, I decided to only alter/address the most obvious issues.
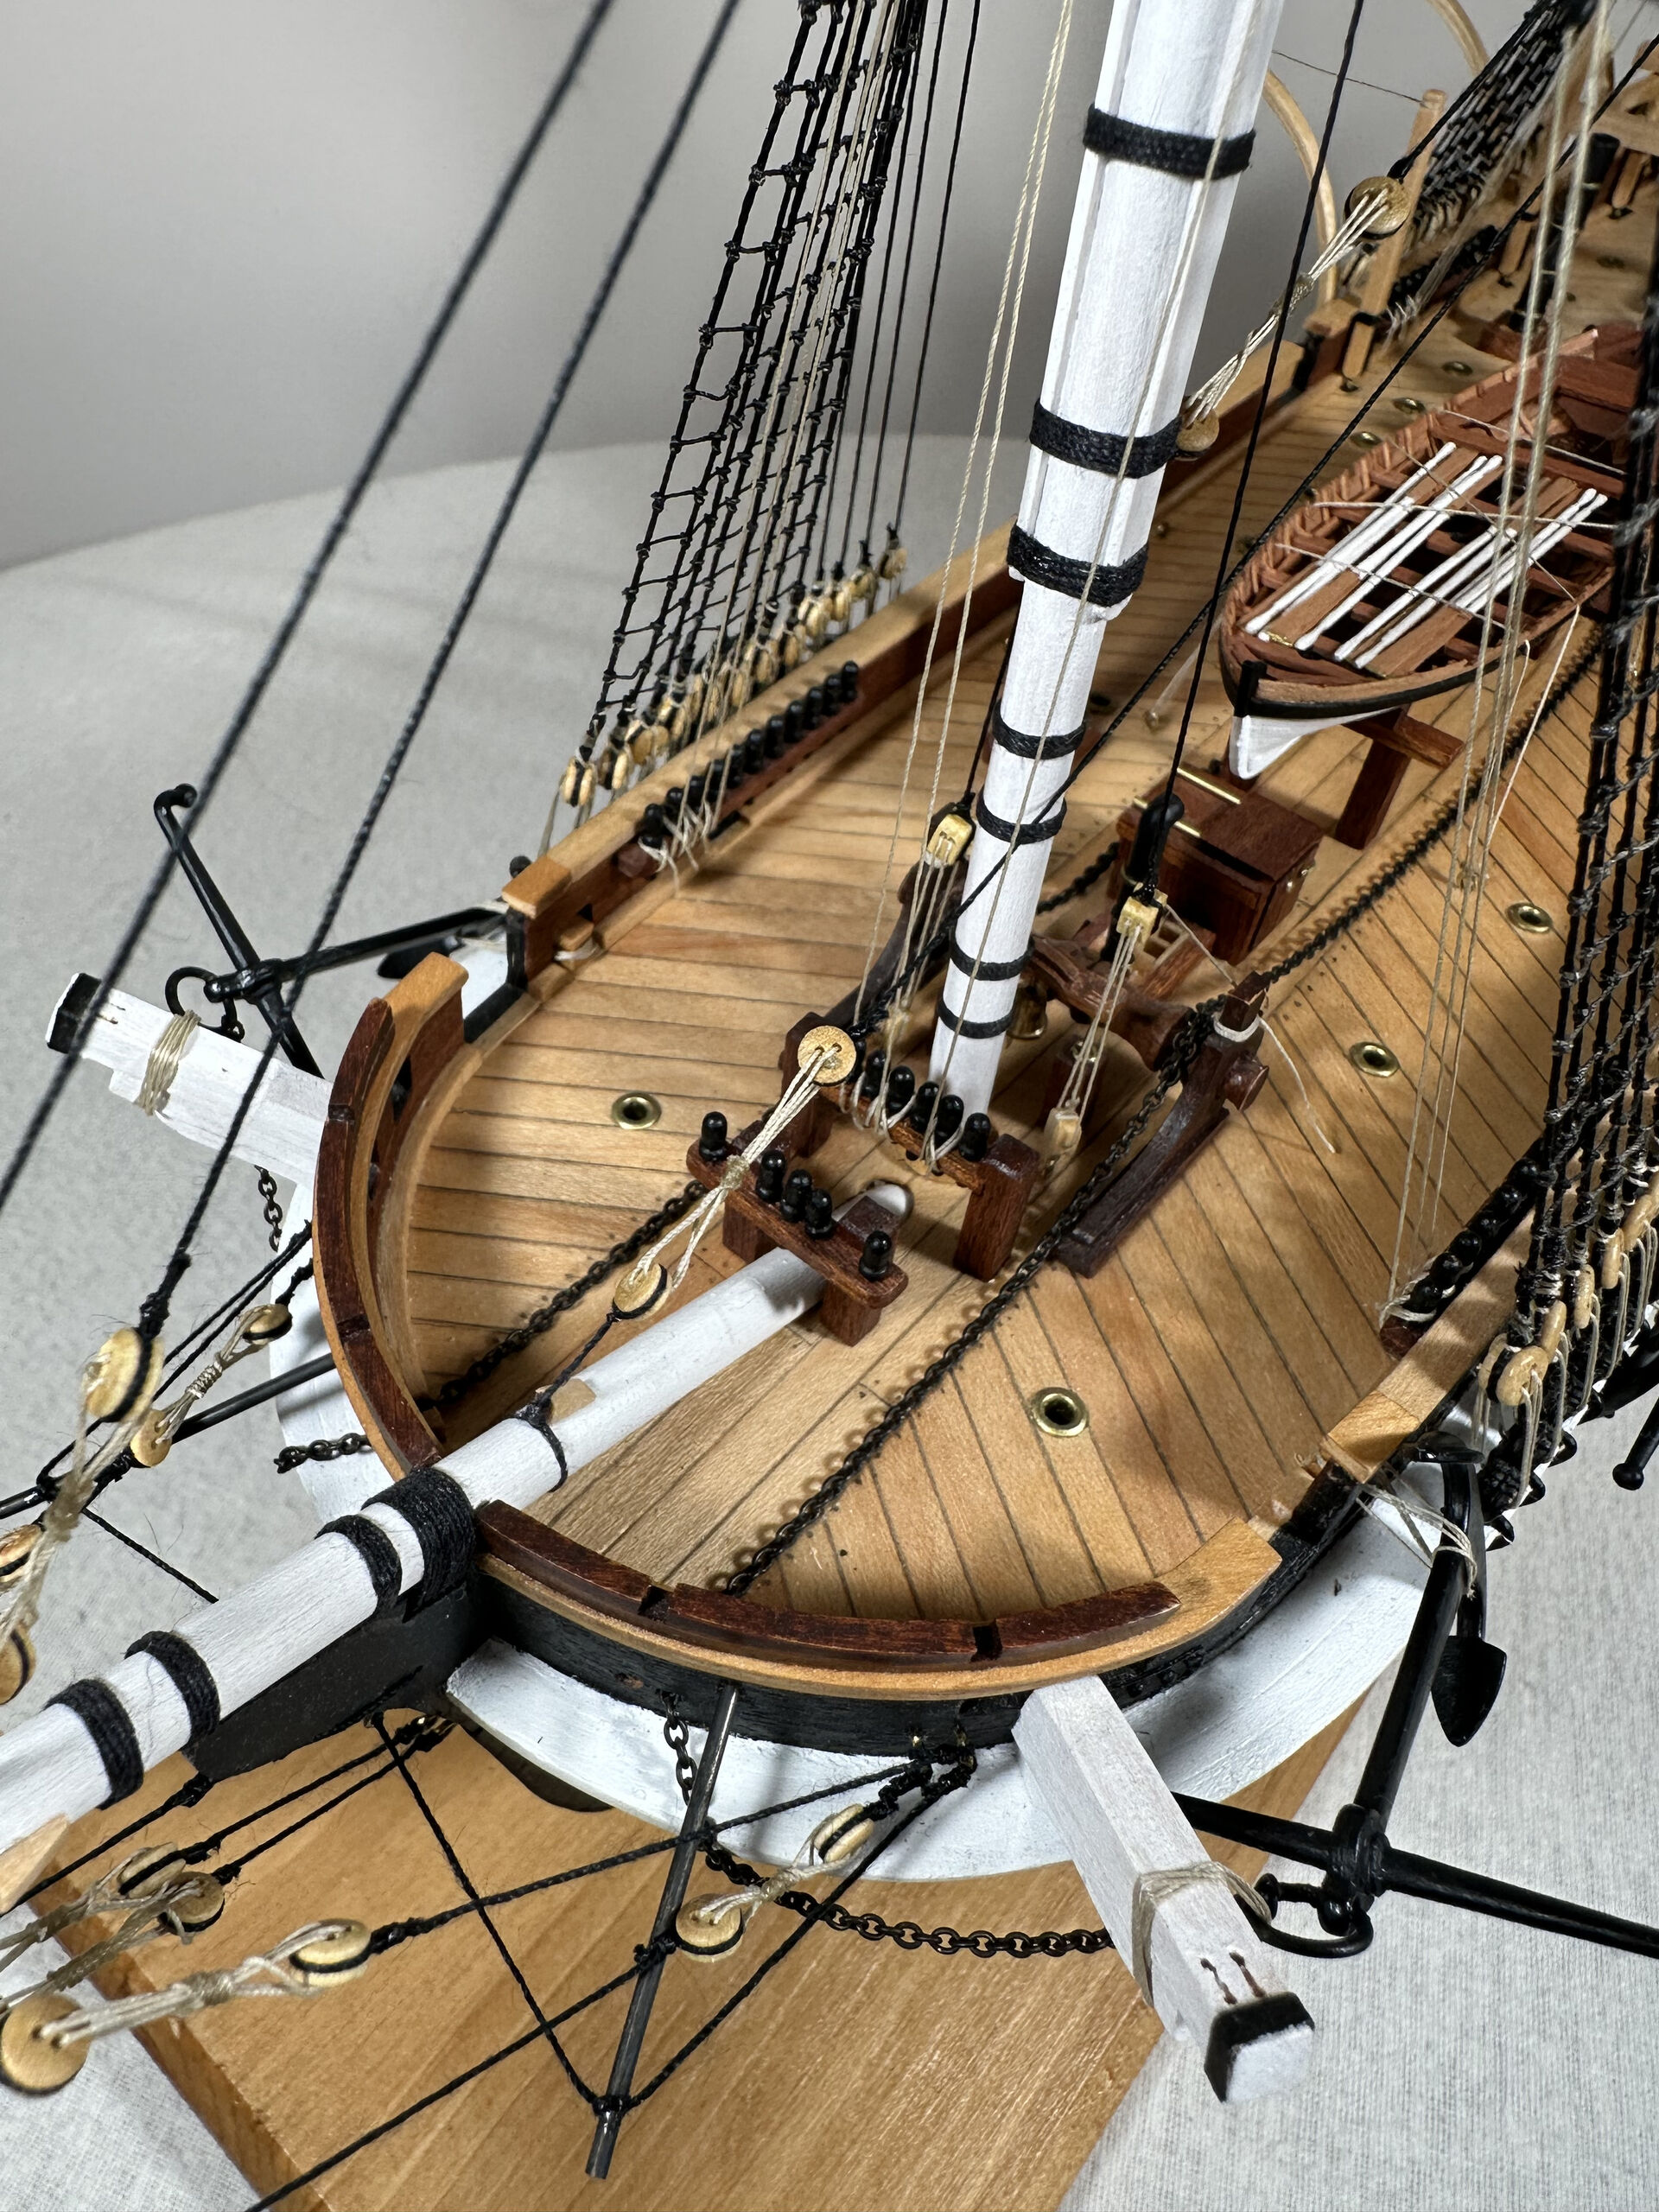
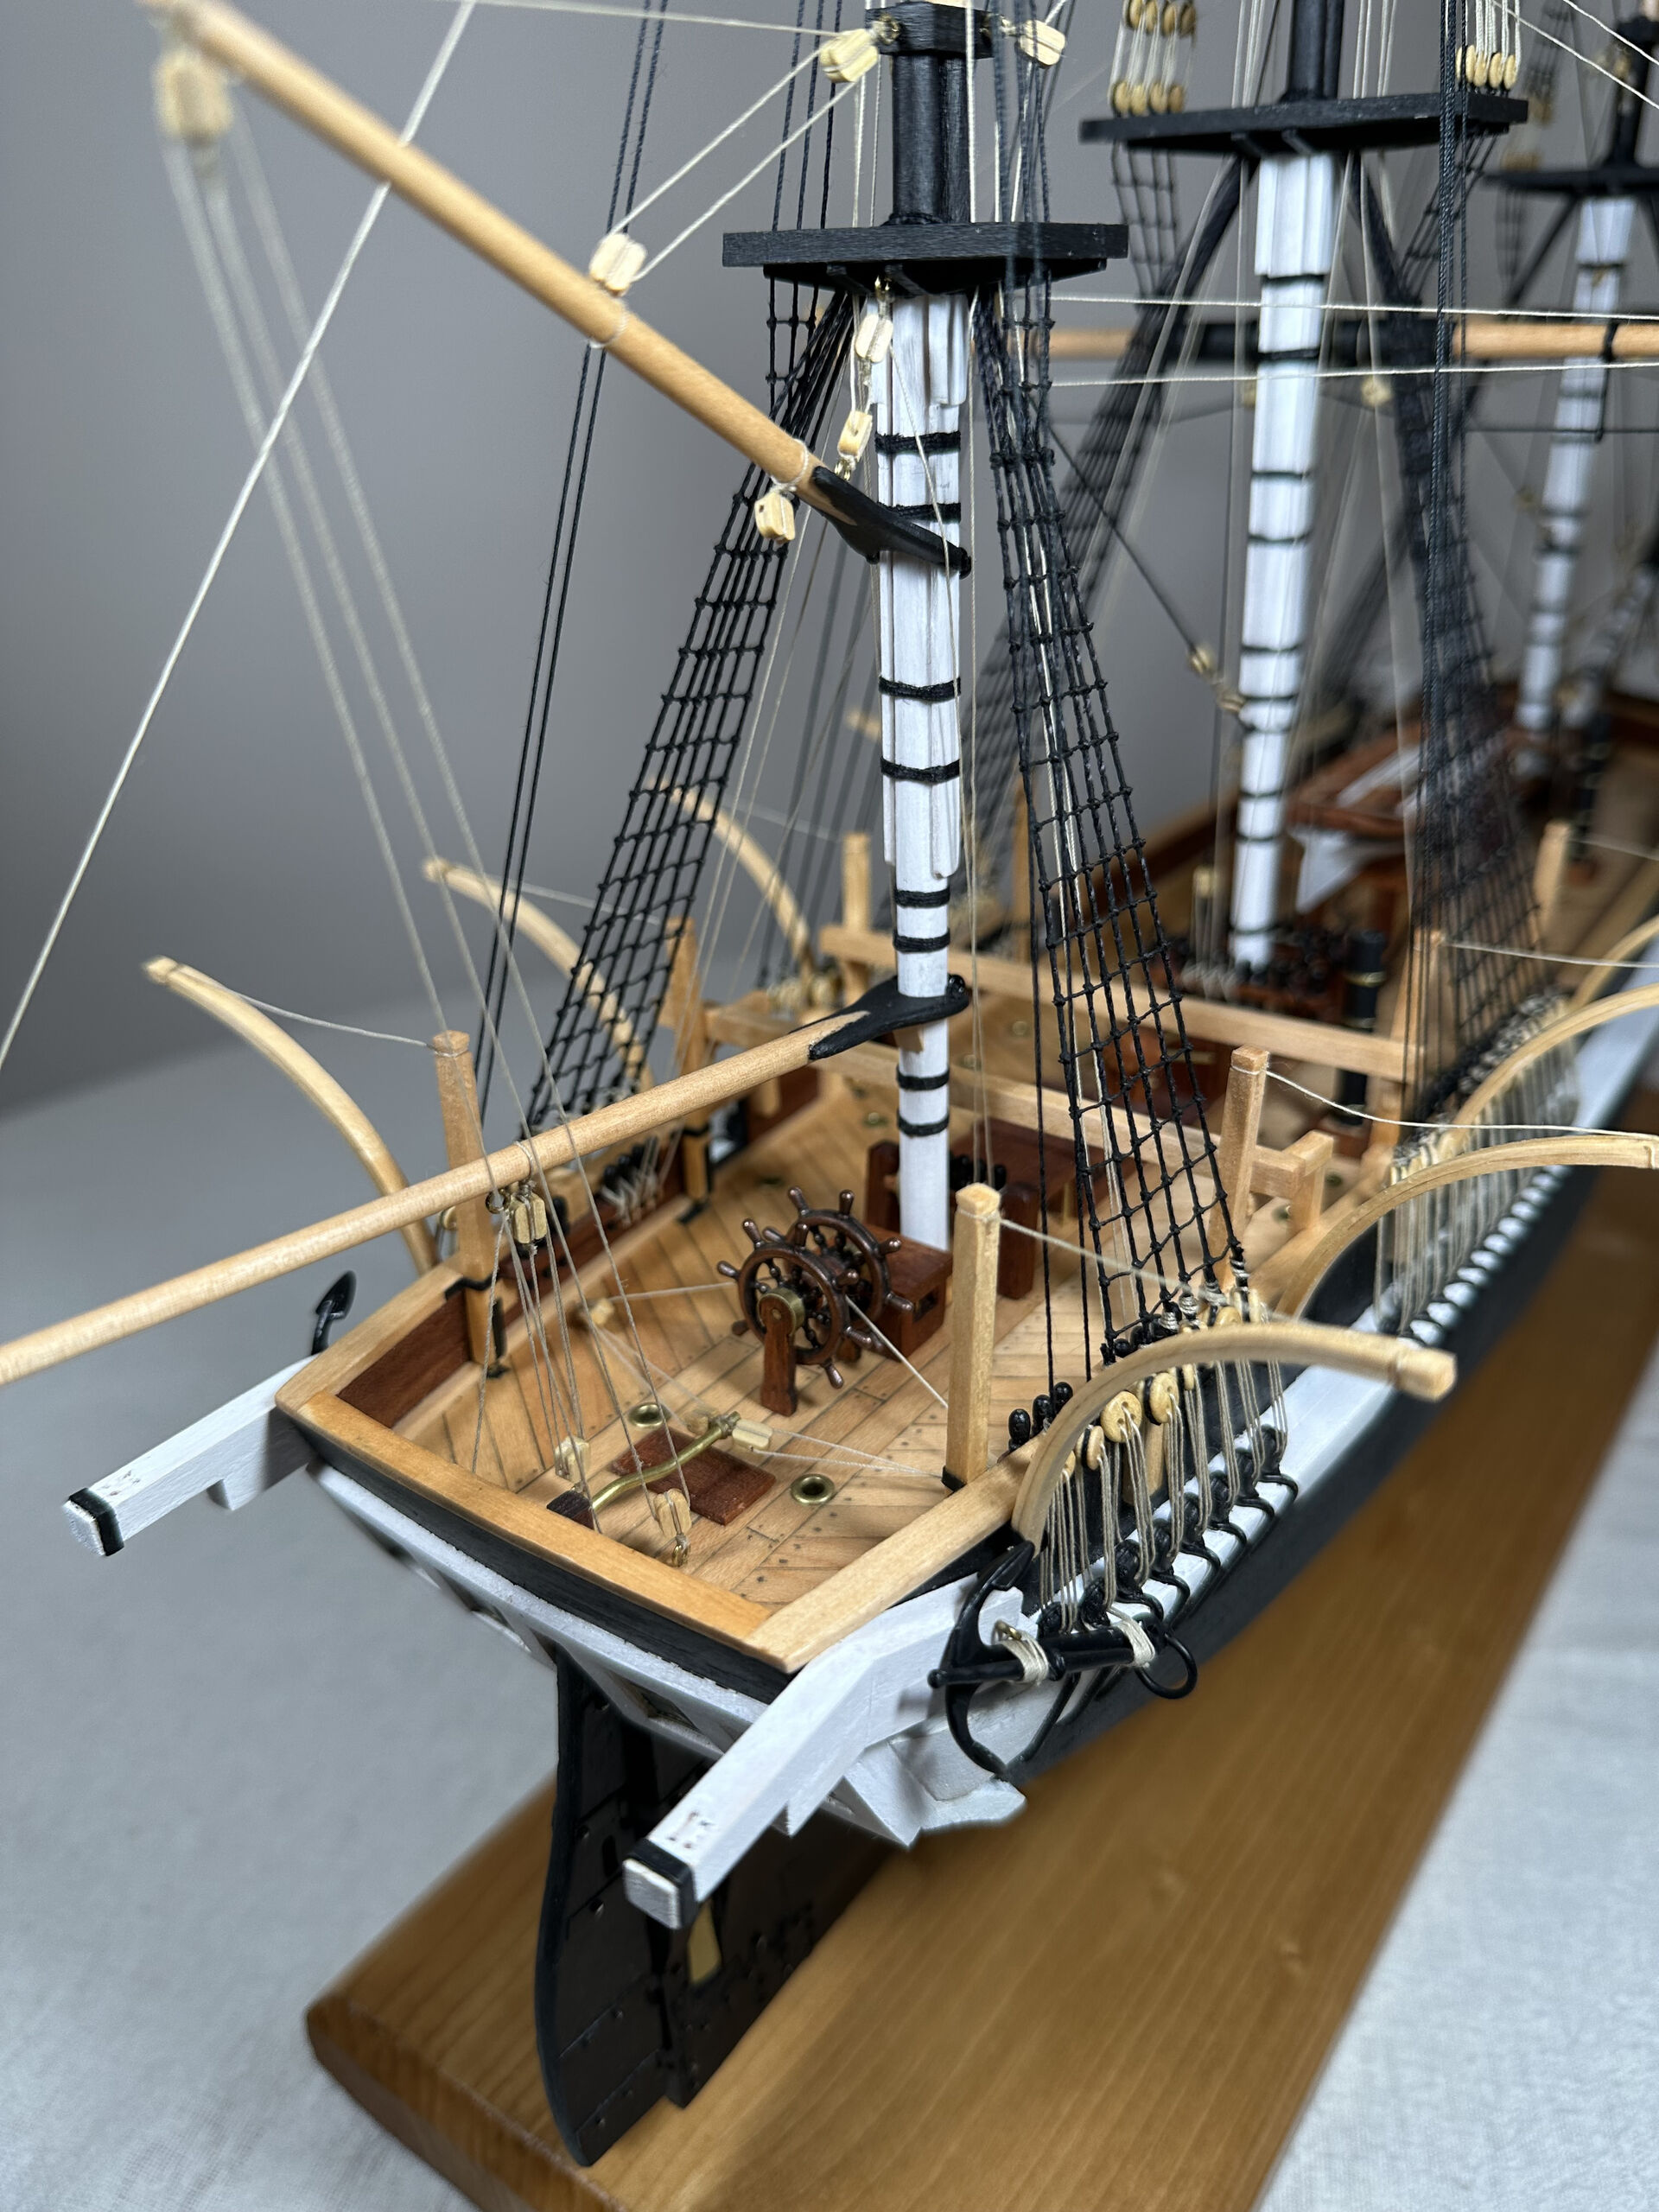
For me, the main such issue was davits - I just hated the over-simplified version from the kit, even before I knew how the real thing should look like. Promptly the kit-provided stuff was removed, and work began on scratch-building a proper replacement, faithful to the book.
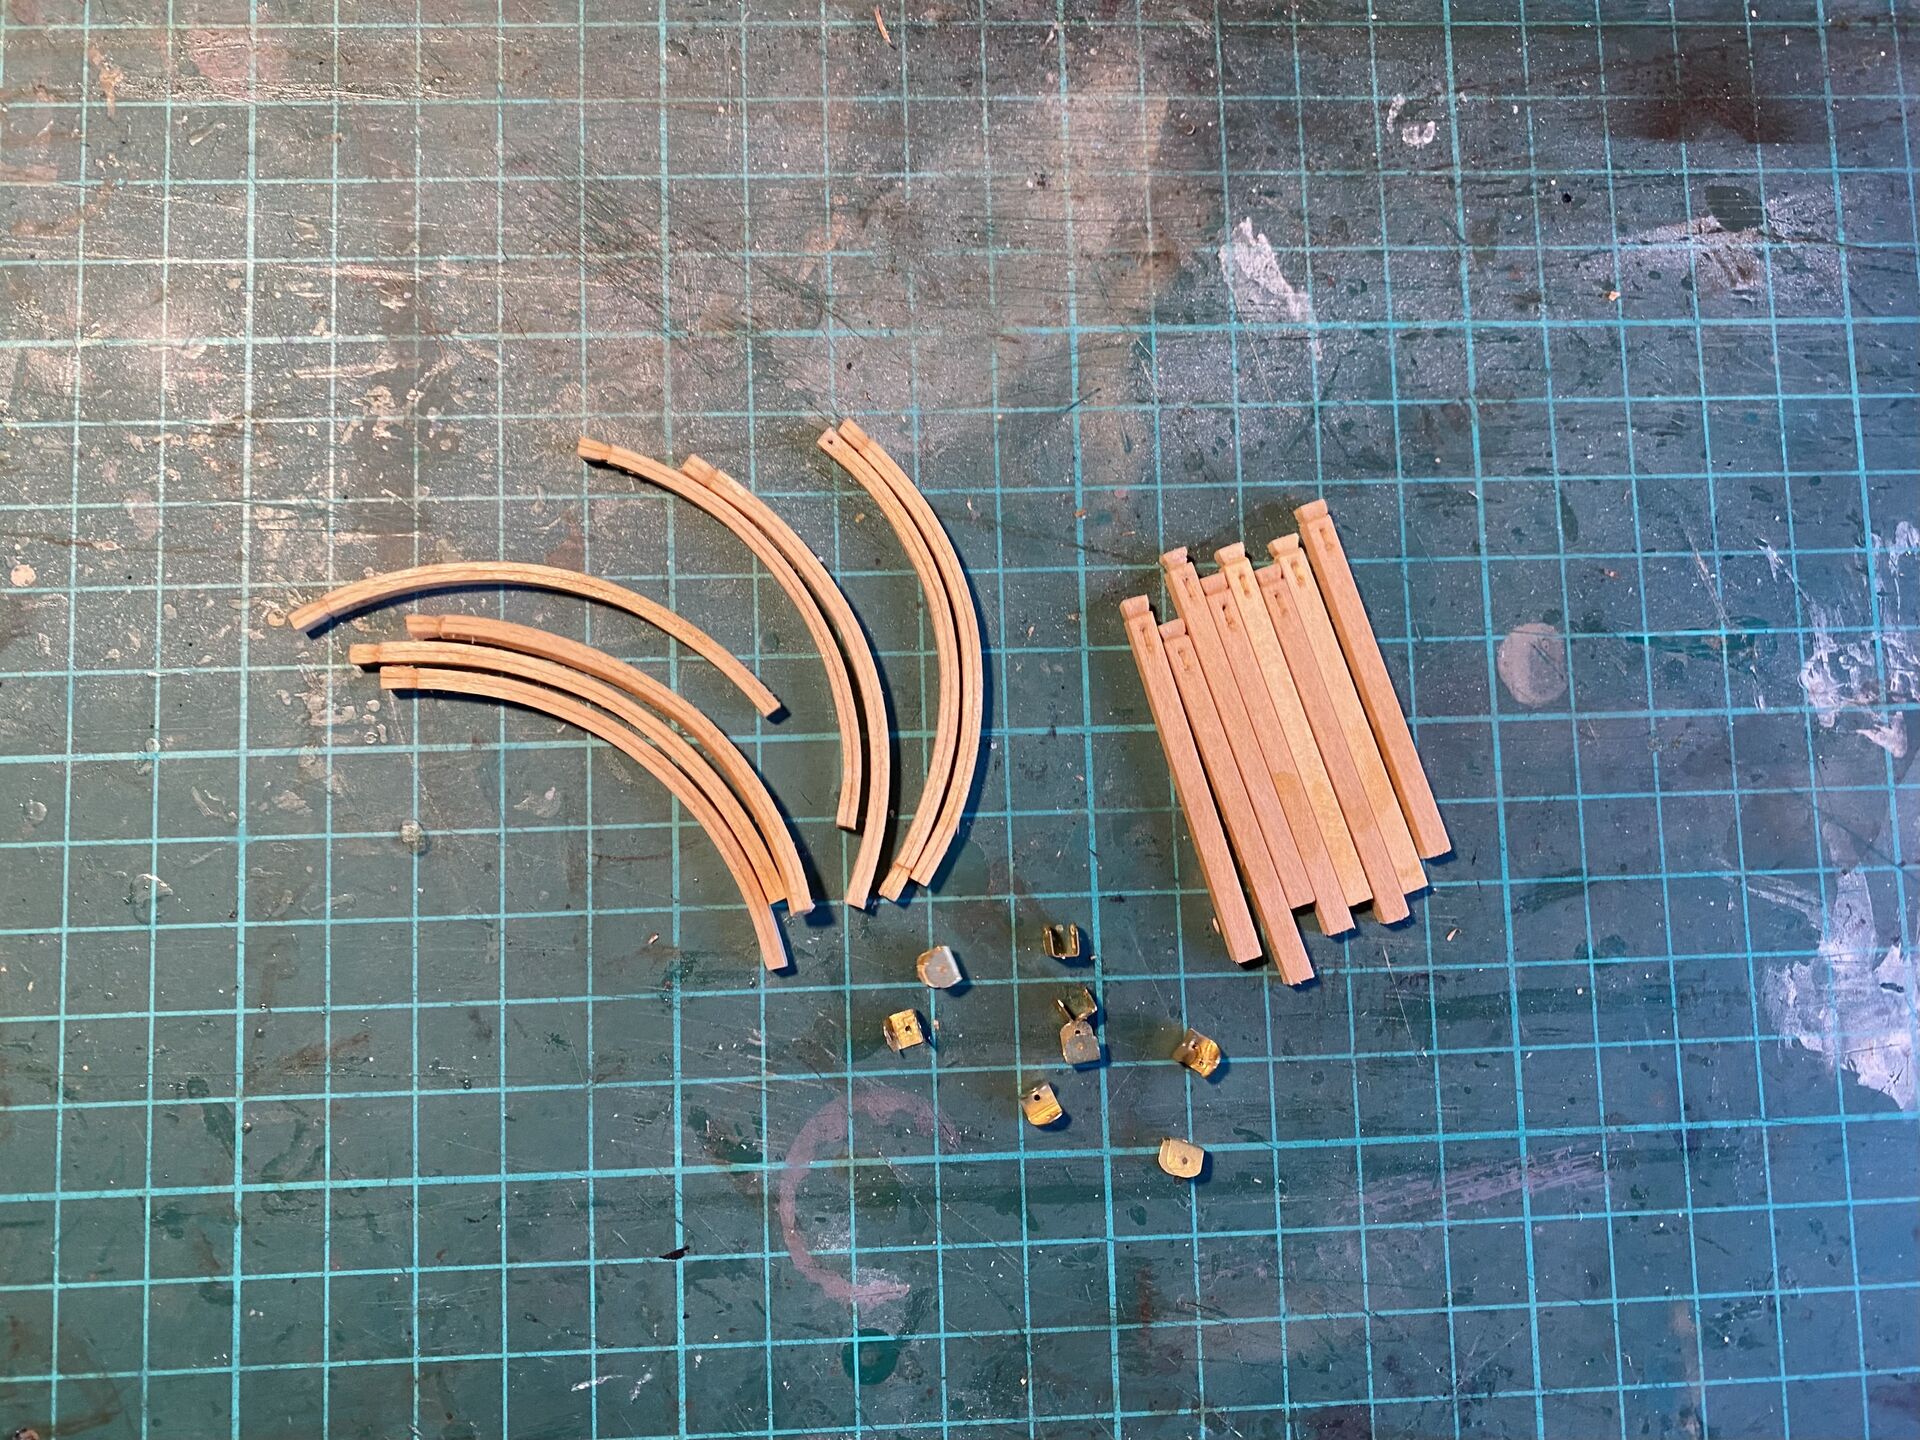
Making davits themselves was easy. I made a very simple jig from scrap wood and nails to bend the curved arms of the davits to shape. Metal parts were more challenging, but I had some PhotoEtch leftovers, and used them to craft hinges. I simply made on free-hand with a file and pliers, and then traced it to make another 7.
I think new davits already look a thousand times better than the old ones, so rather happy with my decision to make a replacement.
Another big thing missing from the kit was ahem toilets, located aft on both sides. They should be relatively easy to make - not a very complex shape, and only two of them - no need for special jigs.
I decided to postpone building them, simply because they are easy to add at the very last stage, if I choose so.
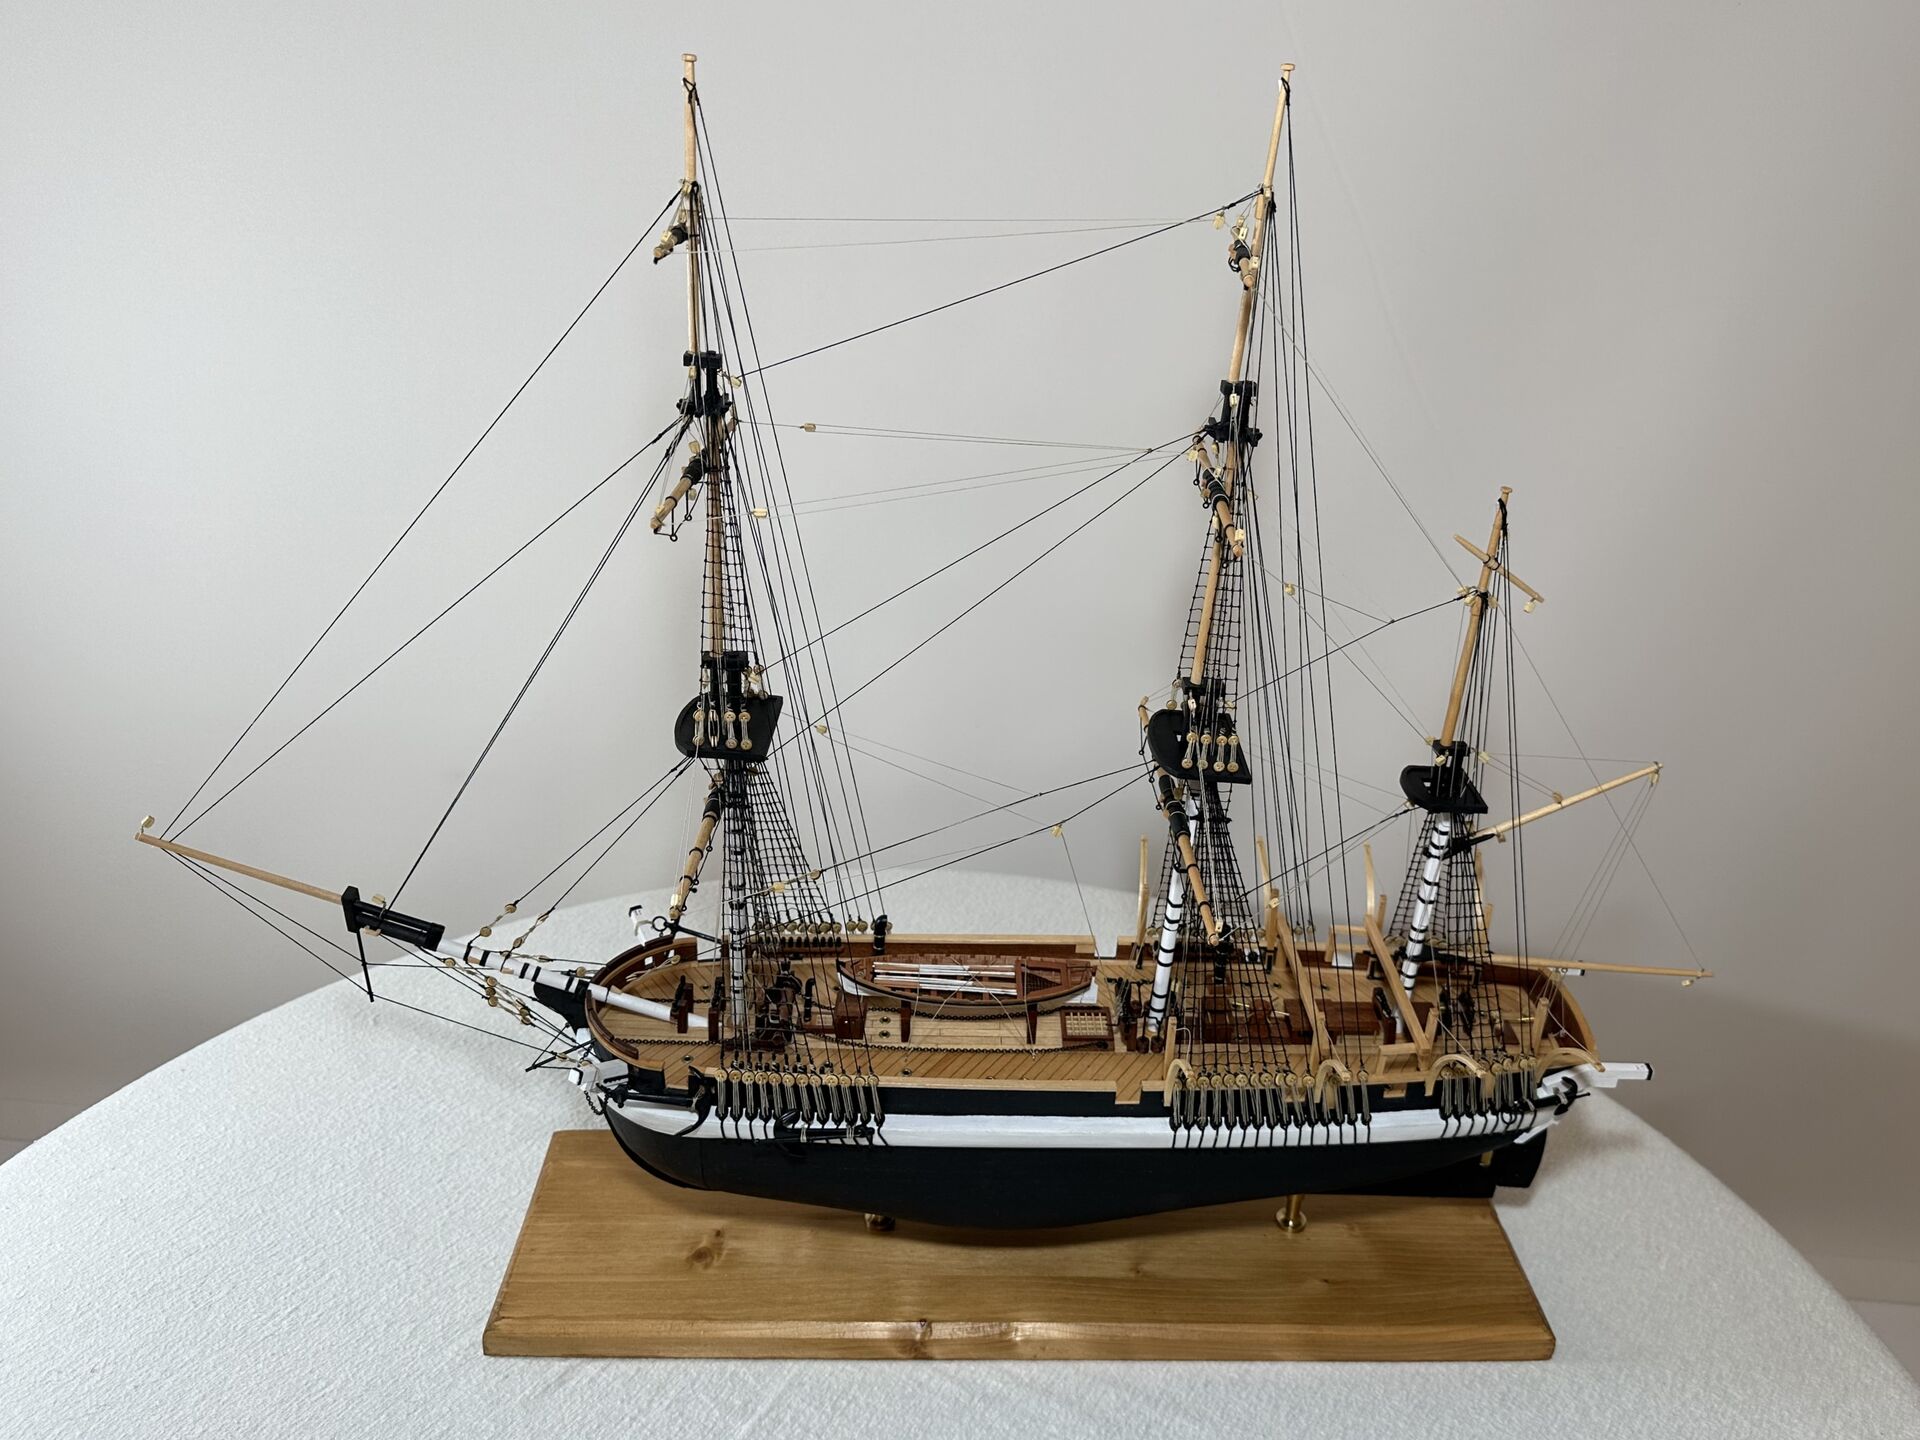
I also mounted the ship on a proper wooden base that made from stained pine board, using brass columns from Amati.
2023
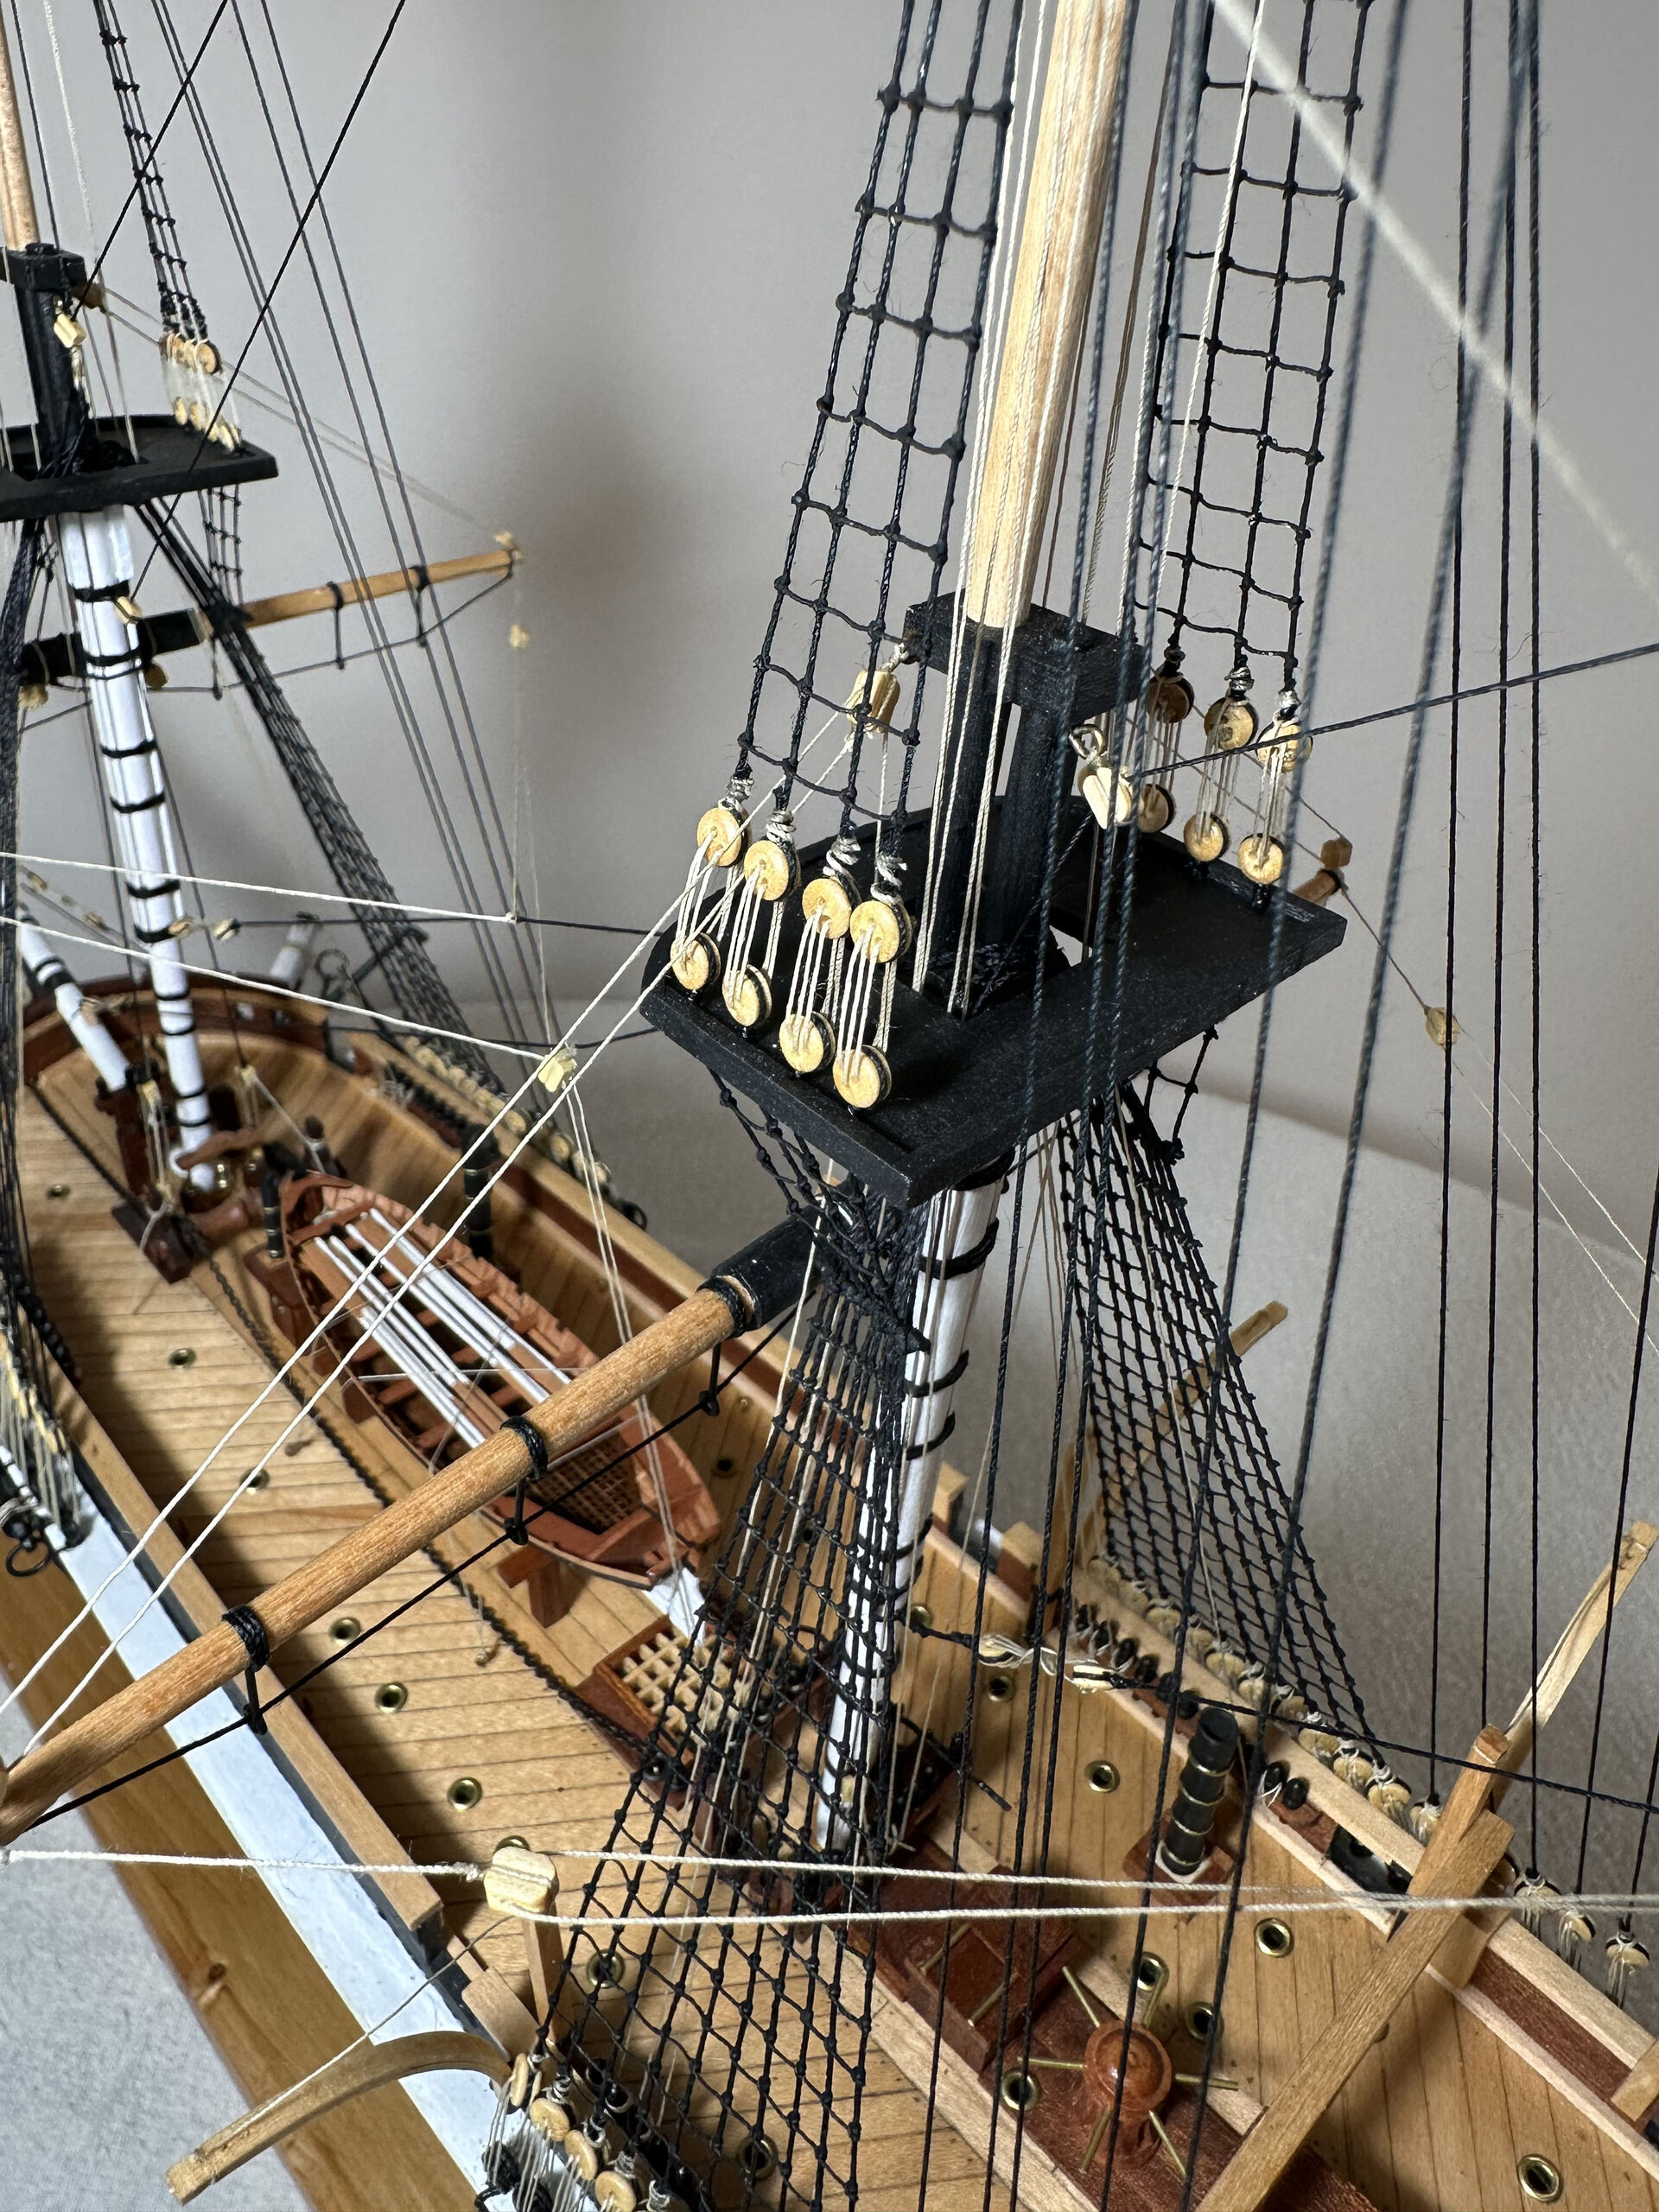
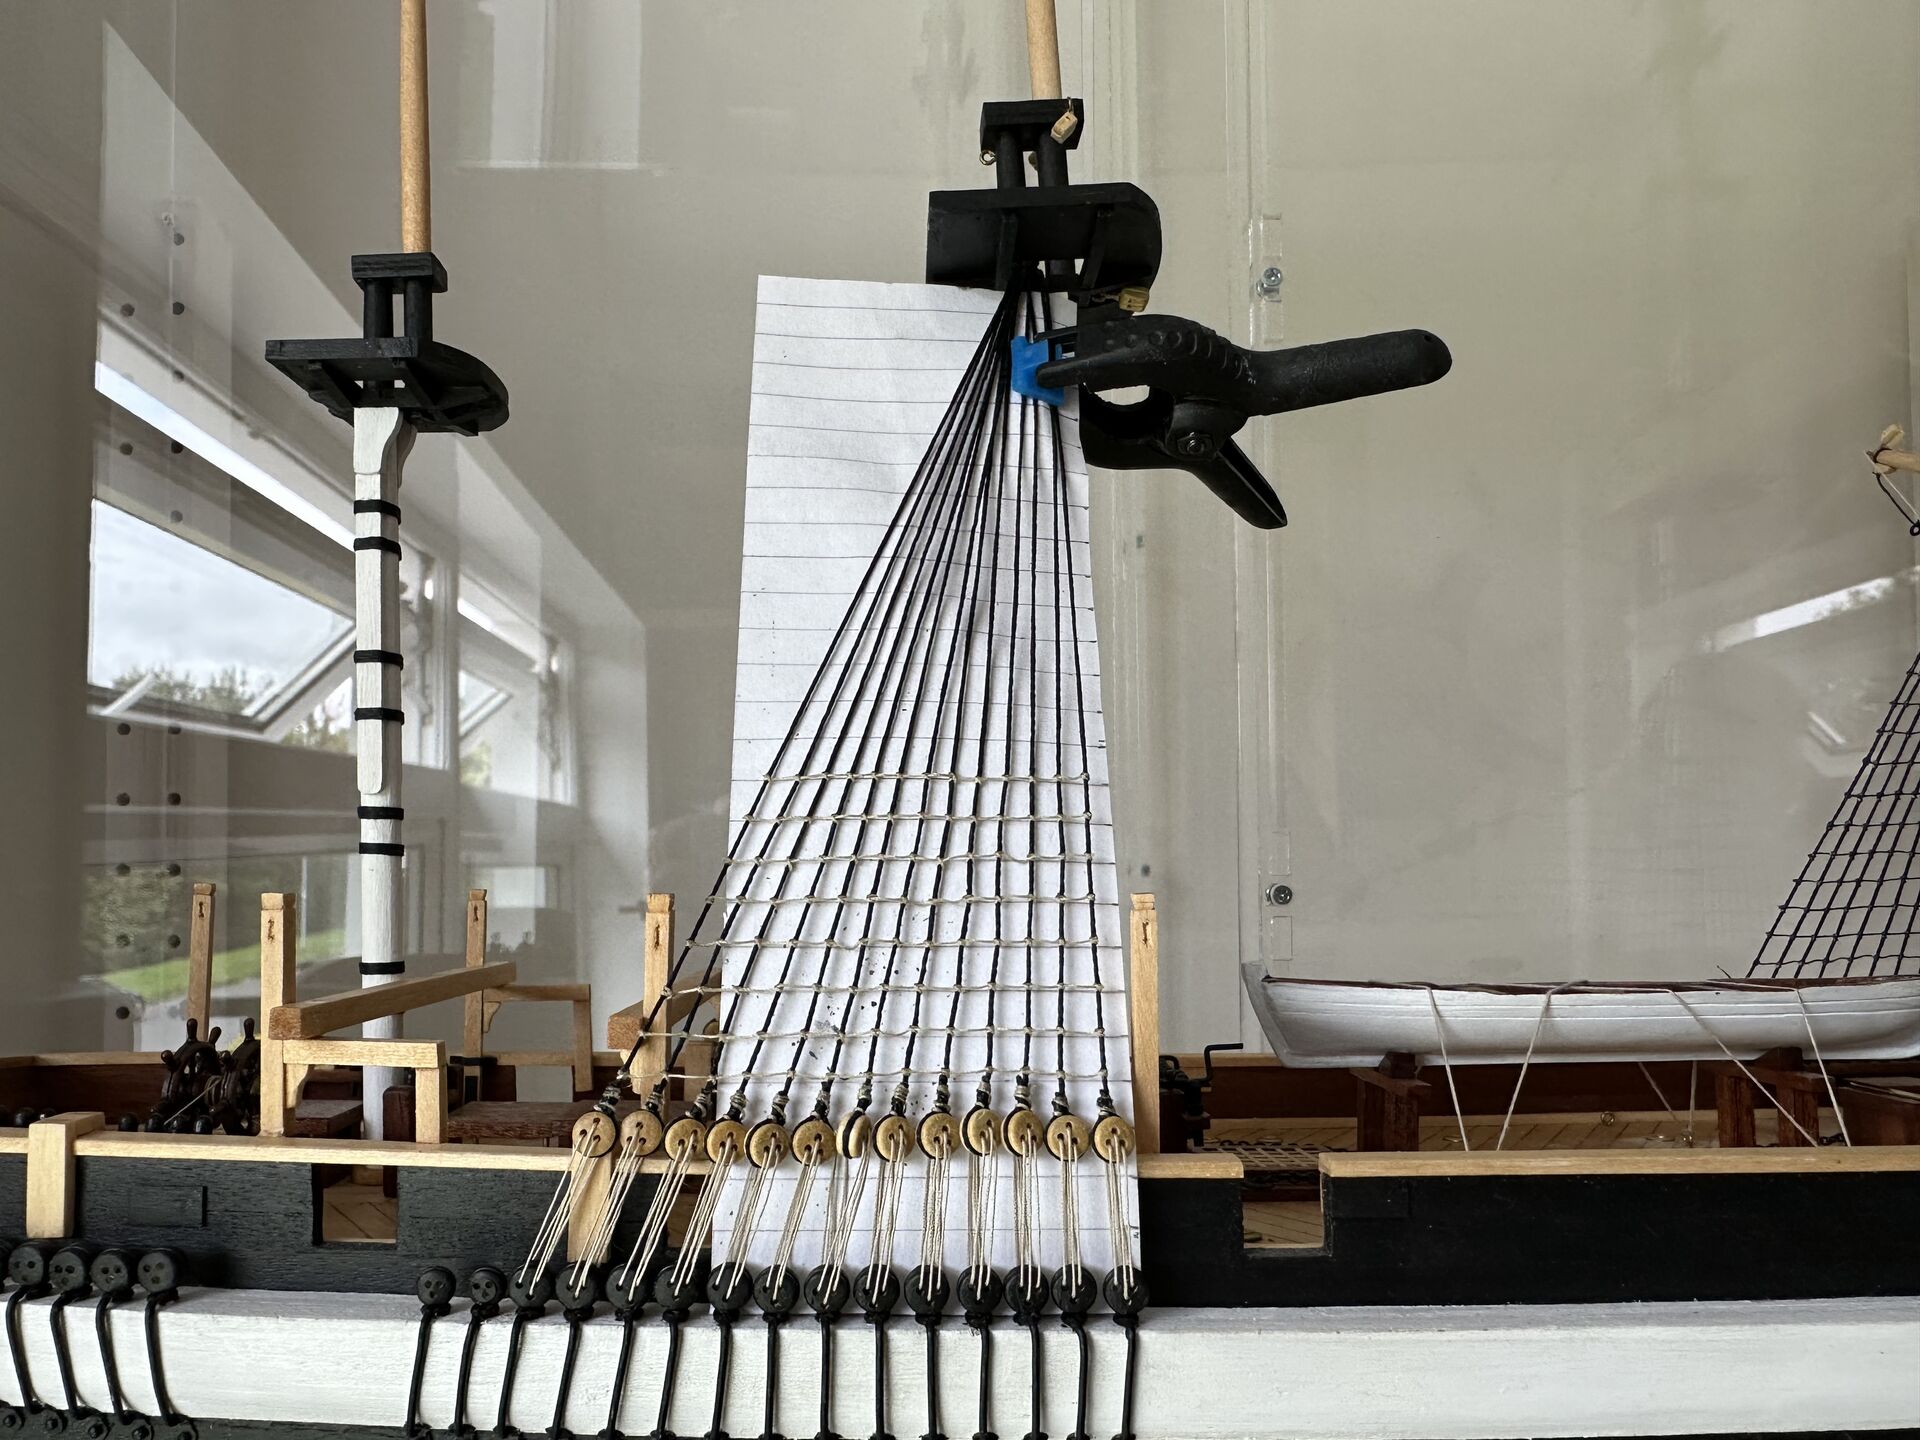
This year I was determined to finish the build and went all in, focusing on the most dreaded part of this build - rigging, namely ratlines. Remember, it was ratlines that broke me in 2020. Surprisingly, this time it was not too bad. Of course, I already had much more experience with rigging, and knew how to dress the mast before mounting it. But still, even dreaded thousands of clove hitches went smoothly, and I finished all ratlines in a month or so.
Here you can see the simple hand-made template I was using to keep ratlines properly spaced and aligned.
After I finished with all ratlines, I consulted with Betts book for the rest standing rigging, just to realize that OcCre had it wrong in their plans, and last 2 or 3 pairs of shrouds should instead be backstays. Luckily I was able to remove them without re-doing the rest of the rigging, and added all backstays according to the plan provided in the book.
I was not happy with how OcCre wanted me to attach some of the stays, so I consulted with truly wonderful book “Rigging Period Ship Models” by Lennarth Petersson and enhanced my build with somewhat more realistic rigging, which you can see on the next photo.
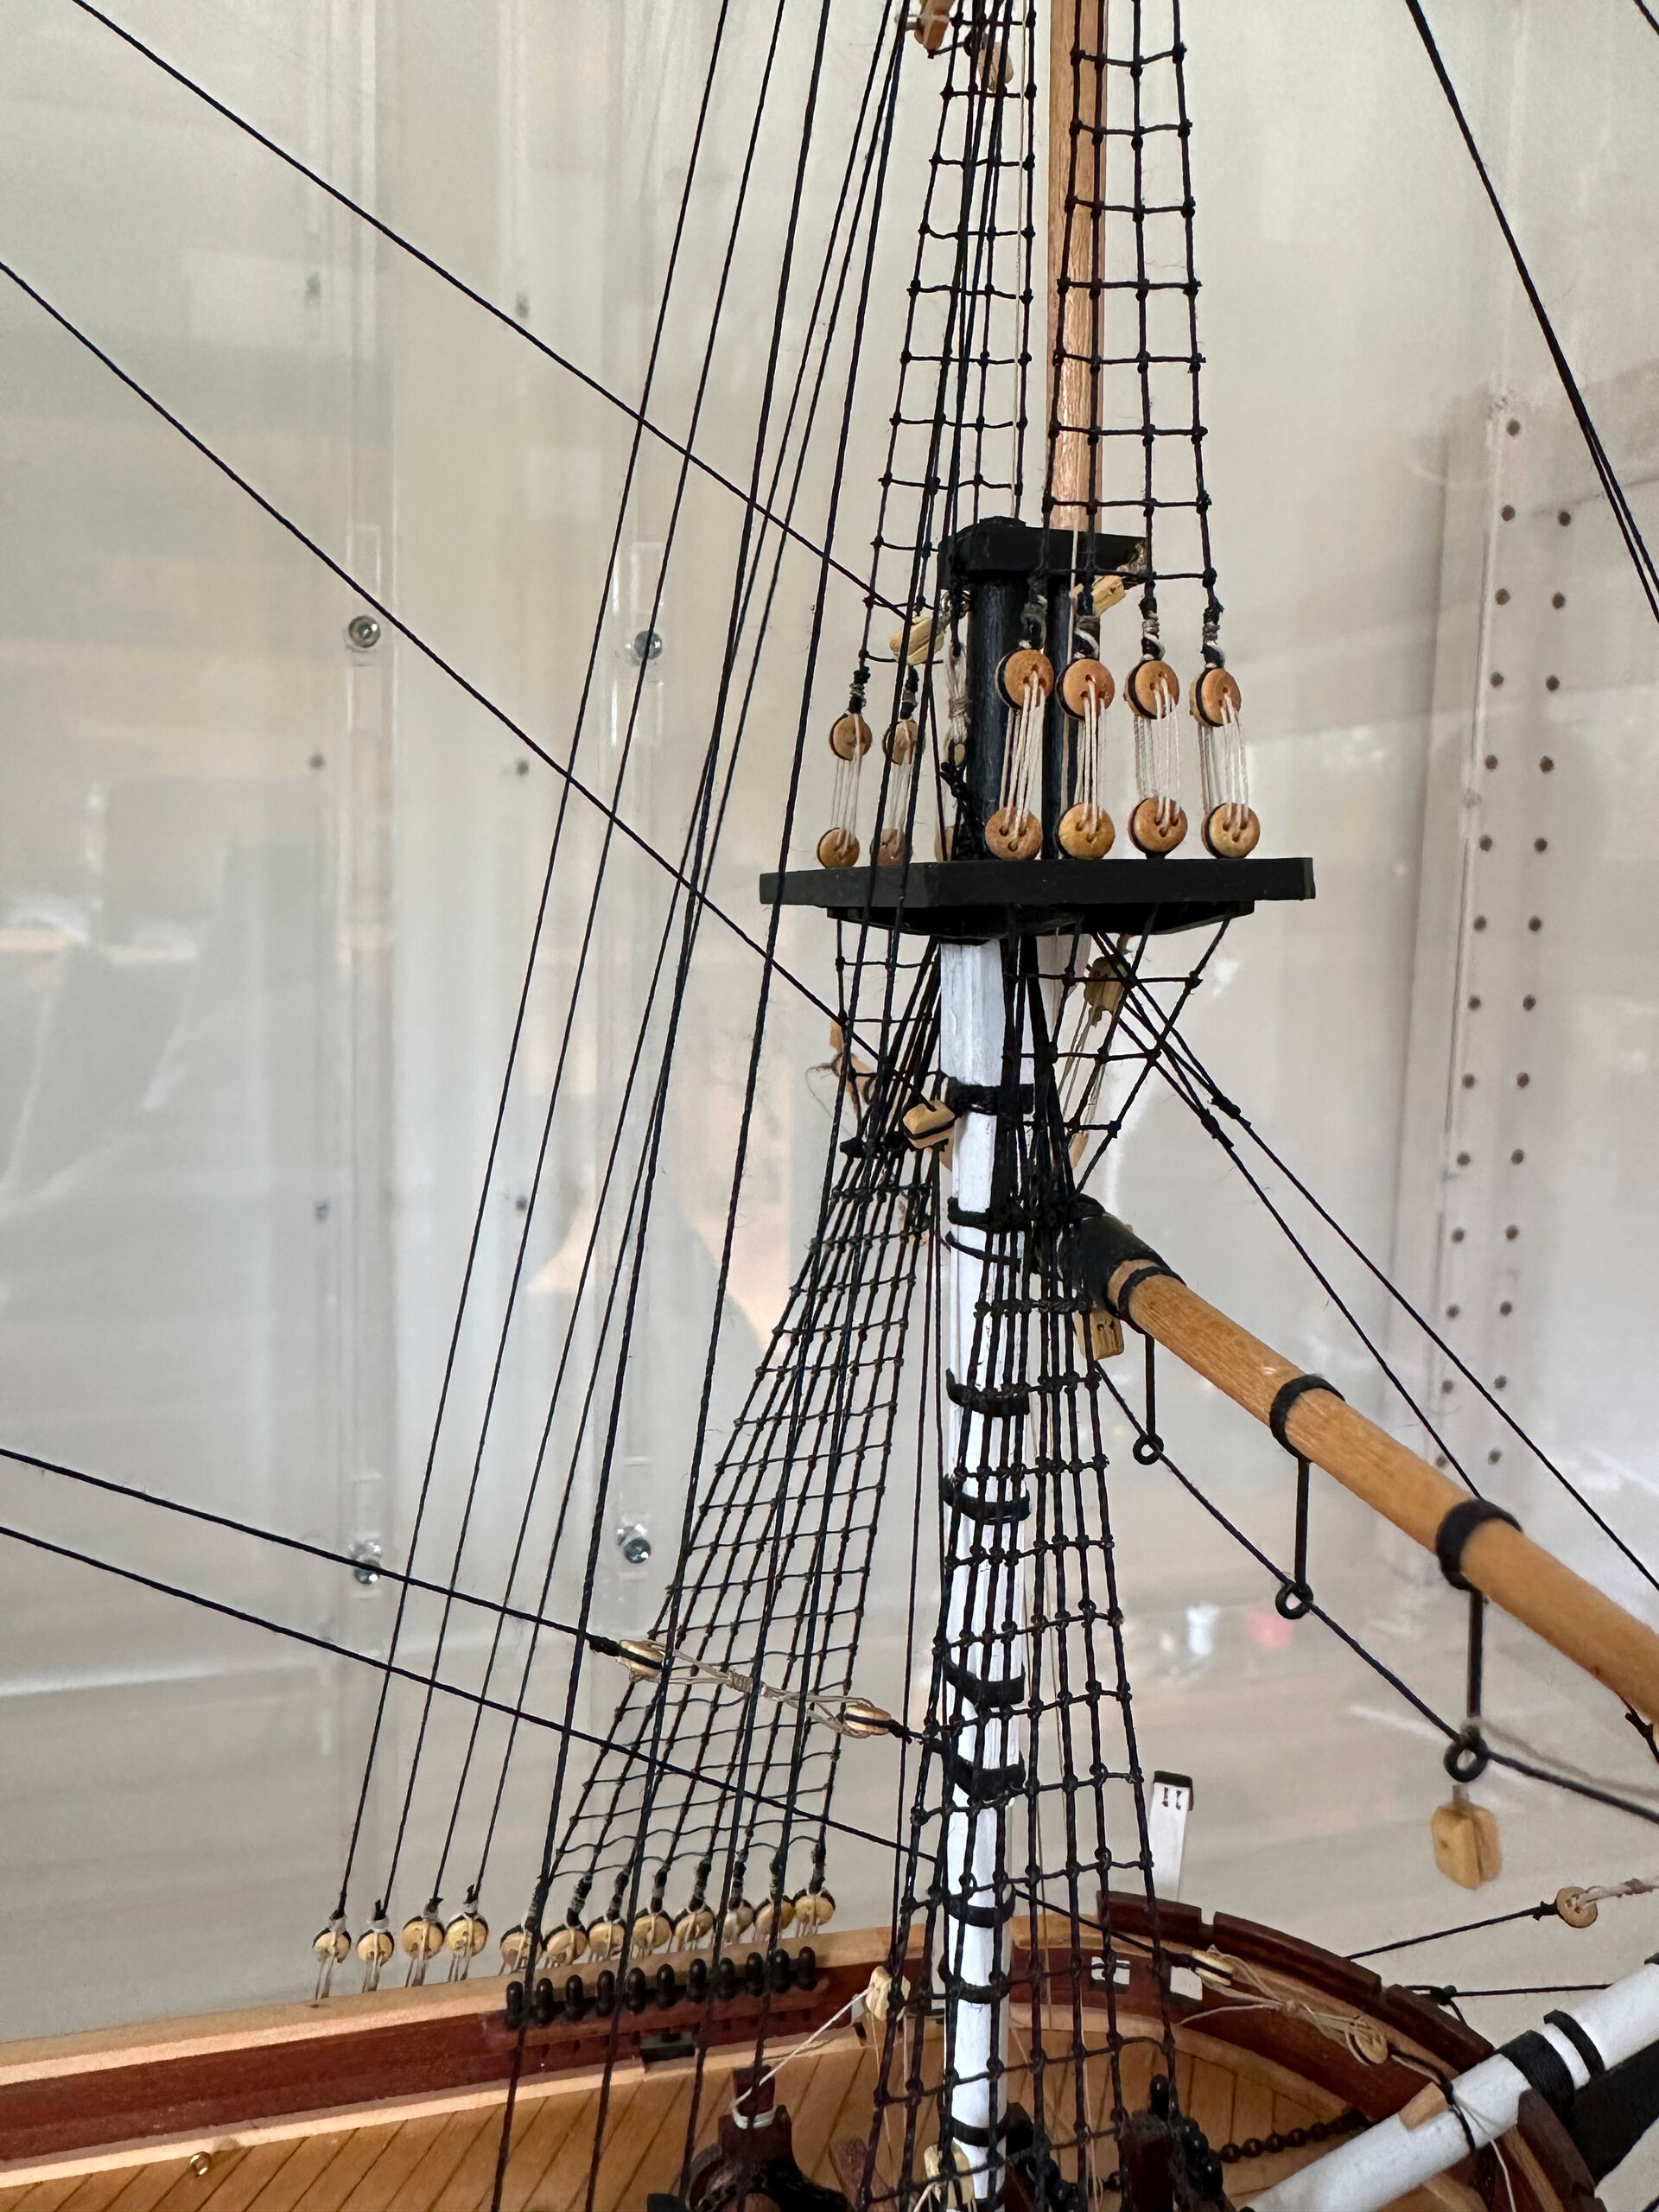
Again, I would like to notice how generous OcCre was with materials, with plenty of blocks and deadeyes to spare, which allows for such improvements at no additional cost or stress of finding extra parts.
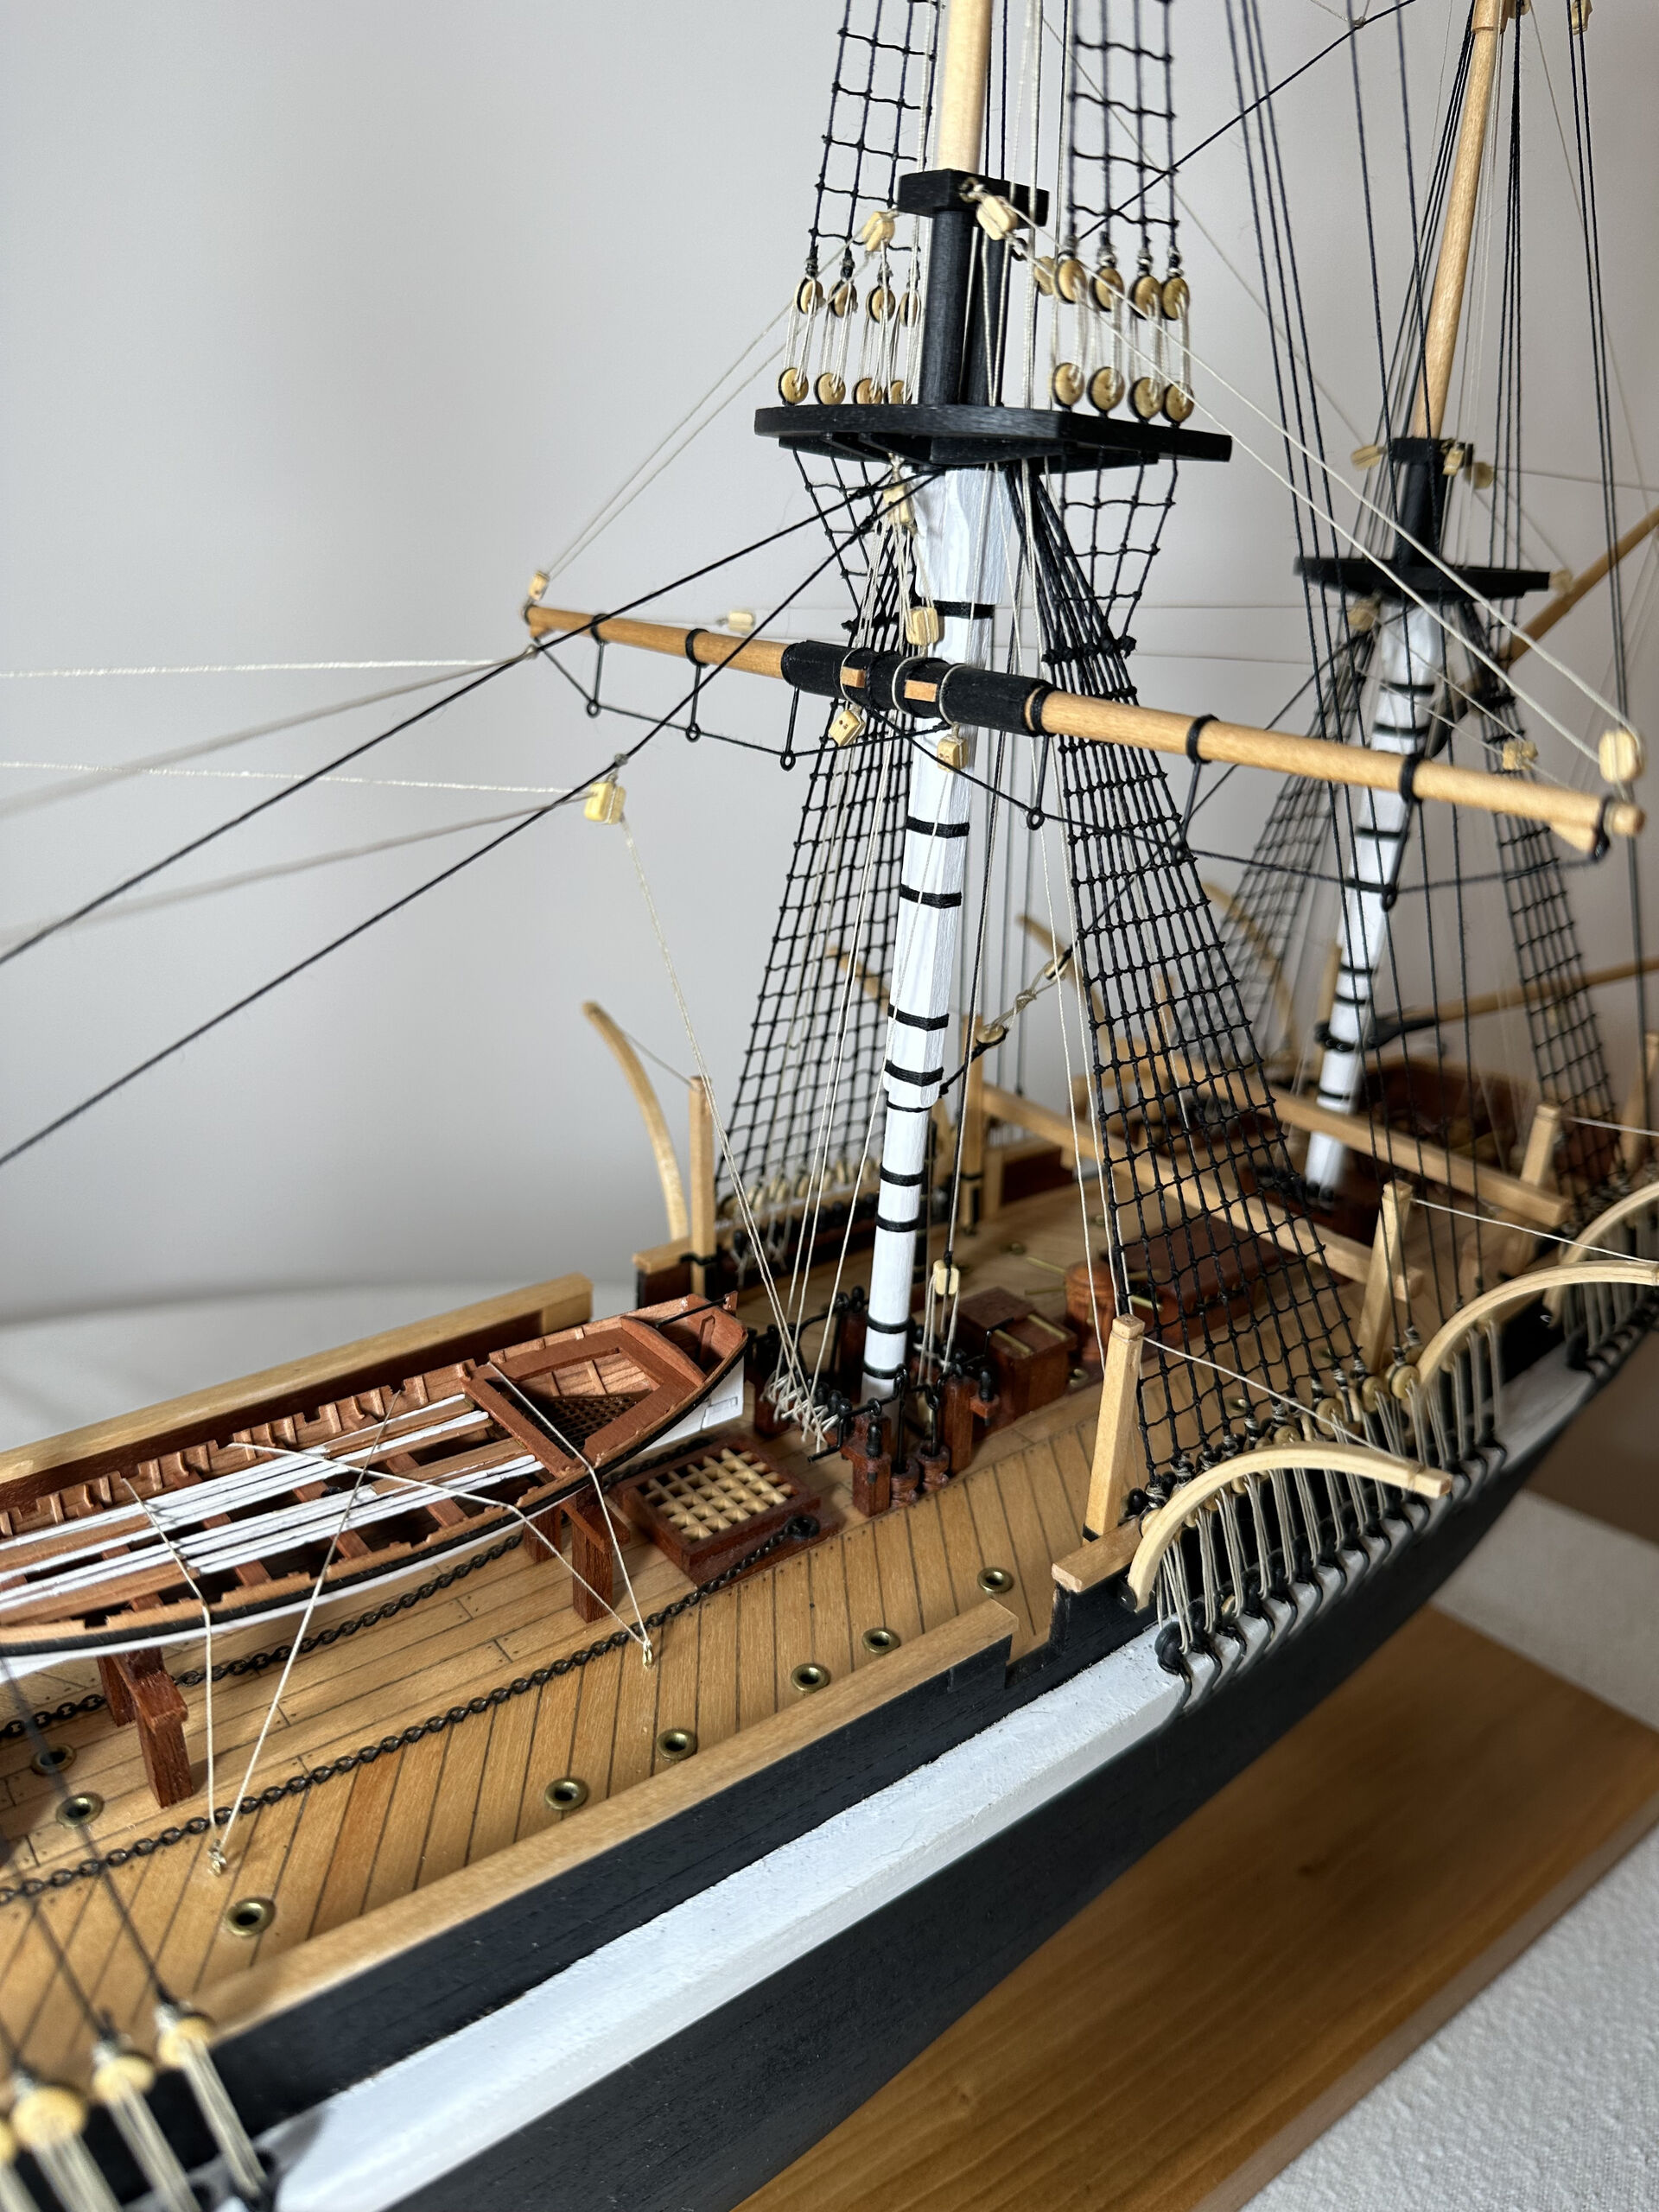
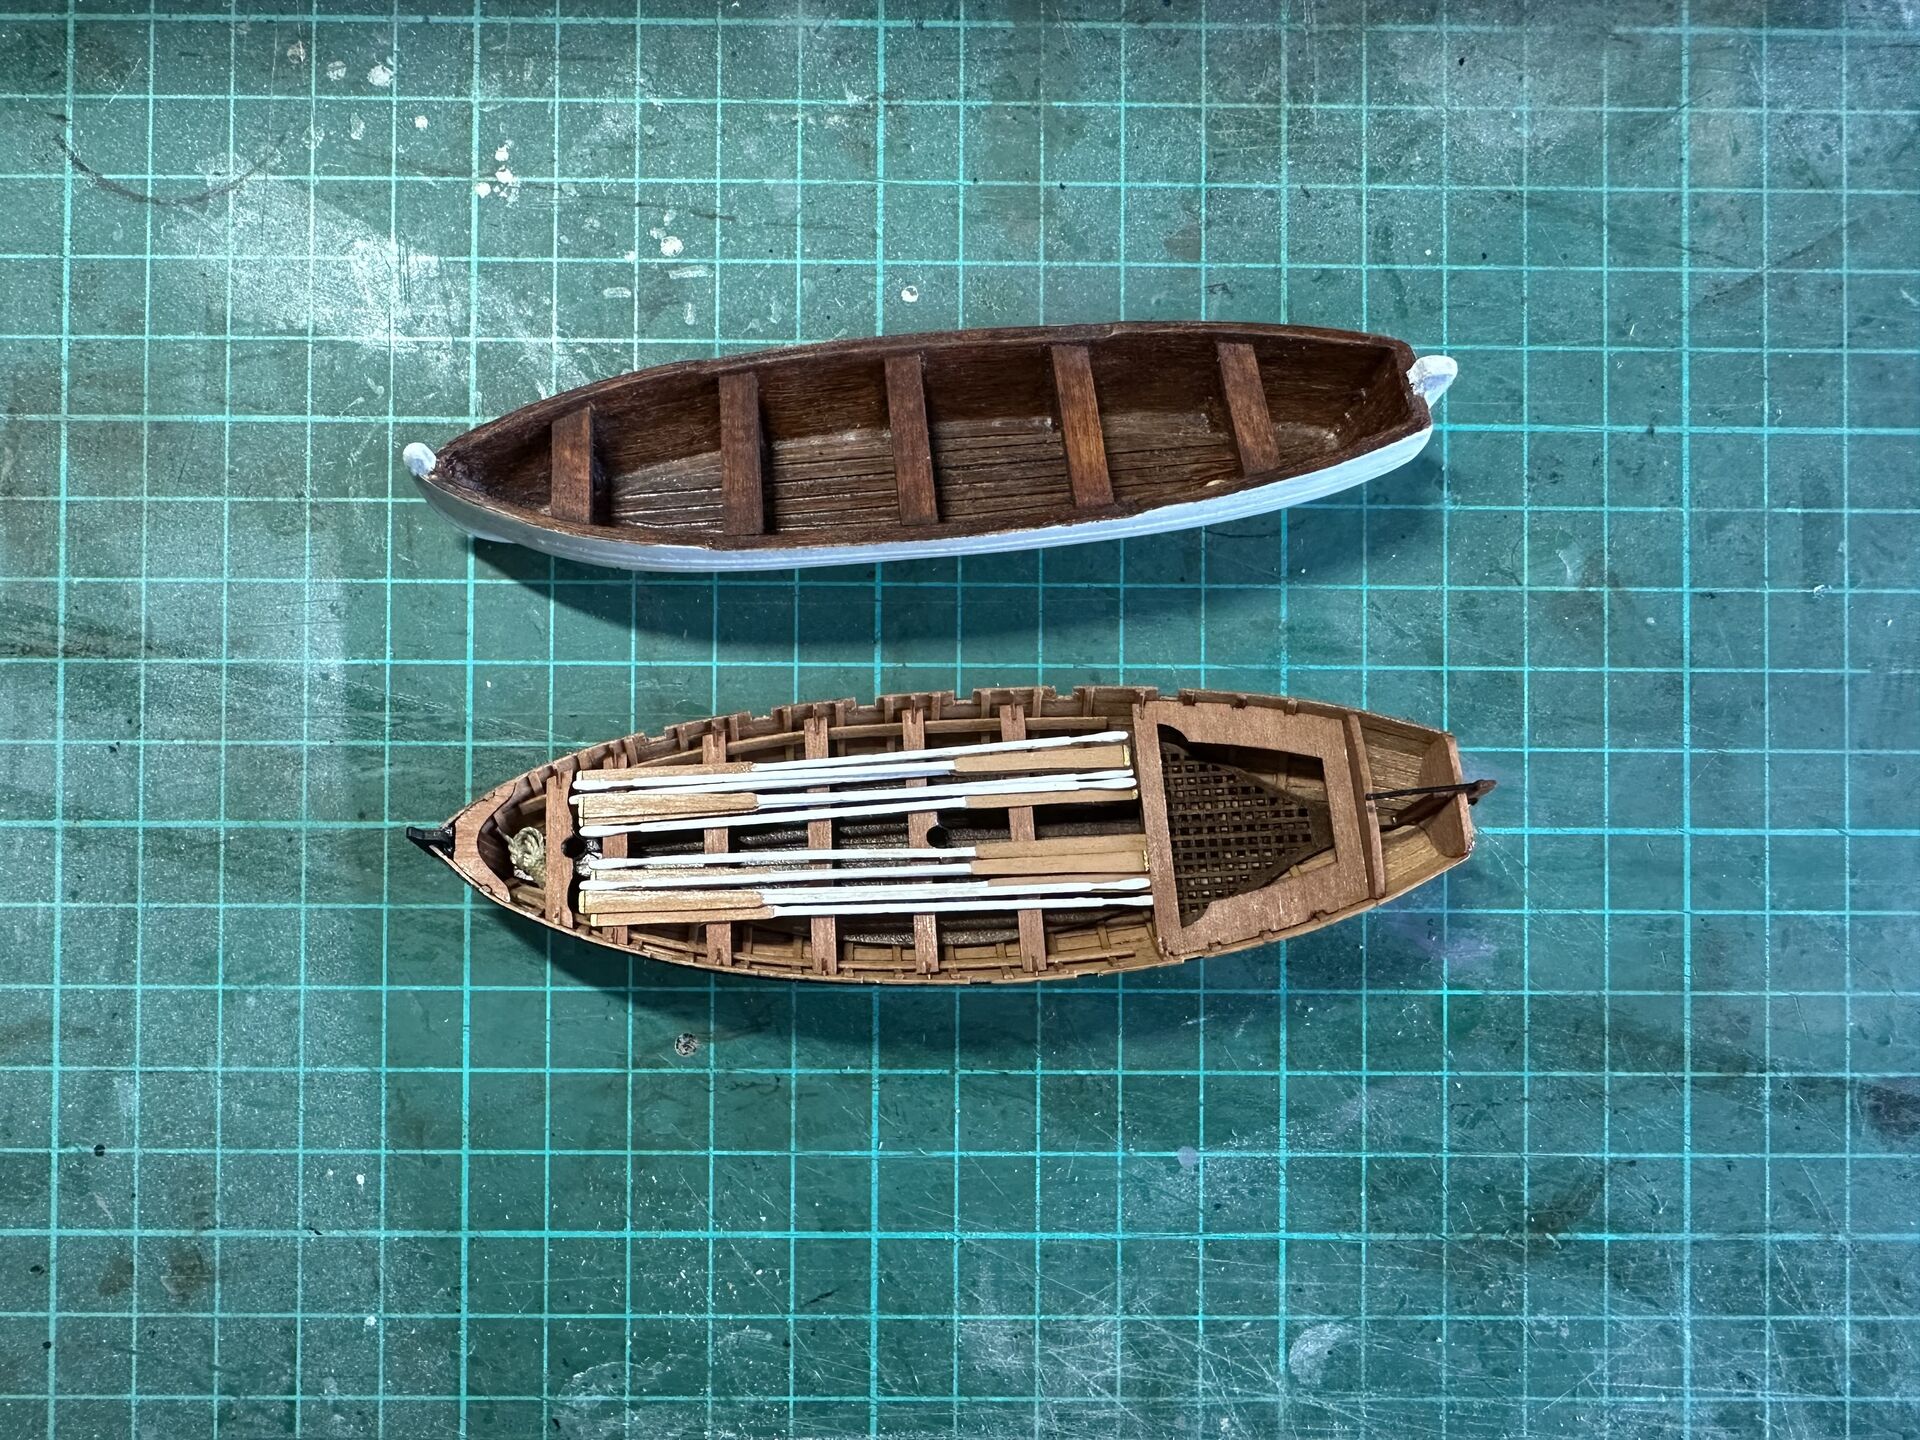
You may also have noticed that I removed ship boat from the deck - that is by choice, as I was unhappy with its looks. After all, it is cast metal, and I’m no artist to make it look like wood.
Instead, I bought a proper wooden boat kit from Vanguard Models which I will work on once Terror itself is finished. I hoped it will be not only a good addition to this model, but also a nice palette cleanser after a long and tedious months of rigging.
I was right, building the boat was a very pleasant experience, and it looks orders of magnitude better than the cast metal one.
Once the new ship boat was tied into place I touched up the paint job that got a bit damaged over the years, and called the project complete. I opted out of building the stern water closets, at least for now. Neither did I add rope coils in this case - too many to make, I don’t feel it is worth the effort.
Just couldn’t make myself work one more minute on this model.
Conclusion
This model took four years to finish, with big breaks in between the active build phases. And I built few more ship models as well, all while this build was still in progress. Of course, I learned a lot, both from this model, and from all the others finished in those four years.
I really burned out with Terror (I guess the name is well deserved, ha!), and ended up having a love-hate relationship with it. On one hand, it looks pretty good when finished, if I dare say so myself. And it is a decent kit as well. On the other hand, its rigging (too many shrouds and ratlines) was not fun to work on, and definitely was the main cause of burnout.
Also, I learned so much about tall ships and building wooden models since I started the build, and improved my skills considerably, which means I can now see plenty of things that I would have done differently. Some I re-did at the final stages of the build, some were impossible to change on a nearly complete model, some were inherent to the kit design (like missing deck camber, characteristic to all OcCre models).
It was also somewhat funny reaching the steps when that I needed to build some things, starting looking for materials just to realize that I already built them few years ago and the parts were simply waiting for the installation.
In the end I’m very happy that I found the willpower and energy to finish this model. I’m mostly happy with the way it looks, and glad that I improved the rigging compared to kit’s instructions.
And I definitely learned my lesson - when I picked all other kits, I made sure the rigging is much simpler than Terror.
Gallery